
Welcome to Hajin
Forward Operating Base Overview
During Deployment: Efficient DMZ Progression
- Looting
- Completing DMZ Orders
- Dynamic and Side Operations
- Lieutenant Hunts
- Commander Encounters
- Combat Engagements
In-game HUD Intel
Additional HUD Intel
Hajin Enemy Intel: A Field Guide to Hostile Forces
Threat Levels Explained
Hajin Vehicle Intel: Land, Sea, and Air Transport
DMZ After Action Report: Deployment Results
Tour of Hajin
Hajin Map Locations
- 14th Political Prison
- Chang-san Air Base
- Deadtown
- Imjin Farmland
- Cheongun Village
- Mirae General Hospital
- Cheonwang Peak Array
- Haneul Nuclear Reactor
- NuriGO Mall
- The Grid
- Songdo Wharf
- Wolves Stadium
- Hajin River Heights
Minor Points of Interest
Locations of Interest
Incoming DMZ Coverage!
Pre-order Modern Warfare 4 Today
Narrative Stories from Hajin
Get ready for DMZ with a comprehensive guide to Hajin and the Exclusion Zone, covering ways to efficiently progress in DMZ deployments, HUD and Tac-Map intel, enemy forces, vehicles, after-action reports, every major POI, and deployment stories from the field.
Welcome to Hajin
This is Call of Duty’s definitive extraction shooter experience, featuring a persistent, open-world combat environment where players loot, complete objectives, fight both enemies and rival Operators, and hope to extract with their rewards.
You’re here to learn everything there is to know about Modern Warfare 4’s DMZ. The intel has been separated into two distinct blogs.
Part 1: Tour of Duty – Hajin Environments and Threats, Full Intel Guide
Think you’re ready to deploy into war-torn Hajin? This Tour of Duty – Hajin blog will confirm topline intel on the FOB, recommend deployment tactics run down points of interest, pinpoint key buildings, vehicles, enemy threats, and trackable statistics. You’re reading this now!
Part 2: Tour of Duty – Forward Operating Base (FOB) Full Intel Guide
Coming later this week: A tour of every single Station within the FOB, with thorough information on 3D Printer crafting, Bounties, Weapon acquisition, Stashes and Loadouts, Active Duty Operators, DMZ Operator Prestiging, Permanent Prestige Traits, and DMZ Player Progression to Level 70. Read the Progression blog here.

From the Ward: DMZ: Addition by Extraction. Click above for an in-depth look at DMZ with gameplay footage and interviews with the teams at Infinity Ward. Then check back throughout the week for additional video intel about the different facets of the game.
Forward Operating Base (FOB): Overview
The Forward Operating Base (FOB) is your command center for DMZ. Manage progression, prepare your gear, and plan the next deployment. As you complete Operations across Hajin, the FOB evolves with you, transforming from a foothold to a fully operational base with over a dozen different Stations.
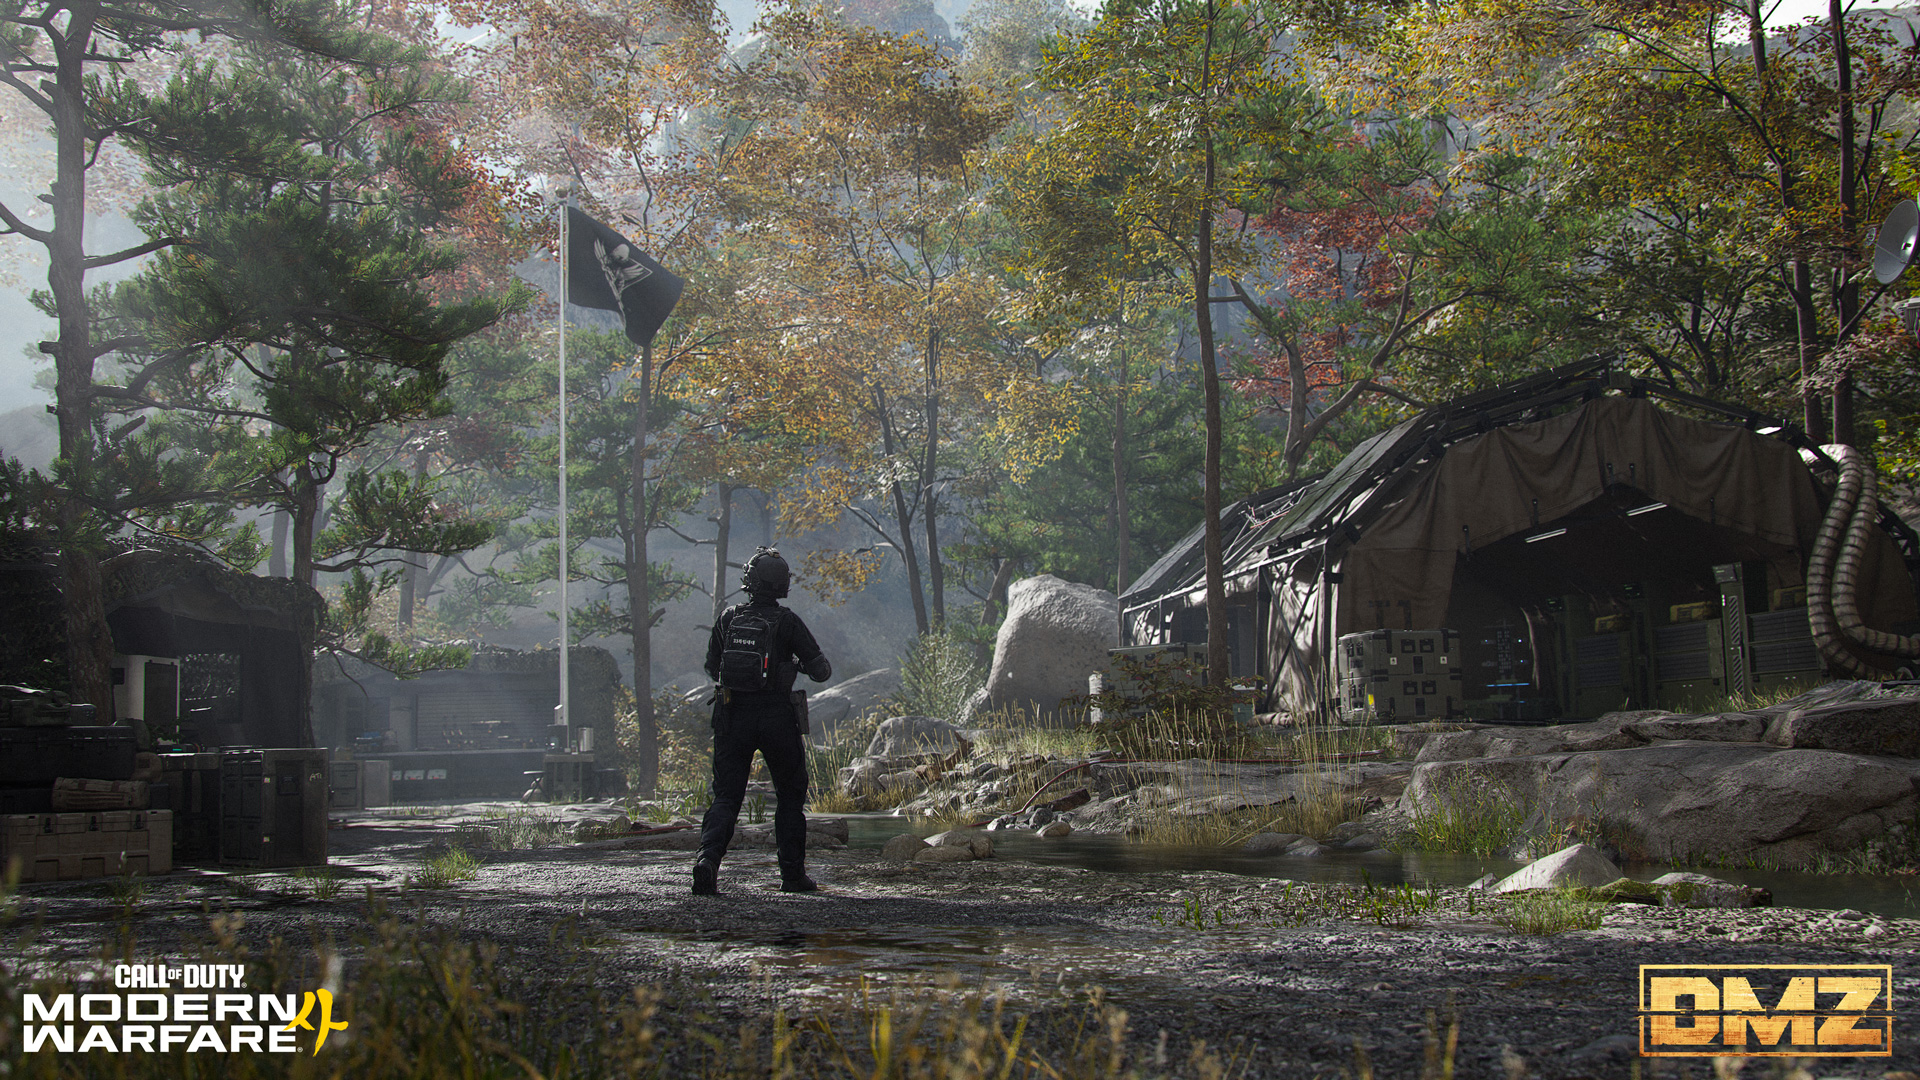
Here are the Stations that your FOB is comprised of, starting with those immediately accessible:
- Operators (Active Duty): Manage your available Operators, check their status, upgrade their Traits, and select one ready for deployment.
- Stash/Loadout: The Stash allows you to store a variety of loot types from Weapons to Gear to 3D Printer Ingredients and more! Every time you extract, make sure to offload items you'll need in future deployments. Equip weapons and gear in your Loadout, ready for the next infil.
- DMZ Orders: DMZ Orders are your guiding Mission Directives in DMZ. These assist with getting you onboarded, telling the story of DMZ and challenging you to master the exclusion zone.
- Firing Range: Test your weapons (especially your optics) and sharpen your aim in this wooded grove, with targets positioned from close to more than 100 meters away.
- Survival Kits: These are themed packs of loot items that can be opened and then used to gear up or used to craft.
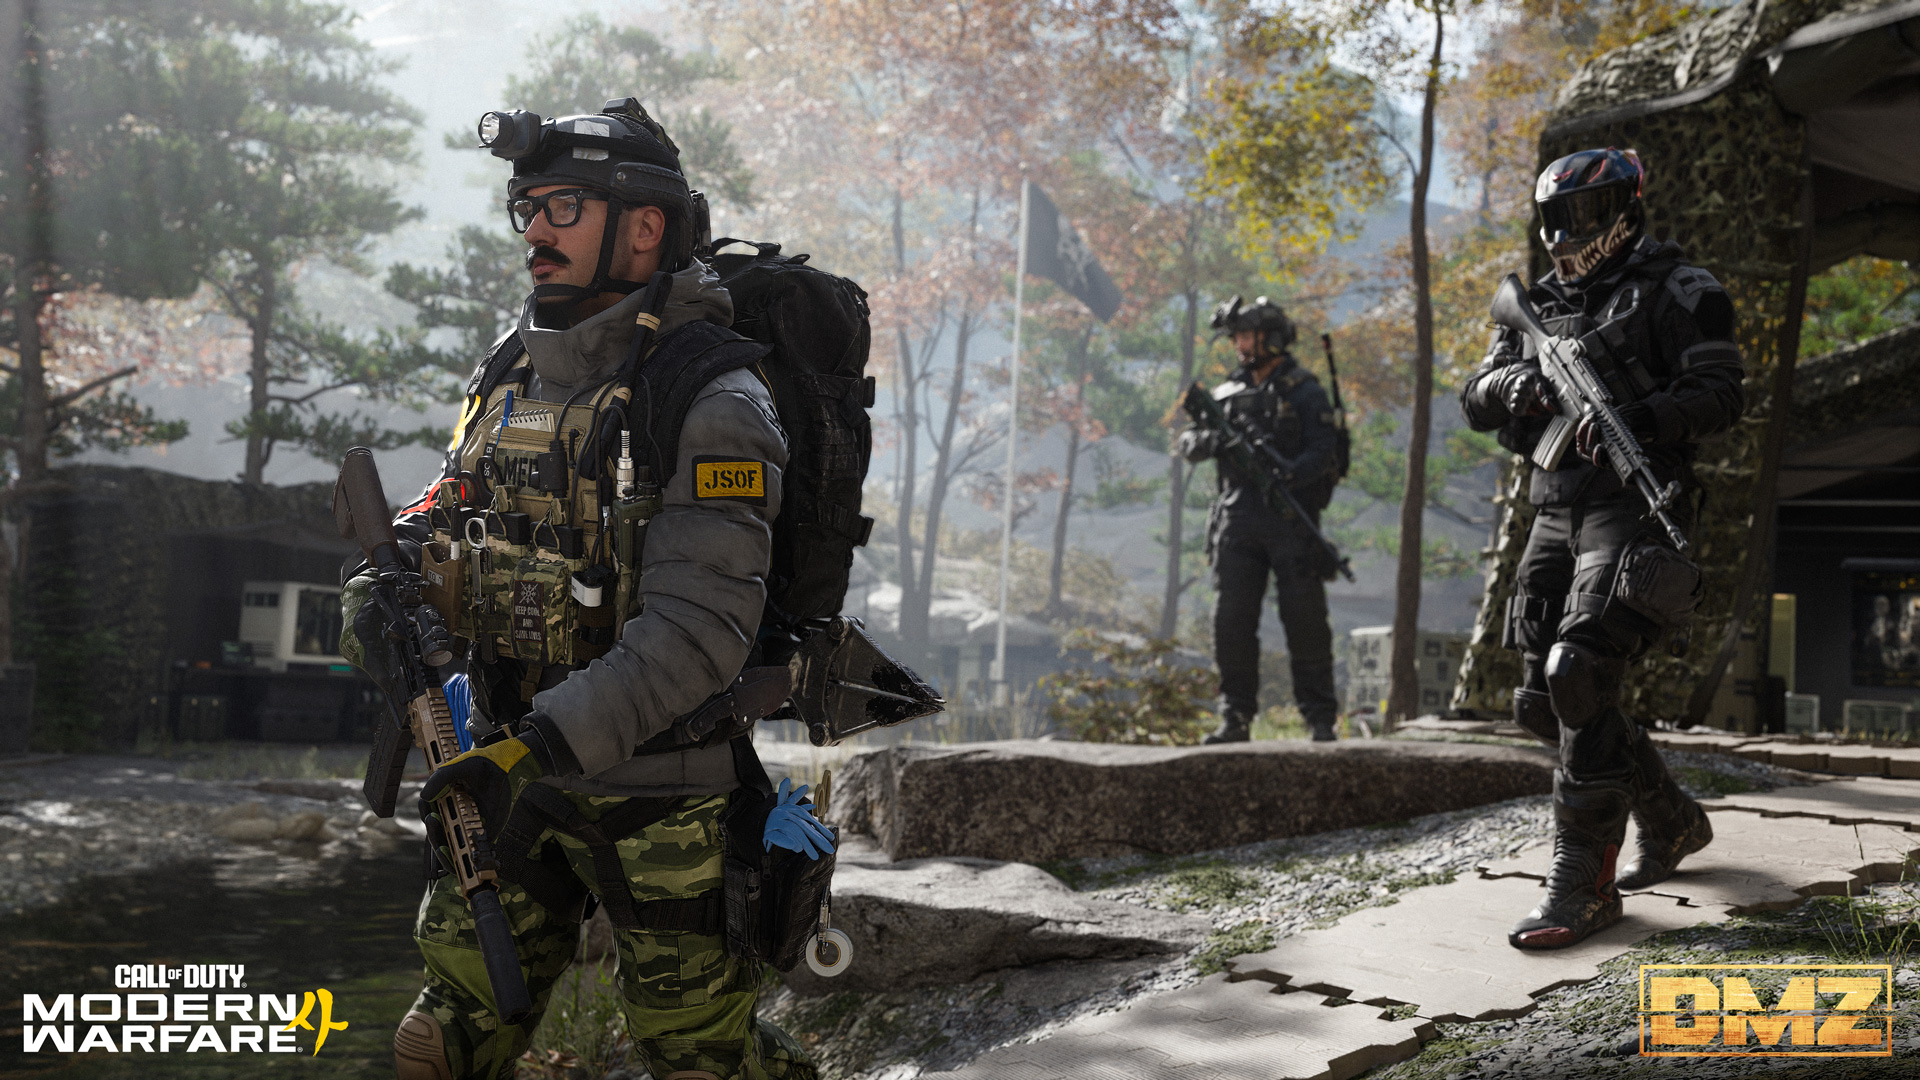
Continue your successful deployments across Hajin, and you’re soon able to expand your FOB, and unlock additional stations:
- 3D Printer: This uses a mix of Printer Resources and 3D Printer Ingredients to craft a variety of gear. The 3D Printer is also used to upgrade various stations in the FOB provided you have the required loot items.
- Gunsmith: Use in-game DMZ Cash to purchase attachments for looted weapons and to build brand new weapons from scratch. The attachments you can build are related to the level of the weapon and the shared attachments unlocked for that weapon. To increase the weapons you can build in Gunsmith you need to find and extract Weapon Manuals.
- Vendor: The Vendor has a variety of weapons and other items for sale using DMZ Cash. The vendor’s wares rotates day to day so get this gear while it’s available!
- Bounty Leaderboard: Track the most successful PvP bounty hunters and killers across the Exclusion Zone.
- Boss Board: Purchase intel on Lieutenants, then locate and prepare to hunt down Hajin’s most powerful adversaries. Additional information is also available for Commanders.
- Dog Tag Case: Display Dog Tags collected from defeated Operators and favorite the ones you don’t want to lose.
- DMZ Progression: DMZ has its own dedicated Progression Track which awards key Printer Recipes, Unlocks FOB stations, and awards various other content all the way up to level 70!
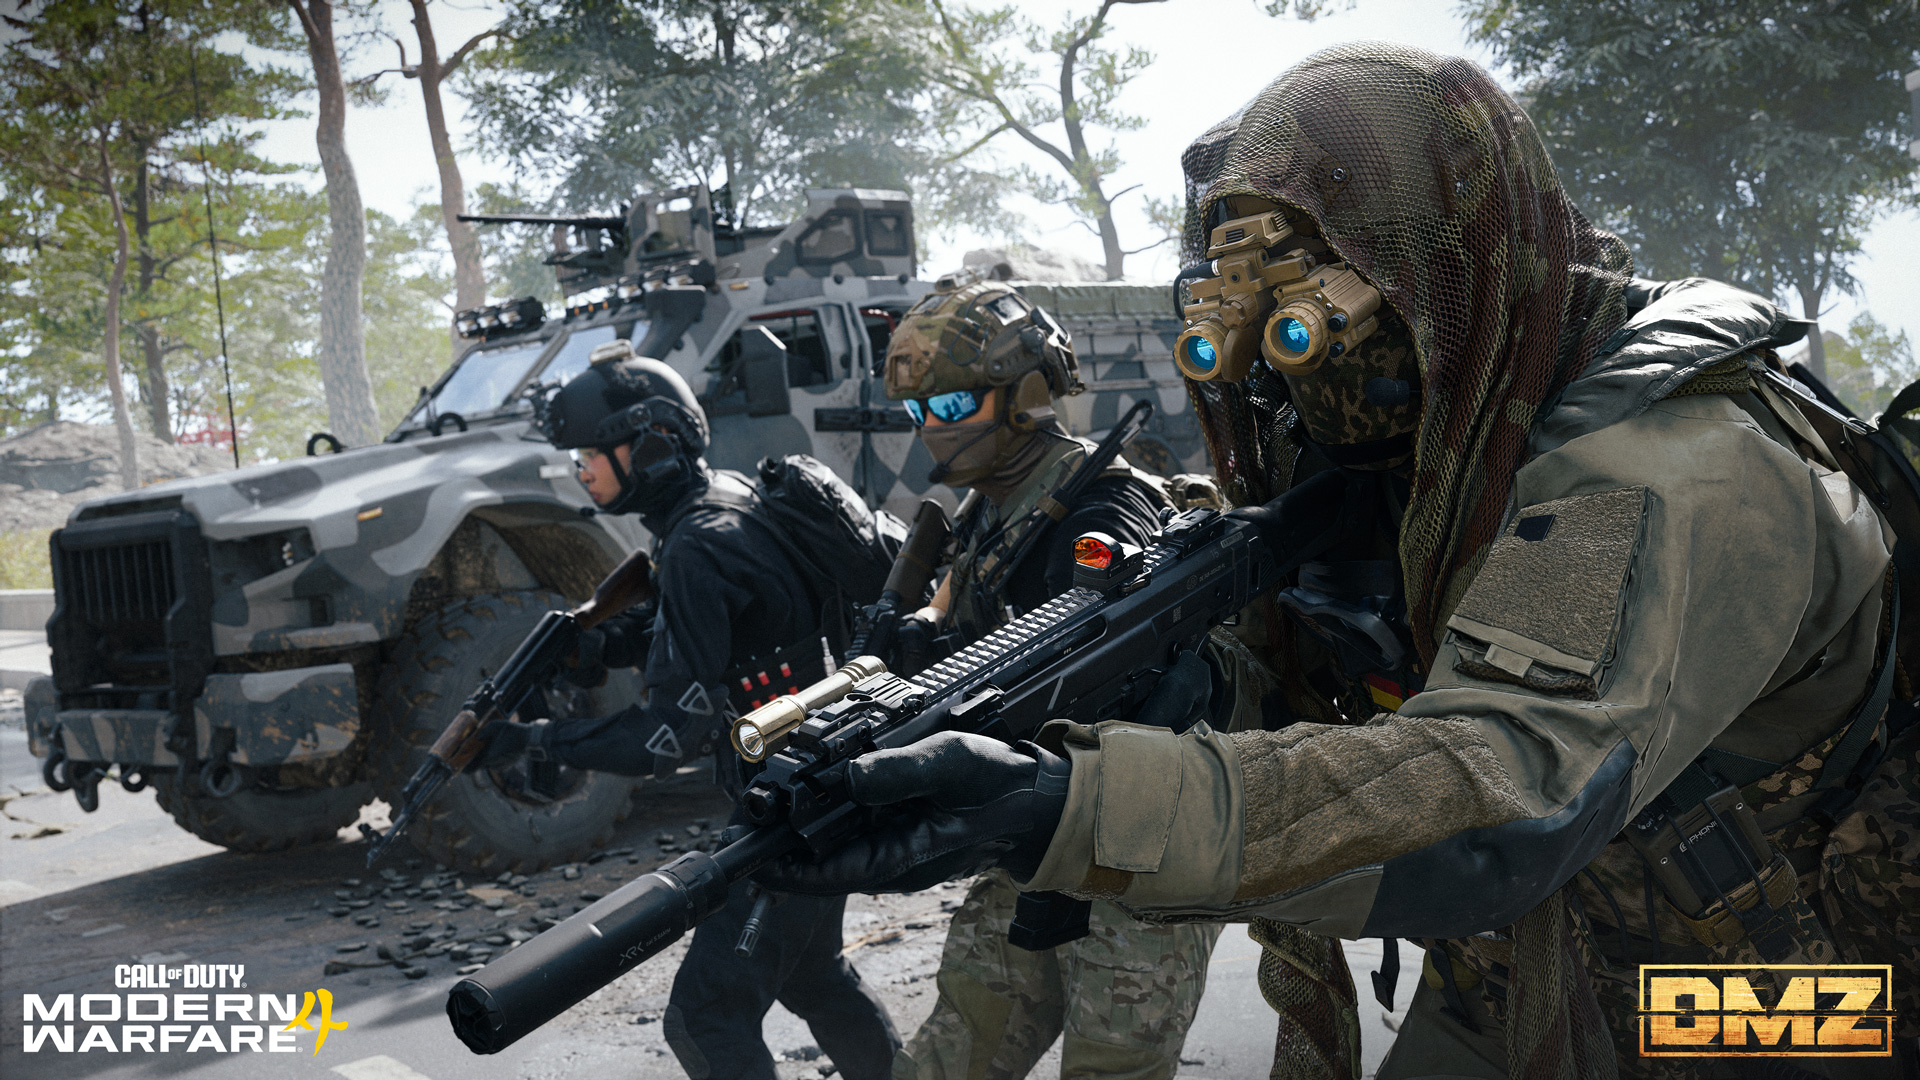
The last station is always available, and confirms your deployment into Hajin:
- Deploy: A threshold of razor wire leading to a heavy-lift military transport helicopter where you’ll begin each DMZ deployment.
Let’s continue with some in-depth intel, starting with how to effectively progress during a deployment, your stats, threats, and a tour of Hajin.
Welcome to the deployment zone: Hajin is waiting.
During Deployment: Efficient DMZ Progression
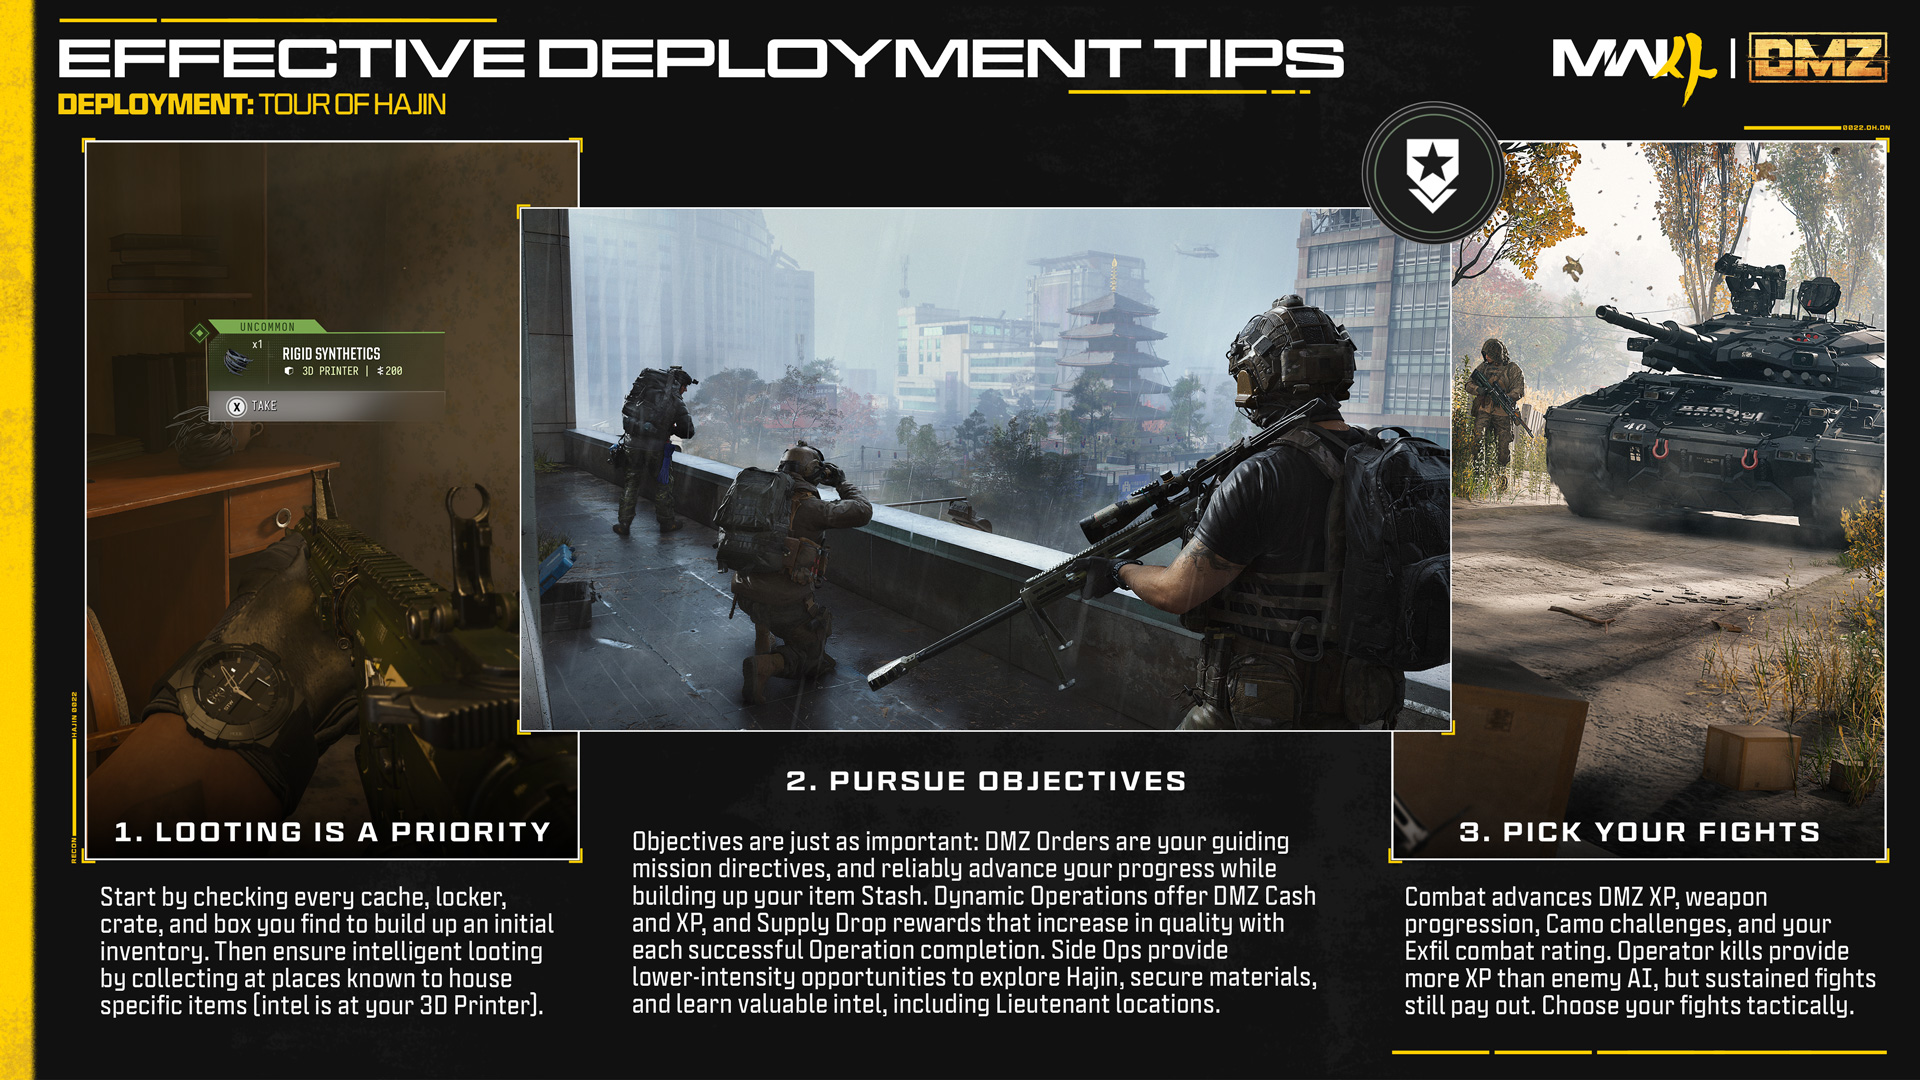
Every deployment contributes to your DMZ Player Level, which runs from Level 1 to 70. However, some gameplay systems pull double duty, awarding DMZ XP while also providing rewards, unlocking upgrades, and expanding your options for future deployments. Here’s how to efficiently explore the Exclusion Zone:
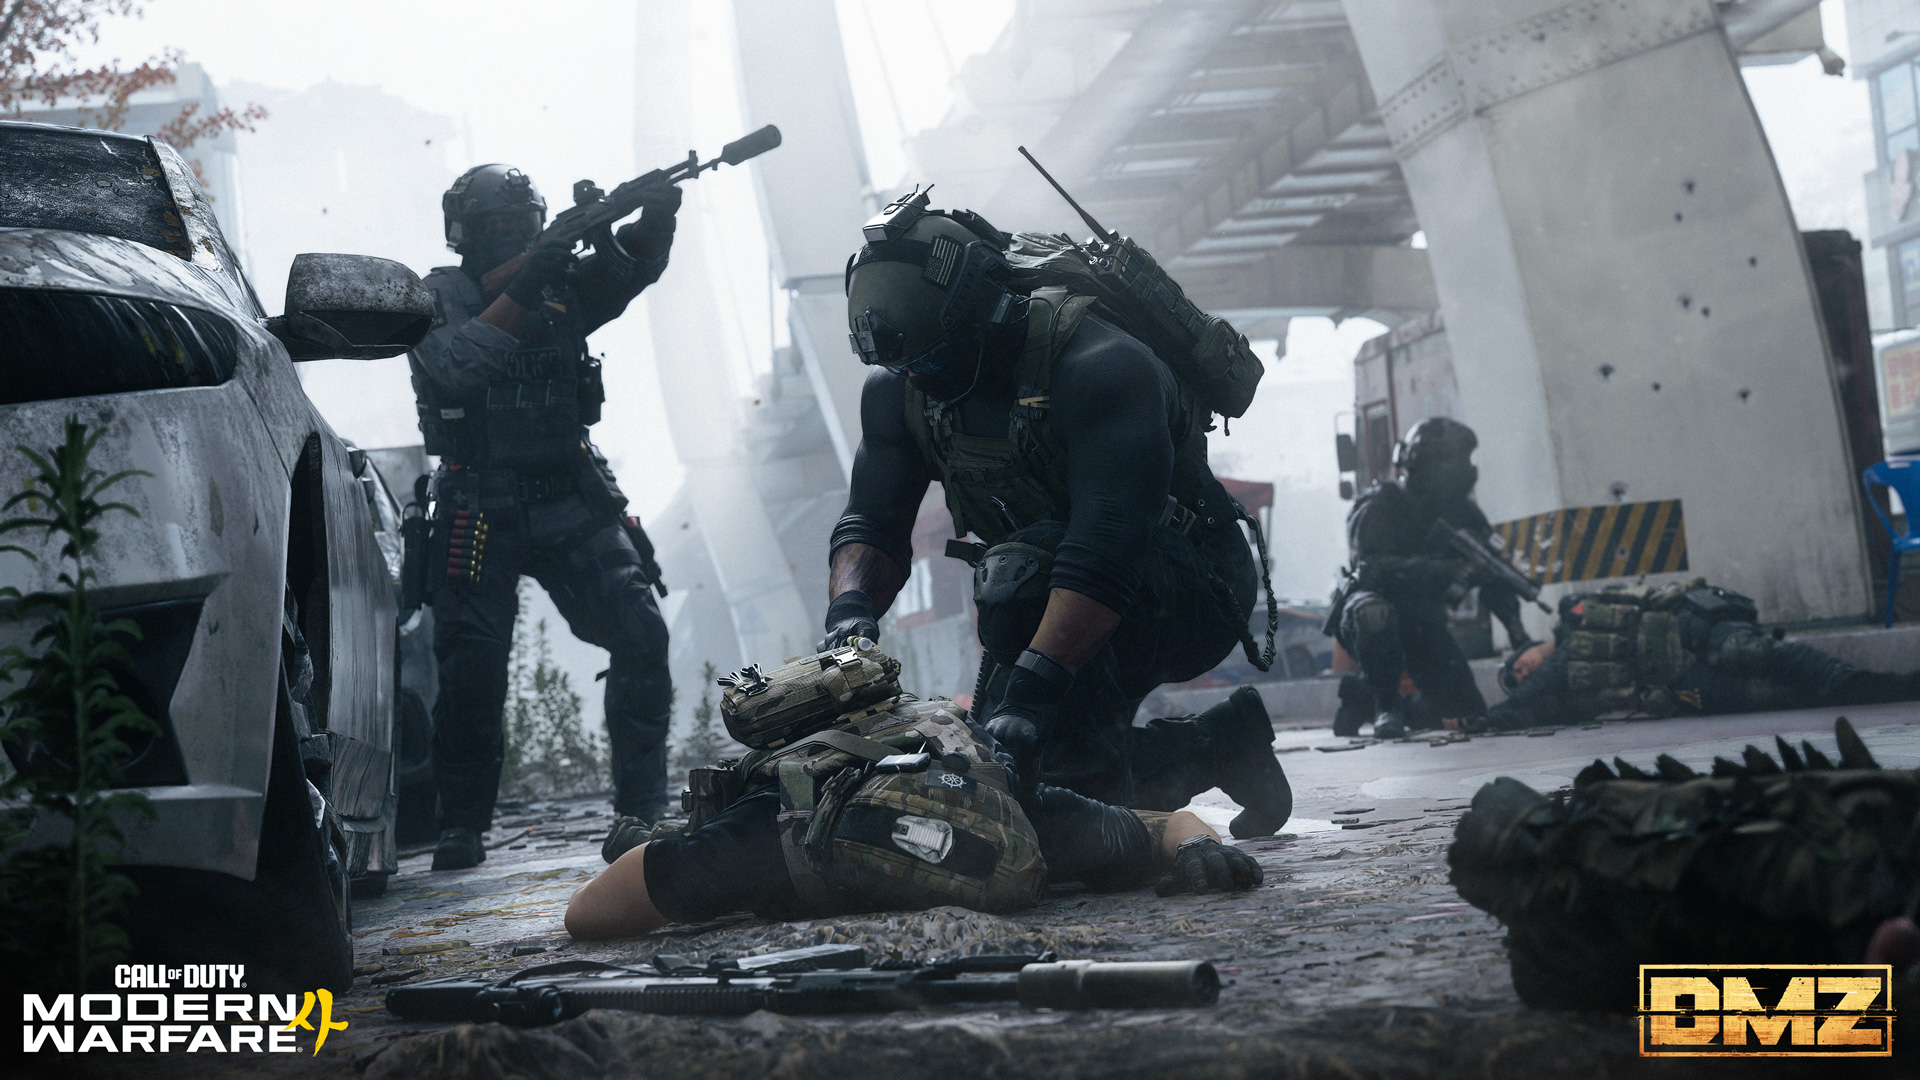
Looting
Looting should be among your first priorities after infil, whether you’re preparing for combat, pursuing a marked Operation, or establishing your position in Hajin. Searching containers is also one of the most reliable ways to earn DMZ XP and progress your FOB. Here’s how to approach looting during a deployment:
- Collect gear and consumables (like Armor Plates and Bandages) at places known to house these items.
- Use Keys you find to unlock special loot rooms.
- Be situationally aware in your exploration: If you find a door locked from the inside, you can bet there’s another way to get in.
- When traveling across more rural and wooded areas, keep your eyes peeled for underground entrances.
- If you’re wanting a more direct path to loot, complete Dynamic Operators for the Supply Drop reward, which increases in rarity for each successful completion within a deployment.
- Learn the secrets of Hajin to uncover high value loot.
Once you’re familiar with the basics, check the 3D Printer back at the FOB for hints about where specific materials are most likely to be found. Use that information to plan your route and search the locations most likely to contain the resources you need.
Open every cache, locker, crate, and supply box you encounter to build your inventory and uncover useful resources, but don’t overly focus on Looting. Instead, try for a well-rounded deployment across Combat, Looting, and Objectives, working toward an S-Tier rating at the end of your deployment.
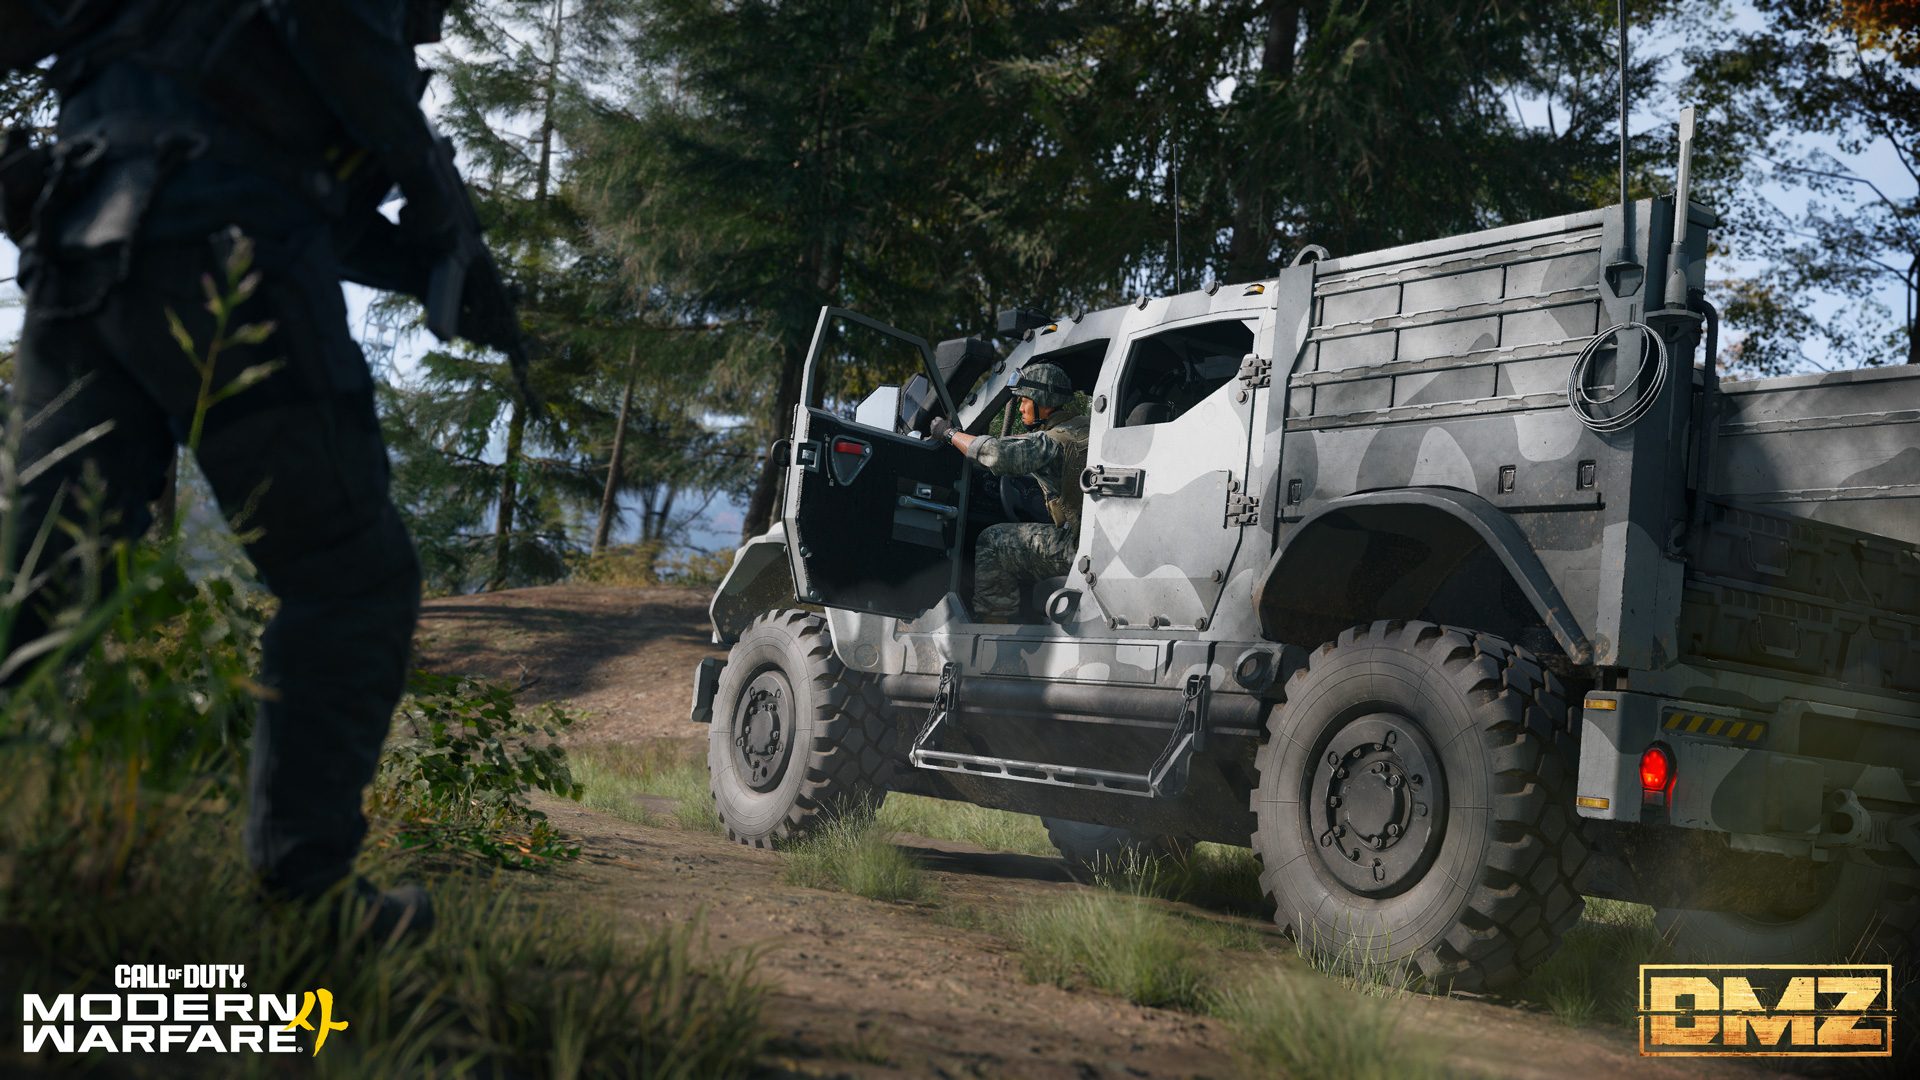
Completing DMZ Orders
DMZ Orders are your guiding Mission directives in DMZ, among the most reliable ways to advance your DMZ Level while building up your Stash. They introduce Hajin’s core gameplay systems, teaching you the ropes, speaking to the narrative, directing you toward different activities across the Exclusion Zone, and rewarding you for completing specific objectives.
Some Orders are straightforward. Others demand better equipment, careful preparation, or a squad ready to respond when the situation changes. Read the requirements back at the FOB before deploying, or by accessing the Orders Menu (when you select your Tac-Map) during deployments.
Before you deploy, ensure you select the right Operator, gear, and route through Hajin for the tasks ahead.
Narrative Stories from Hajin
Hajin Recon Report #1: Jail Break
The squad dropped into the dense, damp woodland due west of the 14th Political Prison under a ceiling of low cloud. From the tree line, the facility appeared impenetrable, a fortified industrial site with concrete walls, fresh earthworks, watchtowers, and a maze of service roads leading toward the main gate.
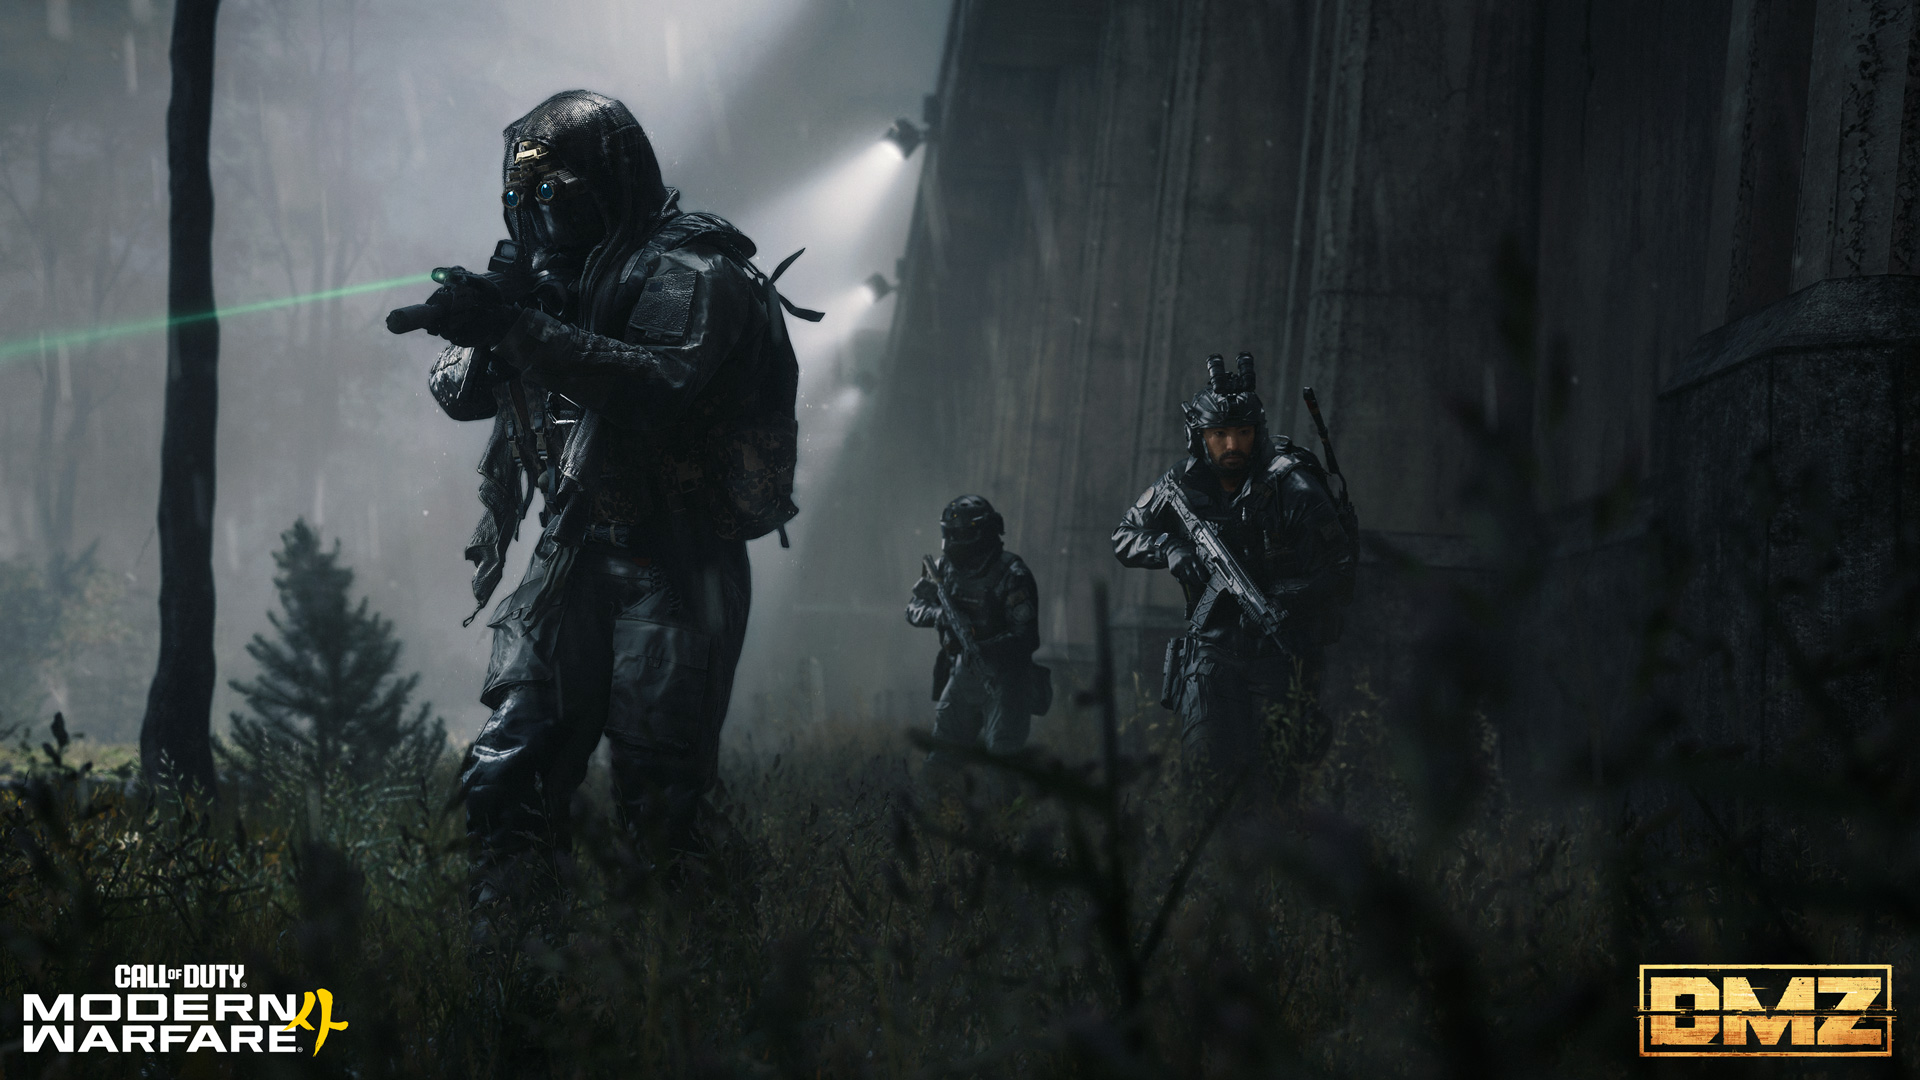
Rook Actual checked the orders. Fifteen hostiles in the prison before they could breach the Citadel. Ten more inside. Reinforcements were expected, most likely by helicopter.
“Bishop, take the towers. Knight, stay on me.”
They advanced through the undergrowth, moving between bushes and irrigation ditches, dropping into the long grass as patrols crossed the open ground. Bishop dropped the first sentry, then shifted to the next tower before the body hit the dirt. Knight handled the checkpoint with considerably less subtlety: a burst of automatic fire tore through three soldiers gathered around a small fire.
“Why not let the whole prison know we’re here?” muttered Bishop, as Knight vaulted over a concrete barricade and slit the throat of a fifth soldier.
Rook pushed through the barracks, clearing small outbuildings and storage bays while the prison’s confused defenders began to converge on their position.
The fifteenth hostile fell beside the southern gate. Watcher 2 would be happy with that.
Then the sirens started.
A helicopter came in behind the construction works, rotors chopping through the cloud as its doors slid open above the yard. Knight stepped into the open, braced the launcher against his shoulder, and waited until the aircraft turned broadside.
The missile struck just beneath the cabin. The craft pirouetted toward the courtyard, ablaze.
It broke apart inside the perimeter.
Bishop used the confusion to force his way into the Citadel first. Inside, the prison narrowed into darkened steel walkways, barred corridors, and cell block chambers connected by elevated crossings. Every gunshot seemed to return from a different direction. Rook took the upper levels while Knight cleared guards more accustomed to controlling prisoners than facing a tier one operator. They fought through the furnace room. Then Rook moved below, following the sound of unfamiliar boots behind the cell doors.
They regrouped only after the tenth defender went down.
They’d been lucky. Resistance had been minimal, and the high-value contraband was recovered. But the extraction route was exposed.
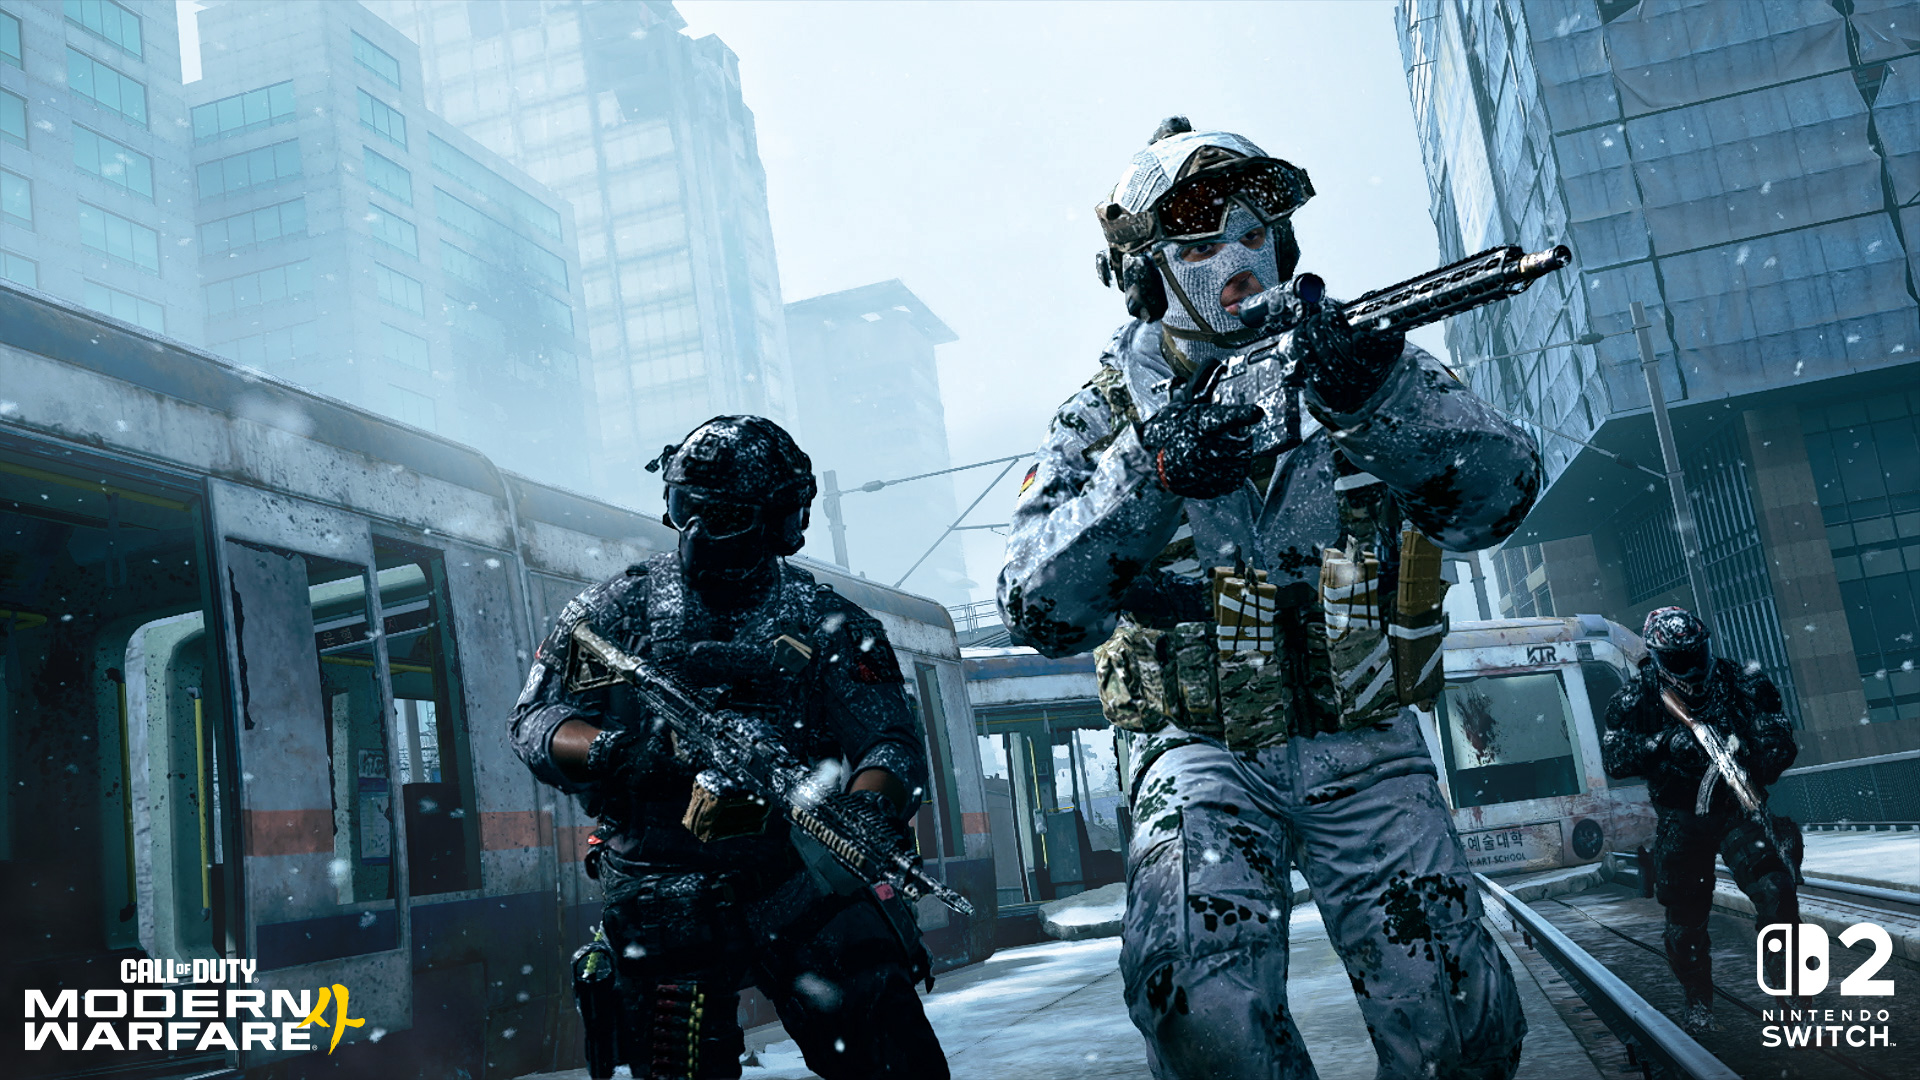
Rook checked his squad. Bishop was on the ramparts, and Knight remained somewhere inside the prison. But beyond the eastern wall, enemy armor was closing fast.
Dynamic and Side Operations
Dynamic Operations give each deployment a clear objective and a reason to keep moving. Select a Dynamic Operation before infil or locate a Dynamic Ops phone in Hajin to initiate one in the field. Complete the Op to earn DMZ XP and DMZ Cash, then secure the Supply Drop that arrives with additional loot that increases in quality with each successful Operation (from Common, to Uncommon, to Rare). Its contents vary, so every successful Op comes with a little uncertainty.
Note: If you accept the Hunt Operators Dynamic Op, prepare to face a full squad of rival Operators. Side Ops offer lower-intensity opportunities to explore Hajin while earning DMZ XP, finding useful resources, or uncovering valuable intel. Locate lost Supply Drops, repair useful trucks, or climb damaged radio towers to reveal the general location of a nearby Lieutenant. These activities can reward a recon-minded Operator… but may also lead into unexpected danger.

Lieutenant Hunts
Depending on your competence, hunting Lieutenants is a high-risk way to earn DMZ XP, DMZ Cash, and valuable loot. Lieutenants may be active whether you’re tracking them or not, so check their known territories as you move through Hajin. For more precise intel, climb a Lieutenant Hunt tower and access the terminal to reveal the general location of an active target.
Once located, prepare for a serious and sometimes protracted engagement. Lieutenants are high-value targets with increased durability and distinct combat behaviors, so study their surroundings before making contact. Eliminate one to claim their weapon and Dog Tag Case but understand the risk: the tag appears on the Tac Map for every Operator. If you pick it up, your position is also broadcast, making a fast exfil the safest option. Even if you leave the tag behind, the Lieutenant kill still awards a substantial amount of DMZ XP, the possibility of them dropping a Key to their special loot room, and DMZ Cash, even if without obtaining the Dog Tag Case. Pick up the Case if you want to progress the Boss Board.
Commander Encounters
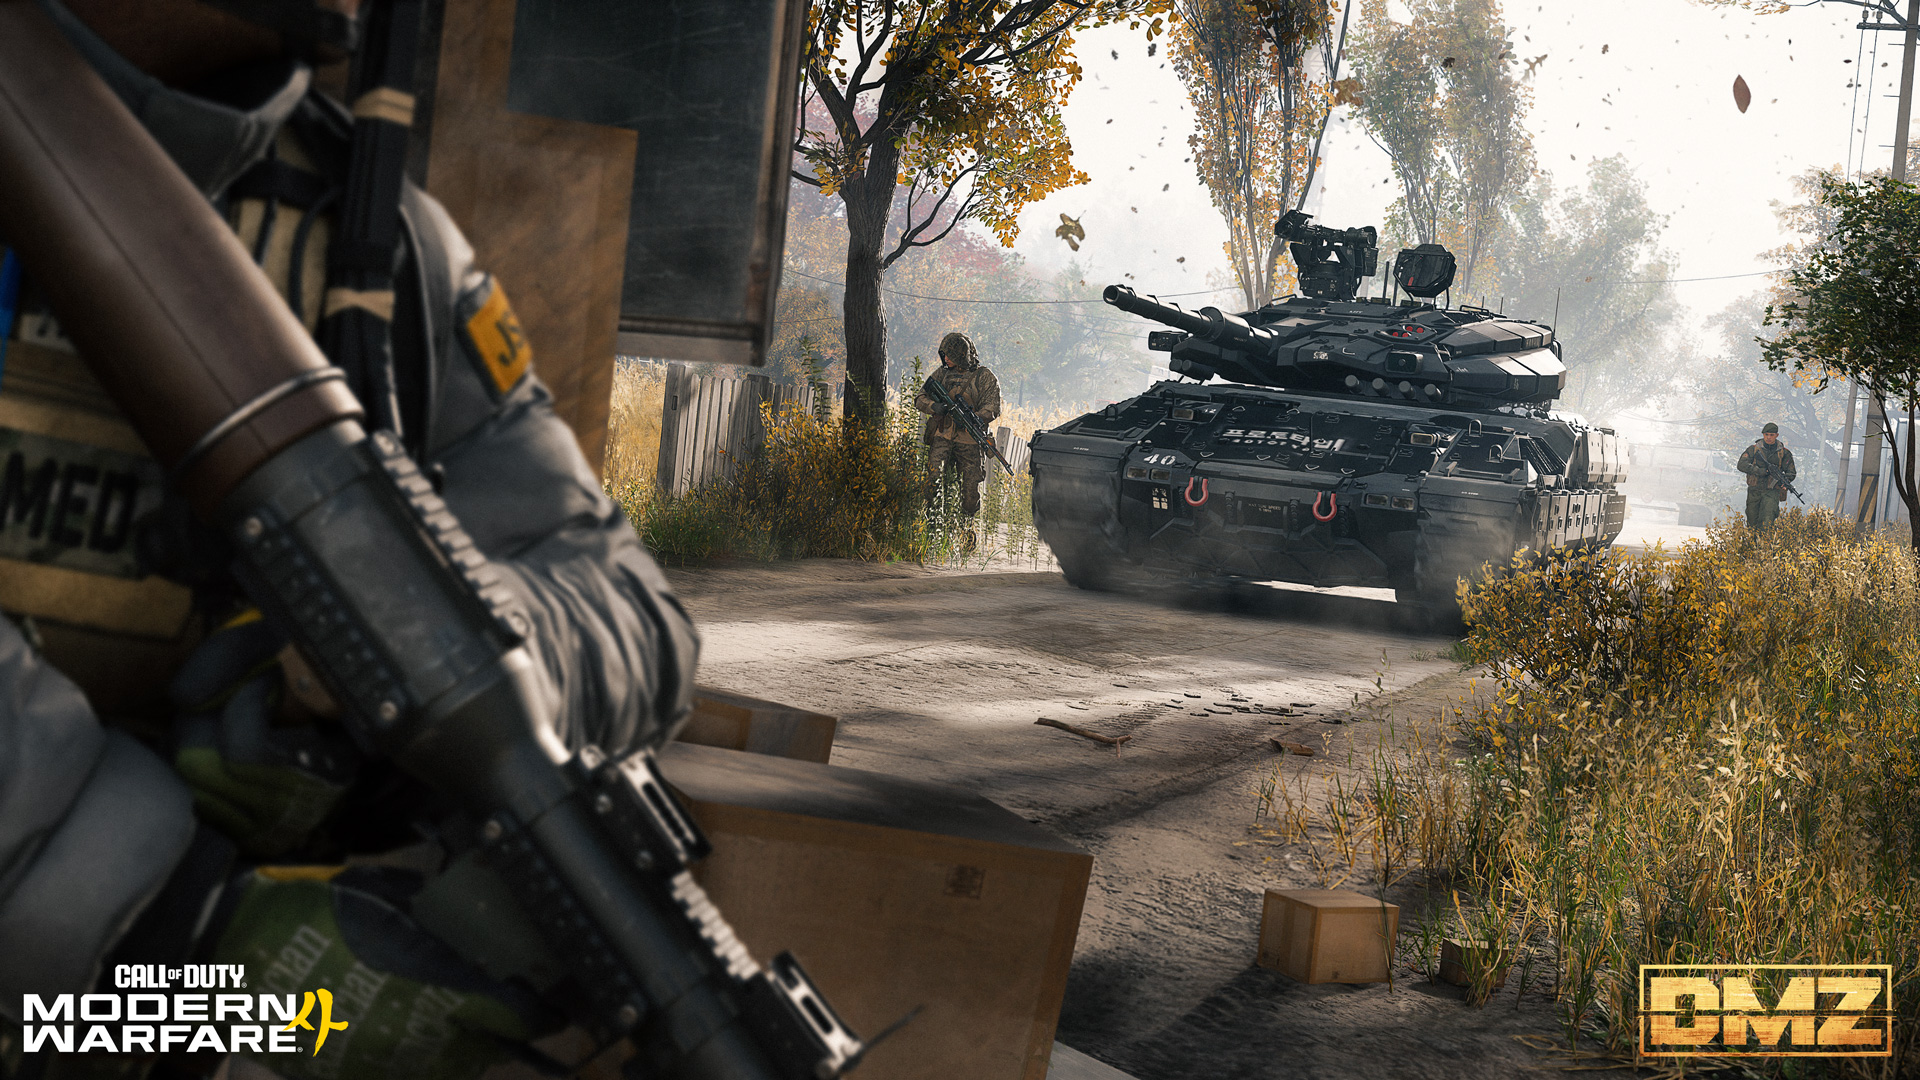
Commanders are roaming bosses that can appear in many different locations around Hajin. Expect fierce resistance when a Commander appears, as they are seemingly impervious against many standard weapons, and may require tactical knowledge to bring down. However, if you’re able to eliminate one, they will drop some good loot as well as a lot of XP.
Engaging one may draw the attention of nearby enemy forces, rival Operators, or squads hunting the same target. Adjust your approach to all these adversaries, control the surrounding area, and be ready to break contact if the fight becomes insurmountable. Eliminate a Commander to secure high-value loot (specifically, prized 3D Printer Ingredients) a substantial DMZ XP and DMZ Cash reward, and an update to the Boss Board station inside your FOB.
Narrative Stories from Hajin
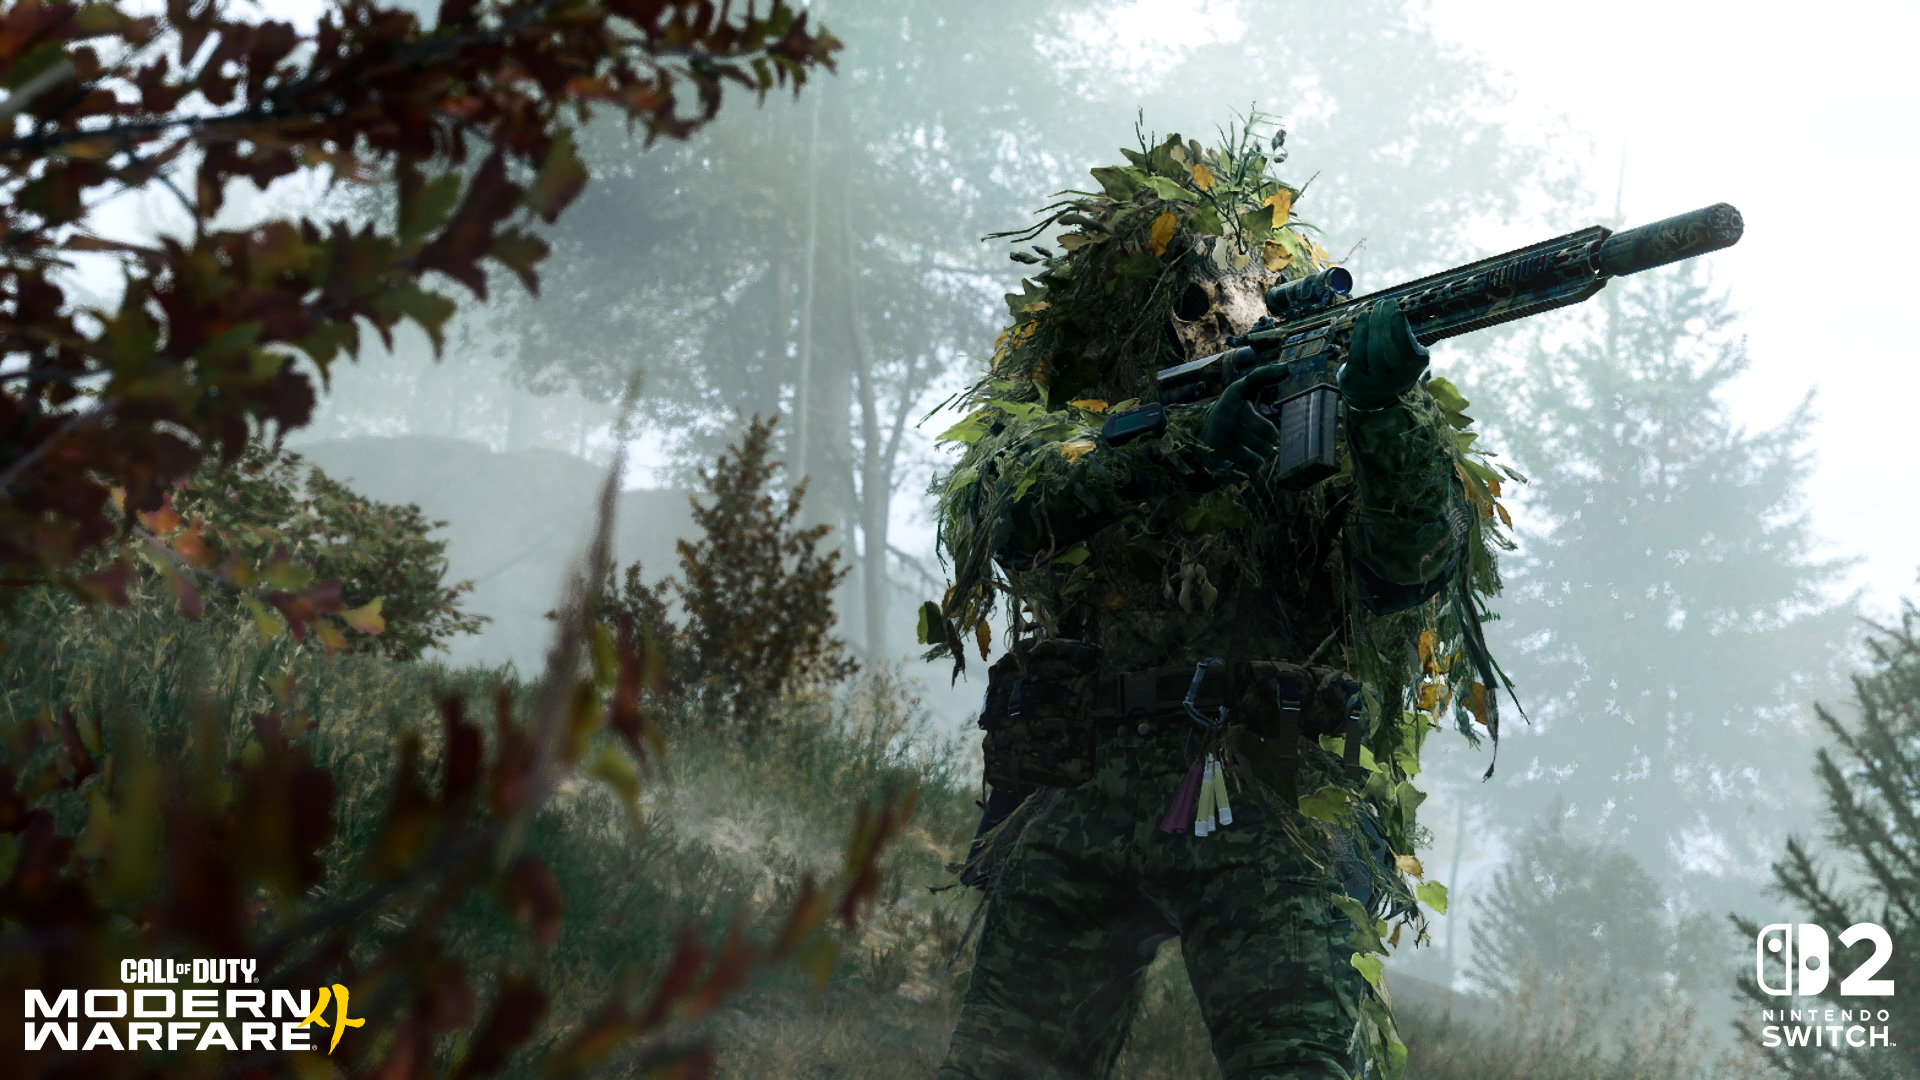
The squad downloaded his intel at the FOB and confirmed his position in the high woodland above Hanrim Village.
Vulture One led them uphill, following terrain and trace evidence rather than any reliable signal. Gorani was known to evade standard tracking methods, but one of his escorts had made a mistake. A partial footprint marked the soft ground beside a drainage cut, its edges still sharp beneath the morning frost.
Vulture raised a closed fist.
The forest moved.
Camouflaged figures rose from the brush on three sides, rifles already shouldered. Kestrel fired first, dropping one before the enemy ambush fully closed. Another escort broke from cover and disappeared behind a stand of pines.
Then Gorani appeared.
The water-deer skull turned between the trees. His M4 cracked once. Kestrel folded into the undergrowth, clutching his midriff.
Vulture hit the ground as rounds tore through the branches above him. The remaining escort advanced, searching the slope. Vulture pulled a smoke grenade and rolled it downhill, crawling toward the drainage cut as the screen expanded around him.
Gorani fired through the smoke. Each burst punched a visible pocket through the whiteout, briefly exposing the ground and movement as the smoke slowly dissipated.
Vulture used the gaps between volleys to reposition. Gorani followed.
Vulture rose behind him at the edge of the trees, drove the rifle aside, and forced the Lieutenant into the mud. Gorani fought with the strength of a man who had survived too long in a hostile country, but the slope gave Vulture leverage. He wrenched the M4 free, struck the deer skull from Gorani’s head, and finished the Lieutenant with a short, controlled burst.
The forest fell quiet except for Kestrel’s labored breathing over the comms.
Vulture secured Gorani’s Dog Tag Case. The Tac Map lit up across Hajin. The hunt had become a signal flare for every Operator in the region.
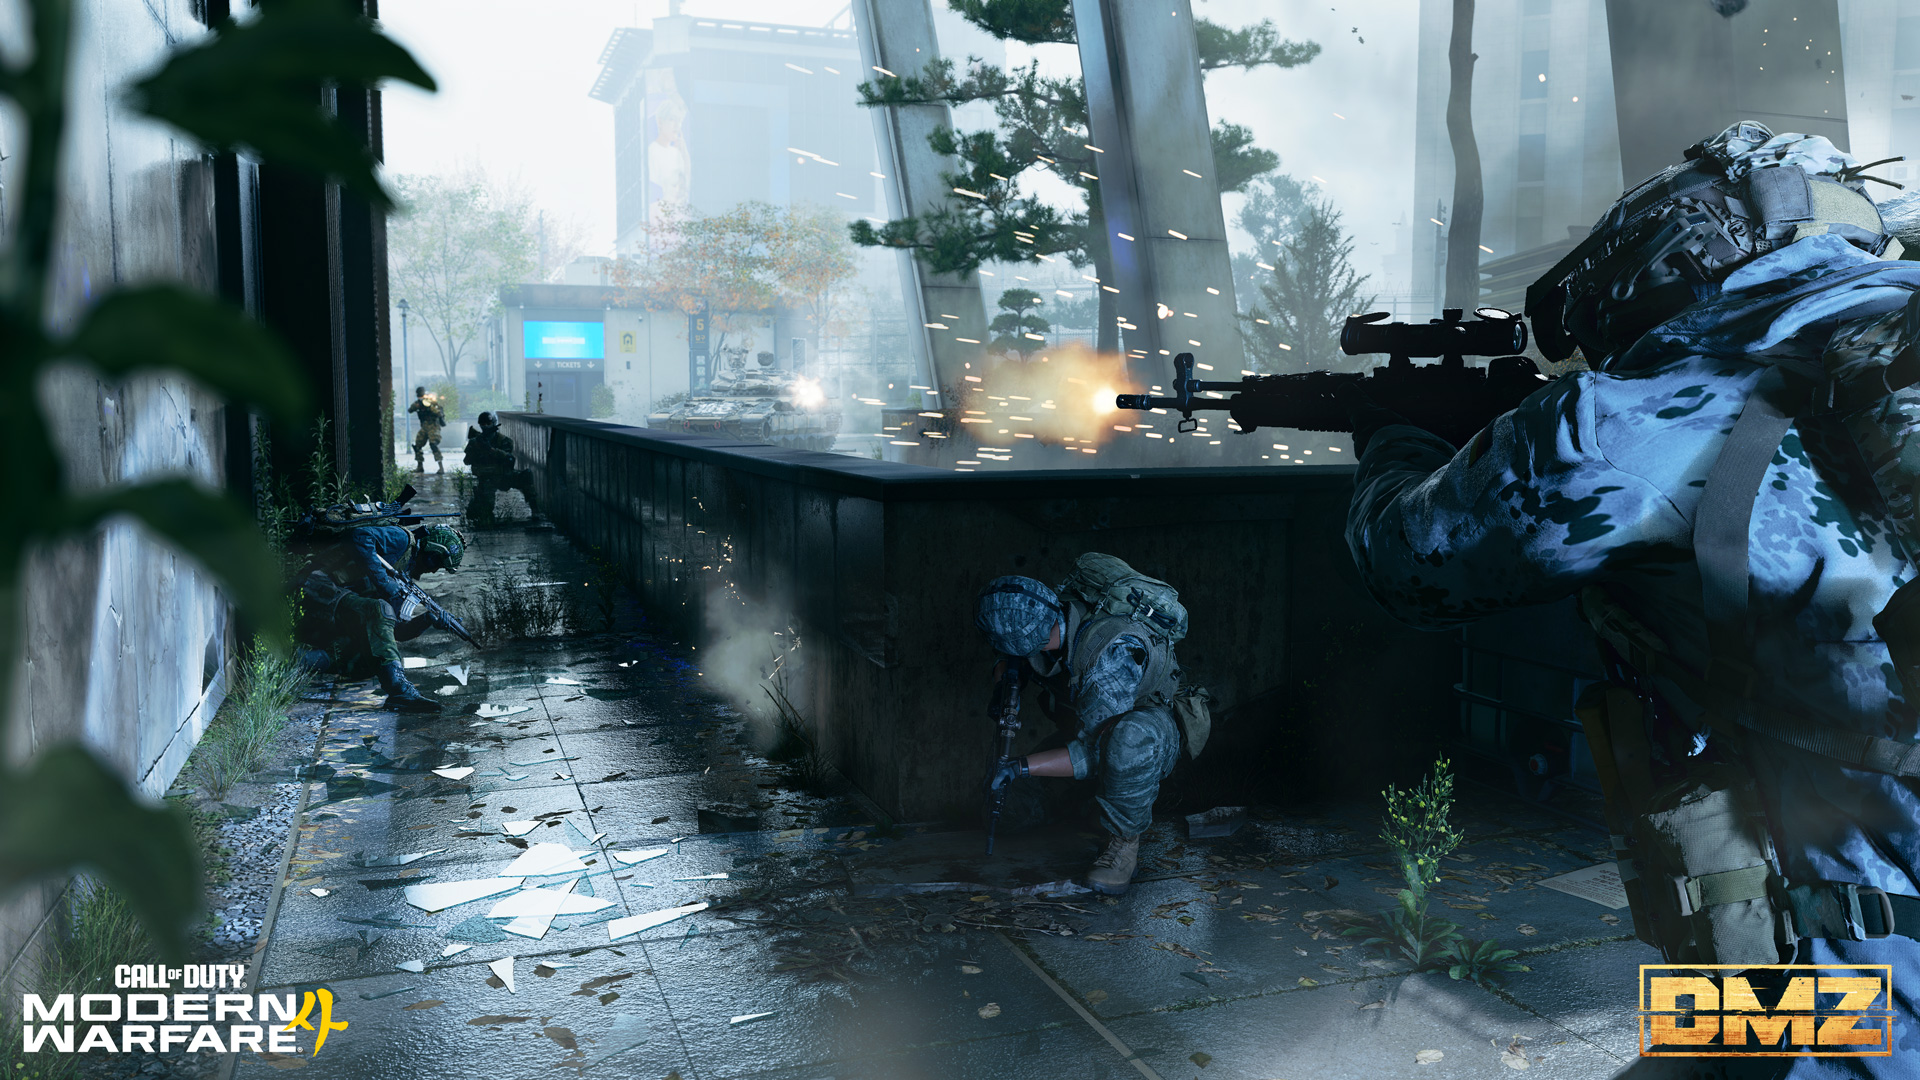
Combat Engagements
Combat is another reliable way to earn DMZ XP, advance weapon progression, and complete Camo challenges while improving your end-of-deployment After Action Report rating. Eliminating rival Operators awards more XP than taking down AI combatants, but sustained engagements with enemy forces can still increase your Combat rating and provide a substantial XP payout. Choose your fights carefully, then press the advantage when the opportunity is worth the risk.
In-game HUD Intel
The DMZ HUD provides the information you need to navigate Hajin, assess nearby threats, monitor your squad, and manage your equipment. Several elements differ from the standard Multiplayer HUD. Here’s what to watch during a deployment:
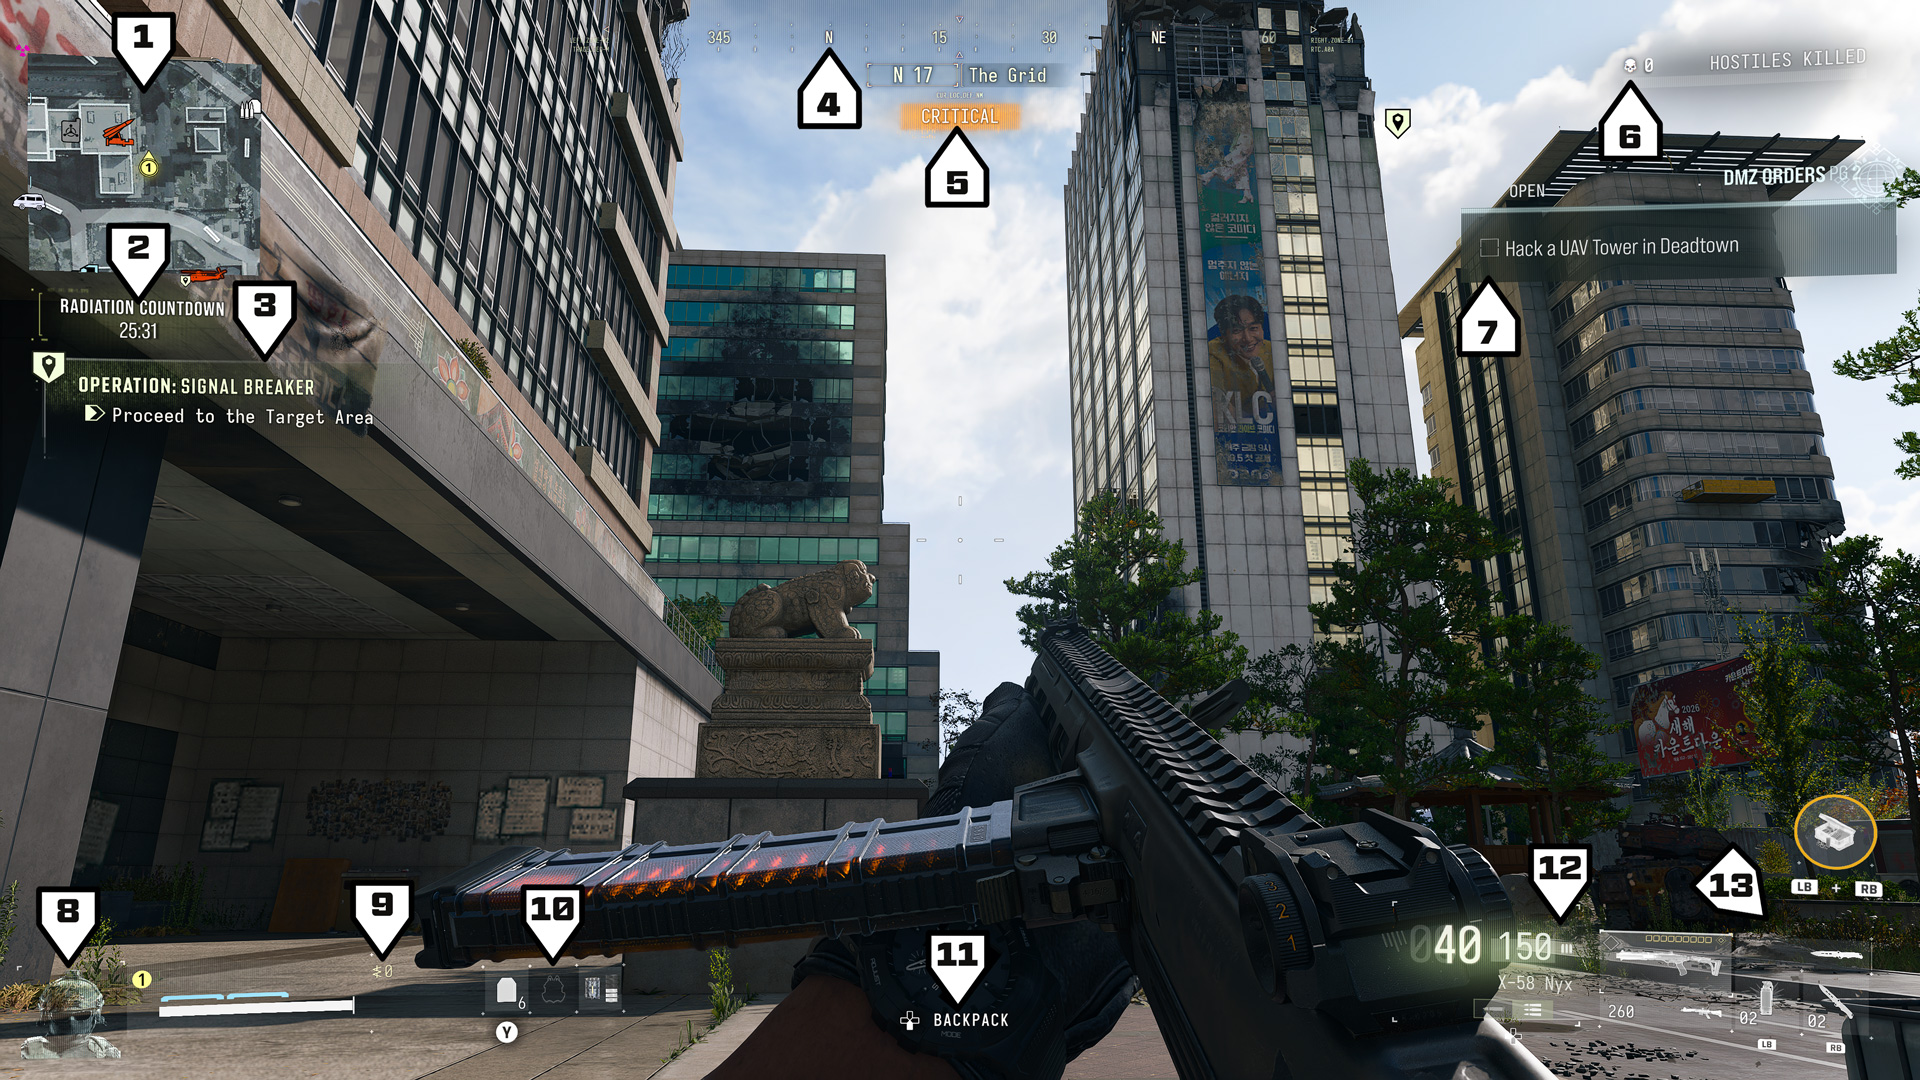
- Tac-Map: Displays Mission Objectives, key Points of Interest, critical threat areas, enemy Compounds, key buildings (like Police Stations, Clinics, Gas Stations, and Fire Stations), Ammo and Armor Caches, the spreading radiation within Hajin, your position and heading, along with nearby enemies, pings, Points of Interest, and other elements of operational interest.
- Time Remaining: Indicates when the radiation storm will intensify across Hajin. As conditions worsen, locate an exfil point or risk remaining in an area too hostile to survive.
- Objectives: Displays the Story Missions, Dynamic Operators, and Side Ops on the left side of the HUD for you and your squad. DMZ Orders are displayed on the right side of the HUD and in the Tac Map, showing your immediate objectives that you are working to complete.
- Compass: Provides precise directional bearings from 1 to 360 degrees and identifies any named POI you occupy.
- Threat Level: Tracks the danger within your current POI, shown under your compass as you enter a new location. The threat rises as you engage increasingly capable enemies, triggering additional hostile reinforcements at higher levels. Break contact and take cover to reduce your threat level.
- Hostiles Kill Count: This meter tracks the number of enemy combatants eliminated during the current deployment. If the meter fills up, an enemy Hunt Squad is dispatched to track you down, and you become Marked for Death.
- DMZ Orders: The current DMZ Orders Objective you are undertaking.
- Squad HUD: Displays the status of you and your squadmates, including:
- Operator Portrait: Identifies each Operator.
- Squad Identifier: Displays each squadmate’s color code and number.
- Operator Status: Shows each Operator’s name, health, Armor Plates carried in their vest, current armor protection, downed, wounded, and death states, and temporary health state (when using pain medication while wounded).
- DMZ Cash: Displays the DMZ Cash currently carried by each Operator.
- Equipment Capacity: Shows available Armor Plates, along with the equipped Gas Mask and Parachute types when applicable.
- Backpack: Opens your Backpack menu (see below), where you can manage items outside your active Loadout, and sort items using the Sort button.
- Weapon and Equipment Display: Shows your current weapon and available Loadout equipment, including:
- Ammunition: Displays rounds in the chamber or magazine, plus total reserve ammunition.
- Weapon Details: Identifies the equipped weapon and its firing mode, such as full auto, burst, or semi-auto.
- Weapon Configuration: Shows the weapon’s rarity and equipped Attachments.
- Secondary Weapon: Displays the weapon icon and ammunition count for your second weapon.
Equipment: Shows your Melee weapon, Tactical, and Lethal equipment, including remaining quantities.
Field Upgrades and Fire Support: Displays any equipped Field Upgrade and Fire Support Killstreaks.
Backpack Menu
Open the Backpack Menu from the main HUD to review stored consumables and equipment, then move items into your Loadout as needed — for example, swapping your equipped Tacticals or Lethals. You can also use eligible items directly from the Backpack, such as Bandages (to temporarily restore health), extra Armor Plates (to bolster your protective vest), or other items like swapping Field Upgrade boxes (switching from Ammo to Armor Boxes if you’re carrying both, for example).
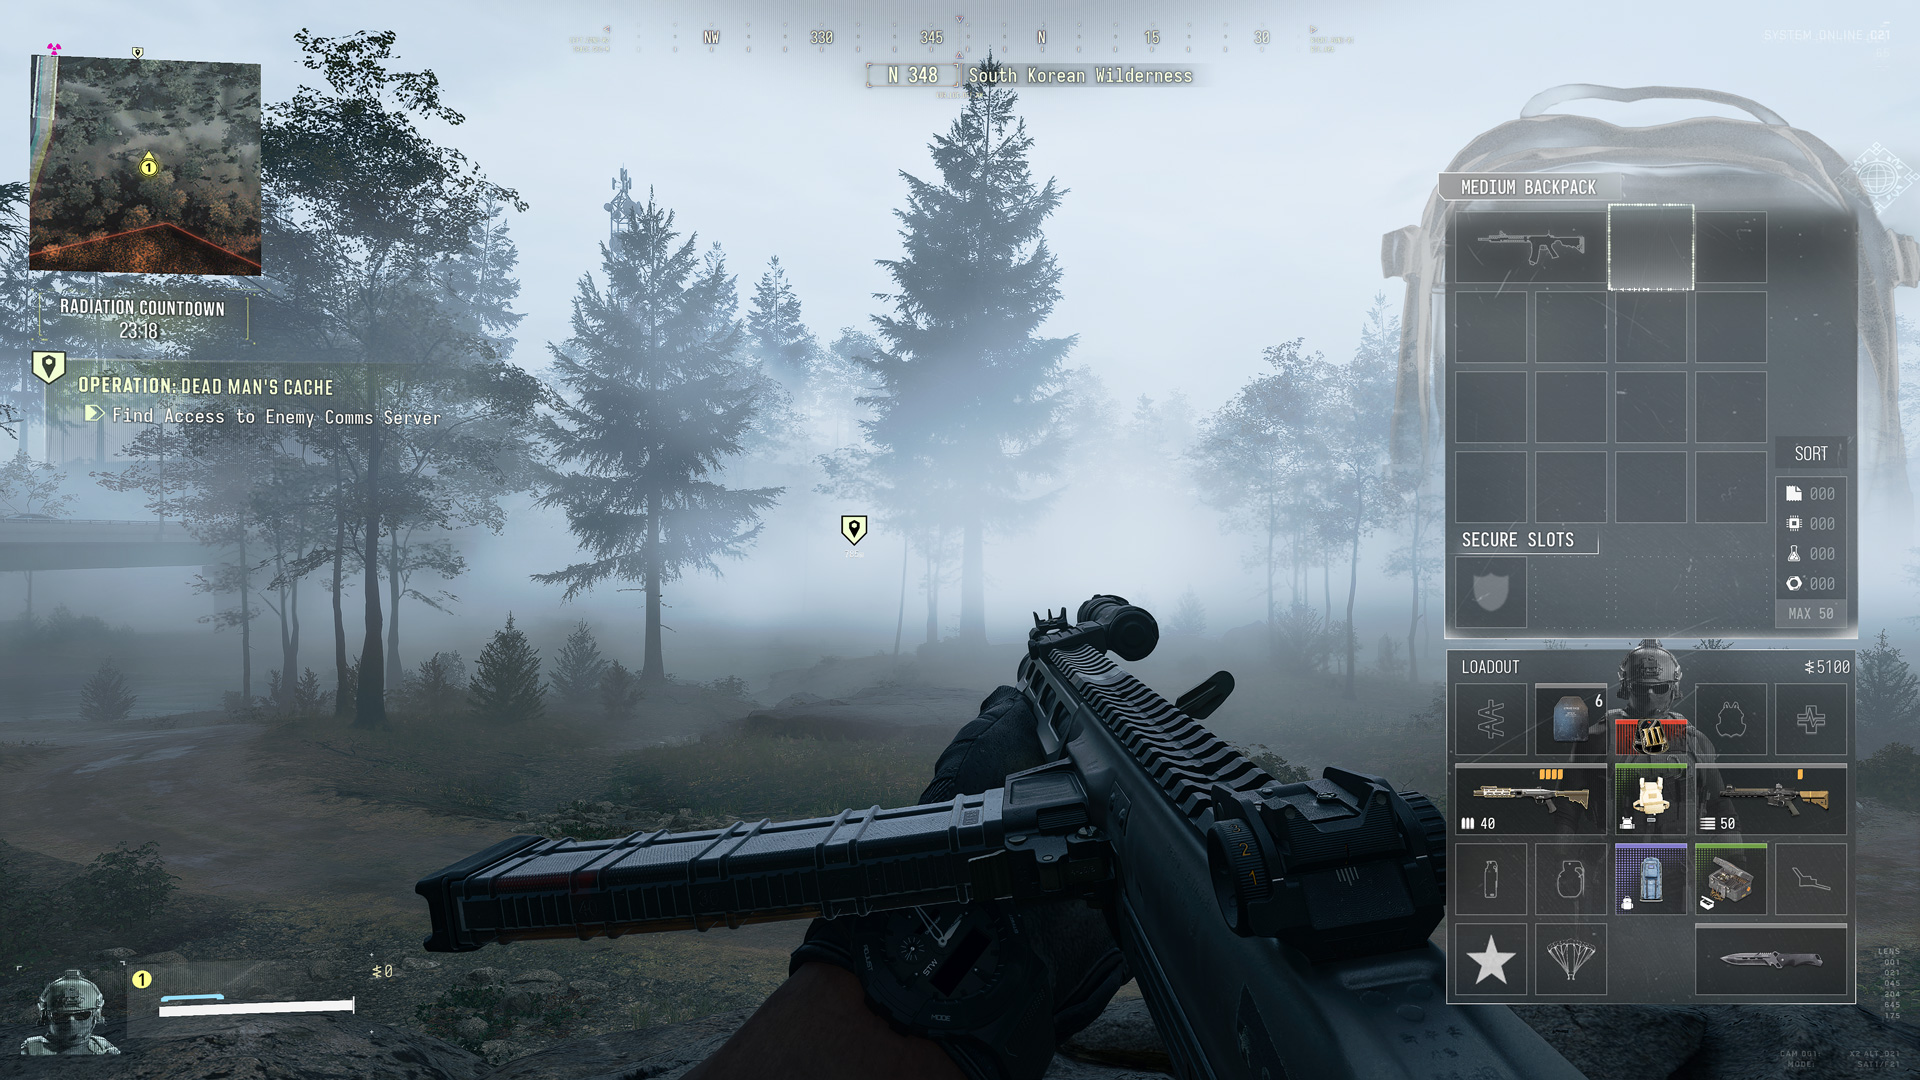
Ping Wheel
Proximity Chat is the fastest way to communicate to nearby Operators within Hajin, but the Ping Wheel gives your squad clear visual commands when voice comms are unavailable, compromised, or best kept silent. Bring it up during a deployment to request a Truce, assimilate with another squad, or access other Operator actions.
Additional HUD Intel
Tac-Map Intel
Open the Tac-Map to access critical reconnaissance on the Hajin Exclusion Zone. With your position centered, move the cursor, zoom in or out, place or clear pings, cancel your current Op, and inspect the terrain, physical threats, and biological hazards. Refer to the sections below for an explanation of the map’s icons.
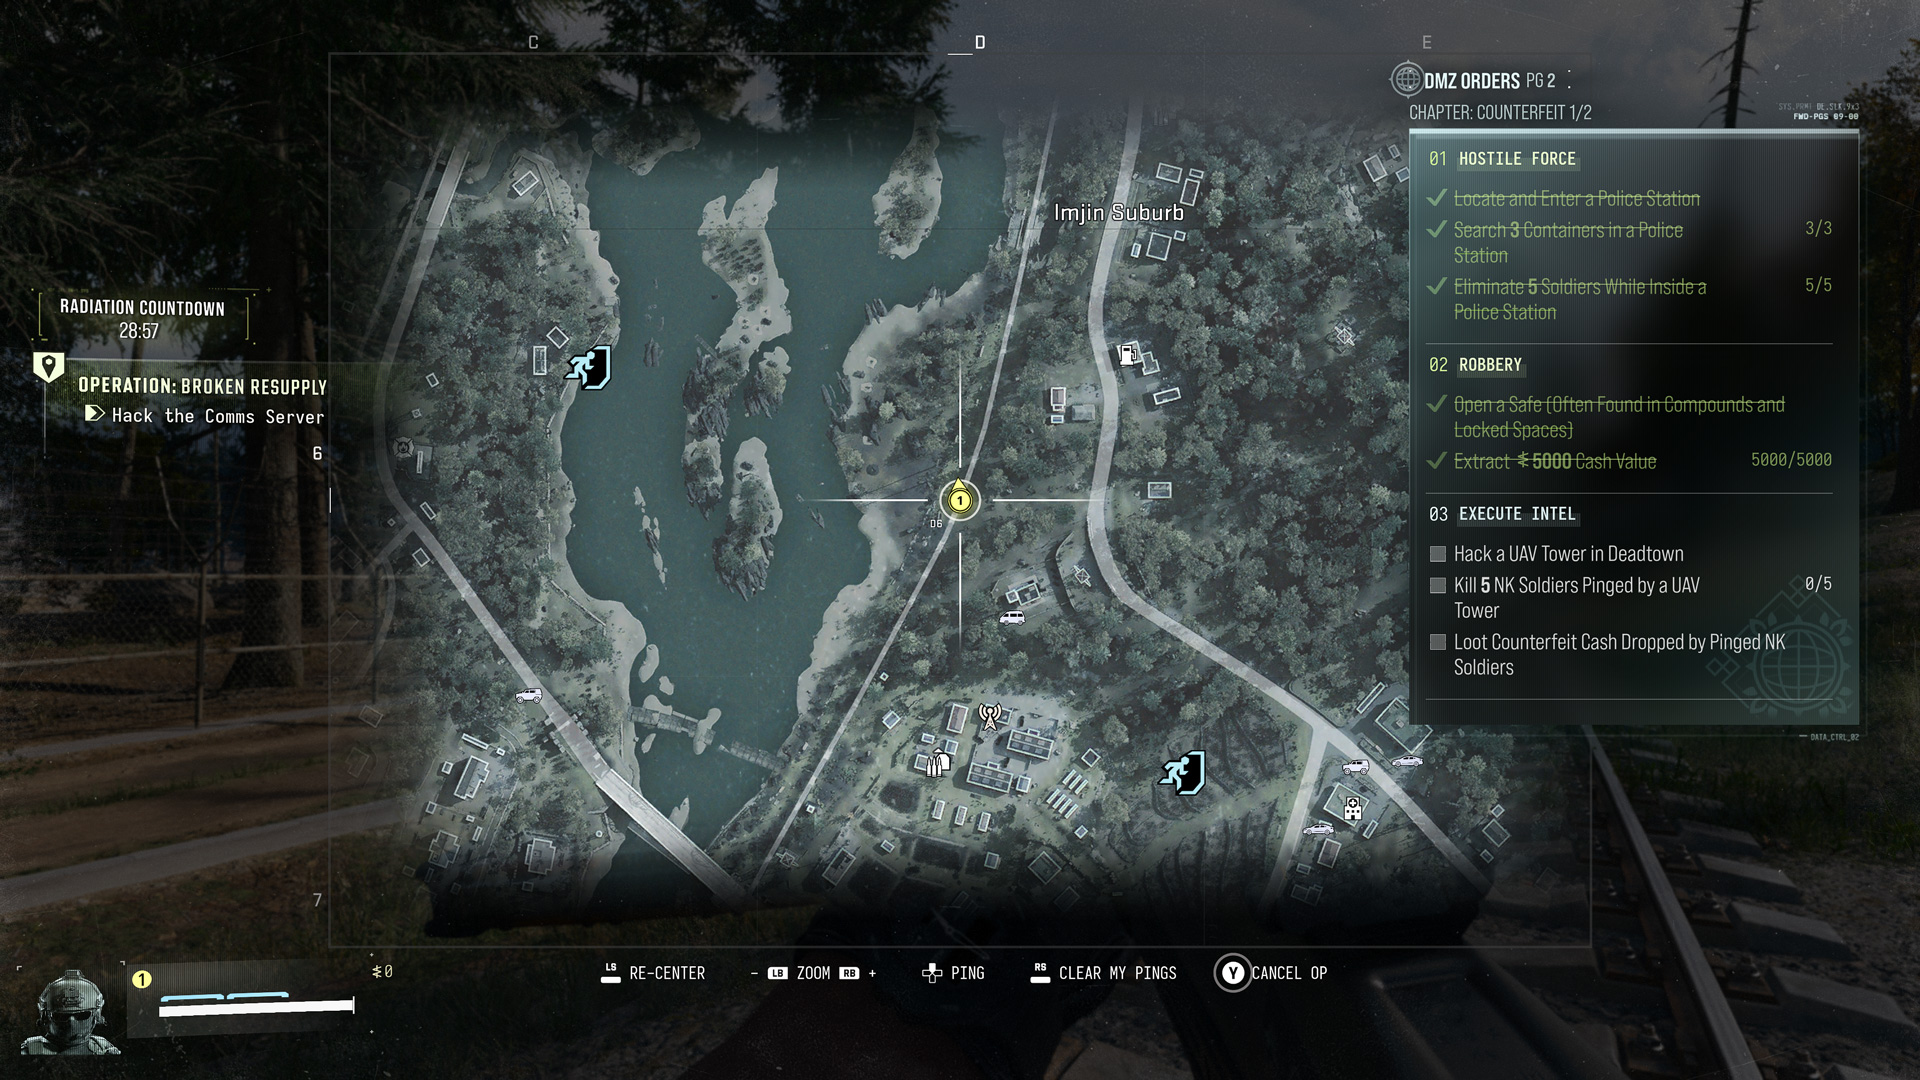
The map also includes a grid overlay, with letters running west to east and numbers running north to south. Use these coordinates to communicate a general area of interest to squadmates — D7, for example, identifies Imjin Farmland. All Keys found in DMZ also have a grid location in their description...
DMZ Orders Intel
Access the DMZ Orders on the right side of the Tac-Map and confirm all the active Orders, and your progress. If an Order requires you to maneuver to or across a specific location, an Order Objective appears on your Tac-Map that you can ping for your squad.
Hajin Enemy Intel: A Field Guide to Hostile Forces
Hajin is an unforgiving place, with both stationary and roving patrols of enemies scattered across its war-torn landscape, part of a secretive North Korean faction. Depending on the threat you pose to them, enemies may ignore you, search for you, or actively engage you in combat. Certain enemies are more adept than others.
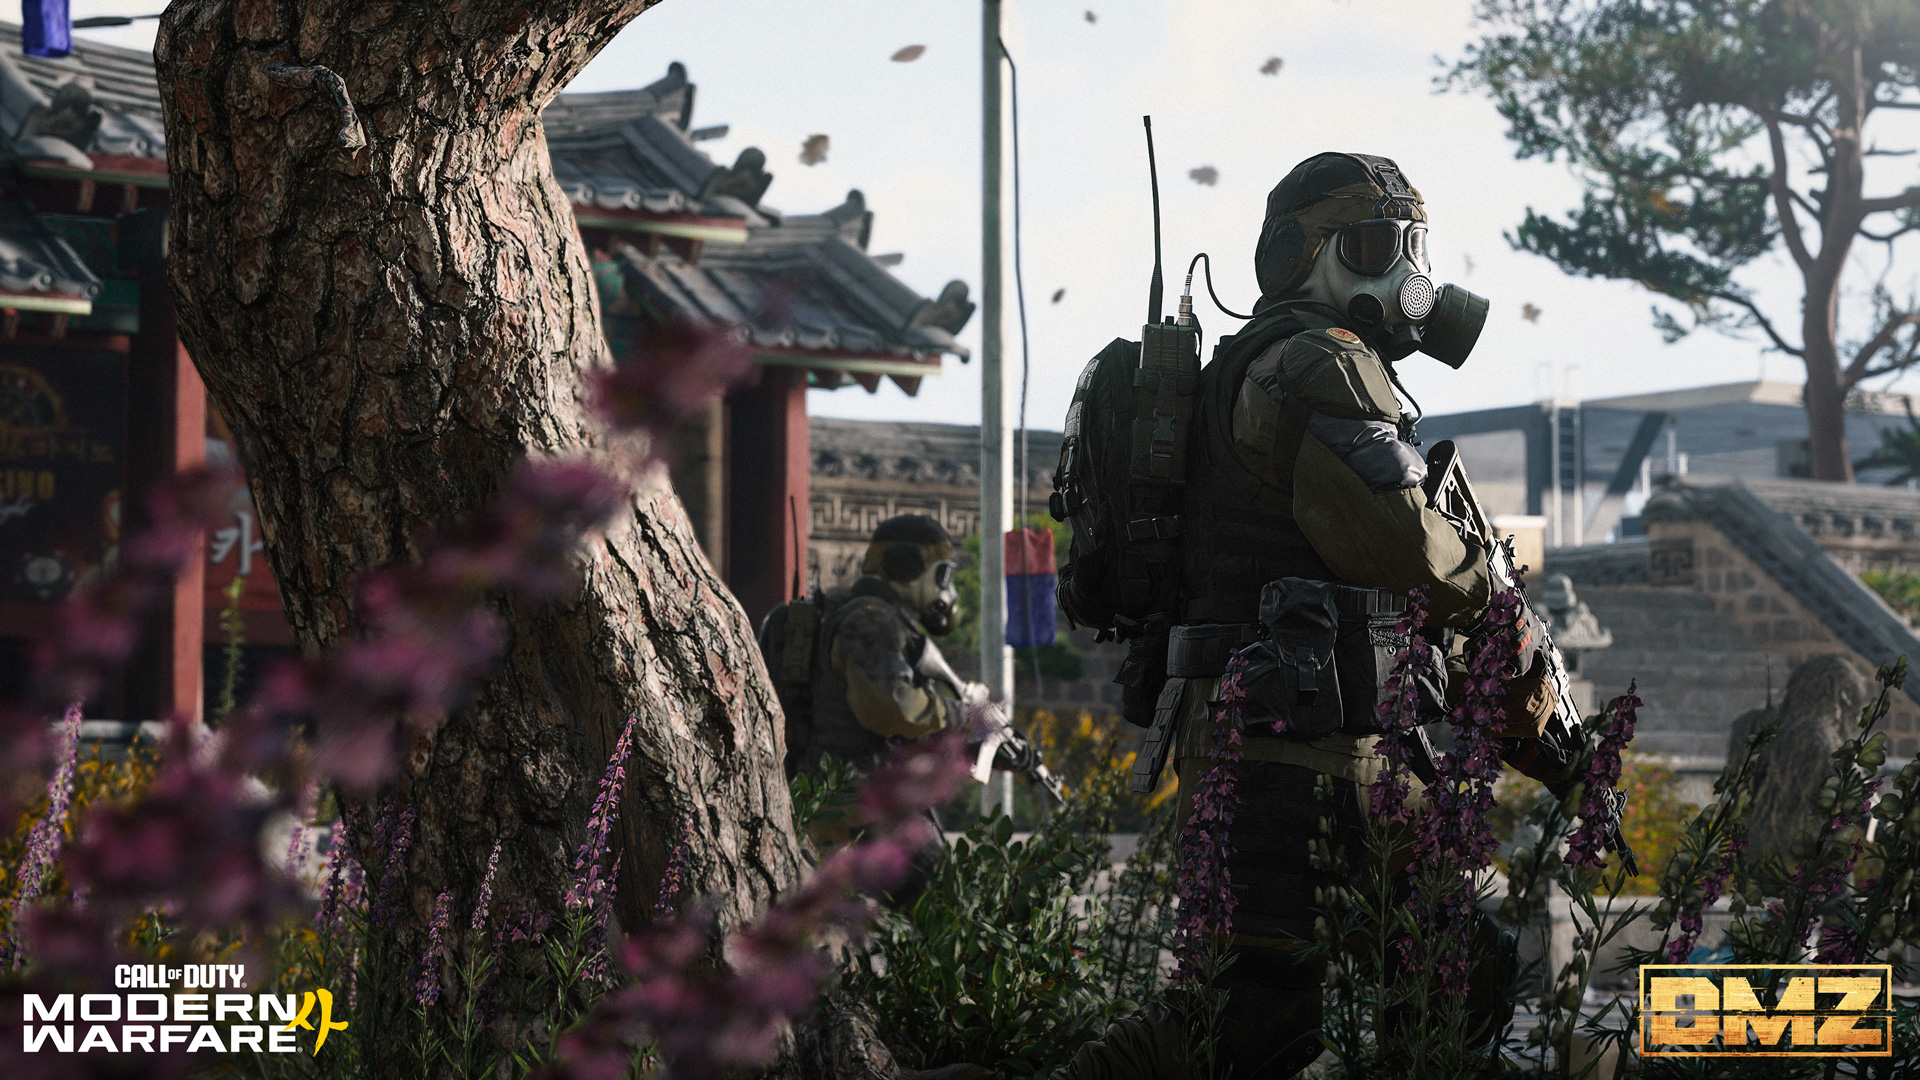
Here are some general enemy types to watch for, and note that Soldiers you encounter may be of various ranks, and carrying a variety of equipment and weaponry:
- Tier 1 North Korean Grunts
- Tier 2 Armored North Korean Soldiers
- Tier 3 Armored, Gas Masked North Korean Soldiers
- Tier 4 Faceless Armored North Korean Soldiers
- Autonomous Combat Drone Swarm
- Autonomous LMG Combat Drone
- Autonomous Quadrupeds: K9 (usually subterranean)
- Attack Infantry Helicopter Patrols
- Road Convoys
- Boss: Lieutenants
- Boss: Commander: Colossus
- Boss: Commander: Deathstalker
- Boss: Commander: Main NK Battle Tank
- Enemy Players
- [CLASSIFIED]
Threat Levels Explained
In DMZ, every Point of Interest has its own level of danger called “Threat.” As Operators create more disruption through combat, the area’s Threat Level — acknowledged on your HUD as you enter each new area — provides an indication of how dangerous the enemy’s response is expected to be.
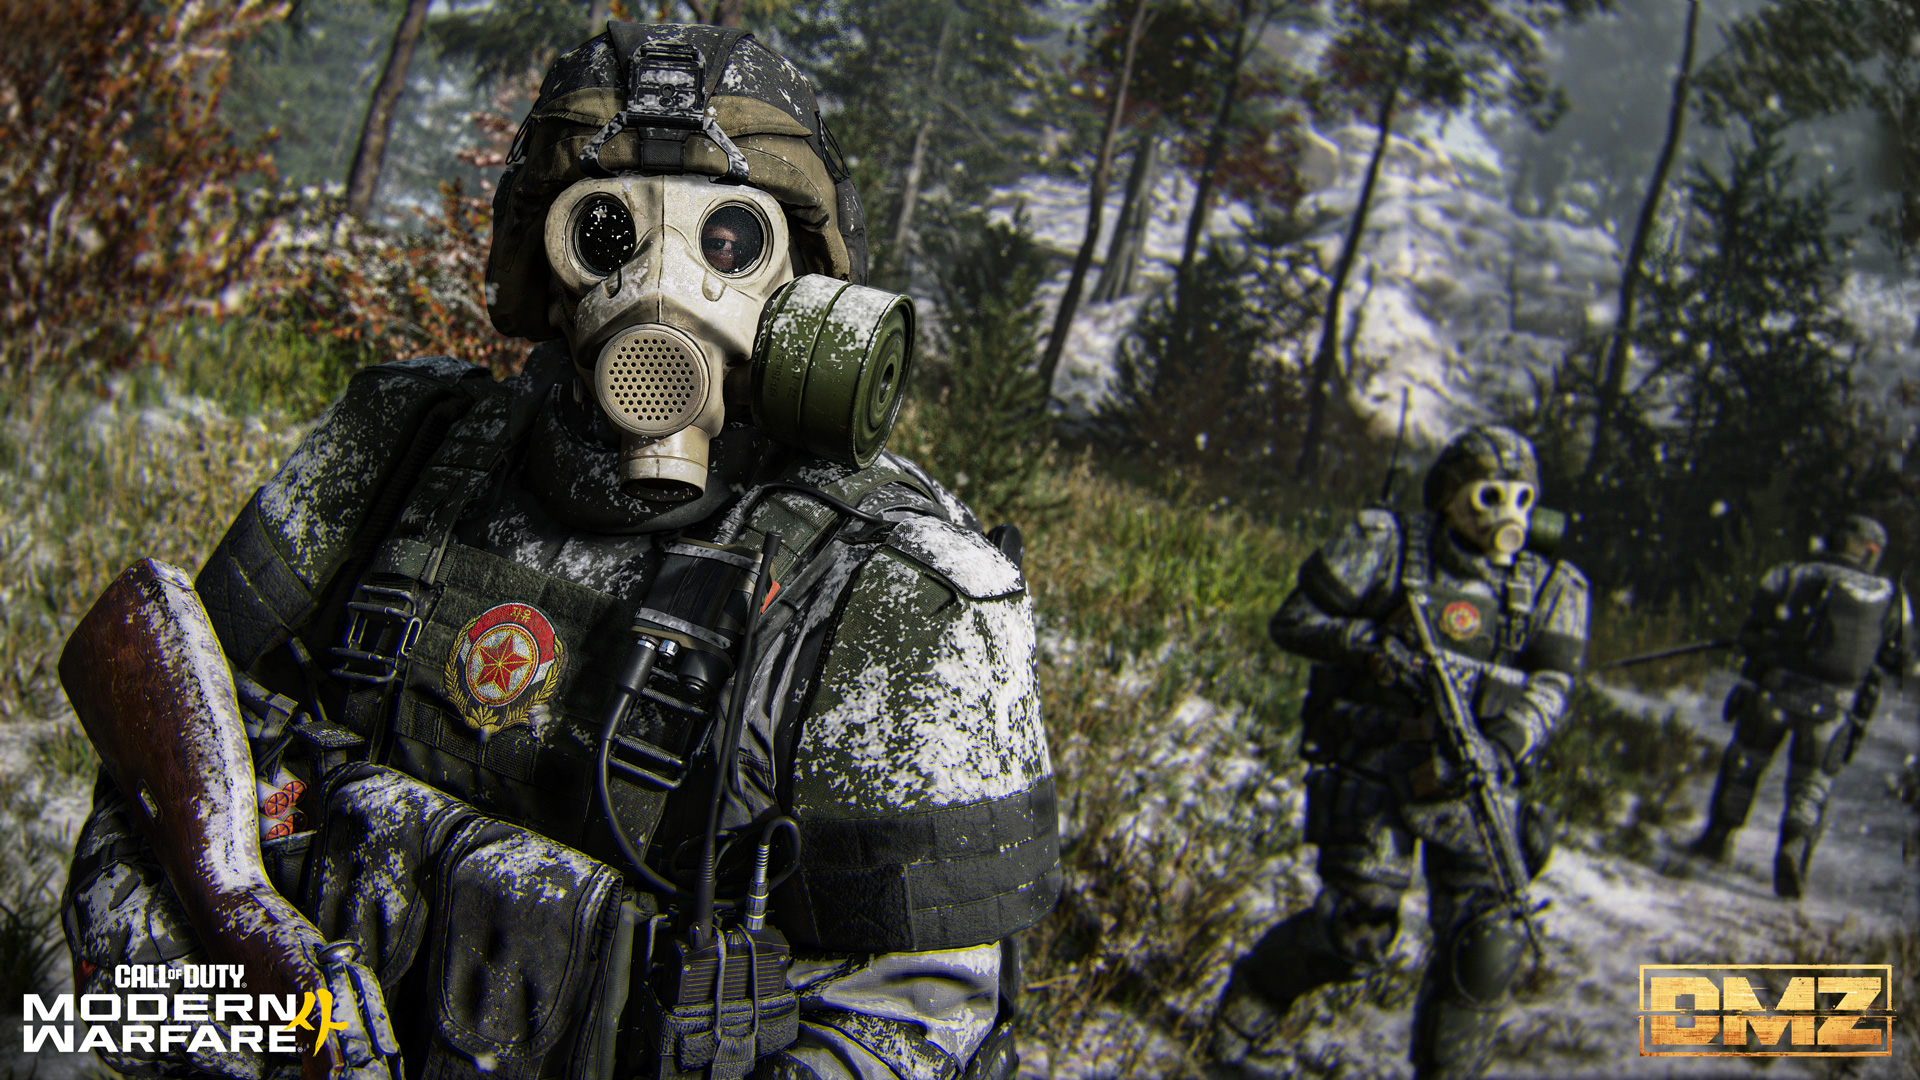
A location’s Threat level is always indicated in the top-middle of your HUD, under the compass. The higher the threat, the more dangerous and numerous the enemies are. Human Operators are not included in this Threat indicator, so be situationally aware for additional combat opportunities… or ambushes.
- The least problematic Threat level in a location with enemies is "Low.”
- The highest is a location with an “Extreme” Threat level.
CAUTION: If you enter an area without a stealthy approach and the enemy notices your actions, whether they’re moving through an area, or committing acts of violence, expect retaliation.
TIP: Stealth eliminations using melee weapons, throwing knives, or suppressed shots are an excellent way to move through higher threat areas without being noticed.
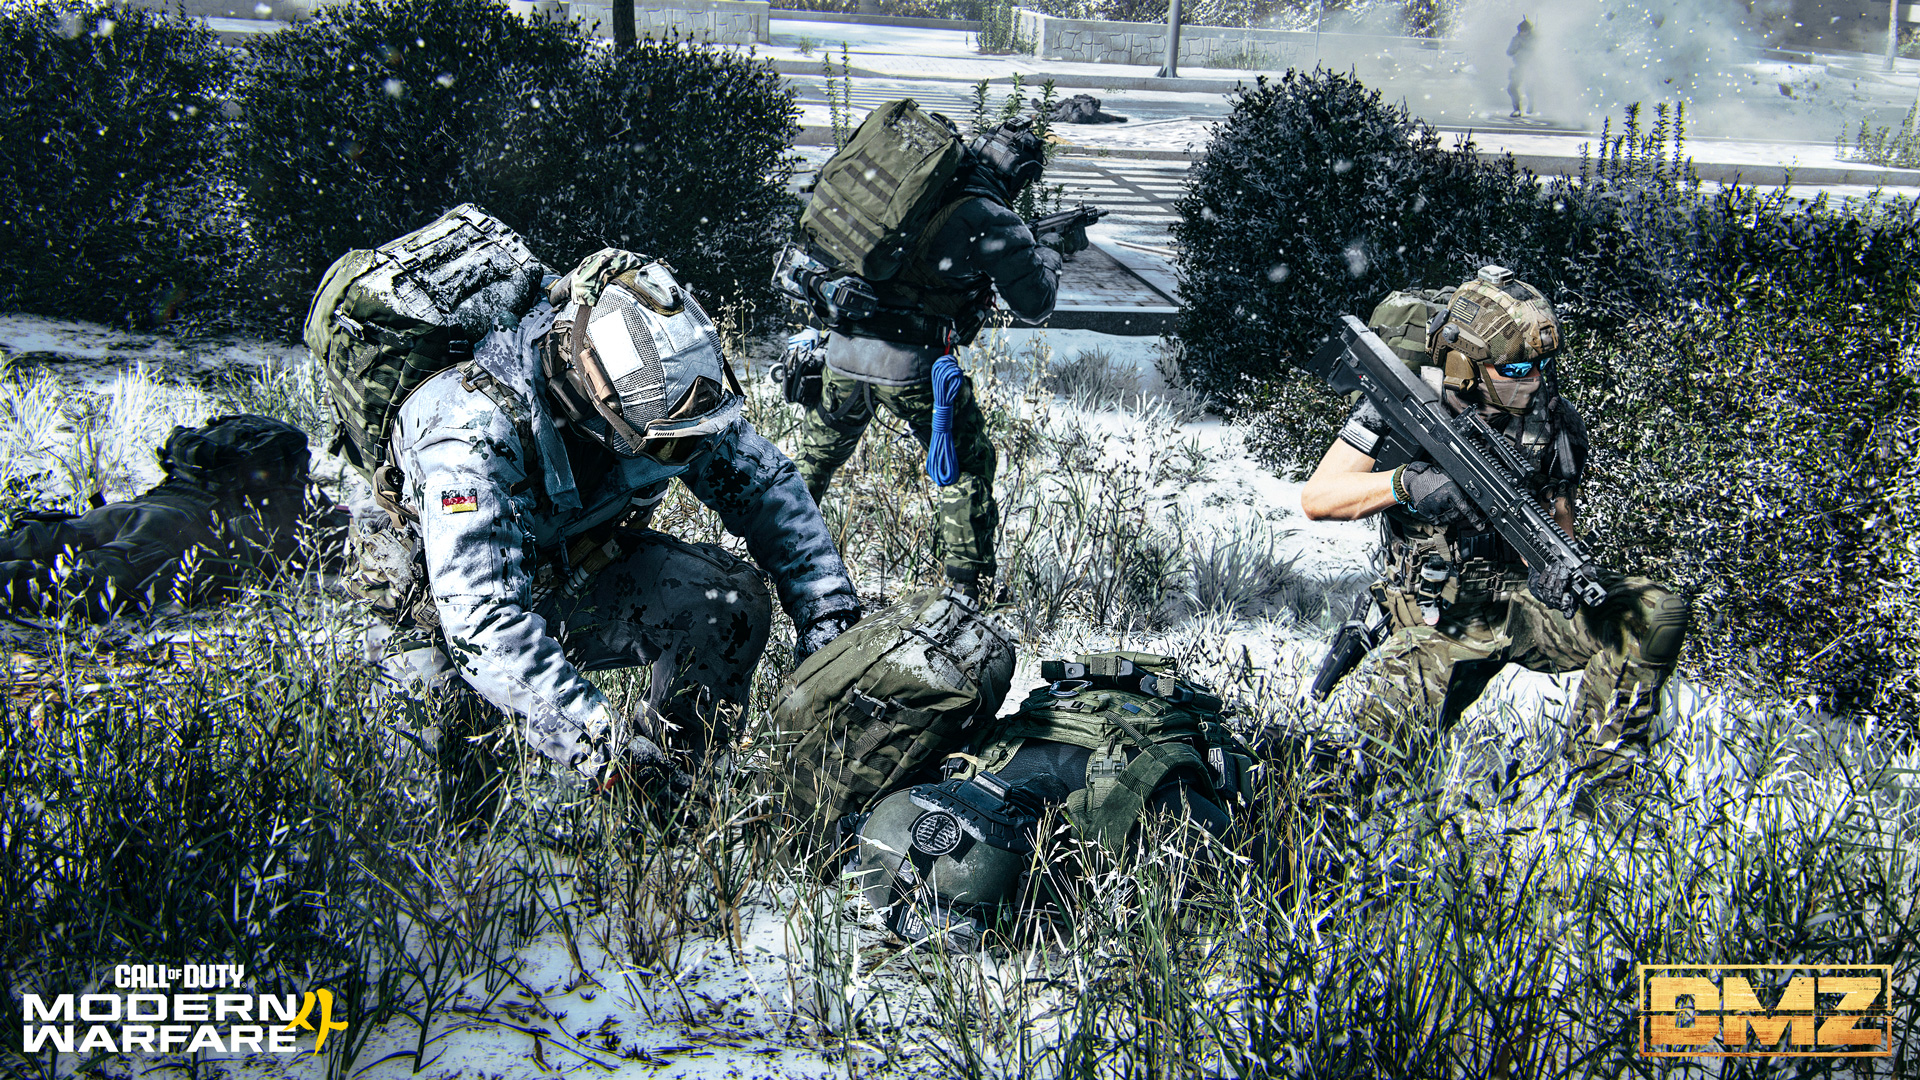
At each point of interest across Hajin, expect a consistent response from the enemy related to the Threat level present, though specific POIs may have unique encounters.
Be situationally aware of how threatening a location is that you are exploring. You have a chance to recognize the danger, decide whether to keep pushing, or disengage before a more dangerous enemy response becomes overwhelming.
While sustained violent aggression causes conflict, reducing aggressive actions calms the situation. Achieve this by vanishing into the shadows, seeking cover, fleeing to a more rural environment, engaging in stealth, and moving away from enemies so they do not have a visual or audible lock onto you.
Hajin Vehicle Intel: Land, Sea, and Air Transport
There are numerous types of vehicles you can commandeer across Hajin, and each offer benefits of faster traversal across land, air, and water, though they have a finite amount of armor and fuel. Repair and refuel vehicles at a Gas Station.
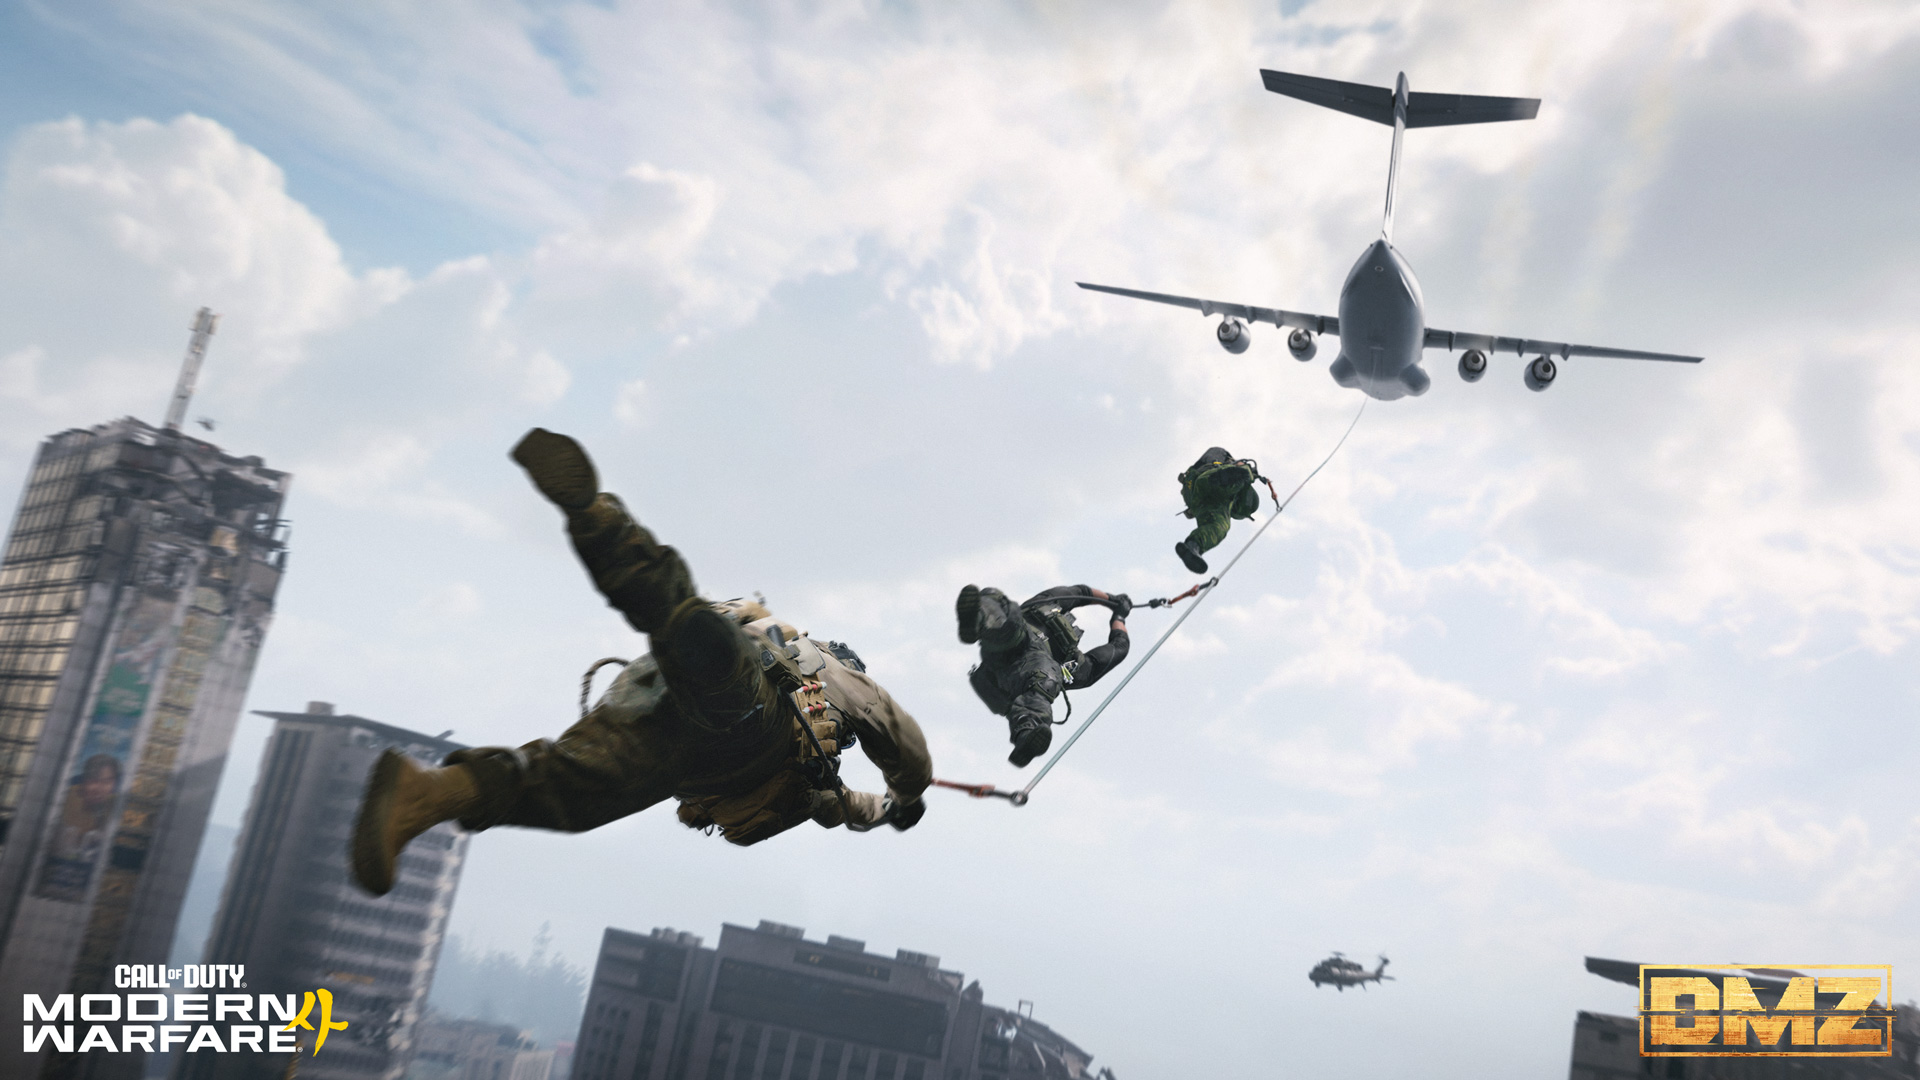
TIP: Certain Traits can increase your prowess at the controls of a vehicle, like hopping out of a vehicle with a puncture and repairing the blown tire.
NOTE: Vehicles in DMZ require repair and refueling. Vehicles in Call of Duty®: Warzone™ will not require repair and refueling.
Ground Transportation
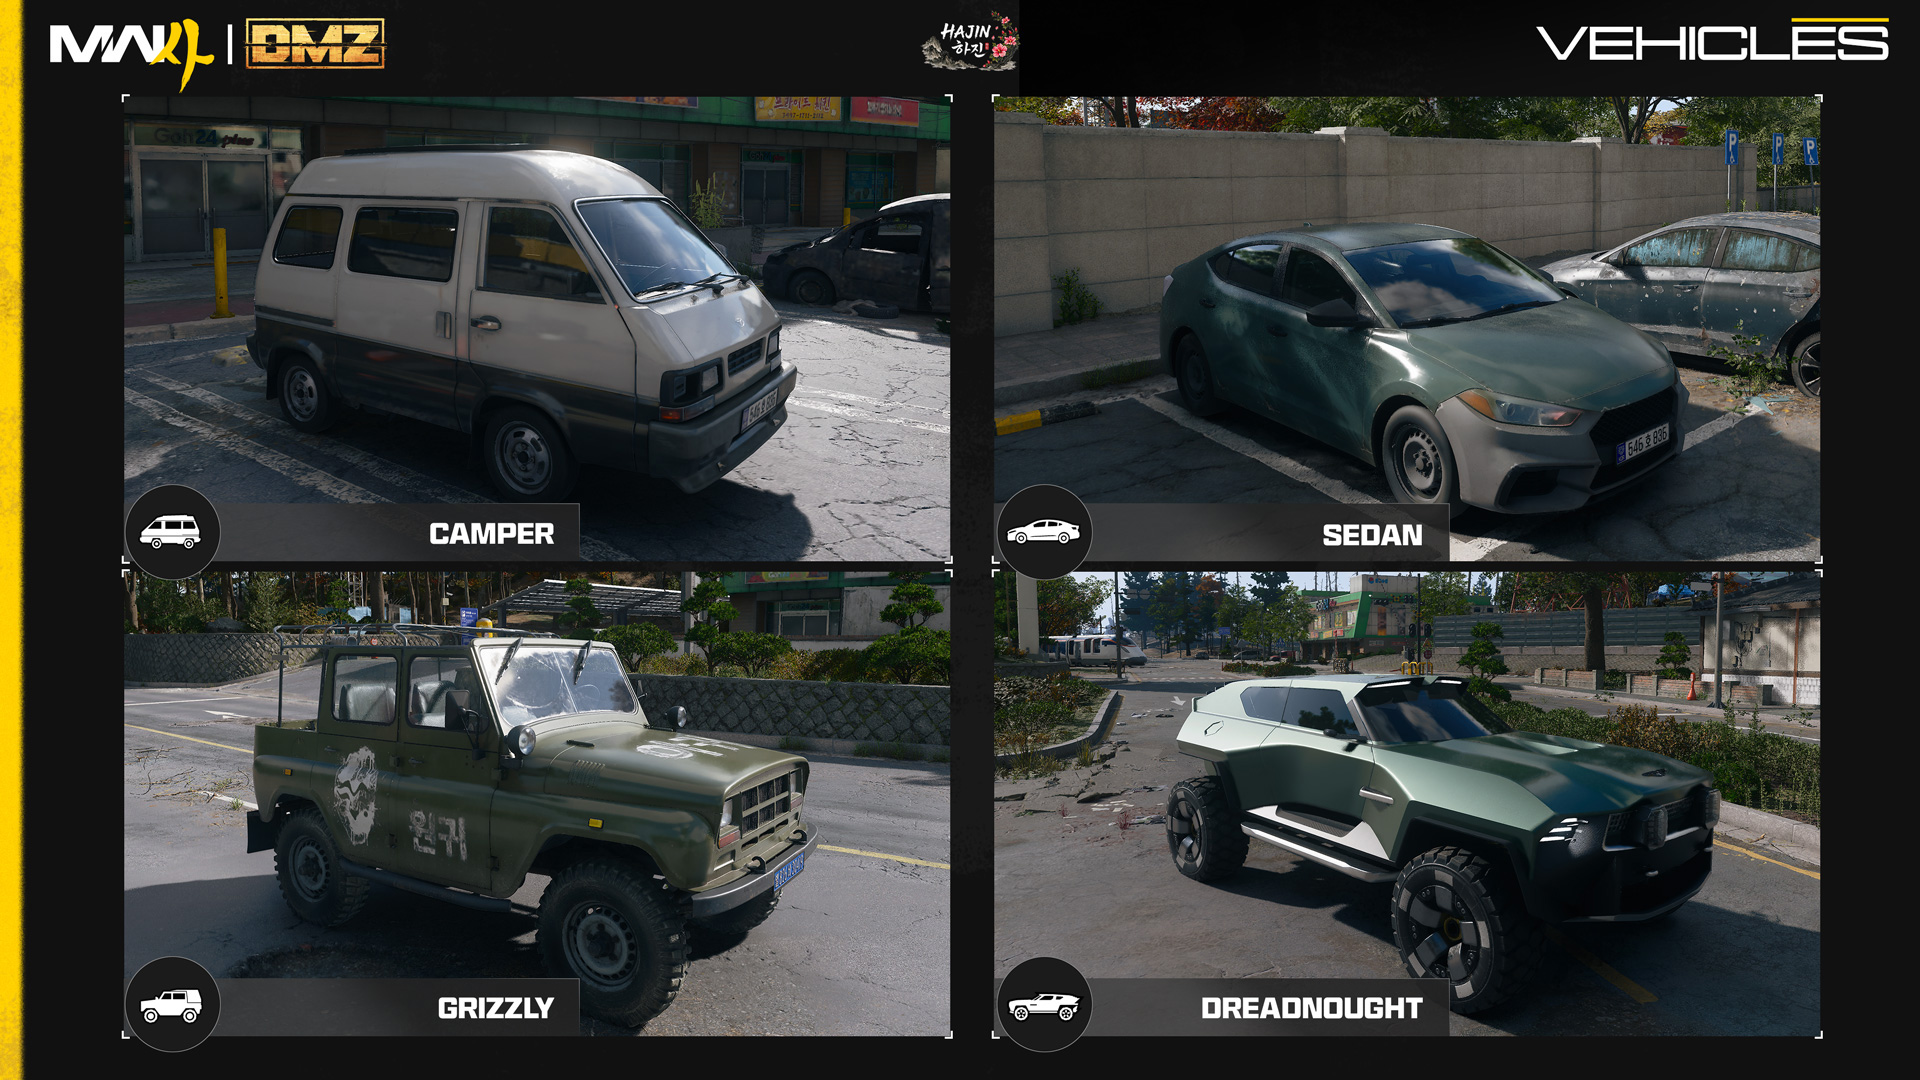
Camper
A mobile, yet unprotected, wagon that can get your squad from point A to point B. Be careful to avoid any direct fire in this unarmed vehicle.
Sedan
A compact civilian sedan designed for daily commutes. While not suitable for combat, this car is a quick fix for mobility across Hajin.
Grizzly
A battle-proven vehicle built on a rugged Soviet design. Light on armor but quick and agile, it excels at hit-and-run engagements.
Dreadnought
A high-performance all-wheel drive tactical SUV by Aston Martin, combining advanced armor, exceptional off-road capability, and the speed and agility needed to operate in hostile environments.
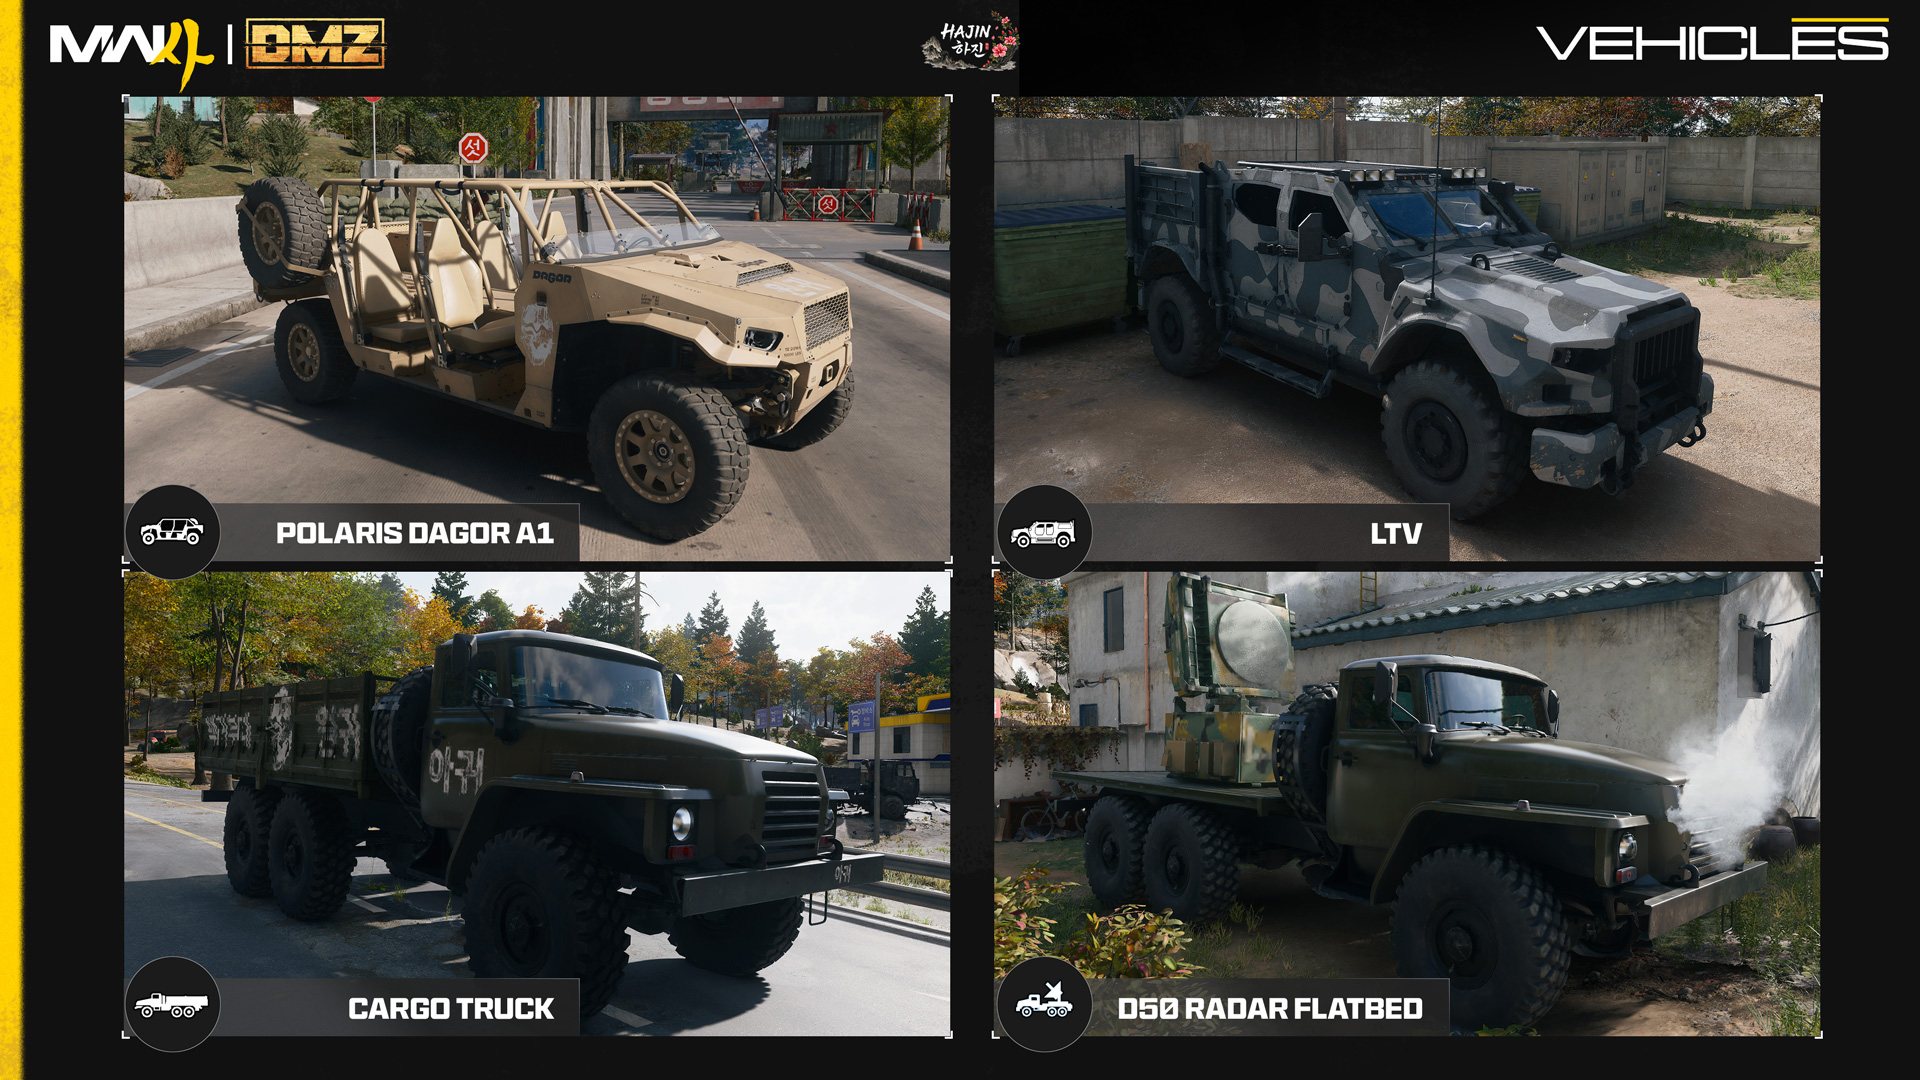
Polaris Dagor A1
A battle-tested tactical vehicle engineered for rapid deployment and extreme off-road mobility. Capable of carrying a full squad and their equipment across the toughest combat environments.
LTV
A versatile light combat platform engineered for rapid deployment, rugged environments, and unconventional warfare. Equipped with an optional mounted .50 Cal to bring serious firepower to the fight.
Cargo Truck
A battle-proven modular vehicle platform powered by a reliable diesel engine, capable of supporting a broad spectrum of military operations. Features a two-seat cabin and a flat cargo bed.
D50 Radar Flatbed
A battle-proven modular vehicle platform powered by a reliable diesel engine, capable of supporting a broad spectrum of military operations. Features a vehicle-mounted UAV.
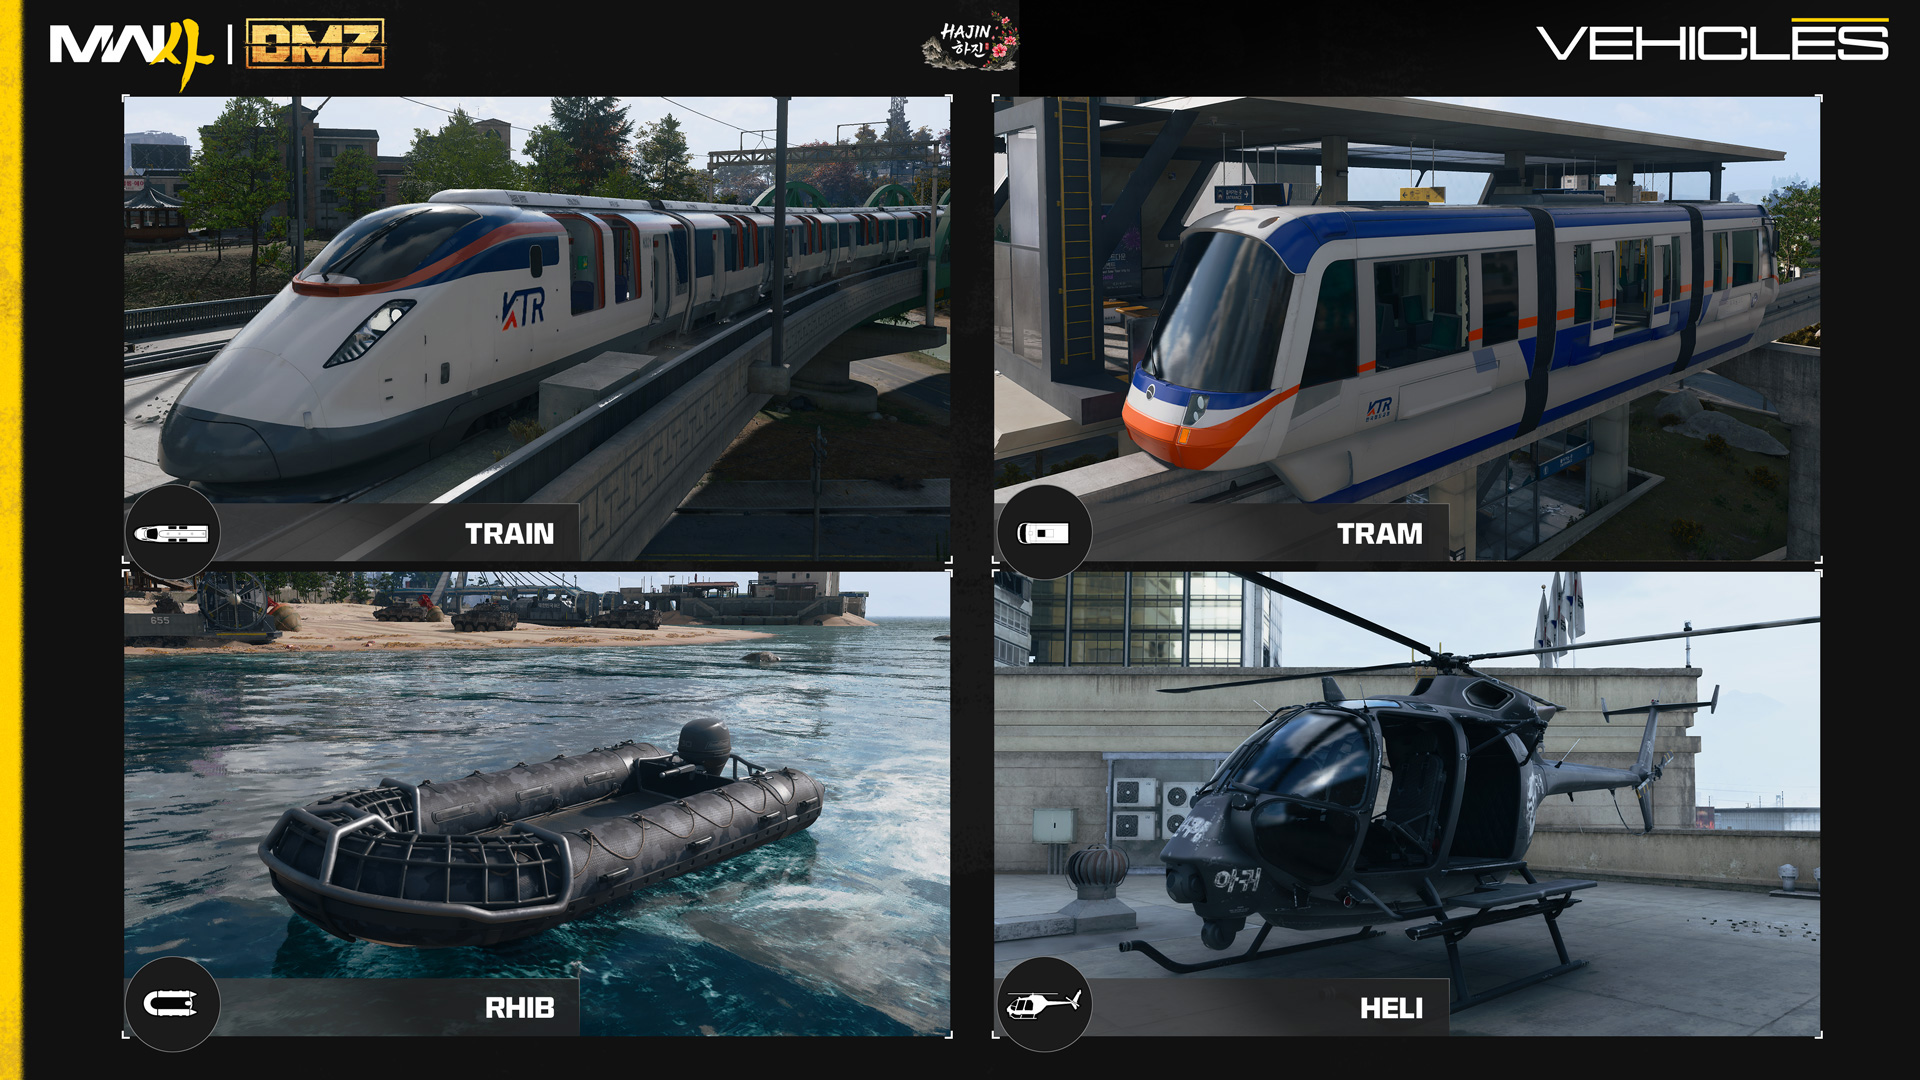
Rail Transit
Train
An automated civilian train service is still functioning and offers rapid transport along a winding route that travels across a wide range of SK points of interest. This vehicle is not controlled by a player.
Tram
A slow-moving pedestrian-carrying carriage that runs along an elevated monorail in a circular route around the outskirts of Hajin City. This vehicle is not controlled by a player.
Watercraft
RHIB
A high-speed, Special Operations inflatable boat engineered for precision maneuvering, rapid deployment, and aggressive maritime engagements.
Aircraft
Heli
A twin-engine combat helicopter built for rapid deployment, aerial fire support, and unmatched mobility across the Exclusion Zone.
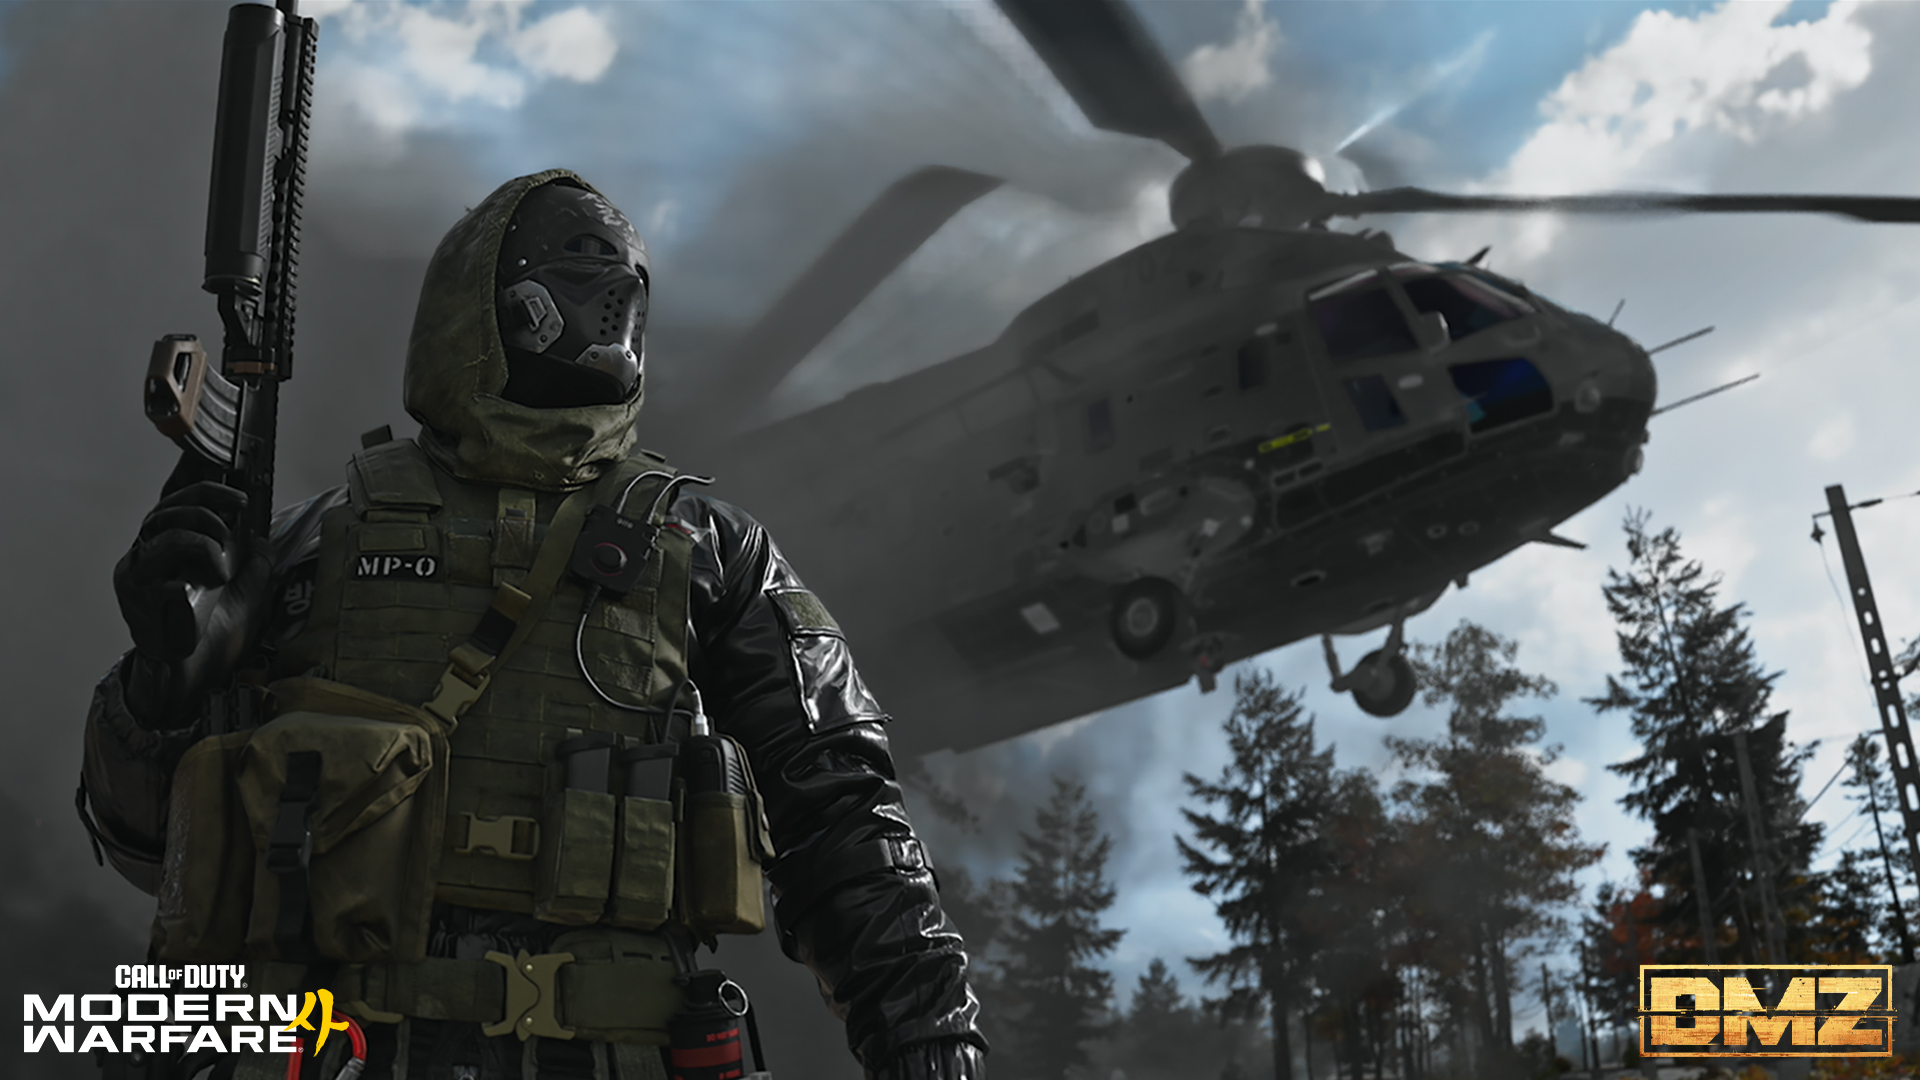
Heavy Chopper
A heavily armored transport helicopter capable of delivering troops through hostile airspace while using defensive flares to evade incoming missile threats. Autopilot engages hover if the pilot leaves the seat while fuel remains. This vehicle is rarely controlled by a player.
Monarch
A twin-rotor heavy-lift helicopter tasked with infil and exfil of friendly forces from the contested zone. When the mission is complete, this is your ticket home and is not controlled by a player.
Narrative Stories from Hajin
Field Report #3: Not Without Him
The operation heated up in Cheongun Village and took the squad southwest toward Chang-san Air Base. By the time they reached the fortified perimeter, the mission had already changed in scope. Bale was waiting for them, backed by a hardline security detail and enough firepower to turn the approach into a running fight.
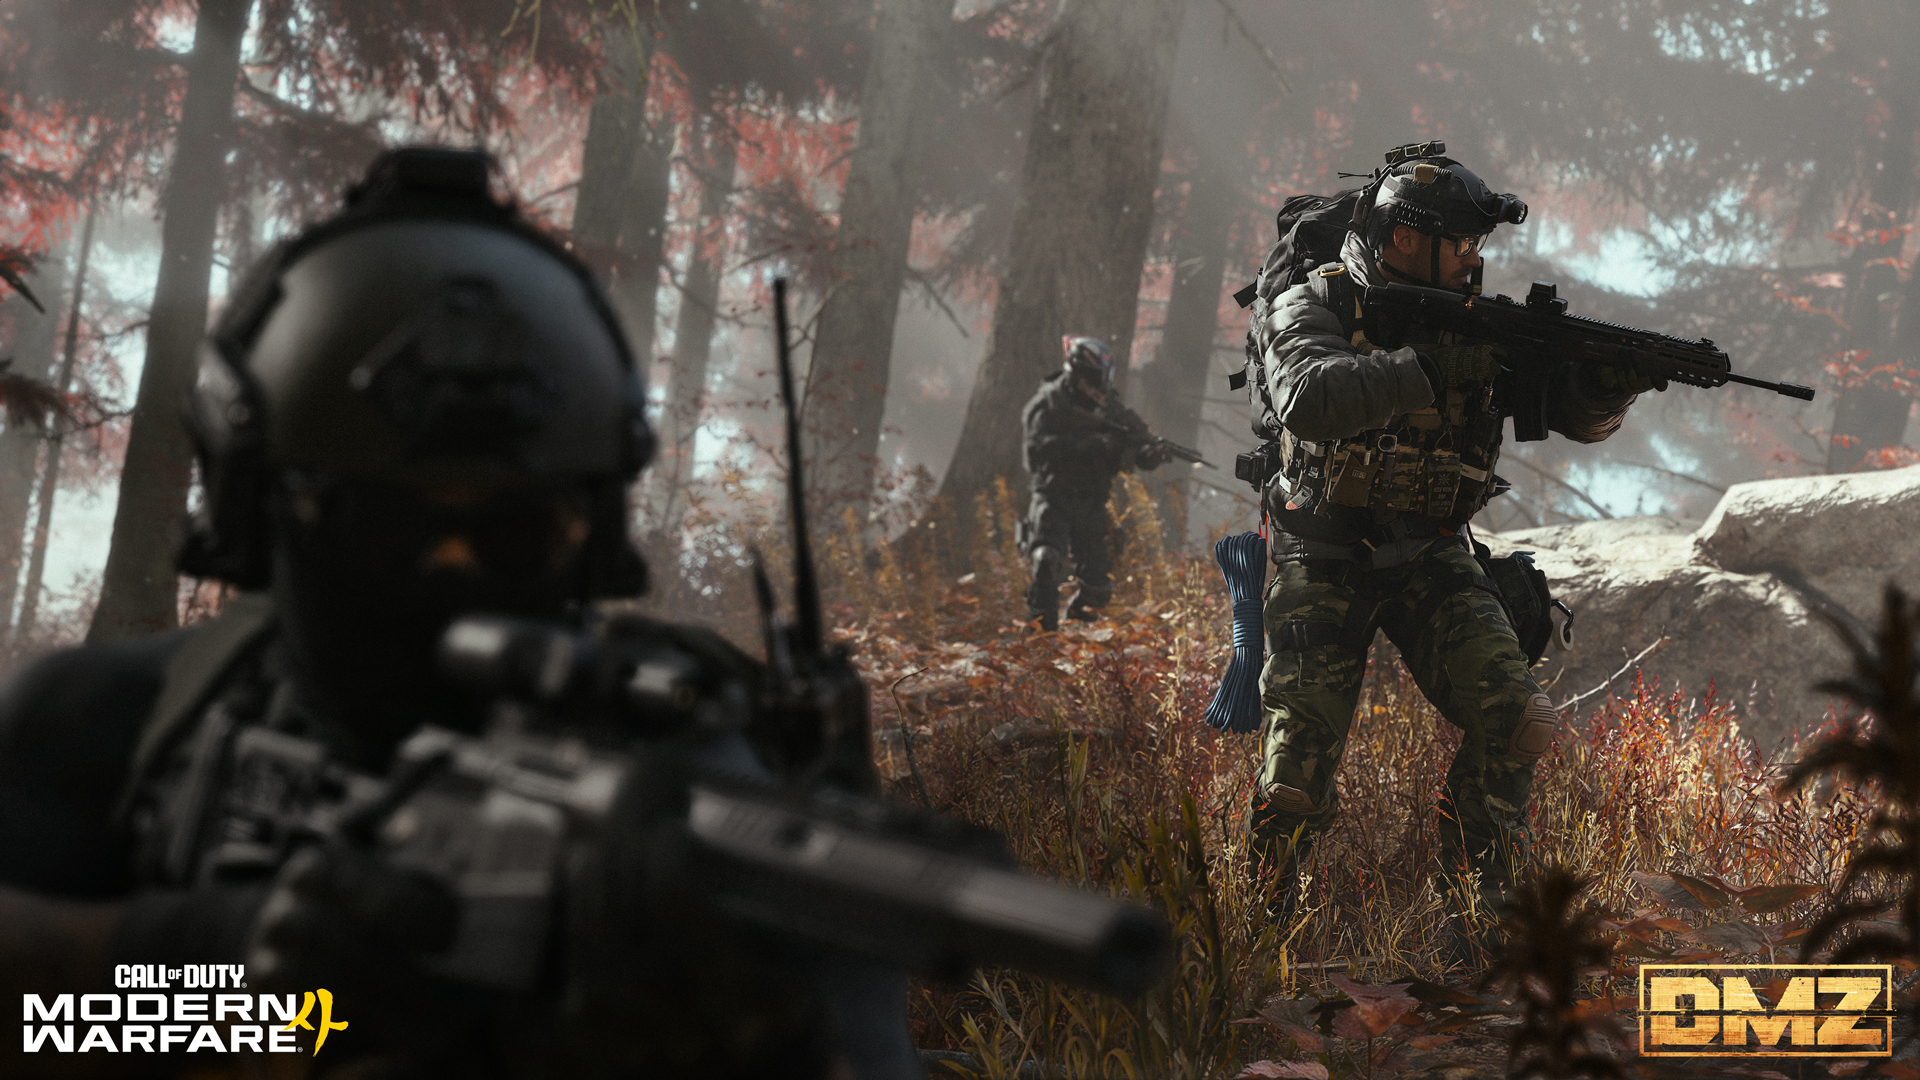
The squad had been moving rapidly when the operation began to heat up in the foothills of the NK Wilderness. The first signs were small: disciplined fire from unseen positions, engines idling beyond the tree line, and a fog-filled silence that settled between bursts. By the time they reached Chang-san Air Base, Bale was waiting.
A hardened Spetsnaz veteran embedded with North Korean forces, Bale acted as a combat trainer and enforcer. His elite troops held the approaches with disciplined fire, turning the assault into a running fight before the squad reached the gates.
Viper Squad brought him down, stripped a still-smoldering tank for anything useful, and pushed toward the Political Prison. That was when Hajin seemed to notice them.
Enemy units began closing from every direction. The squad fought through the compound under constant pressure, moving only when the next position offered better cover than the last. By the time they reached the extraction site, the air was alive with Drone Swarms. The situation worsened: A Colossus had joined the response. The belt-fed Minigun mounted to his armor began to spool up, its barrels whining before the first burst cut across the landing zone.
There was a small window of hope: The extraction helicopter dropped in low through the smoke.
“Move!” shouted Viper Actual.
They threw everything they had into the final exfiltration. Viper and Wraith reached the ramp, then realized Nomad was still down in the kill zone. Wraith turned back without hesitation.
That was when another squad arrived.
The newcomers hit the extraction site from the eastern wall, firing into the chaos and forcing everyone toward the same narrow stretch of ground. Wraith brought up his X-58 Nyx. Through the thermal optic, the smoke thinned to a pale veil, revealing the rival squad as white-hot shapes moving along the eastern wall. The suppressed weapon bucked in short, controlled bursts. One operator fell, then another, until Wraith held the approach long enough for Viper to reach the helicopter.
Nomad never made it back.
Radiation was spreading across the site. The helo lifted with Viper and Wraith aboard, but Wraith had seen the truth of it: They were leaving without their own. As the helicopter cleared the compound, he stepped back into the red haze below.
The last transmission was brief.
“Not without him.”
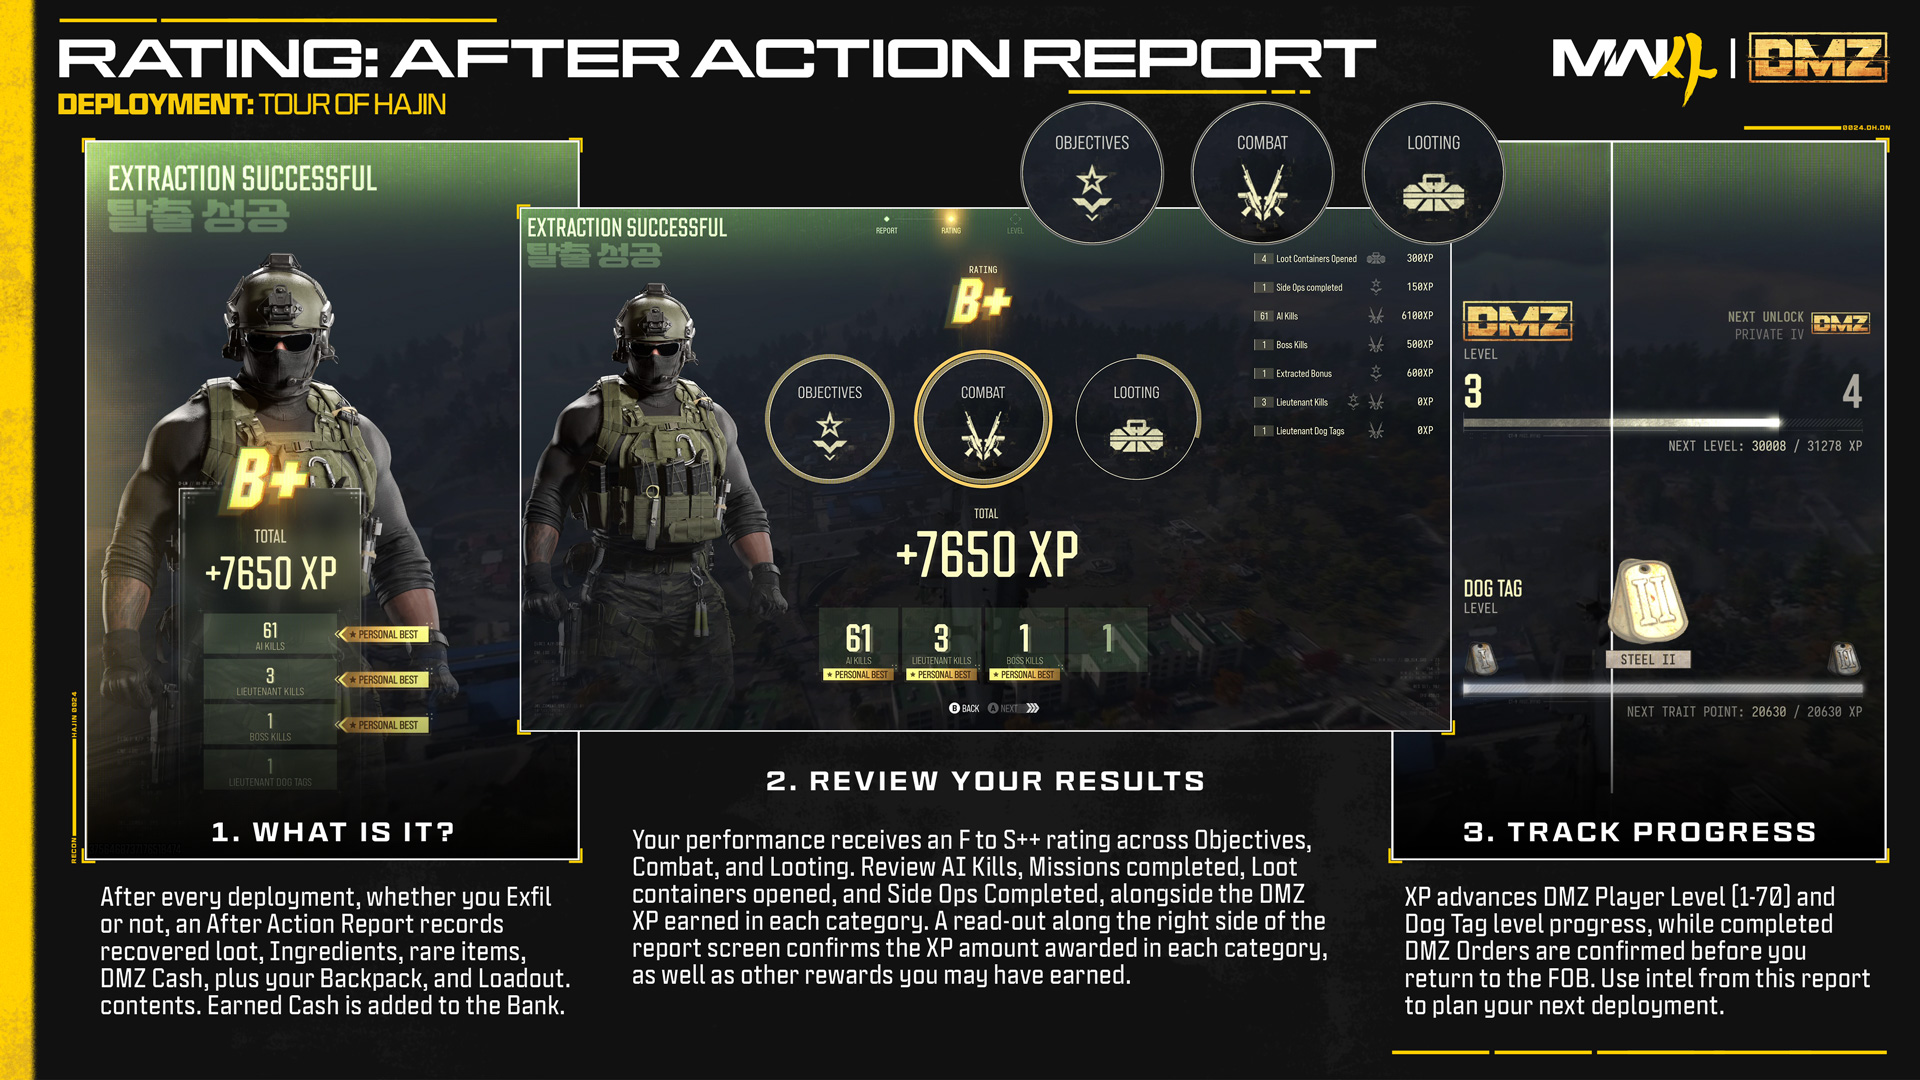
Whether you exfil successfully or not, prepare for statistical intel on how you performed during your deployment, courtesy of the After Action Report, which is divided into four separate sections:
- Report: This gives a detailed breakdown of the items and resources you gathered, including valuable items, 3D Printer ingredients, rare items, and DMZ Cash found or earned from Operations. A total amount of DMZ Cash is awarded and placed into your Bank. The contents of your Backpack and Loadout is also shown.
- Rating: You’re given a combined rating (ranging from F to S++) related to your competence. The rating is based on your contributions regarding Objectives, Combat, and Looting within the deployment.
Totals for the following are then confirmed:- AI Kills
- Missions Completed
- Loot Containers Opened
- Side Ops Completed
A read-out along the right side of the screen confirms the XP amount awarded in each of the above categories.
- Level: The XP you acquired is then applied to your DMZ Player Level, with unlocks at every level from 1-70. Additionally, the level of your Dog Tag increases (from Steel to Onyx III, with 18 total levels, and an Operator Trait awarded each time you level up your Dog Tag.
- Summary: Finally, a confirmation of any DMZ Orders you completed is listed, as well as rewards, before you return to the FOB and receive Weapon leveling updates.
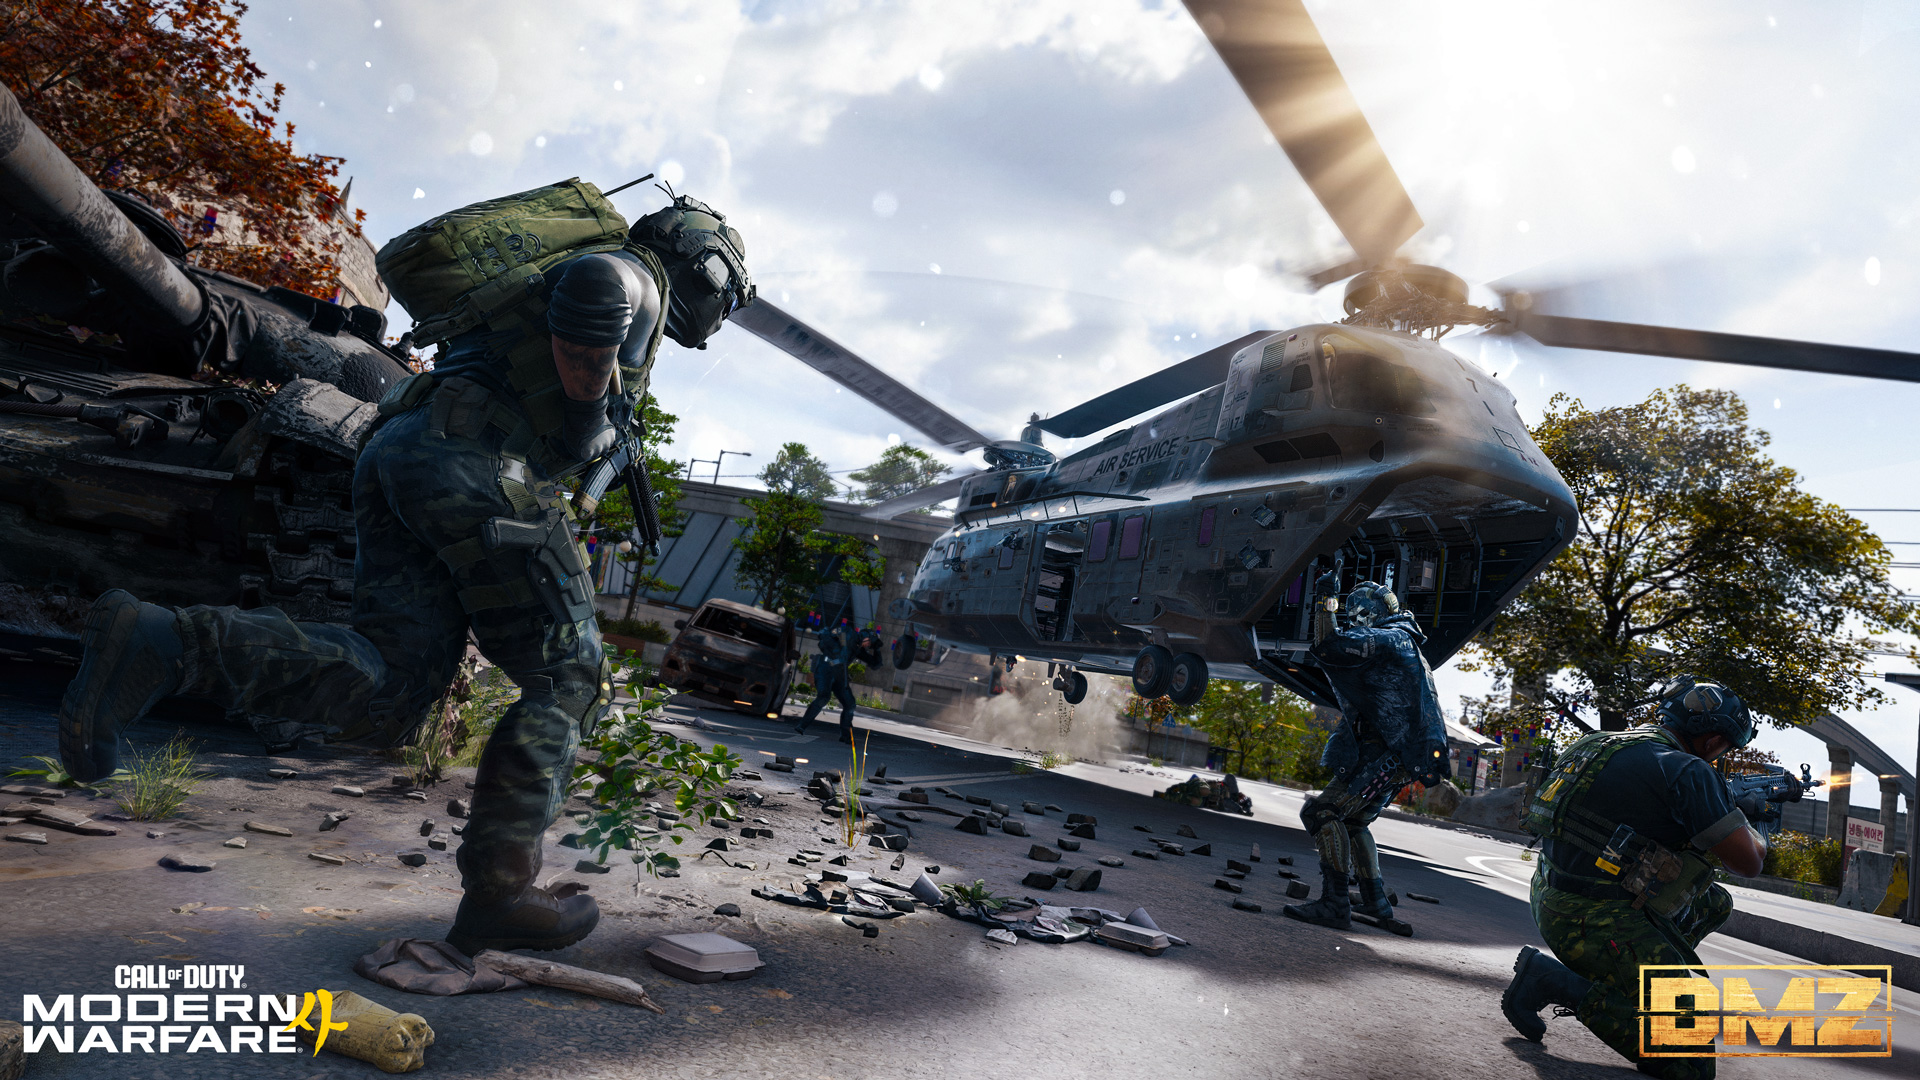
Tour of Hajin
Get your bearings across Hajin and the Exclusion Zone with a guided tour of the region’s major Points of Interest, from fortified military installations and urban districts to rural settlements, industrial sites, and hazardous facilities. Use this tour to understand the terrain, identify key landmarks, and plan your first deployment.
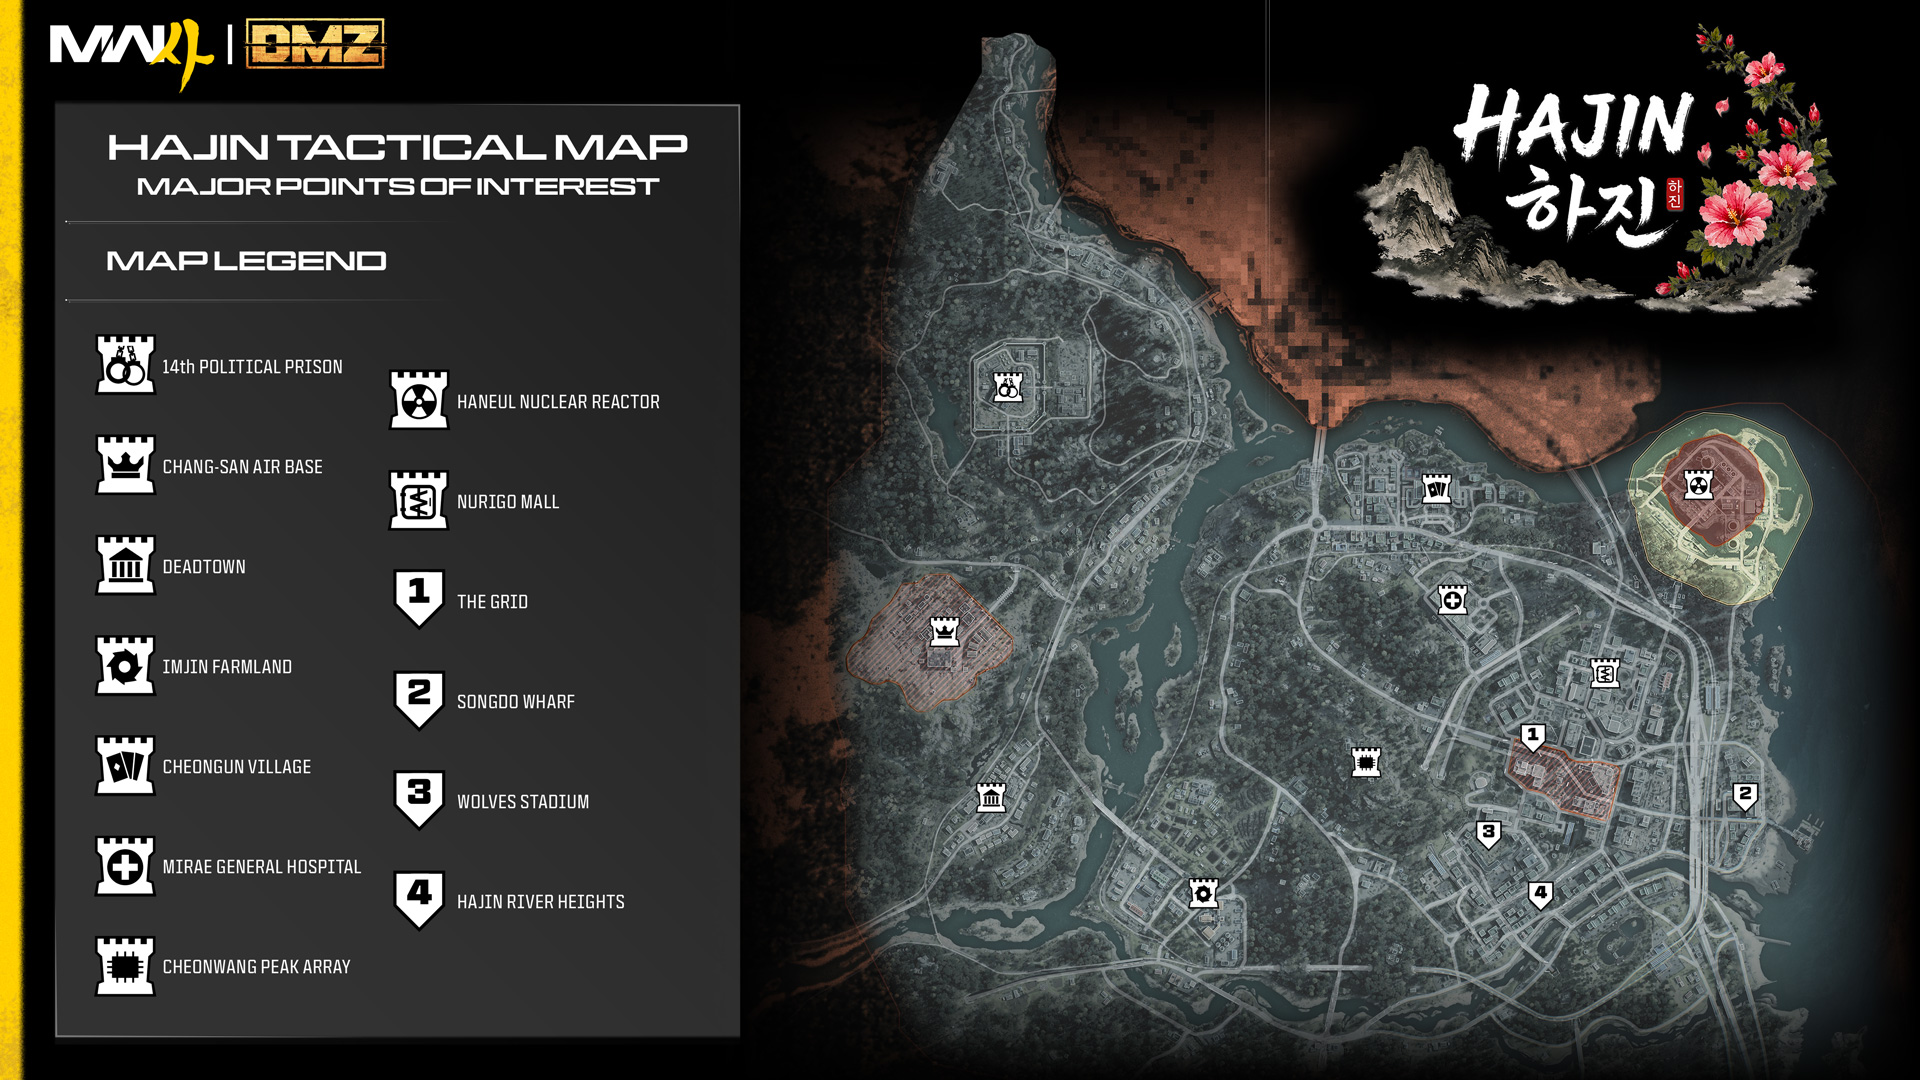
Below are details on each of the major Hajin points of interest (POIs):
Location: The general location where the POI is within Hajin, and the previous territory (NK or SK).
Expected Threat Level: The danger present prior to any combat engagement, ranging from low threat locations to extreme danger. The Threat Levels of any named locations associated with the POI are also noted.
Hajin Map Locations
14th Political Prison
Location: Northwest Hajin (NK)
Expected Threat Levels:
Prison: High
The Fortress Prison Yard: High
The Citadel: Critical
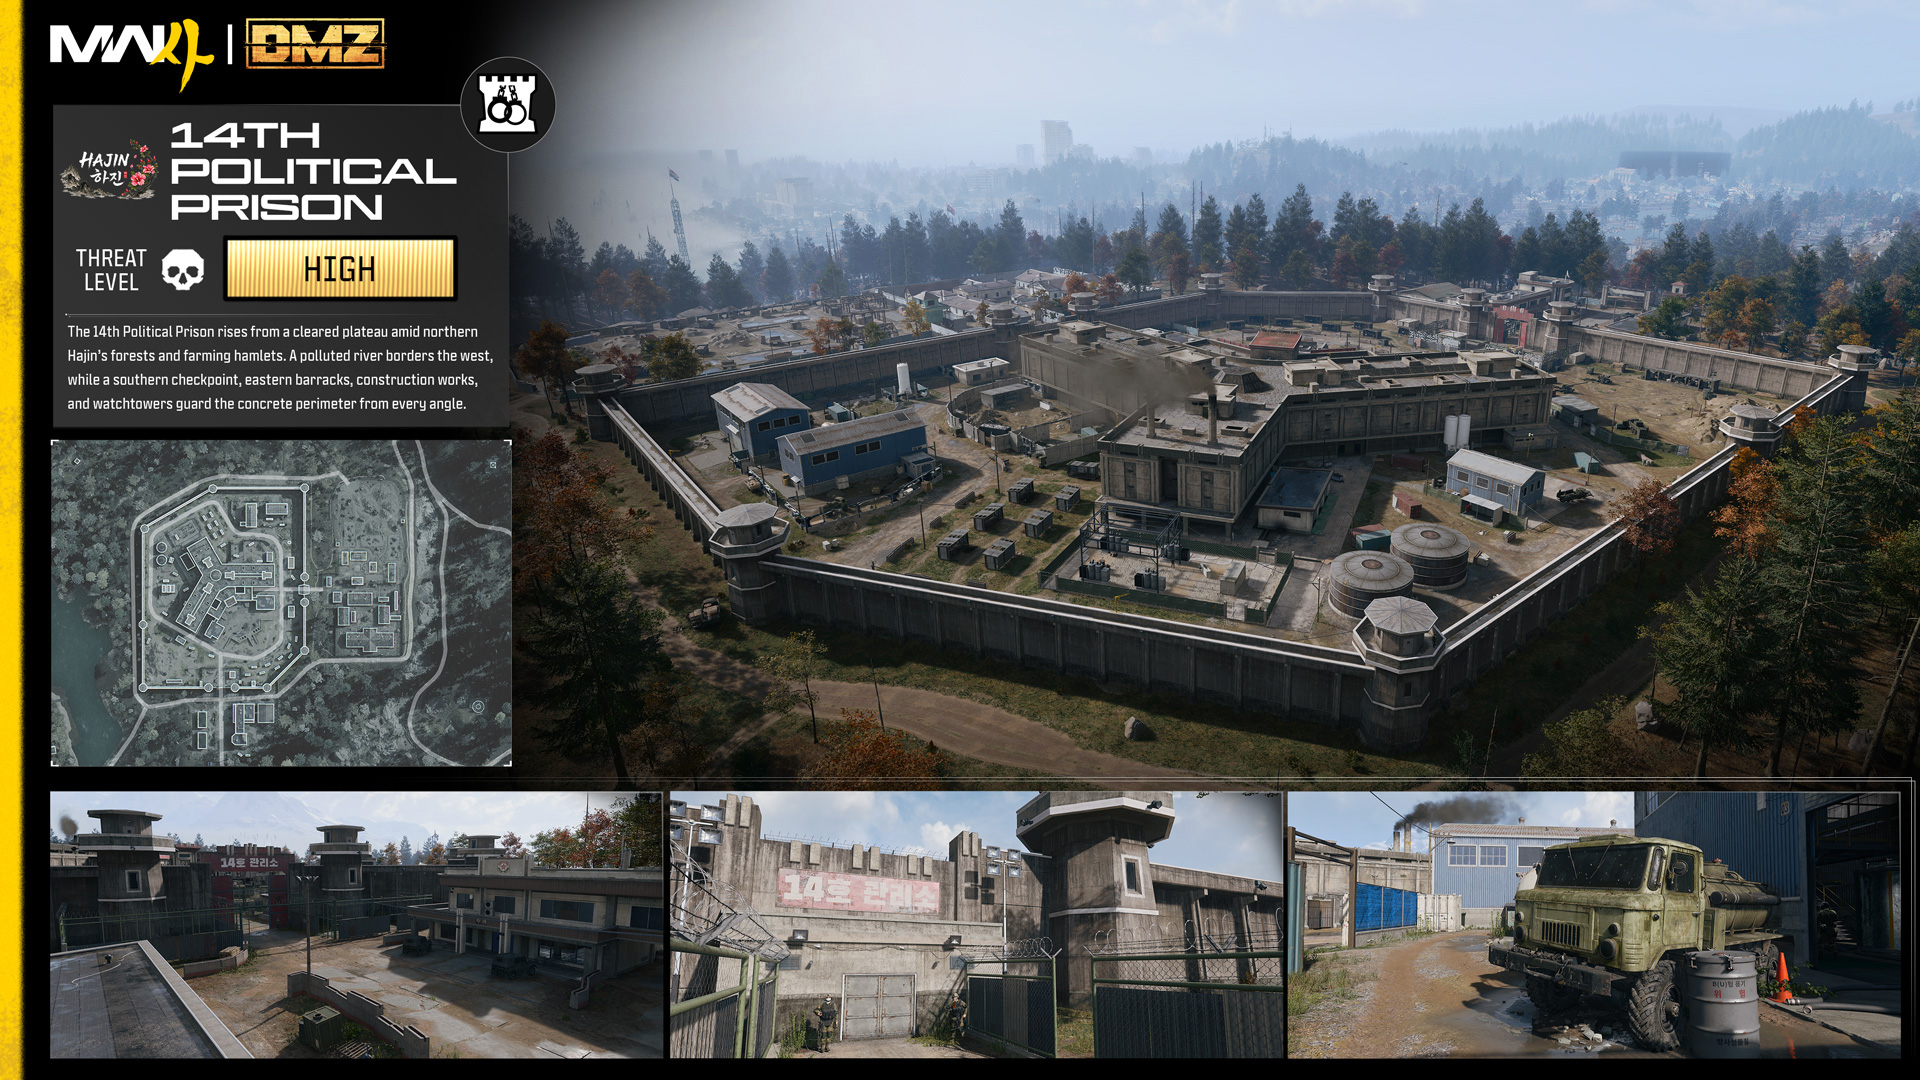
Hidden within the North Korean Wilderness of dotted shacks and farming hamlets within areas of coniferous woodland is an imposing concrete-walled edifice built atop a huge, deforested plateau. The defensive towers on the perimeter indicate the ruthlessness of those operating this detainment facility, while the size of this prison cannot be underestimated, and construction work was already under way on the eastern side of the base. Flanked by a polluted river to the west, there’s a main entrance and checkpoint to the south, barracks to the east, and the main prison within a tall and almost impenetrable concrete wall with watchtowers at every corner.
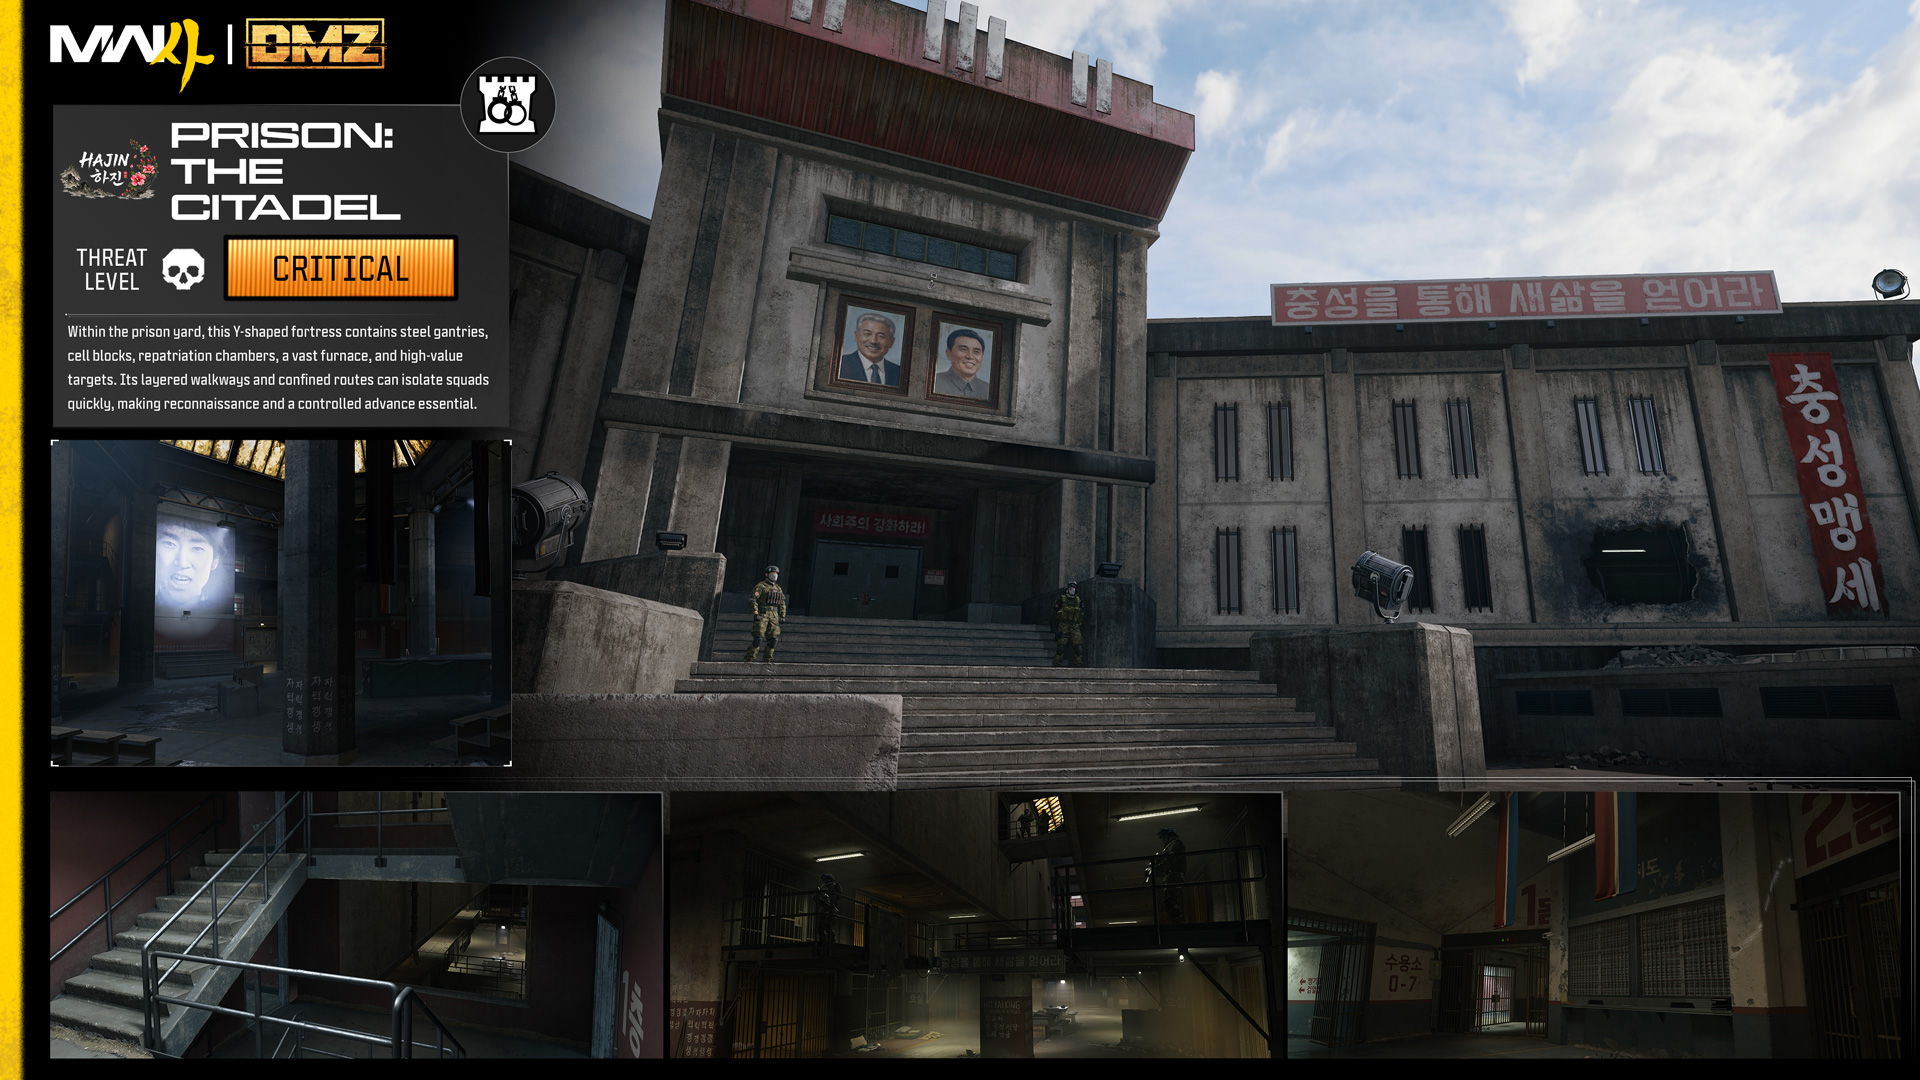
Inside the prison yard is an ominous Y-shaped structure, a Fortress known as the Citadel. This maze of highly dangerous gantries, walkways, repatriation chambers, a huge furnace, a range of deadly high value targets and a rabbit warren of cell blocks can test even the most adept infiltrators. Without careful topographical reconnaissance, operators can quickly become isolated, surrounded, and overwhelmed.
Chang-san Air Base
Location: Western Hajin (NK)
Expected Threat Levels:
Air Base Exterior: Critical
Air Base Bunker: Extreme
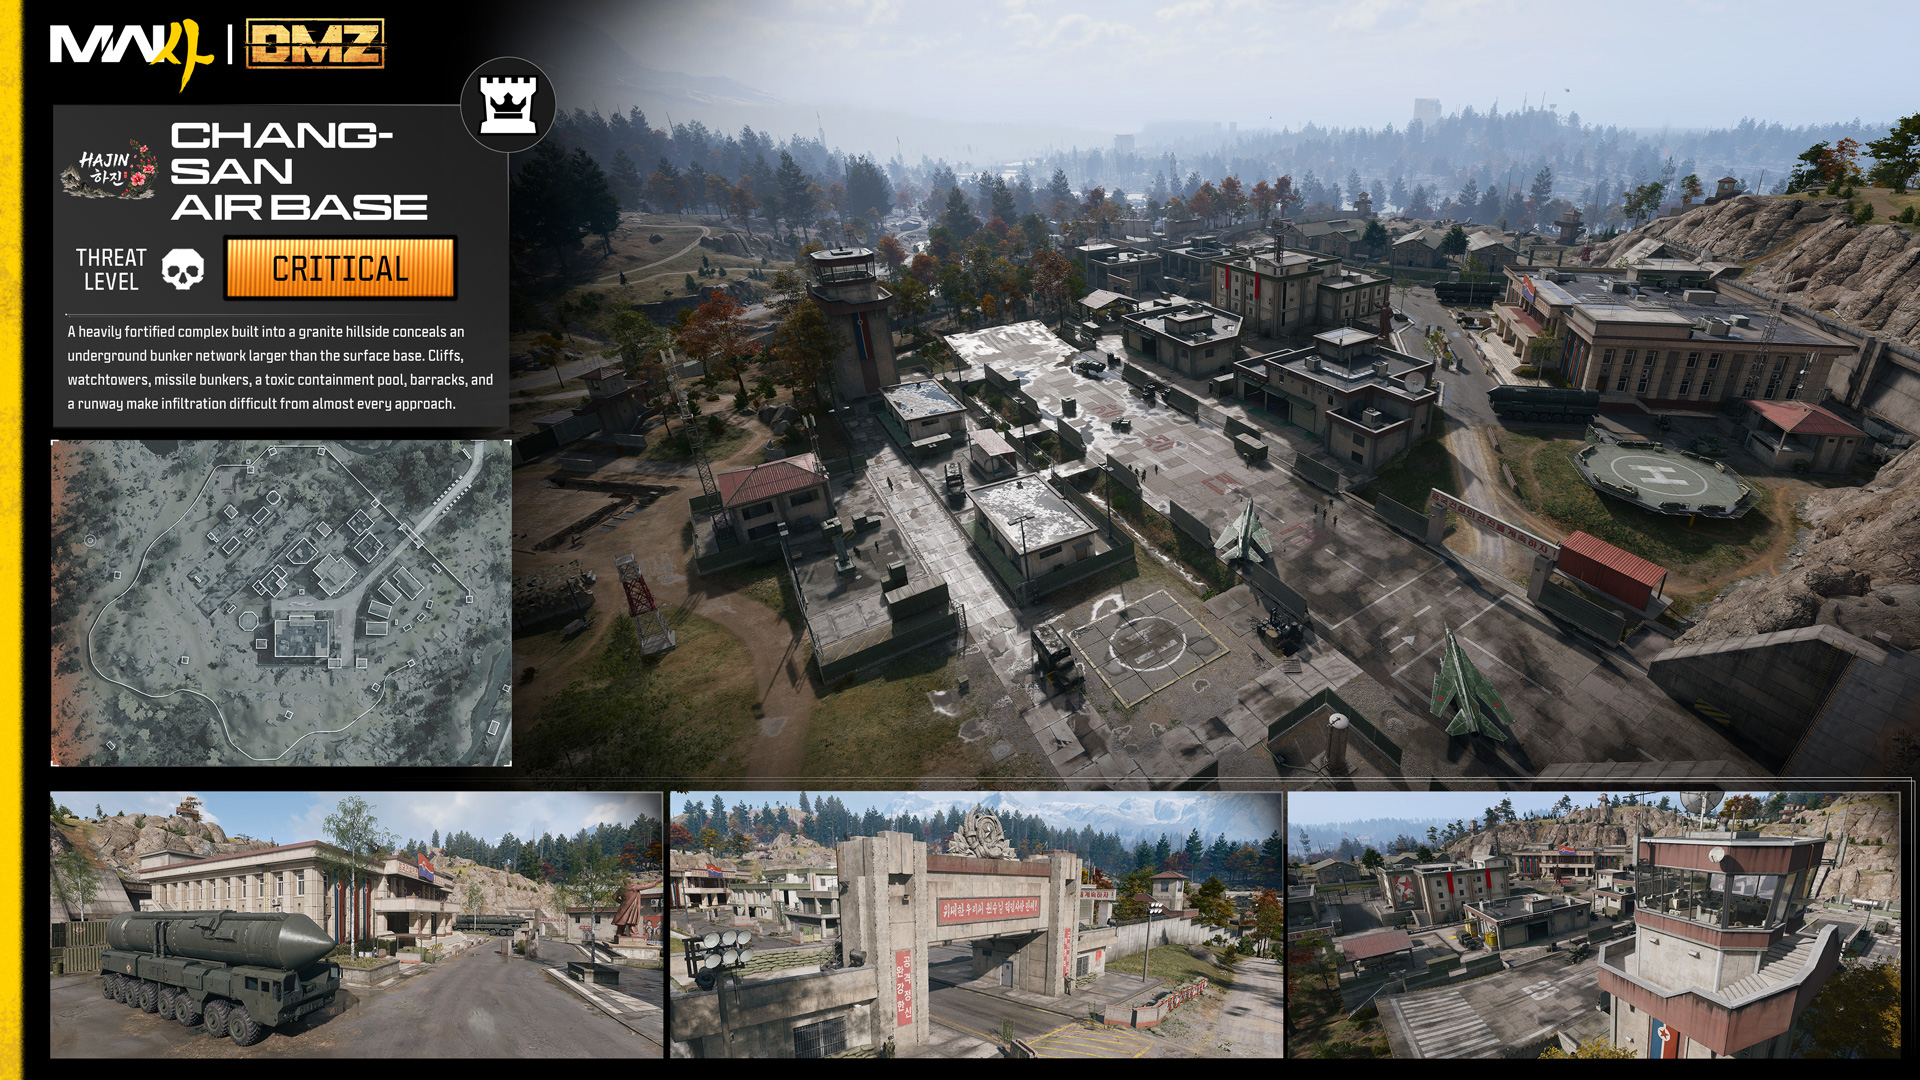
Operators are advised to move with extreme caution when reconnoitering this sprawling North Korean air base, not least because of the challenging topographical conditions as the base is built into a massive granite hillside that hides a vast underground bunker complex bigger than the footprint of the surface-level base.
Flanked by inhospitable wilderness to the west, as well as hidden missile bunkers, a large toxic containment pool, and several rural hamlets and smaller NK supply depots, the Chang-san Air Base is an incredibly dangerous, well-fortified complex with a full complement of guards and higher value targets. Actual infiltration is tricky from any angle, given the cliffs along the eastern perimeter, though recon teams have managed to acquire access from the elevated woodland to the south.
Finding a gap in the concrete perimeter wall while remaining hidden from watchtower guards requires exceptional skill and good judgment. Recon suggests several large structures comprising of a hospital, helipad, jet runway, barracks, supply depots, and an ornate command and control structure.
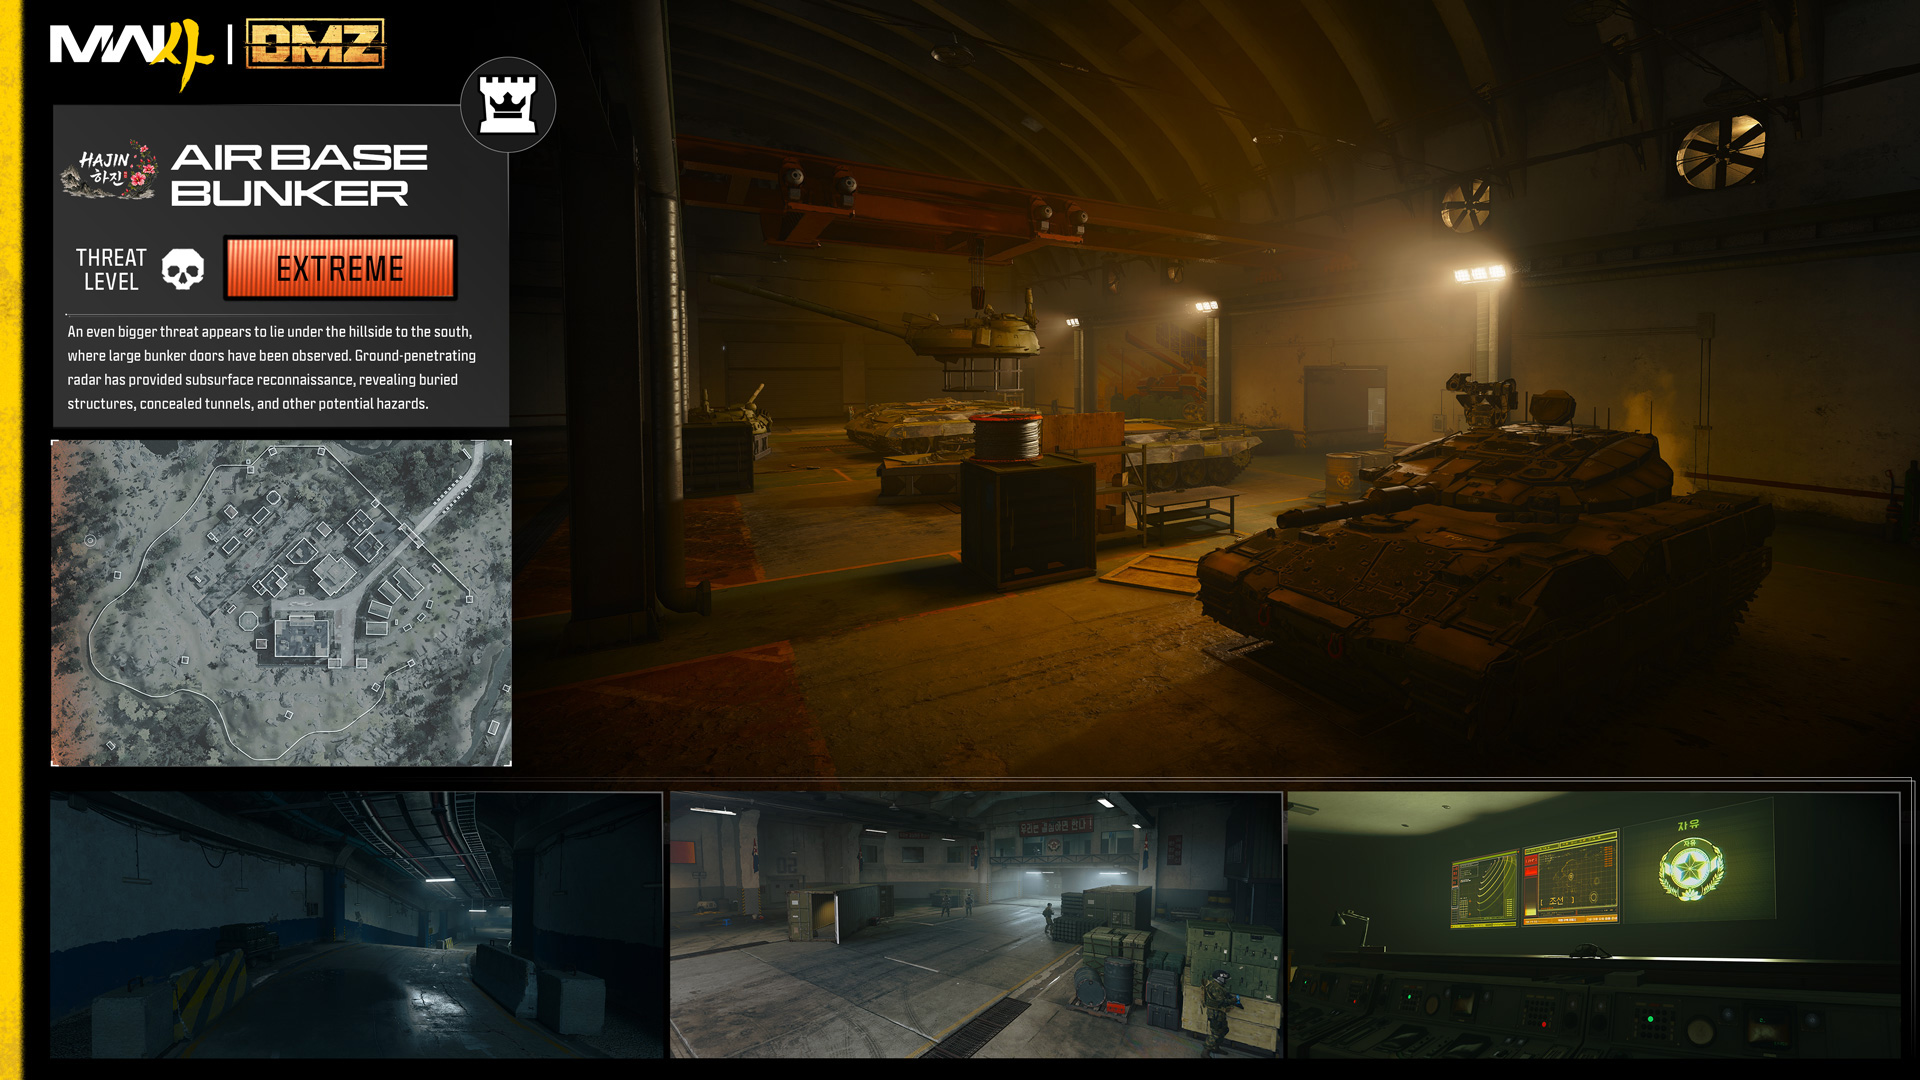
An even bigger threat appears to lie under the hillside terrain to the south, where large bunker doors have been observed. Ground-penetrating radar has provided subsurface reconnaissance, revealing buried structures, concealed tunnels, and other potential hazards hidden beneath the terrain, not least a vast underground tunnel system bigger than the surface area of the base itself.
Deadtown
Location: Southwest Hajin (NK)
Expected Threat Levels:
Deadtown Exterior: Low
Re-Education Center: Medium
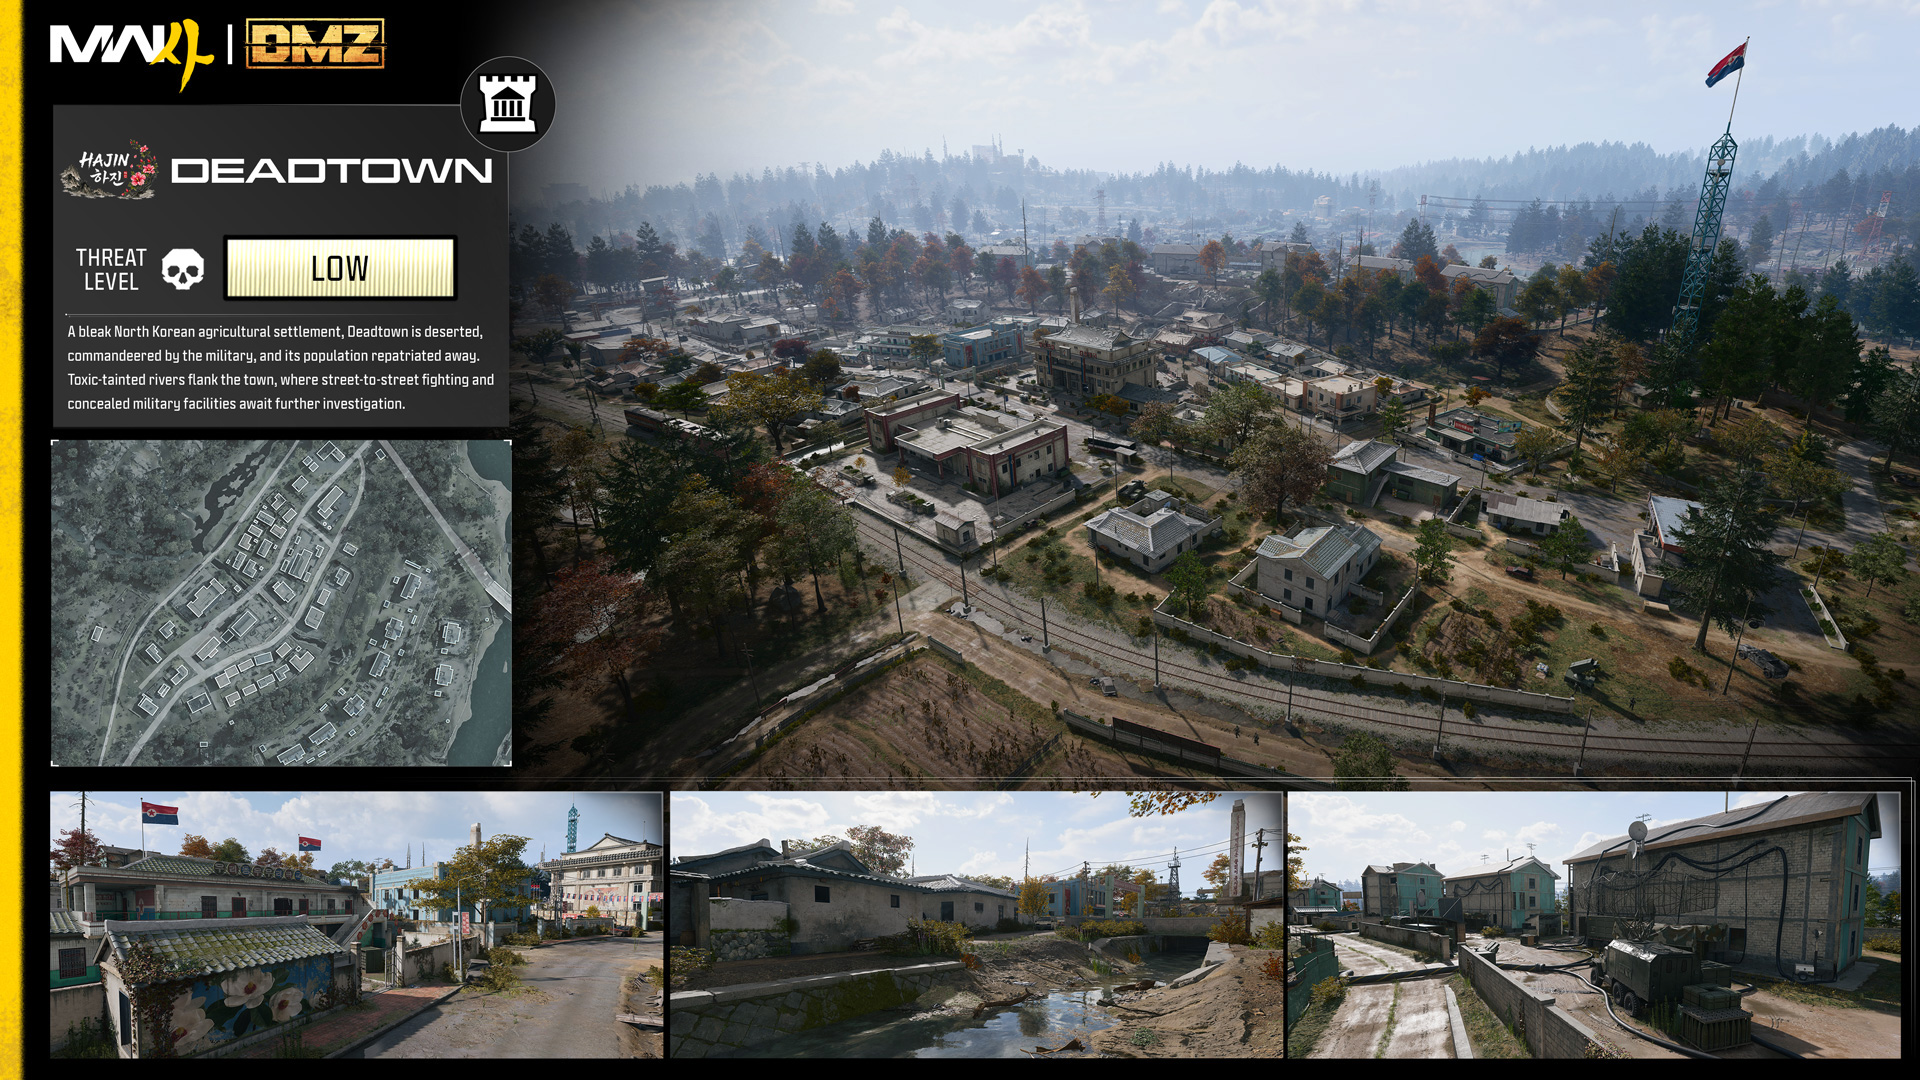
A bleak NK agricultural township, Deadtown is now deserted, having been commandeered by the military, and the population repatriated away from the conflict. This is a relatively sizeable settlement, flanked to the northwest and east by rivers of toxic-tainted water. Indeed, there’s a sewer system running under, and possibly connected to the more important, dilapidated buildings across the town, including the two main Re-Education Centers.
Expect to initially encounter lightly armored foes and possible convoy activities, with combat focused on street-to-street fighting, and higher value targets likely found within the larger, more ornate structures.
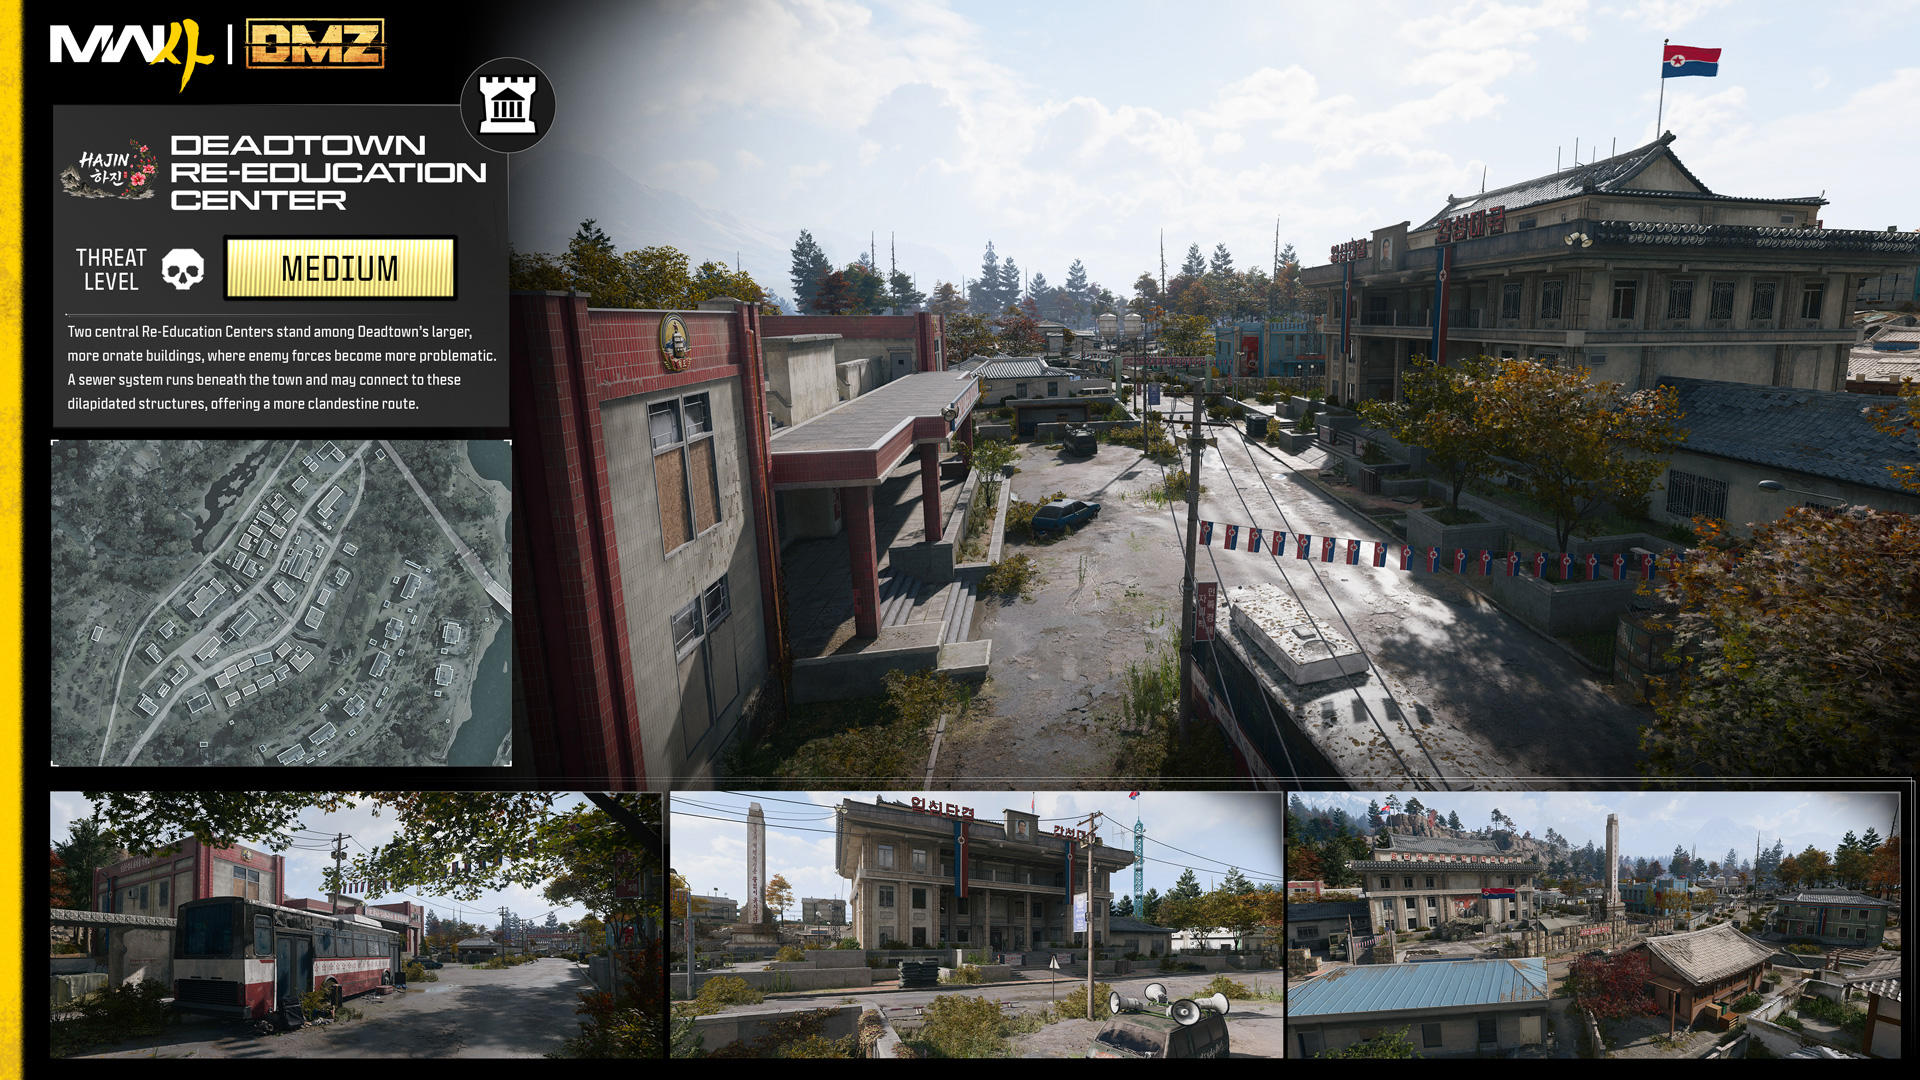
The east side of town by the Hajin River is elevated, offering more modern structures: small tenement blocks and other block shells with military storage concealed to appear as residential buildings. The older town has a variety of older, single-family structures, and a main dirt thoroughfare with amenities such as a Clinic, a Gas Station at each end of town, and two central Re-Education buildings where the buildup of enemy troops becomes more problematic.
Continue following the railroad to the northeast to encounter smaller, more impoverished small hamlets along the main river.
Imjin Farmland
Location: South-Southwest Hajin (SK)
Expected Threat Level:
Farmland Exterior: Low
Jeong Loading Dock: Low
Rice Mill: Medium
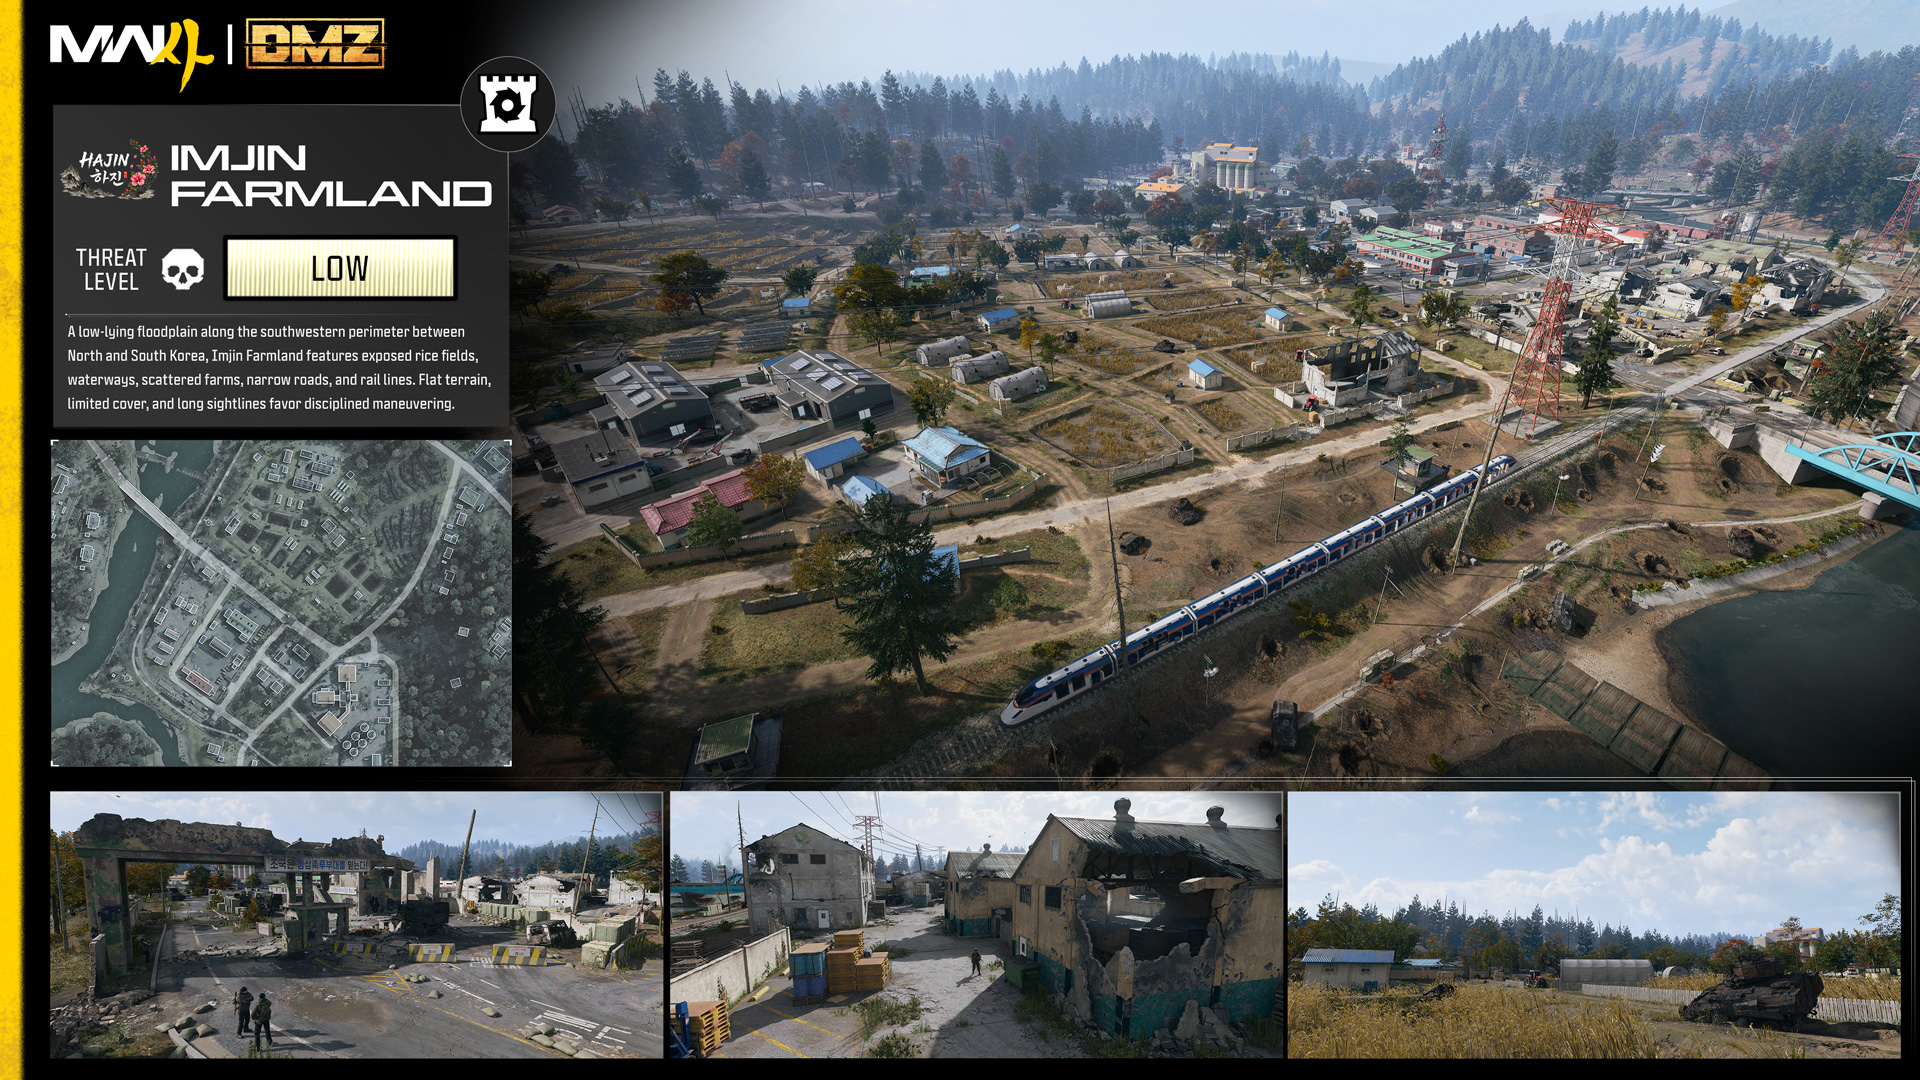
A low-lying floodplain along the southwestern perimeter between North and South Korea, Imjin Farmland comprises exposed rice fields, winding waterways, scattered farms, narrow roads, and rail lines converging around a vast industrial mill. Relatively flat terrain, limited cover, and long sightlines favor disciplined movement, vehicle maneuvering, and coordinated assaults on key strongholds.
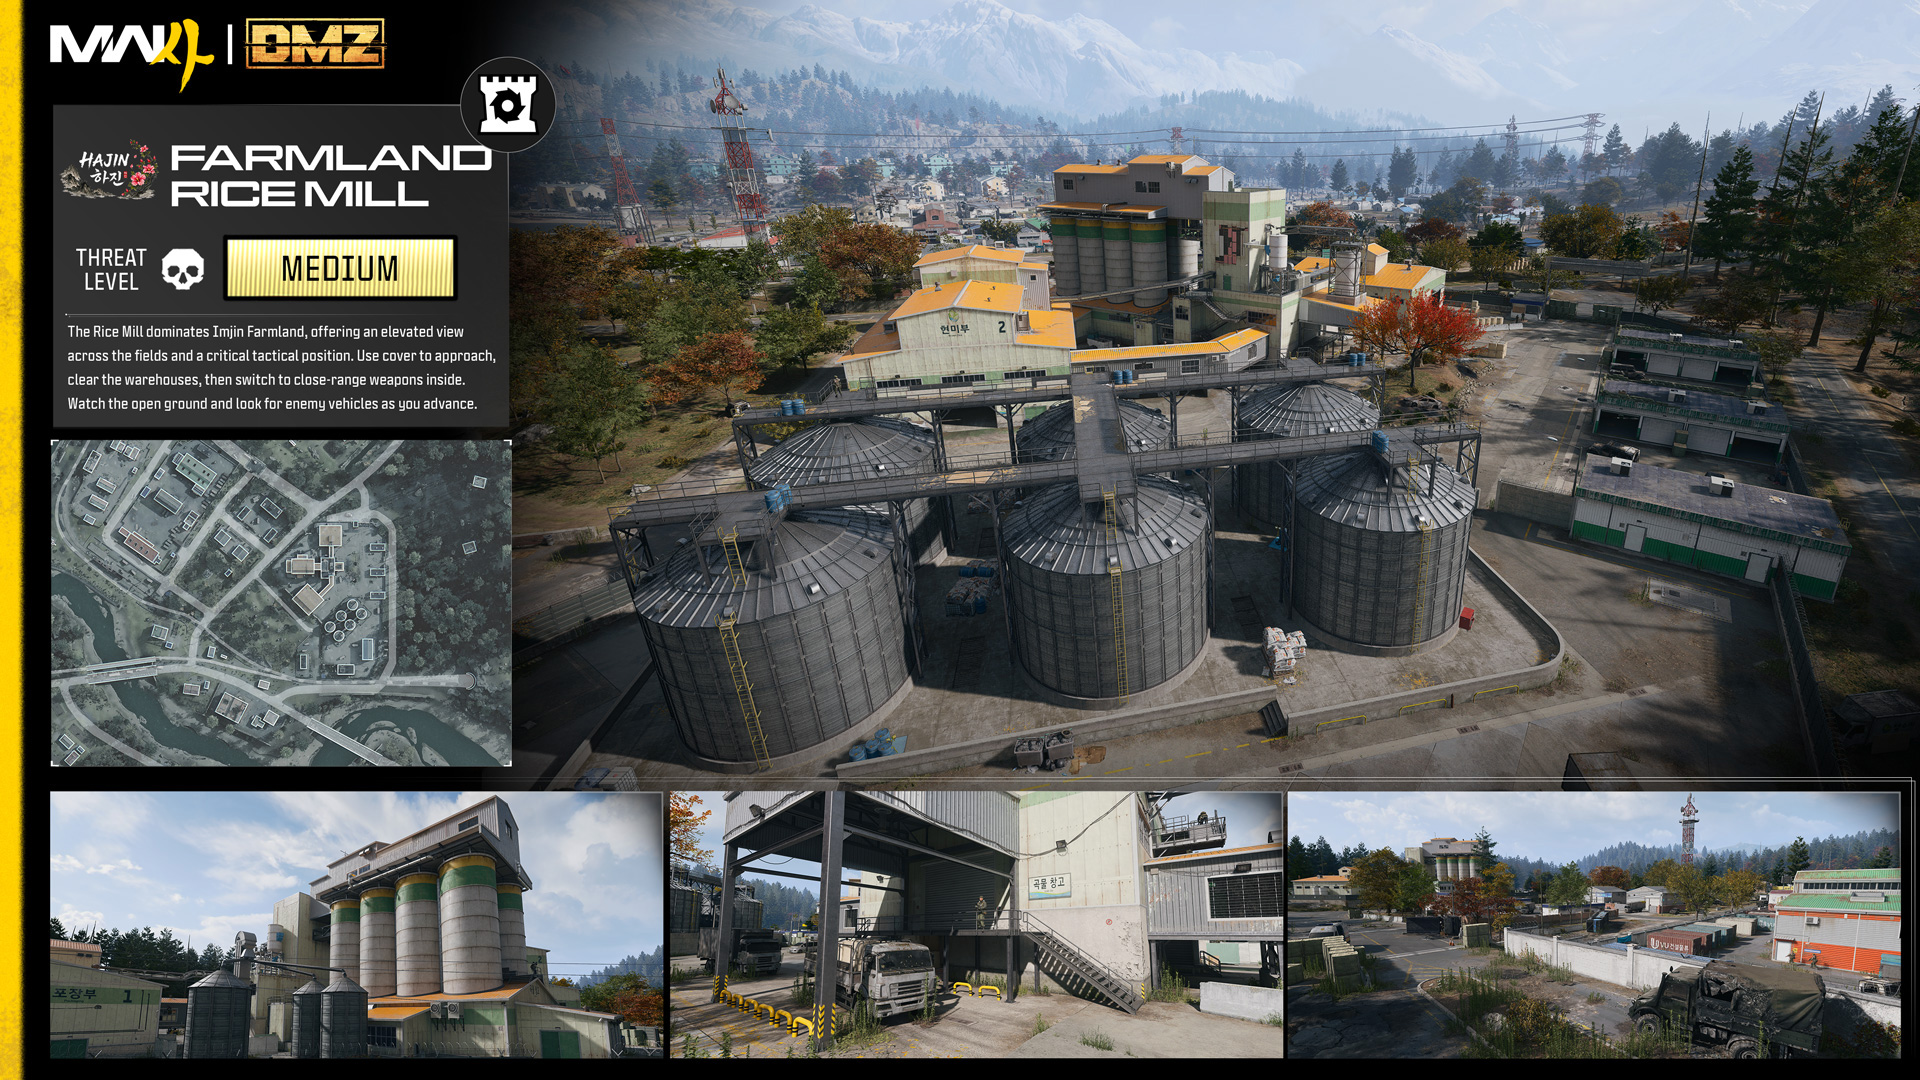
The Rice Mill dominates the landscape, providing an elevated view across the surrounding farmland and serving as a critical tactical position. Use cover when approaching from the outskirts, coordinate access through the cover the multiple warehouses provide, and transition to close-range weapons once inside. Squads must manage their exposure across the open ground, account for enemy vehicles, and reinforce secured positions before pushing deeper into Hajin.
Cheongun Village
Location: Northern Hajin (SK)
Expected Threat Level:
Cheongun Village: Low
Russian Border Crossing: Low
Cheongun Outskirts: Low
Heavenly Luck Casino: High
Russian Border: Low
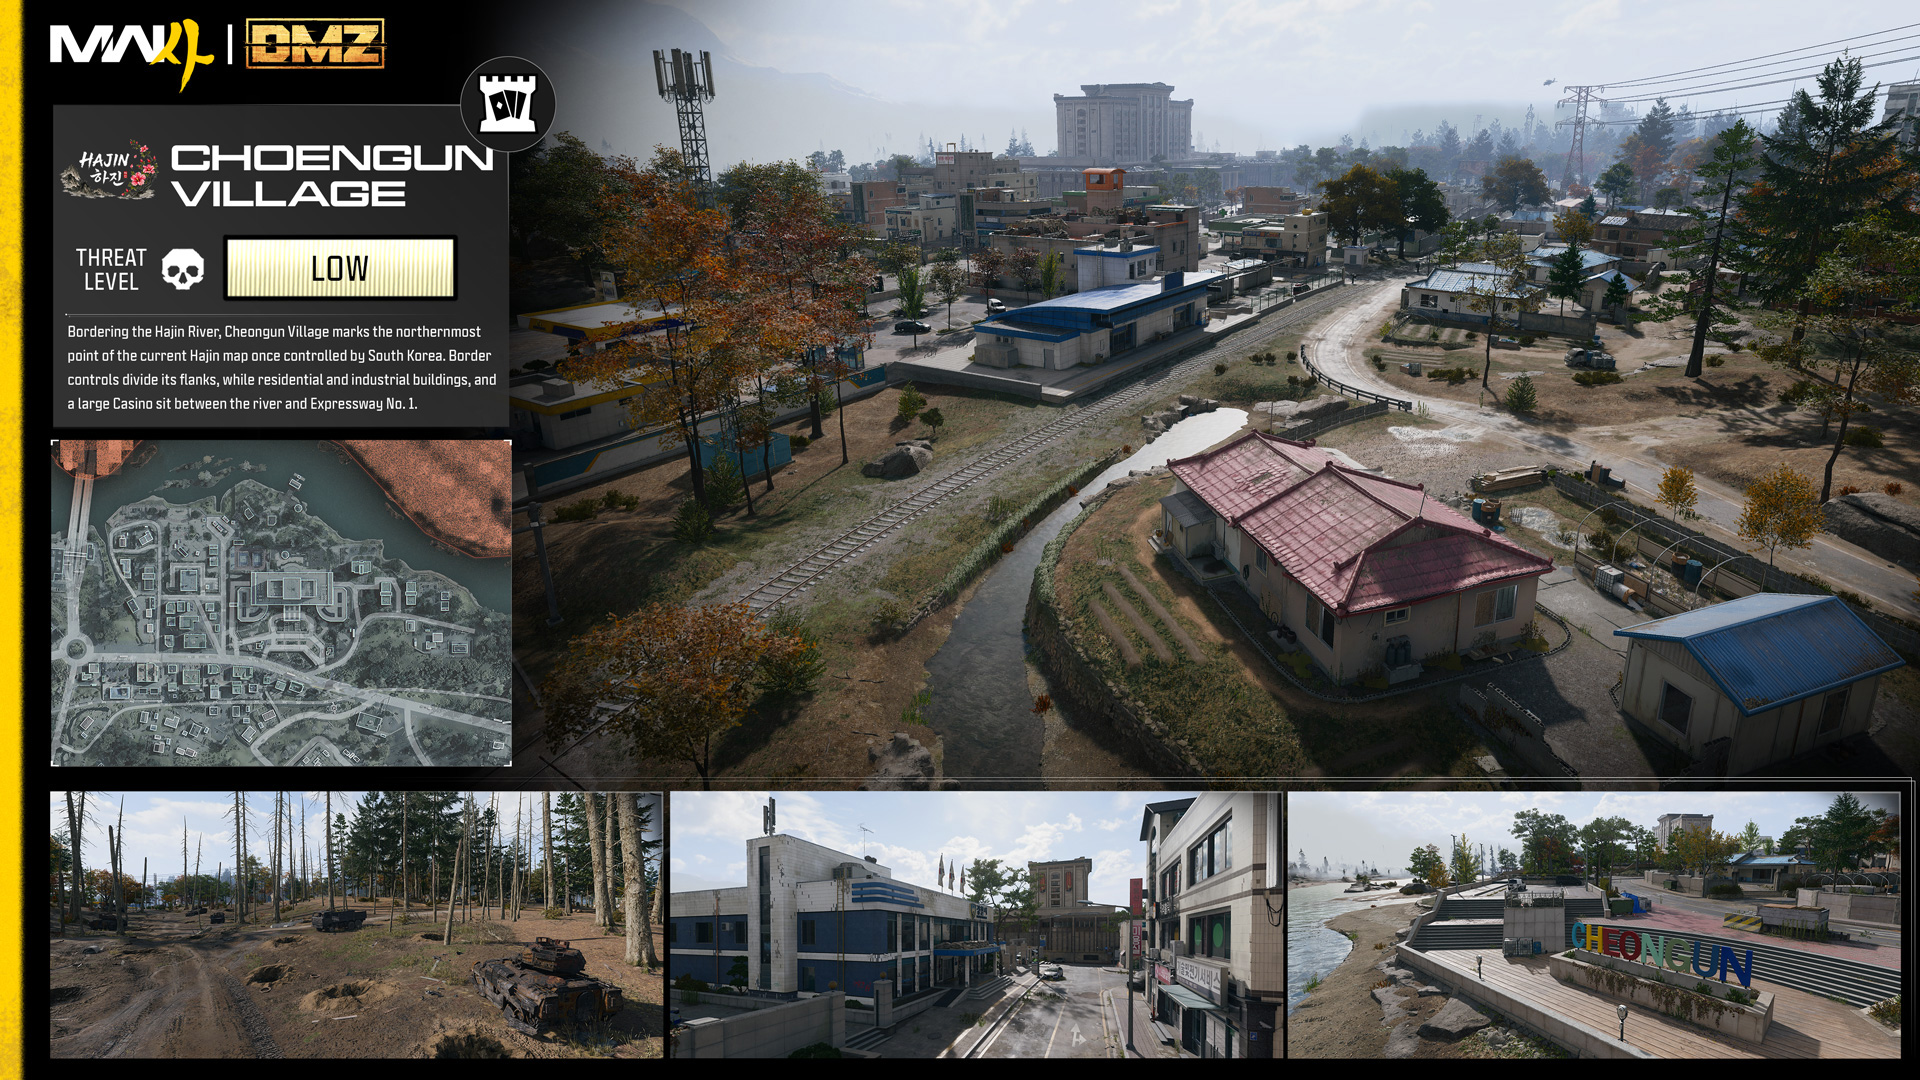
Bordering the Hajin River, this is the most northerly point in the current Hajin map previously controlled by South Korea, and comprises an urban village divided to the east and west by border control to and from Russia. Fewer buildings and denser woodland denote Cheongun Outskirts to the west, with the SK border control close to the river. Over on the opposite, eastern edge of Cheongun Village is the Russian border control.
North across the Hajin River is the currently inaccessible, fog-filled Russian Border, and the southern perimeter of the Village, is bisected east to west by Expressway No. 1, the main freeway across Hajin. Within these boundaries is a mix of urban residential and industrial housing on low, flat land raised slightly above sea level. Before the conflict however, most of the locals came here to gamble.
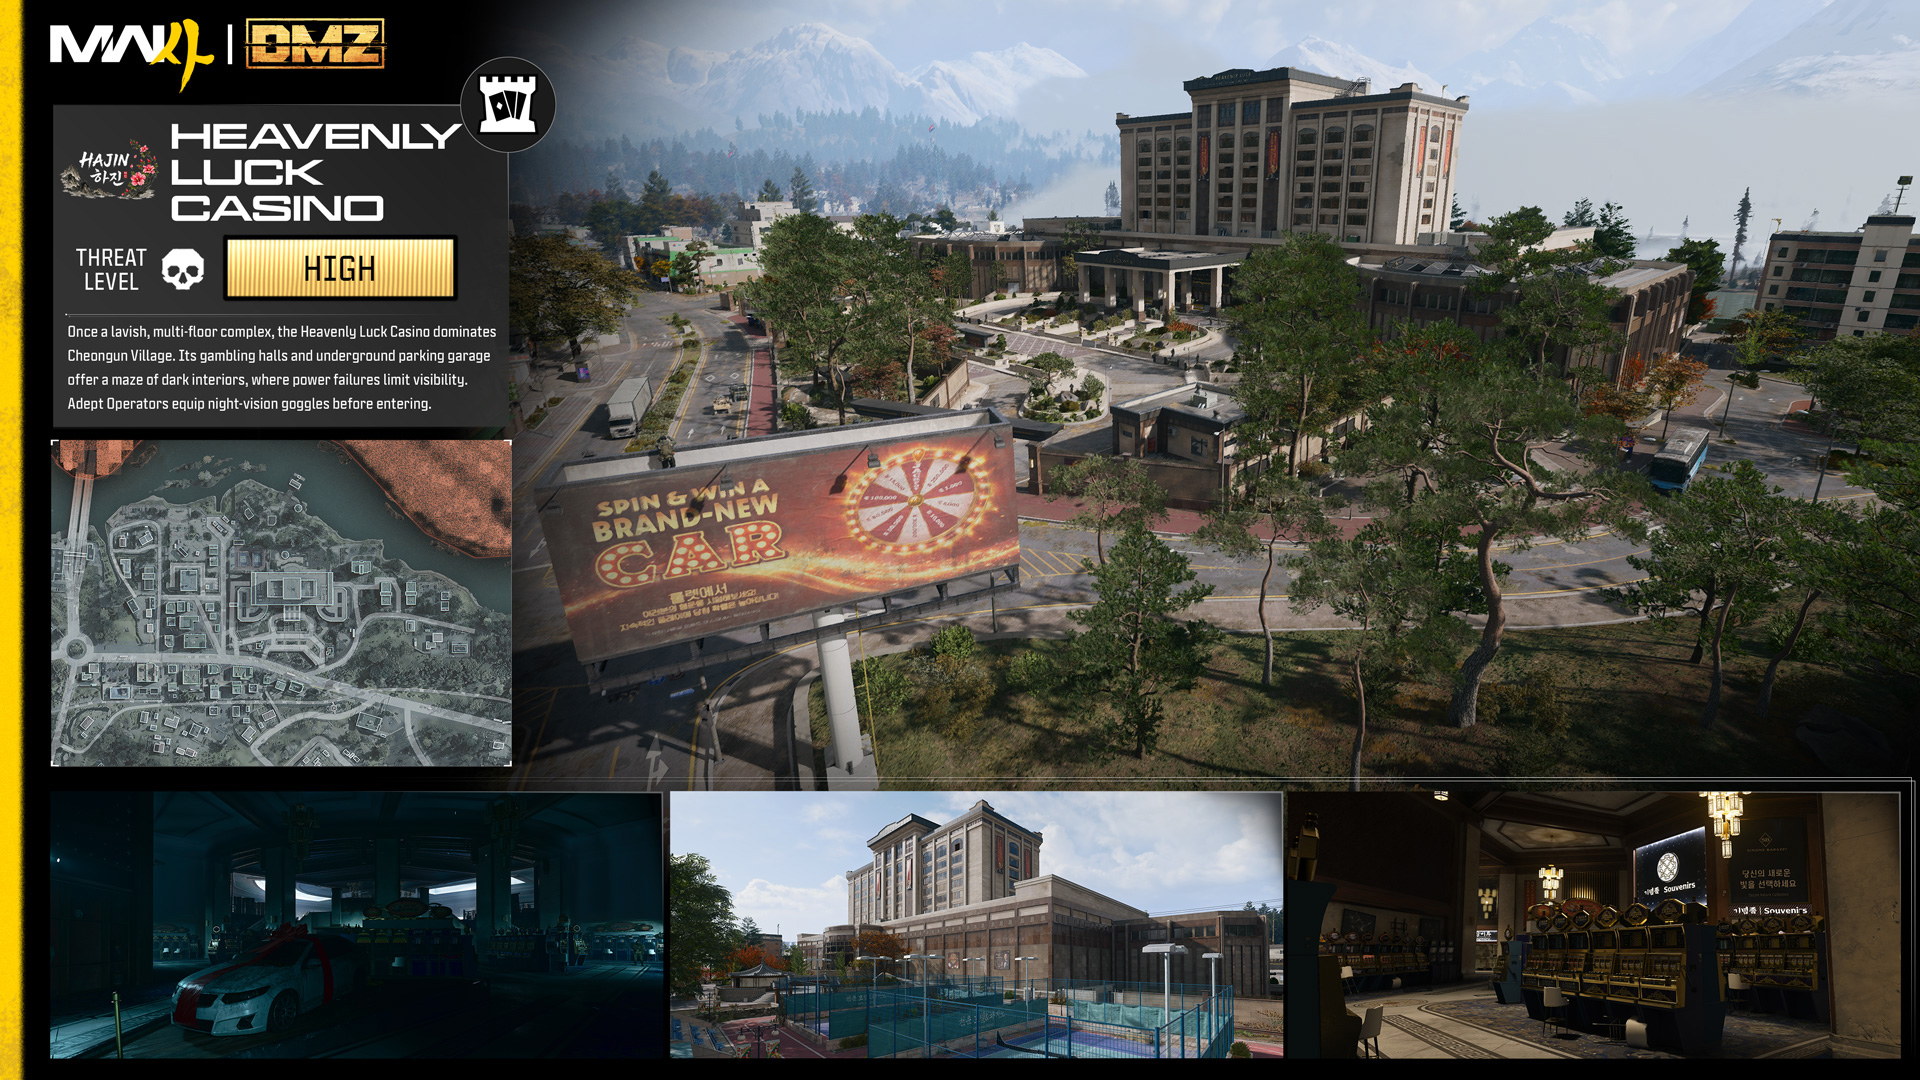
Cheongun Village is dominated by the Heavenly Luck Casino, a large, and once-opulent, multi-floor complex with an underground parking lot, and multiple gambling halls across varying floors. This maze of gambling machines offers limited visibility due to the lack of mains electricity across multiple locations, and use of NVGs is encouraged.
Mirae General Hospital
Location: North Central Hajin (SK)
Expected Threat Level: Low
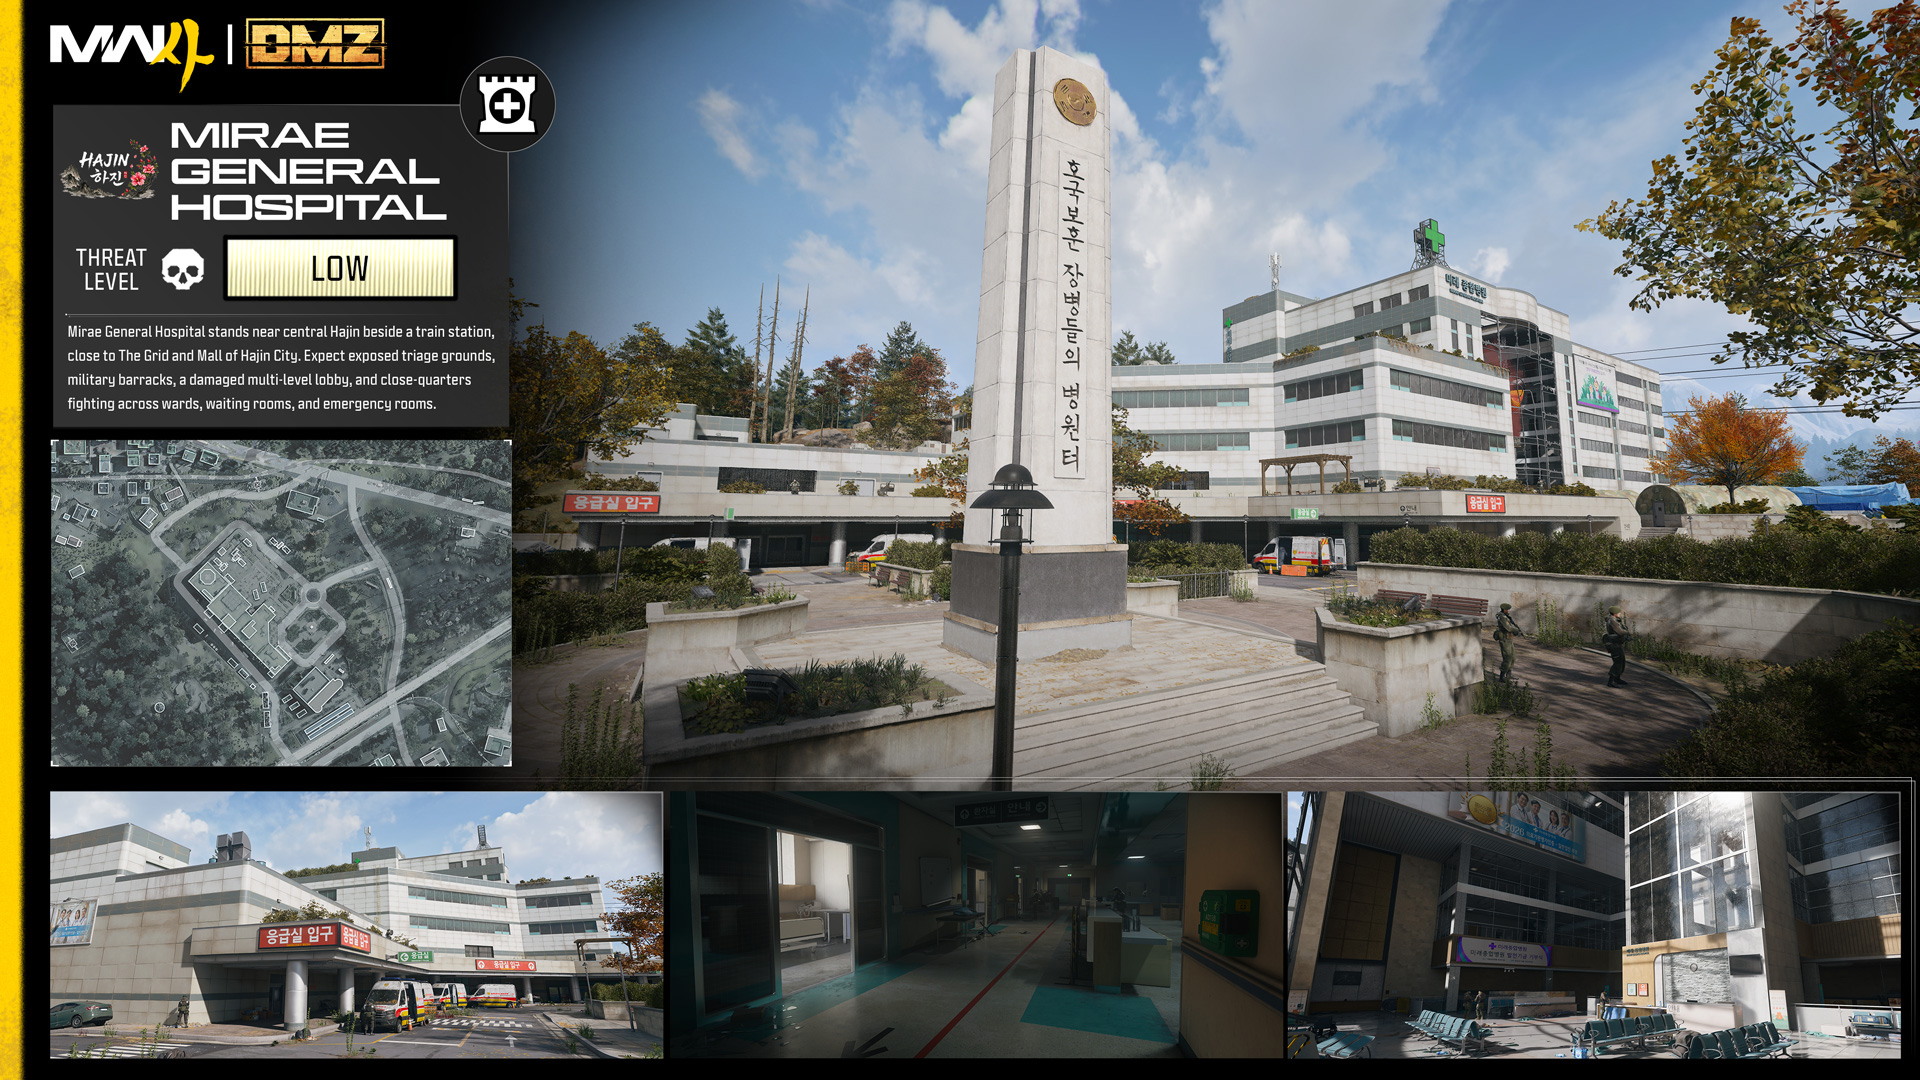
The main Hospital serving all of Hajin is located in a roughly central location. Find it adjacent to a train station, close to The Grid and Mall of Hajin City to the east, while the main Expressway No. 1 roadway runs along the north. Expect snipers within a wooded Array hidden along the elevated woodland to the south known as Mujin Pass, and the rural Choengun Outskirts to the west.
The main hospital building comprises of large, stepped exterior grounds where triage tents have been erected, as well as temporary military barracks in front of and behind the hospital. Close to a memorial obelisk and gardens to the southeast is a parking structure and train station.
Inside, the recent conflict has all but gutted the windowed, multi-level lobby. Push further into the Hospital and expect more close-quarter fighting across multiple wards, waiting, patient, and emergency room areas, all color-coded with floor and stairwell signage designed to lessen the sheer size of the structure.
Cheonwang Peak Array
Location: Central Hajin (SK)
Expected Threat Level: Medium
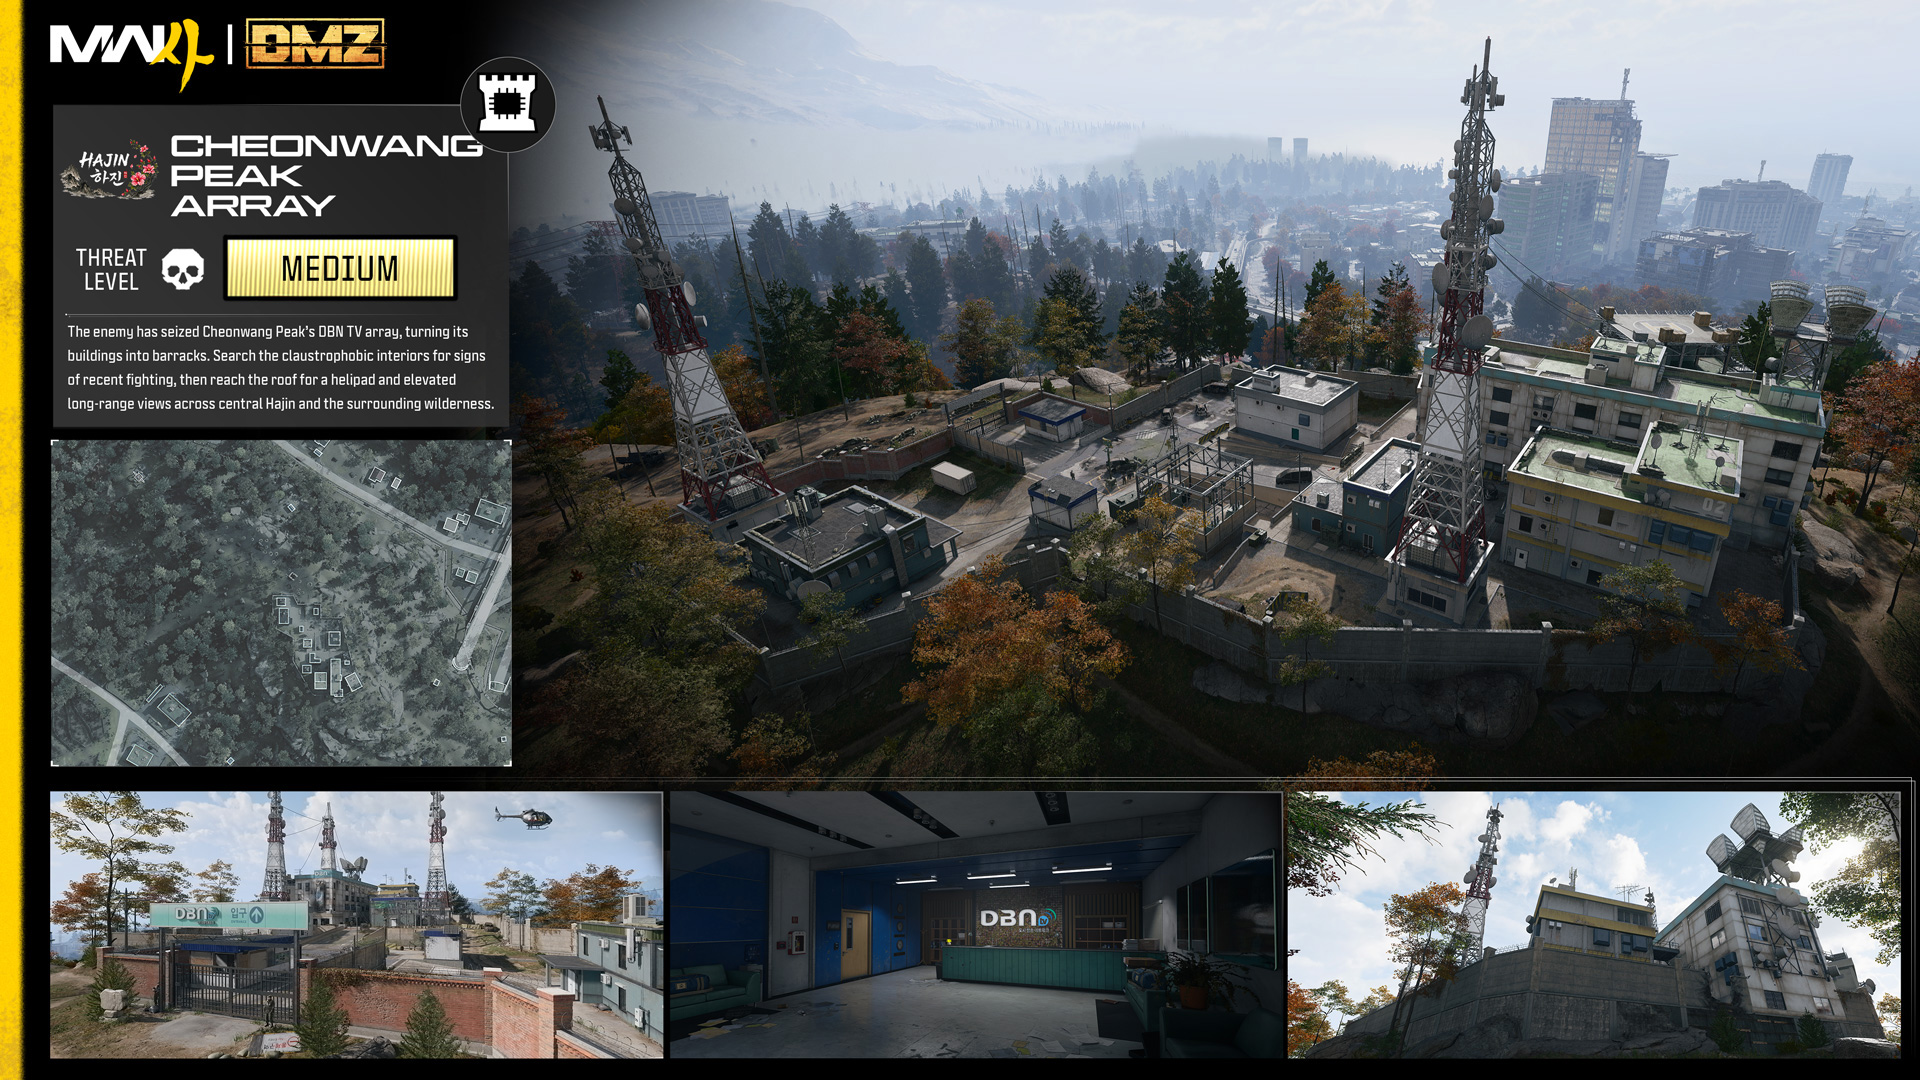
The largest telecommunications array in Hajin sits atop a flat summit surrounded by the South Korean Wilderness. Gigantic granitic boulder outcrops to the west encourage the learning of trails that weave between them, and the rural Daesong Ridge. Head down the more forgiving woodlands to the north to reach Mujin Pass in the vicinity of the Hospital.
Infiltrate the grounds of the DBN TV station array, and you’ll discover it’s been commandeered by the enemy, and the signs of recent conflict are everywhere. Interior buildings have been turned into barracks, and there’s a stifling, claustrophobic atmosphere to overcome. Reach the roof, and you’ll find a helipad and elevated, long-range views across the vicinity.
Haneul Nuclear Reactor
Location: Northeast Hajin (SK)
Expected Threat Level:
Reactor: High (with Radiation)
South Korean Border Zone: Medium
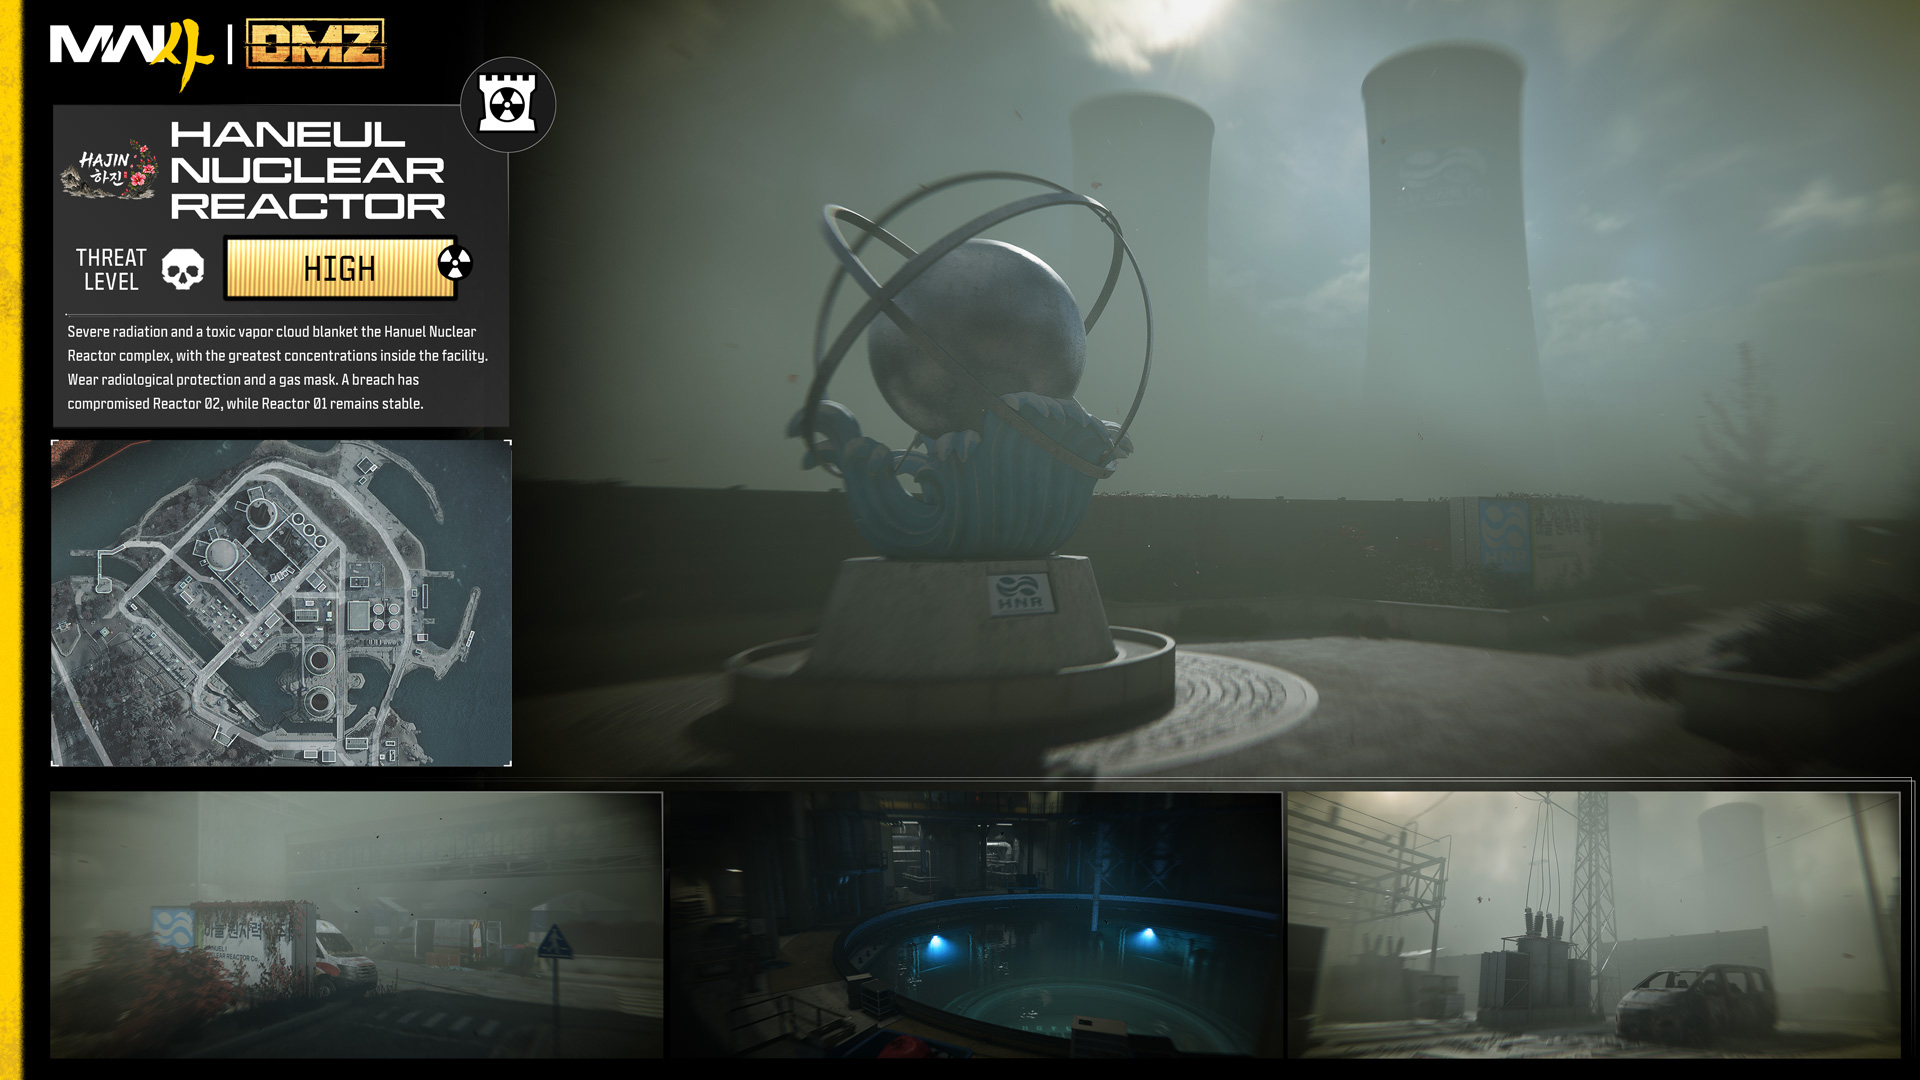
Be advised: Operators deployed within and around the Hanuel Nuclear Reactor complex should expect severe radiation levels throughout the surrounding area, with heightened concentrations inside the reactor facility itself. Following recent events, a cloud of toxic, radioactive vapor has settled across the site. Current weather patterns indicate limited atmospheric movement, meaning the radiation field is expected to remain concentrated around the affected area.
All personnel entering the complex must wear appropriate radiological protective apparel and a gas mask at all times. Exposure to the contaminated environment without adequate protection is likely to result in severe injury or death.
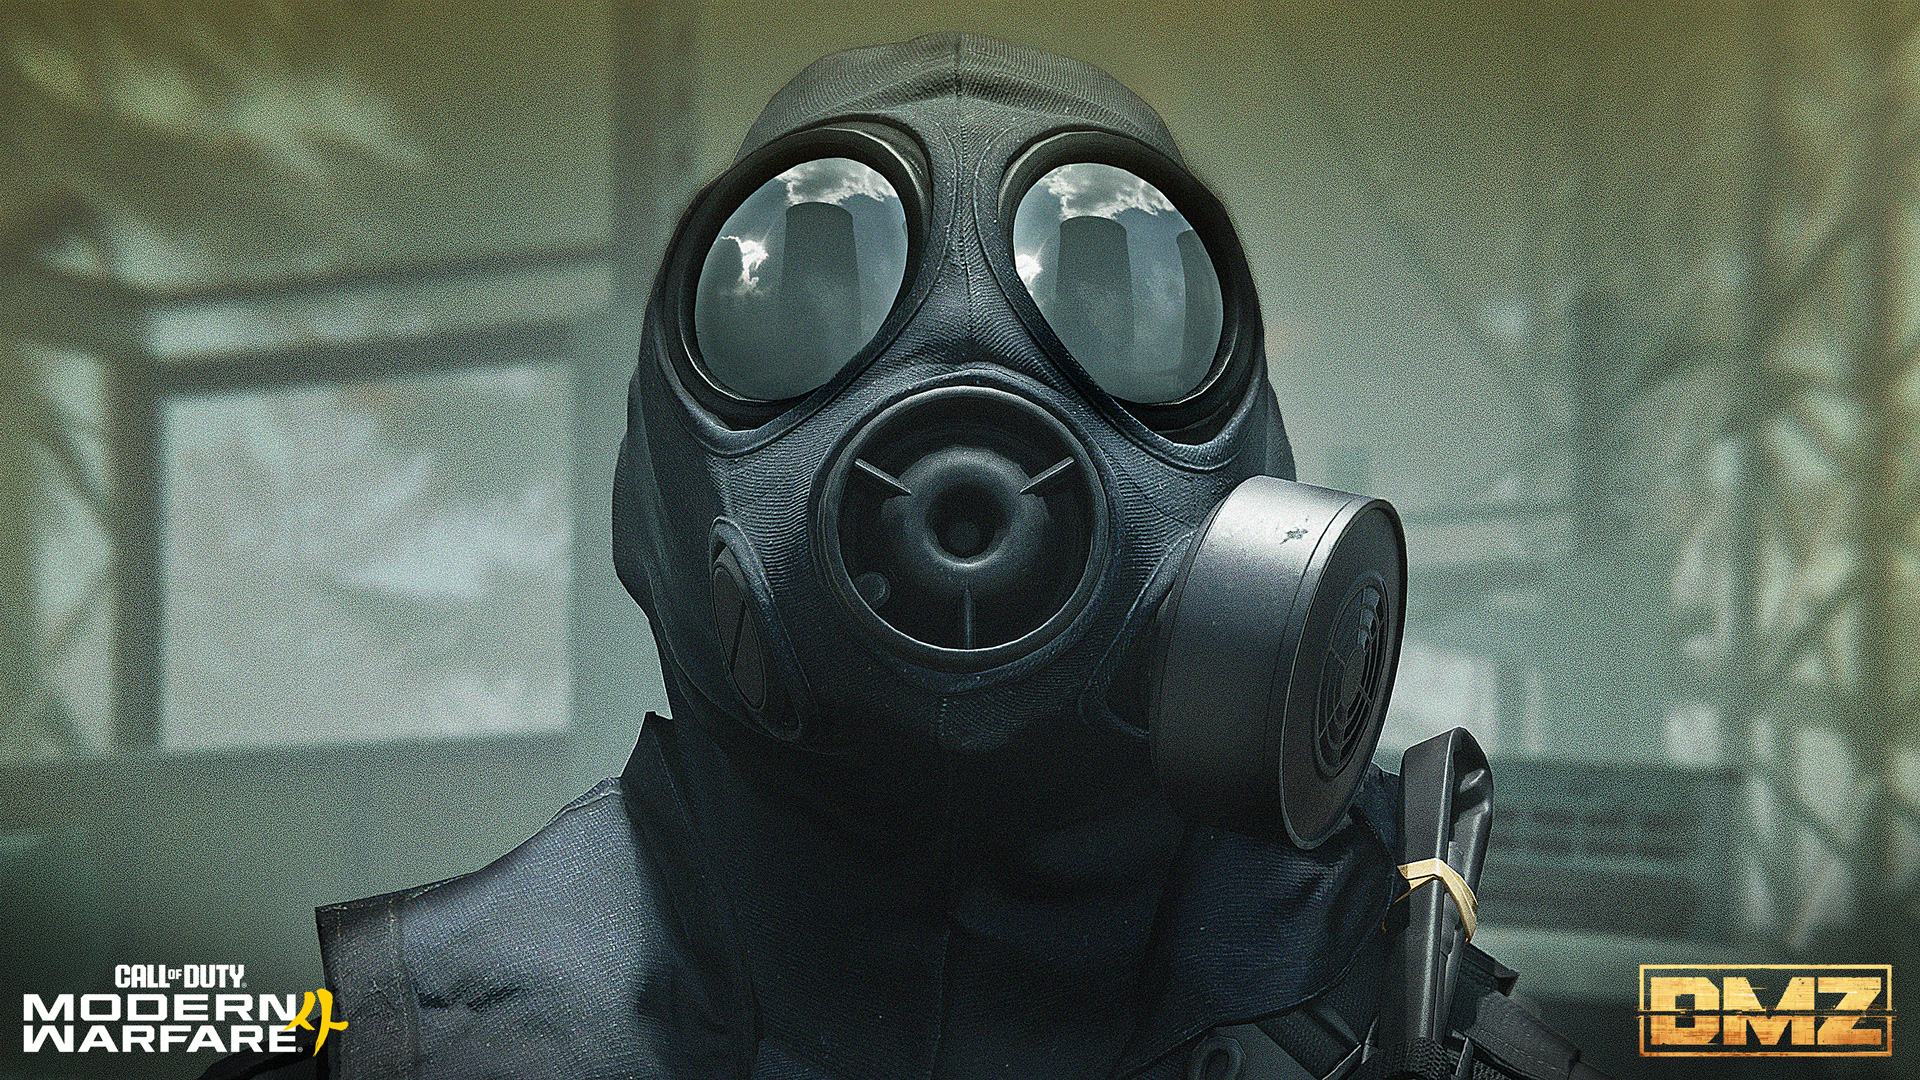
Access to the reactor complex is strongly discouraged. However, waterborne insertion may be possible, as may passage through a tunnel running from Compound Delta to the southwest. Reconnaissance indicates a substantial breach centered on the containment block and extending across Reactor 02. Reactor 01 remains stable — for now.
NuriGO Mall
Location: Northeast Hajin City (SK)
Expected Threat Level:
NuriGO East: Medium
NuriGO West: High
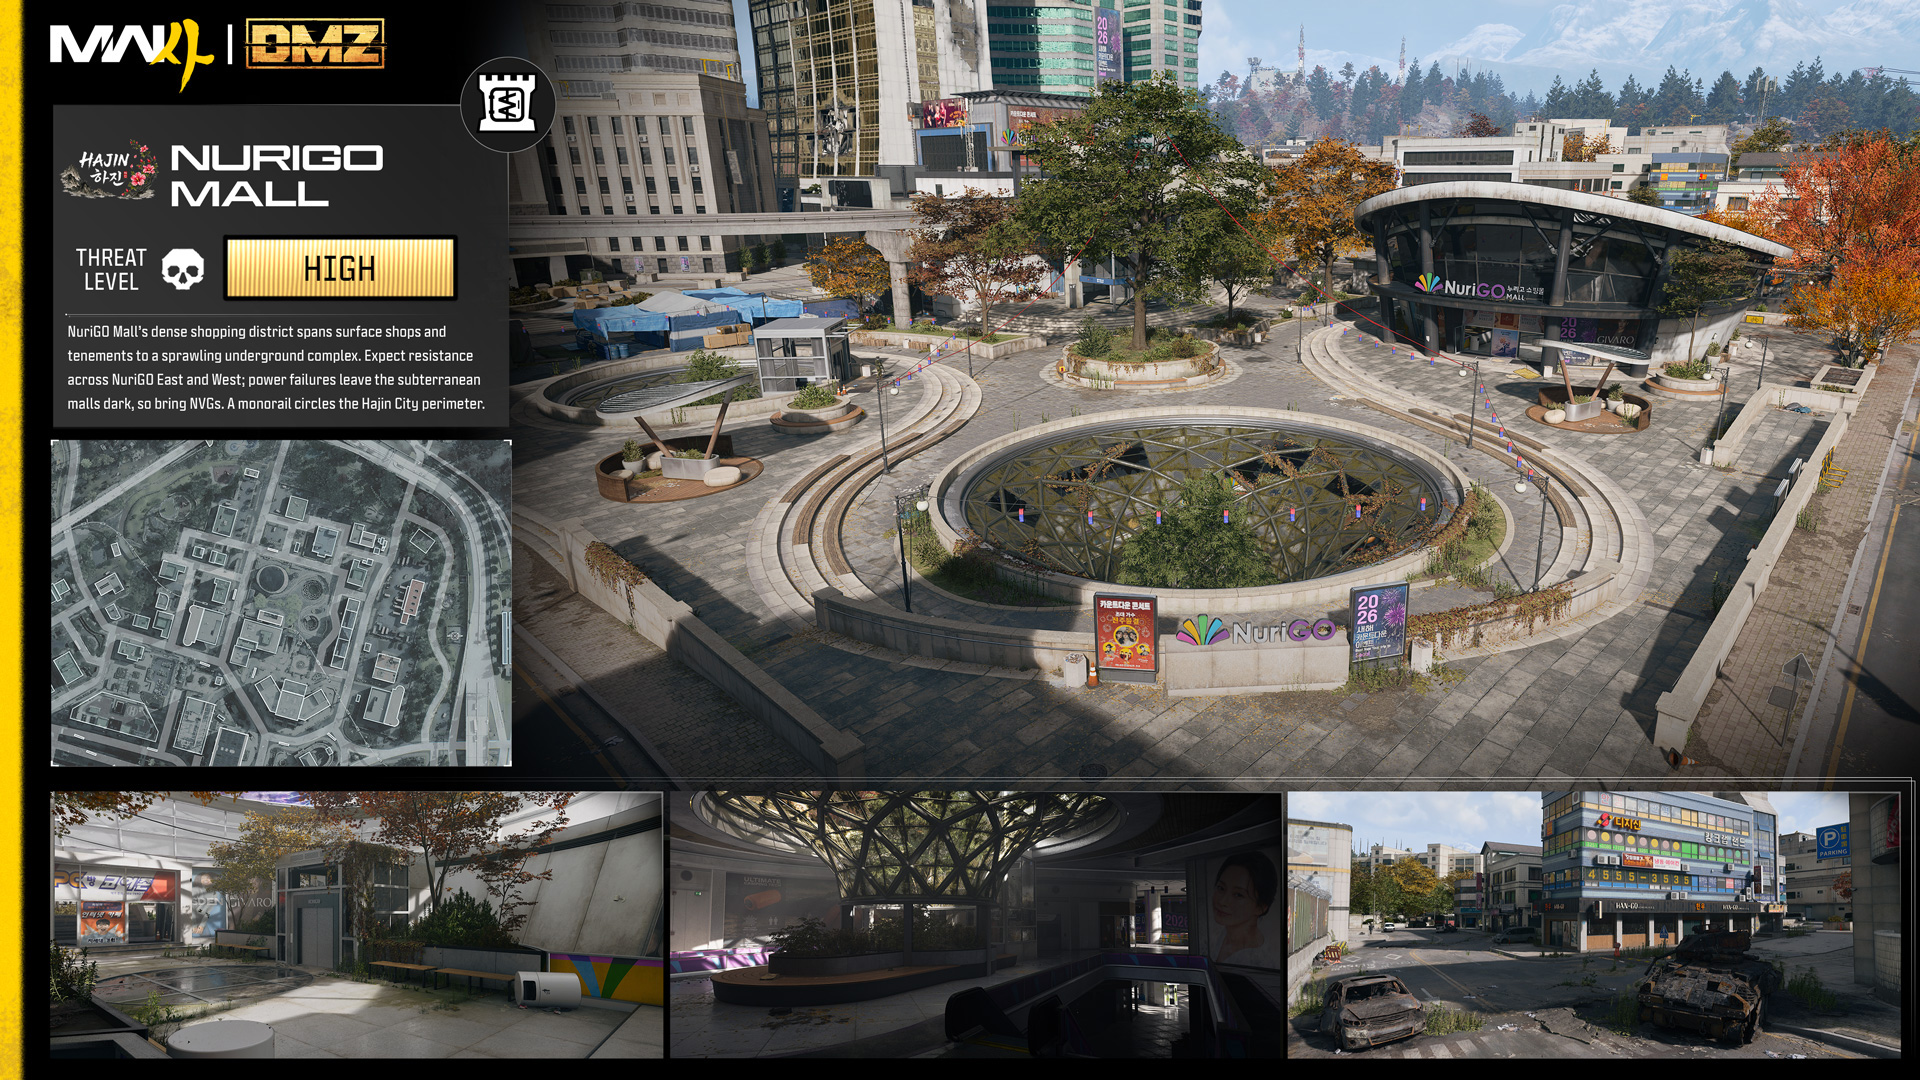
Primarily a shopping district in the shadow of the Hajin skyscrapers to the south, this mixed-use urban development includes tenement blocks along the western edge close to the Hospital, a northern parkway, with the expressway bordering along the eastern flank, down to the Donpyeong Gate. Be aware of heightened awareness across a well-defended and fortified zone within Hajin City to the south, known as The Grid.
Surface edifices include the Han-Go Korean BBQ, district police station, clinic, City Hall, an elevated monorail station (with an active monorail offering automated journey around the entire perimeter of Hajin City), ample parking both above and below ground. Additional smaller shops and malls are built across this area, offering a dense urban environment in which to perfect your combat abilities.
Close to the old Train station is the main courtyard with three circular structures; a pavilion and two large light wells (one with an elevator), all leading to a substantial and sprawling subterranean shopping district. Due to the lack of electricity, Operators exploring this set of underground mall tunnels are advised to utilize NVGs.
The Grid
Location: Central Hajin City (SK)
Expected Threat Level:
The Grid: Critical
Nenshin Tech Complex: Extreme
DBN Headquarters: Critical
Hanex Bank: Critical
Minsok Art School: Critical
Construction Zone: Critical
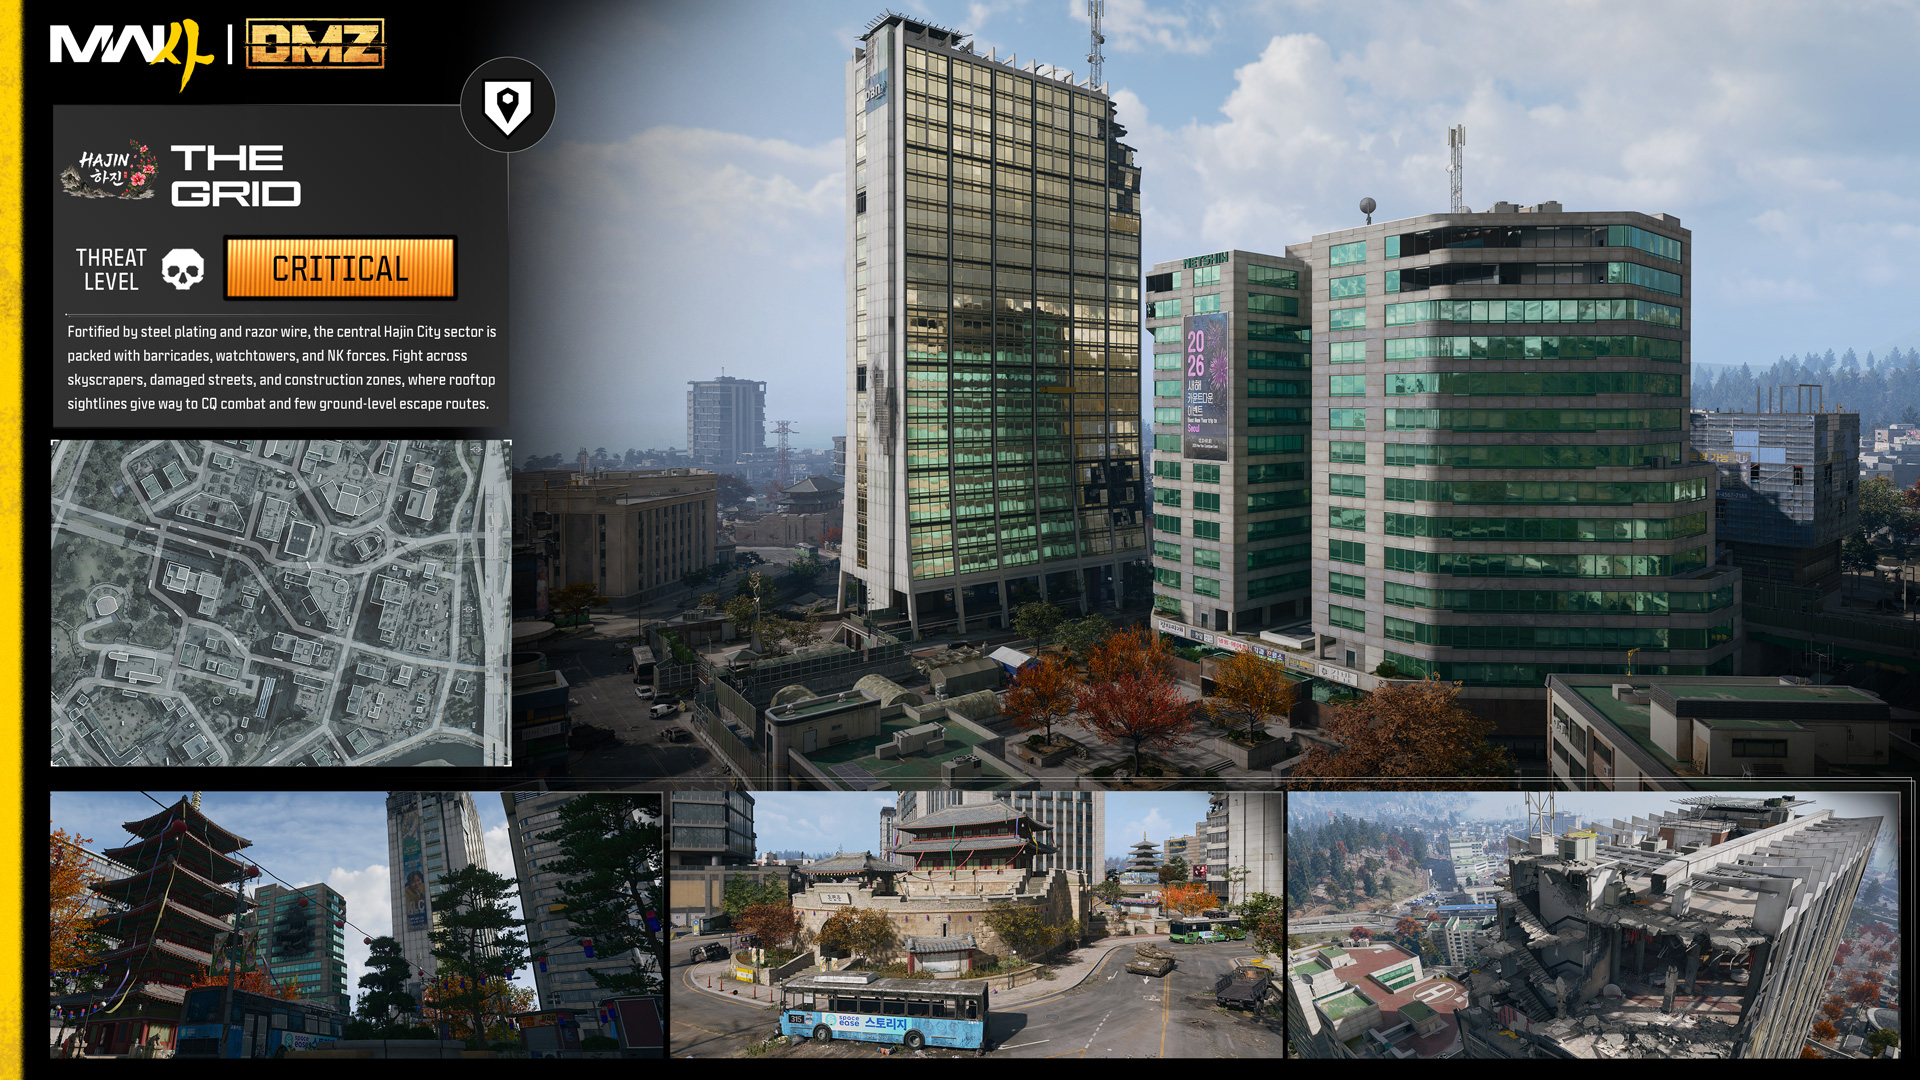
A toughened, steel-plated wall of razor wire running across multiple city blocks is your first indication of a fortified structure within the central business district of Hajin City. Expect heavy resistance as you navigate the worn-torn streets between The Grid and the NuriGO Mall area, with multiple roadways sealed with barricades, watchtowers, and roving NK soldiers ready to escalate the threat still further.
The Grid stretches from the Donpyeong Gate (a historical fortification close to the City Hall and the Hanex Bank tower, the DBN TV tower (the tallest building in Hajin), as well as the Netshin Tech Complex, a red-roofed twin high-rise with an extremely volatile enemy presence. The Grid continues across a partly razed raised roadway and train tracks towards the Minsok Art School and sections of the attached structure currently under construction.
The military presence remains heavy across the sector opposite Wolves Stadium to the south, extending through a historic courtyard and pagoda, past the Year of the Fire Horse statue, and along a major arterial road. The area includes several substantial structures, including Hotel Lucera, as well as a construction zone spanning multiple city blocks on the eastern side of The Grid.
This dense urban sector is difficult to navigate and offers limited ground-level escape routes. Operators should prepare for vertical engagements across the skyscraper rooftops, followed by close-quarters, street-by-street fighting below.
Songdo Wharf
Location: Eastern Hajin City (SK)
Expected Threat Level:
Songdo Wharf: Low
Oamsik Turtle Island: Low
Shoreline Station: Low
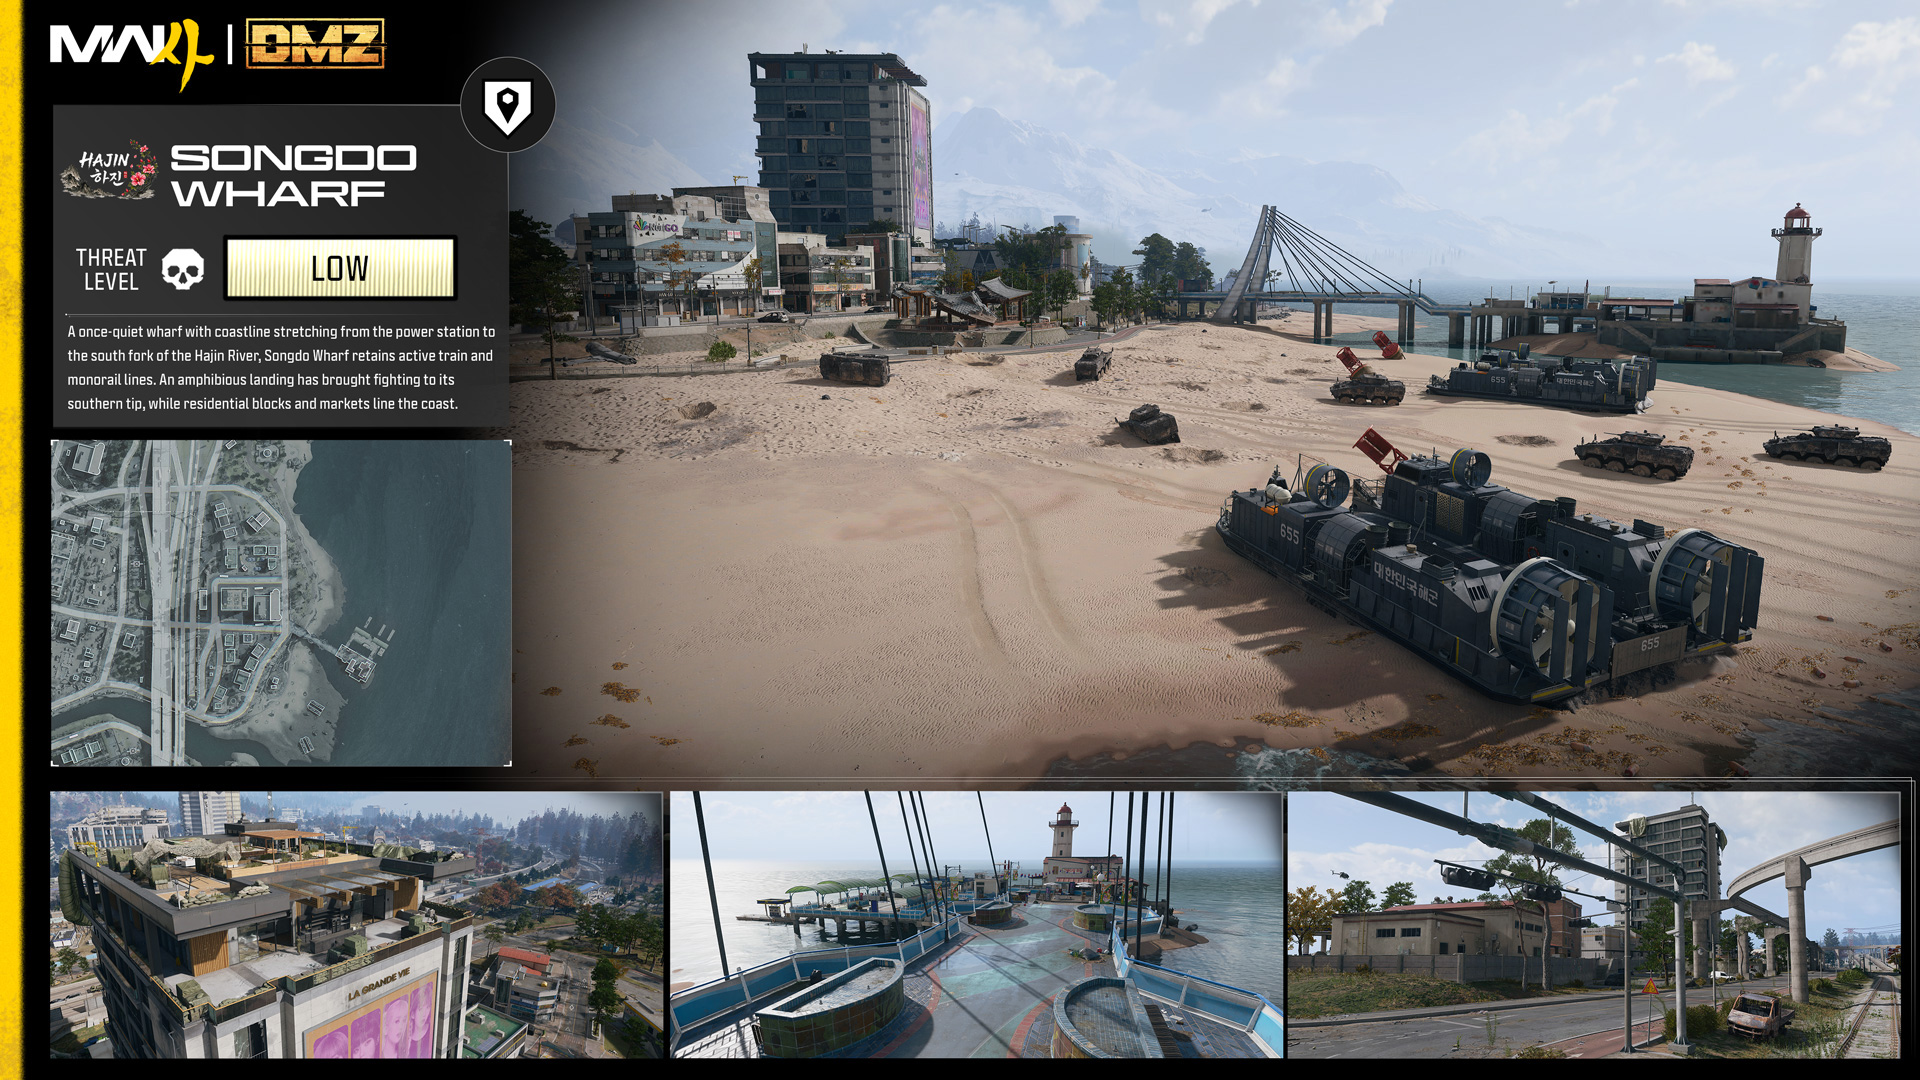
Running from the edge of the Nuclear Power Station to the north, to the south fork of the Hajin River to the south, and the Expressway denoting the western edge of this area, Songdo Wharf was once a largely a quiet zone, and provided excellent train and monorail services across Hajin, both of which are still active. Recently, an amphibious landing at the southern tip of the area denotes the recent conflagration.
To the north is a residential district and a luxury apartment tower called La Grande Vie, the tallest building in the vicinity. Overlooking the East Sea is a more modest traditional market of tents and a bridge to a pier and lighthouse, with a train station and traditional park, with small pagodas and a sea-shore rock outcrop with Oamsik Turtle Island to explore or hide within.
Wolves Stadium
Location: South Central Hajin City (SK)
Expected Threat Level:
Wolves Stadium: Medium
Theatre: Medium
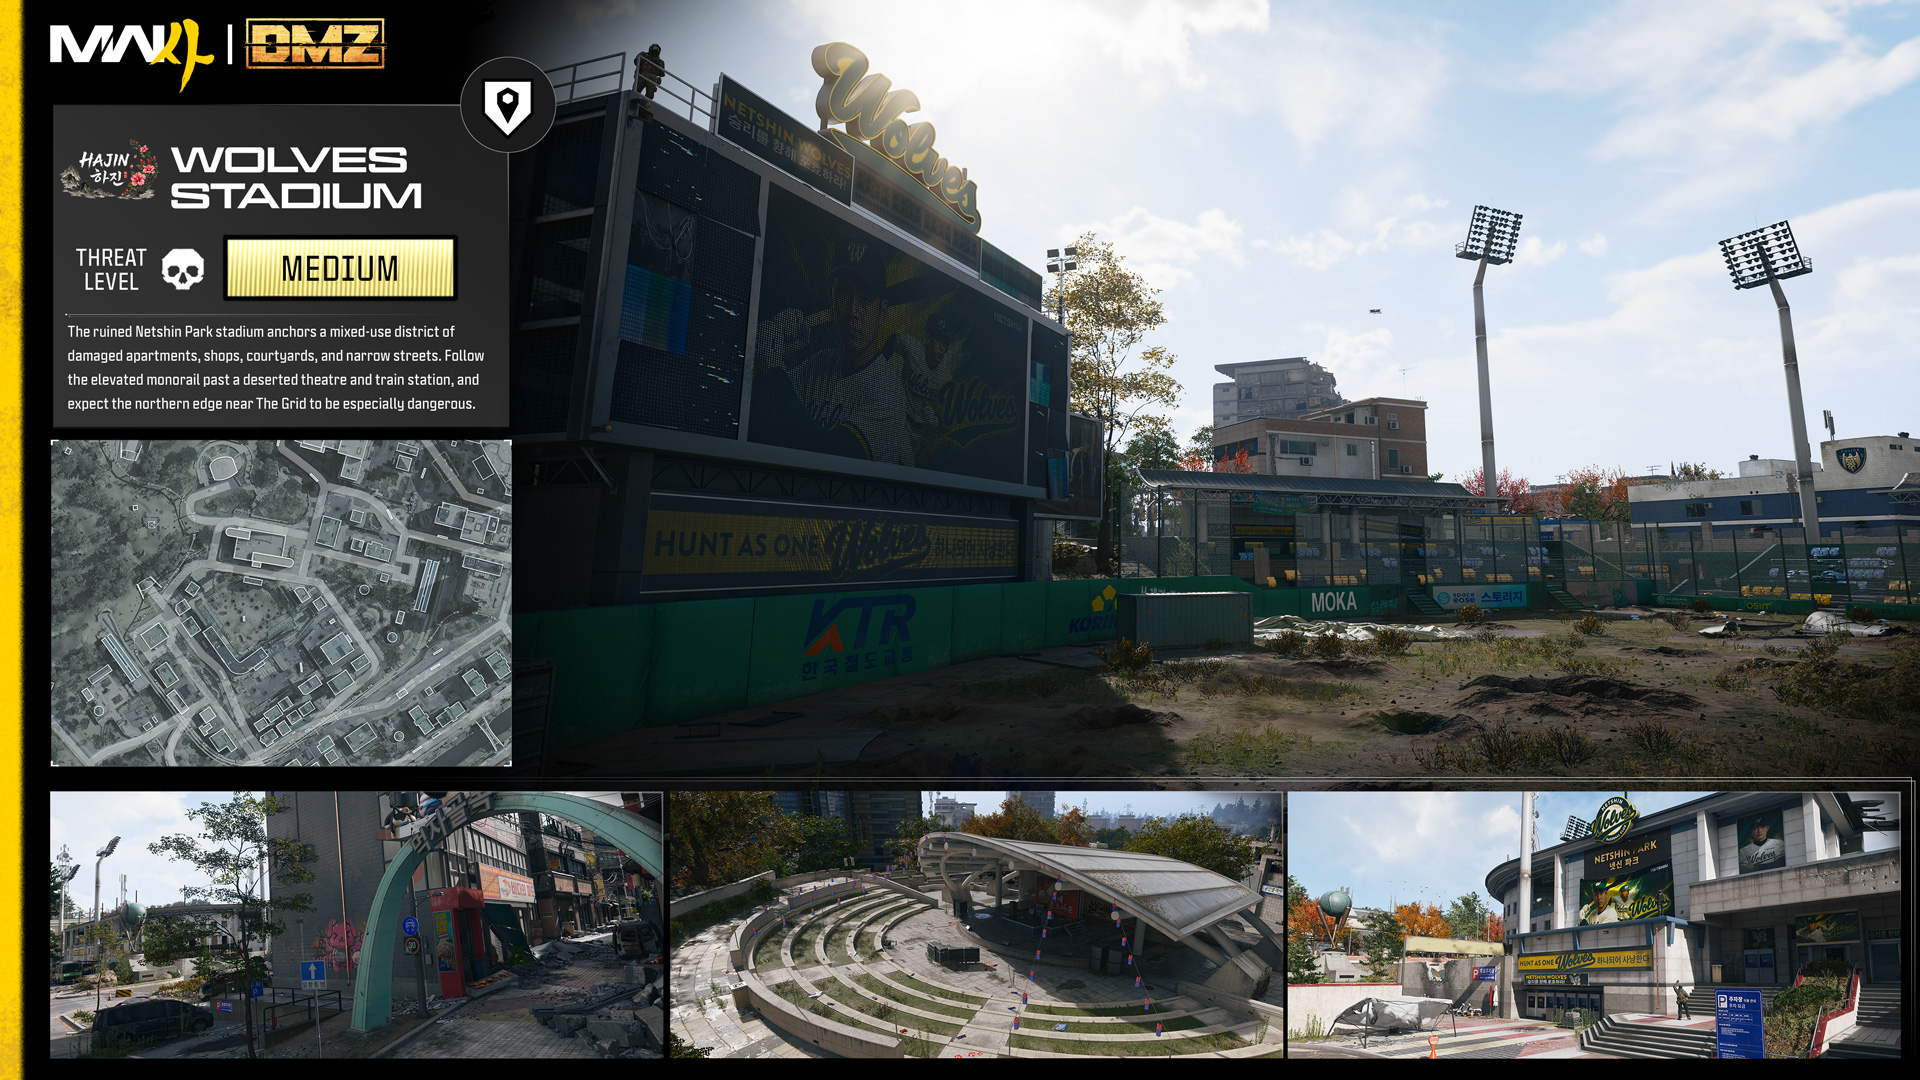
The district’s northeast corner is marked by the Baseball Stadium B Station, and the remains of a partly destroyed luxury apartment block with the top floors caved in. Follow the elevated monorail southwest to the Ginyeom-il Bridge, to the ruined park and nearby train station. North of the Stadium is a deserted open-air Theatre, a modern concert pavilion recently abandoned. The northern perimeter with The Grid is likely the most dangerous.
The surrounding streets away from the stadium is mixed use, with a Police Station, bank building, open courtyards, and narrow streets between small shopping and pedestrian malls and apartments, with debris from the recent invasion strewn everywhere. The Netshin Park stadium was once home to the local baseball team, but the Wolves are no longer howling here, and the stadium grounds are in ruins.
Hajin River Heights
Location: Southeast Hajin (SK)
Expected Threat Level:
Hajin River Heights: Medium
South Island: Medium
Jinseo Park Towers: Medium
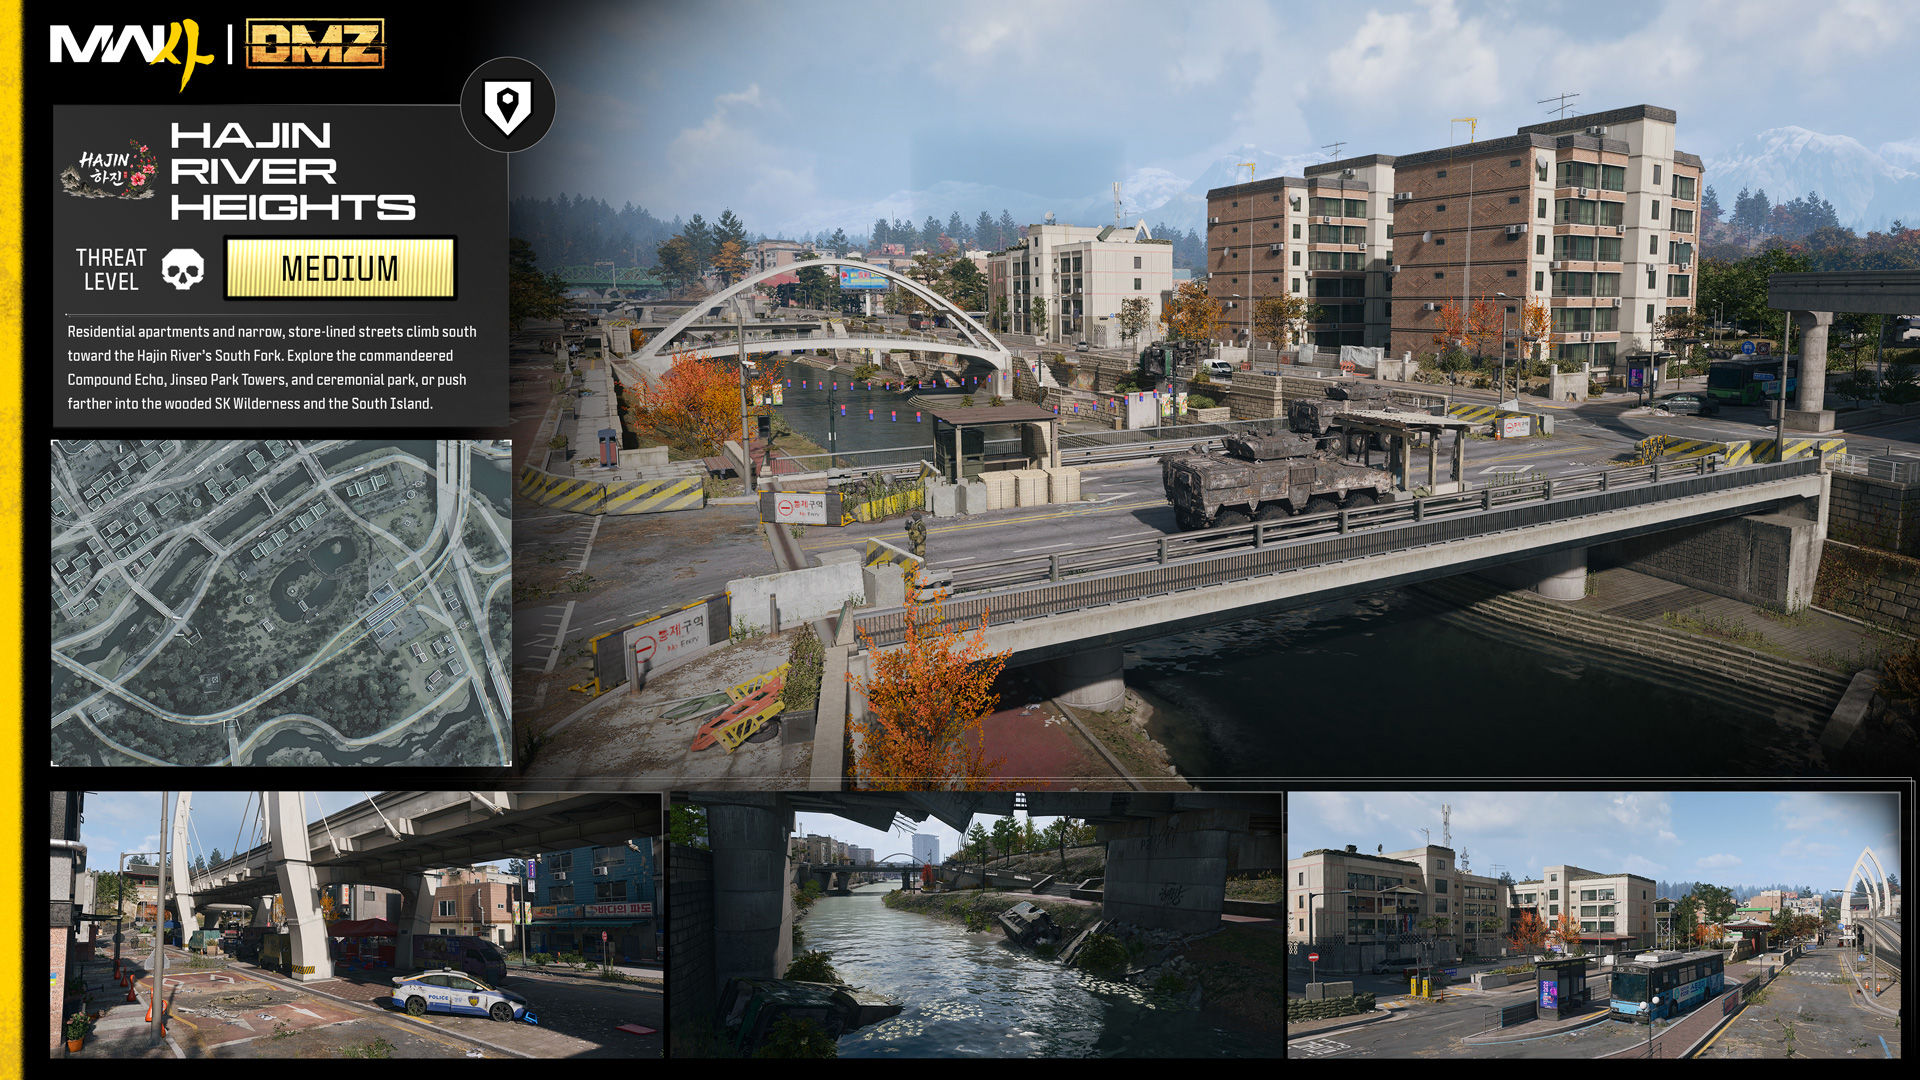
South of Wolves Stadium lies Hajin River Heights, known as mainly residential apartments and narrow, store-lined streets that have taken the brunt of recent devastating attacks. The topography rises to the south, close to the South Fork of Hajin River and the long green metal bridge, the boundary of this district. Follow this northeast, staying close to the river, to reach more apartments, with one of these buildings being commandeered into a military base known as Compound Echo.
Continue south to reach the concrete residential edifices of Jinseo Park Towers near a ceremonial park. Venture further away to disappear into the wooded rural climbs of the South Korean Wilderness, and a lone comms tower atop South Island.
Narrative Stories from Hajin
Hajin Recon Report: Gone to the Dogs
The key had come from a Lieutenant’s corpse after a long pursuit through the northern hills, finally ended by Morrow’s Astaroth sniper rifle punching through a narrow gap in the foliage at extreme range, and through the skull of the Warden. He nearly left the key among the target’s other possessions, until he recognized the stamped location: a sealed door somewhere beneath the NuriGO Mall.
Morrow worked alone. He crossed beneath the old train station as the fog began to lift, the Astaroth slung across his back and a suppressed GS .50 drawn for close encounters.
At the courtyard, three circular structures marked the entrance to the underground mall: a pavilion and two light wells, one built around a service elevator descending into the abandoned shopping district.
The elevator had been the site of a previous ambush. Morrow had survived it by seconds.
He took the stairs.
Above ground, Hajin had been all fog, engines, and distant gunfire. Below, the noise fell away. No patrols. No voices. Only the soft footfalls of his boots and the faint electrical hiss of his NVGs as they turned the black corridors green.
The mall stretched farther than the recon notes suggested. Corridors of shuttered storefronts opened onto branching service tunnels, with traps hidden beneath collapsed signage and loose cables. He moved slowly, checking each threshold before stepping through.
Then came the sound.
A mechanical click. A pause. Another click, closer.
Something moved at the far end of the corridor. It unfolded from the darkness on four articulated legs, each joint correcting with quick, precise adjustments as it advanced. Its compact body stayed level over the garbage-strewn floor. It moved like a hunting animal rebuilt in steel.
The first robot dog broke from a side passage at a full sprint.
He fired twice, staggered it, and finished the machine beneath the jaw assembly before it could close. The second charged through the smoke, following the gunfire. Morrow caught it with a shot through the optic cluster, then retrieved the key as he reached the locked room.
Inside, the reward was waiting: a high-value Plate Carrier recipe, rare components, and a weapon manual sealed in a waterproof case.
More mechanical clicks answered from the dark before he reached the exit.
He pocketed the spoils, thumbed a fresh magazine into his hand cannon, and started back through the mall.
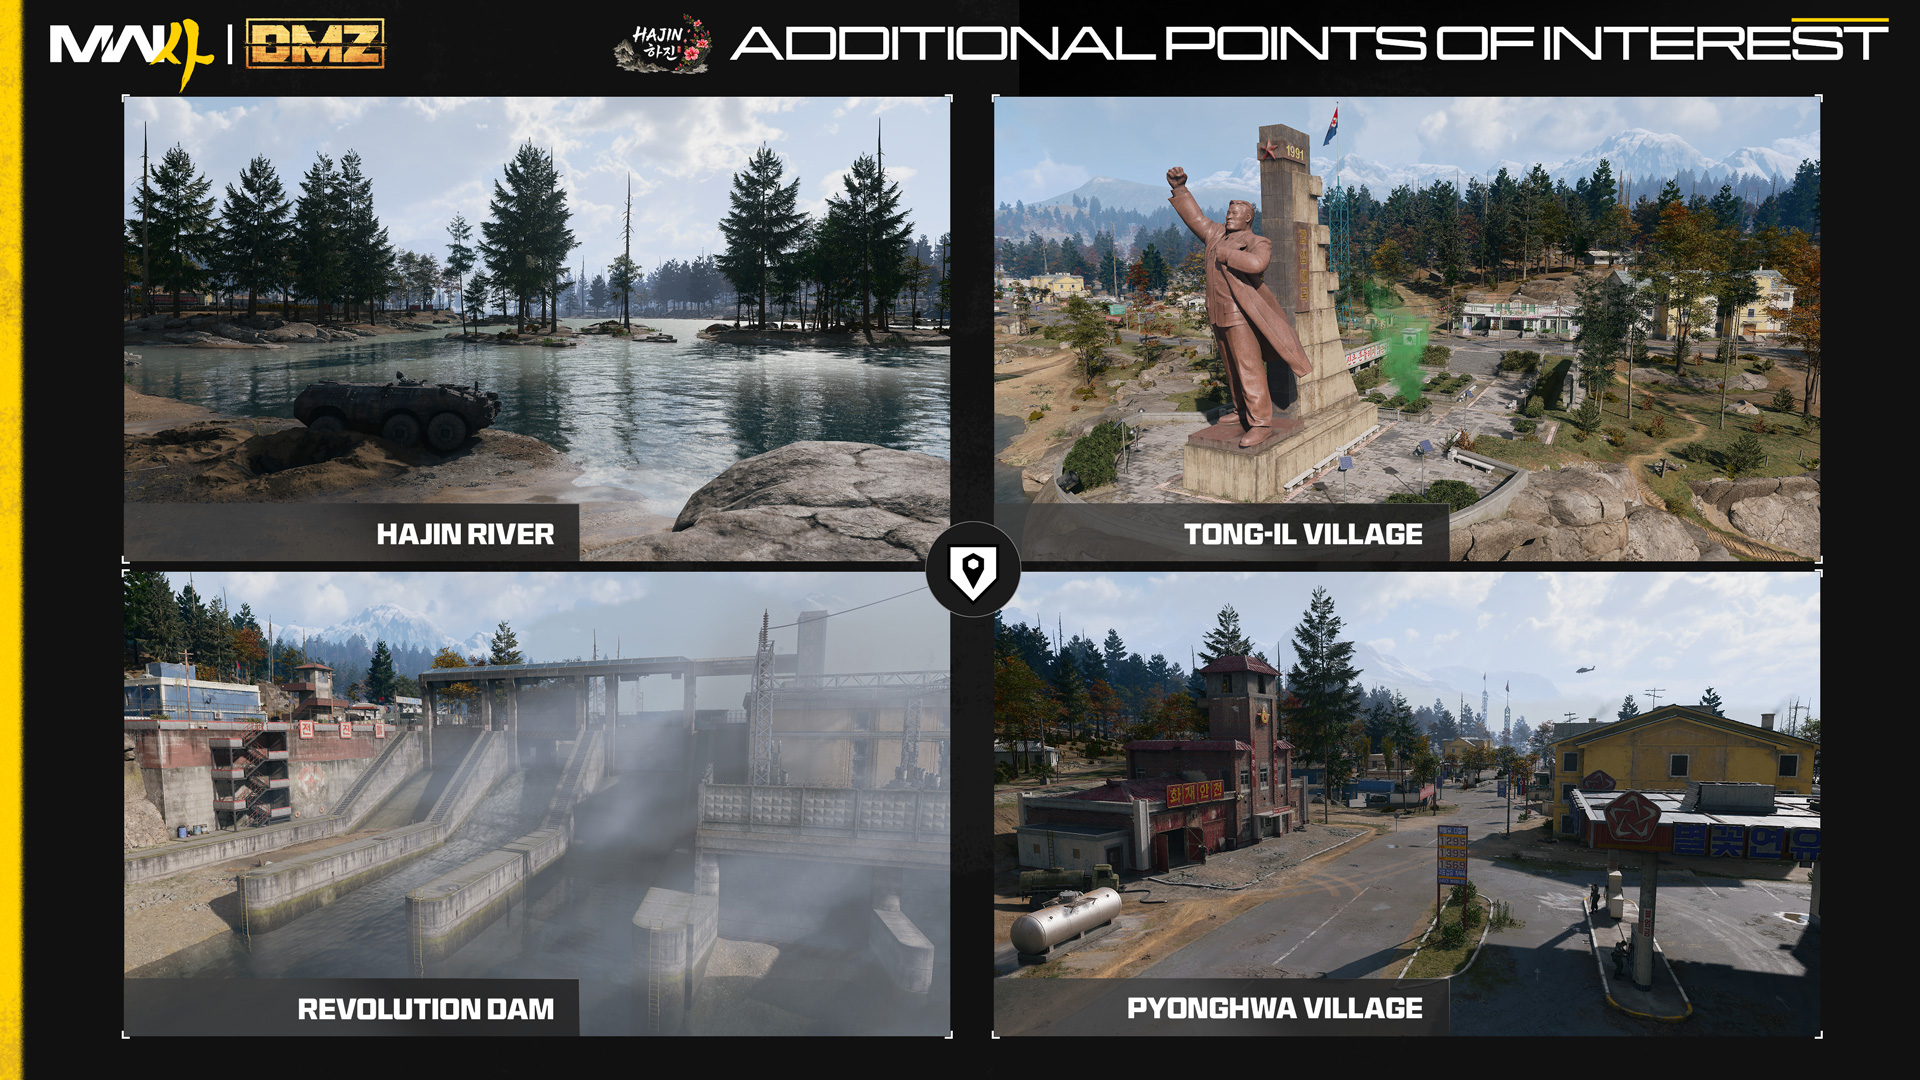
Hajin River
Winding north and south tributaries of the mighty Hajin River originate in the mountains to the west, and flow east and southwards, to the sea close to both the Reactor and Songdo Wharf.
Tong-il Village
A once-robust farming community on the floodplains of the north delta of Hajin River, complete with an imposing statue of a past leader.
Revolution Dam
A strong military police presence is noted at this intact and critical piece of infrastructure. Tong-il Village is just to the southeast.
Pyonghwa Village
A cluster of dwellings and farmland on the flat ground west of Hajin River, offering rapid vehicular access across the water via a partly destroyed pontoon bridge.
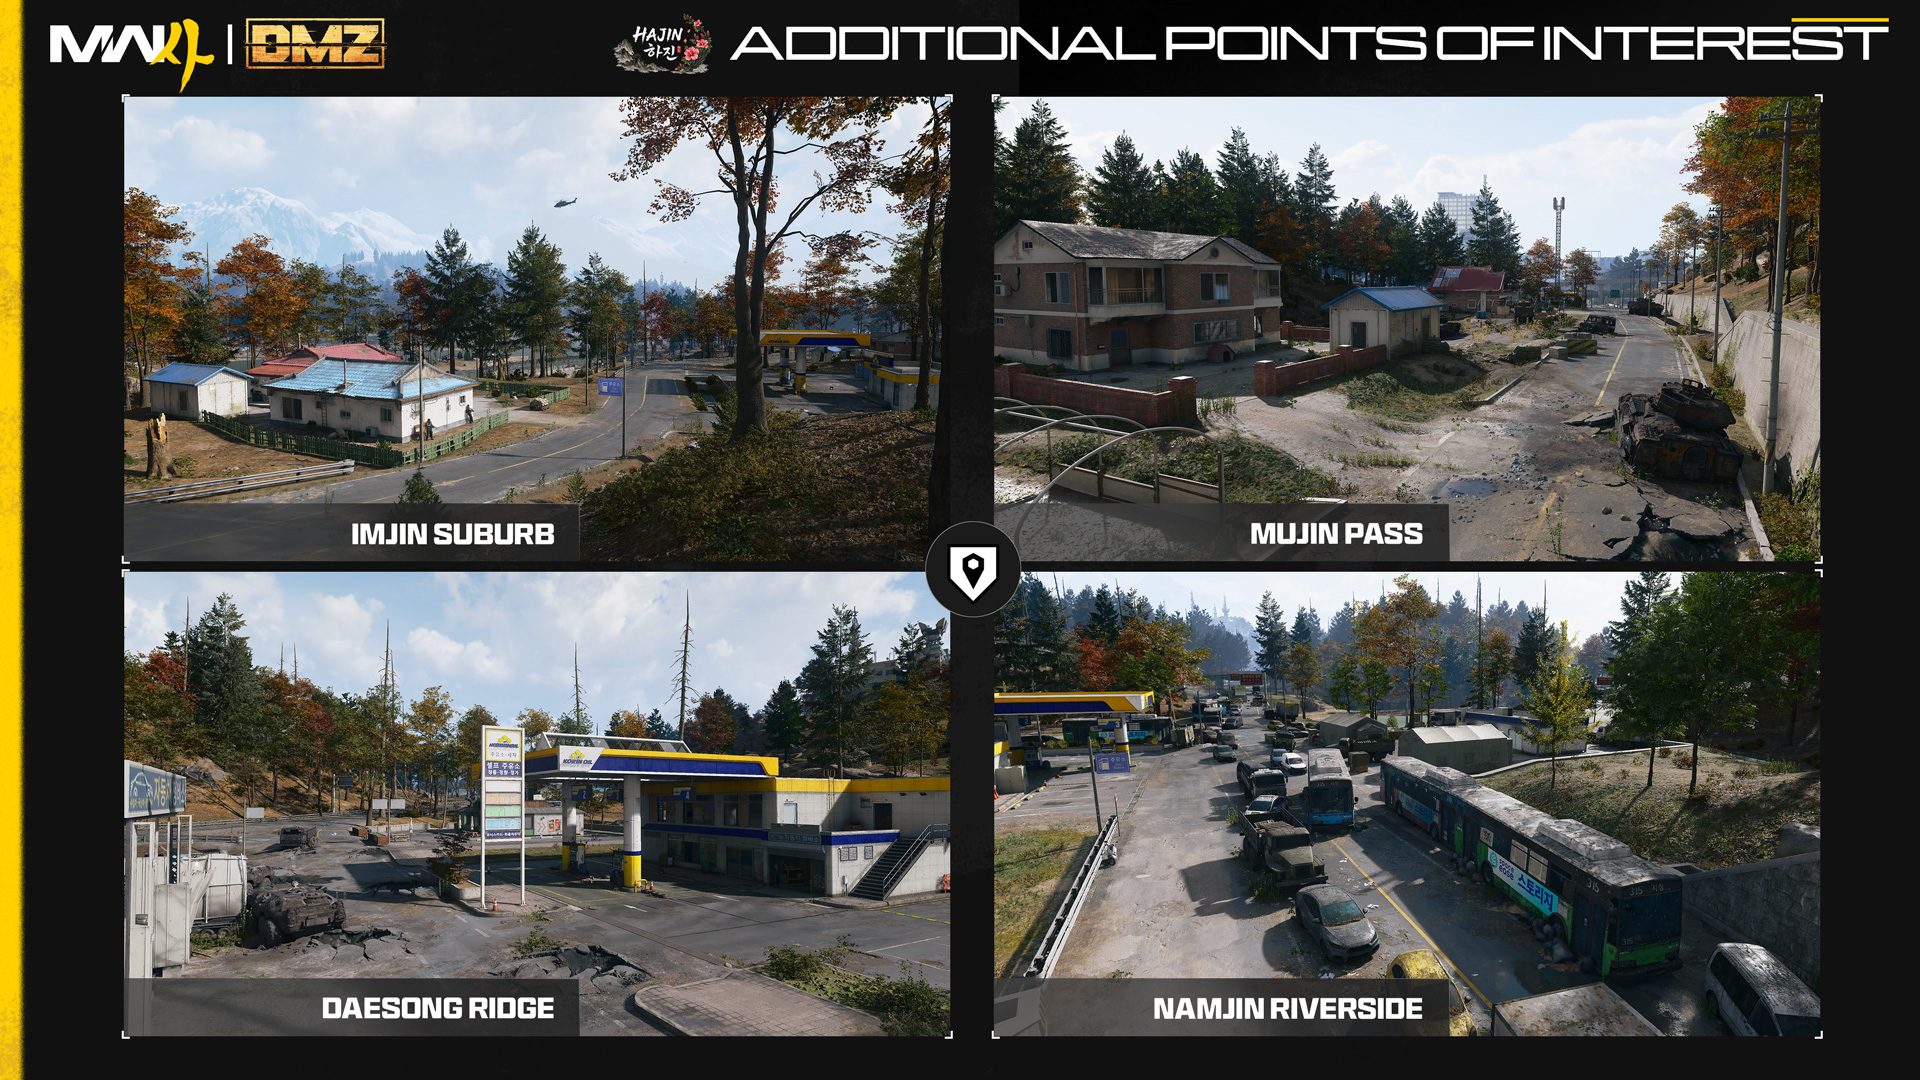
Imjin Suburb
A small hamlet along the Hajin River, housing farm workers, tucked away at the foot of a wooded hill, and close to the railroad tracks.
Mujin Pass
A small farming community of arable land sits within a dell and a major road, bisecting two large forested areas, with the Hospital to the north, and the Array to the south.
Daesong Ridge
The burned-out husks of APCs sit rusting along a pock-marked roadway that runs through this rural settlement, just northeast of Imjin Farmland.
Namjin Riverside
Along the southern edge of Hajin is evidence of conflict, not least the cluster of civilian vehicles abandoned near an exit tunnel close to the South Fork of the Hajin River.
Locations of Interest
Hajin’s Exclusion Zone is a sprawling operational area, with hundreds of buildings and outlying sites to recon, search, and exploit. As well as the main Points of Interest described above, the following locations are marked on your Tac-Map. Investigate each for an increased likelihood of preferred loot, though the exact contents remain yours to discover.
TIP: Use local architecture to establish your position. Distinctive structures and infrastructure can reveal whether the area was formerly under North or South Korean control, and the color of buildings (red for Fire Stations, blue for Police Stations, green for Clinics) are also helpful to your recon.
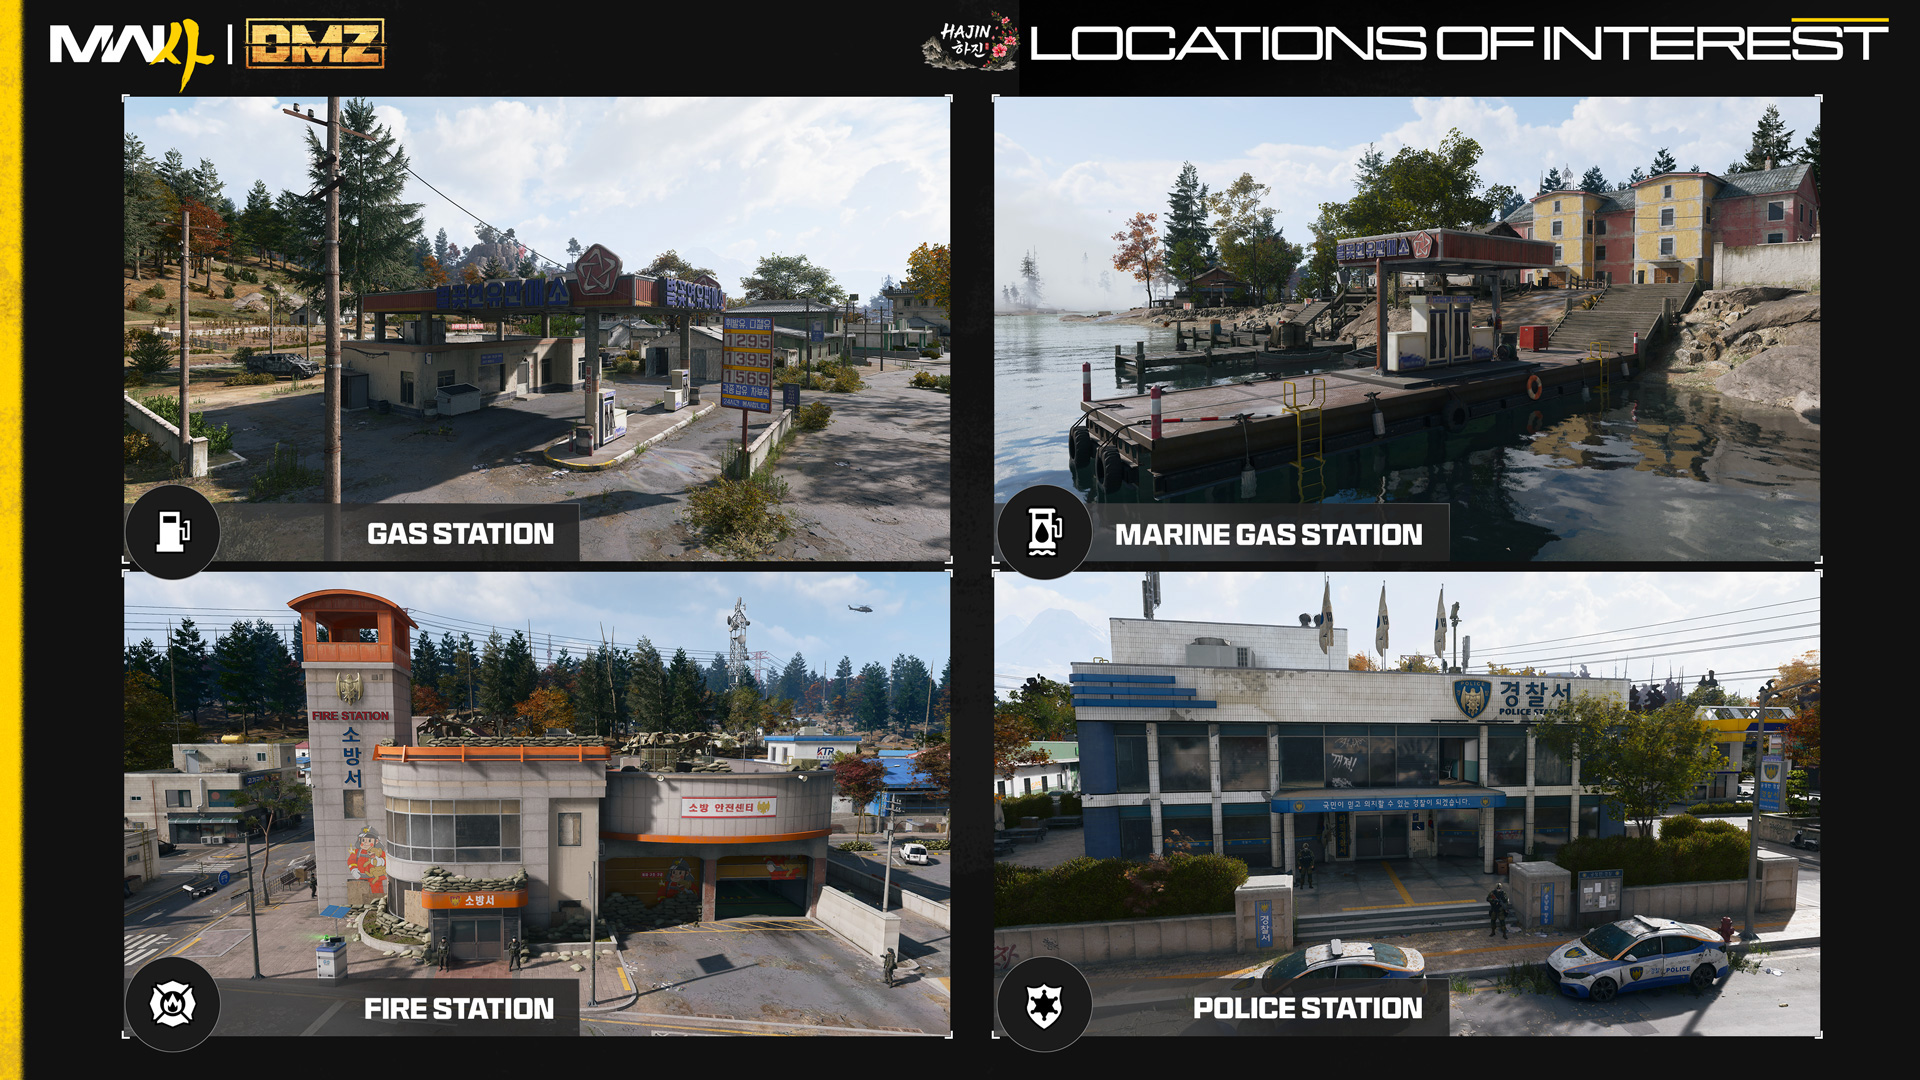
Gas Stations
Located throughout Hajin, Gas Stations allow for repairing and refueling ground and airborne vehicles. They can also refill Operator-carried Gas Cans, making them valuable resupply points during an operation.
Marine Gas Stations
Marine Gas Stations provide additional repairing and refueling capabilities and usually comprise of a small jetty and two pumps. Armored Patrol Boats and RHIBs benefit most, though carefully positioned ground and airborne craft can also use them. Operator-carried Gas Cans can be refueled here, too.
Fire Stations
Usually located in built-up areas, Fire Stations differ in size and structure depending on which part of Hajin you’re in. NK Fire Stations are built of brick, while SK Fire Stations have a more modern appearance. An enemy presence is expected. Search here for Radiation Gear and Parachutes.
Police Stations
Police Stations across Hajin vary in architectural design, but their blue color scheme makes them easy to identify. Expect hostile resistance, multiple rooms to clear, and, depending on the layout, roof access for overwatch. Search here for military gear and a locked Armory.
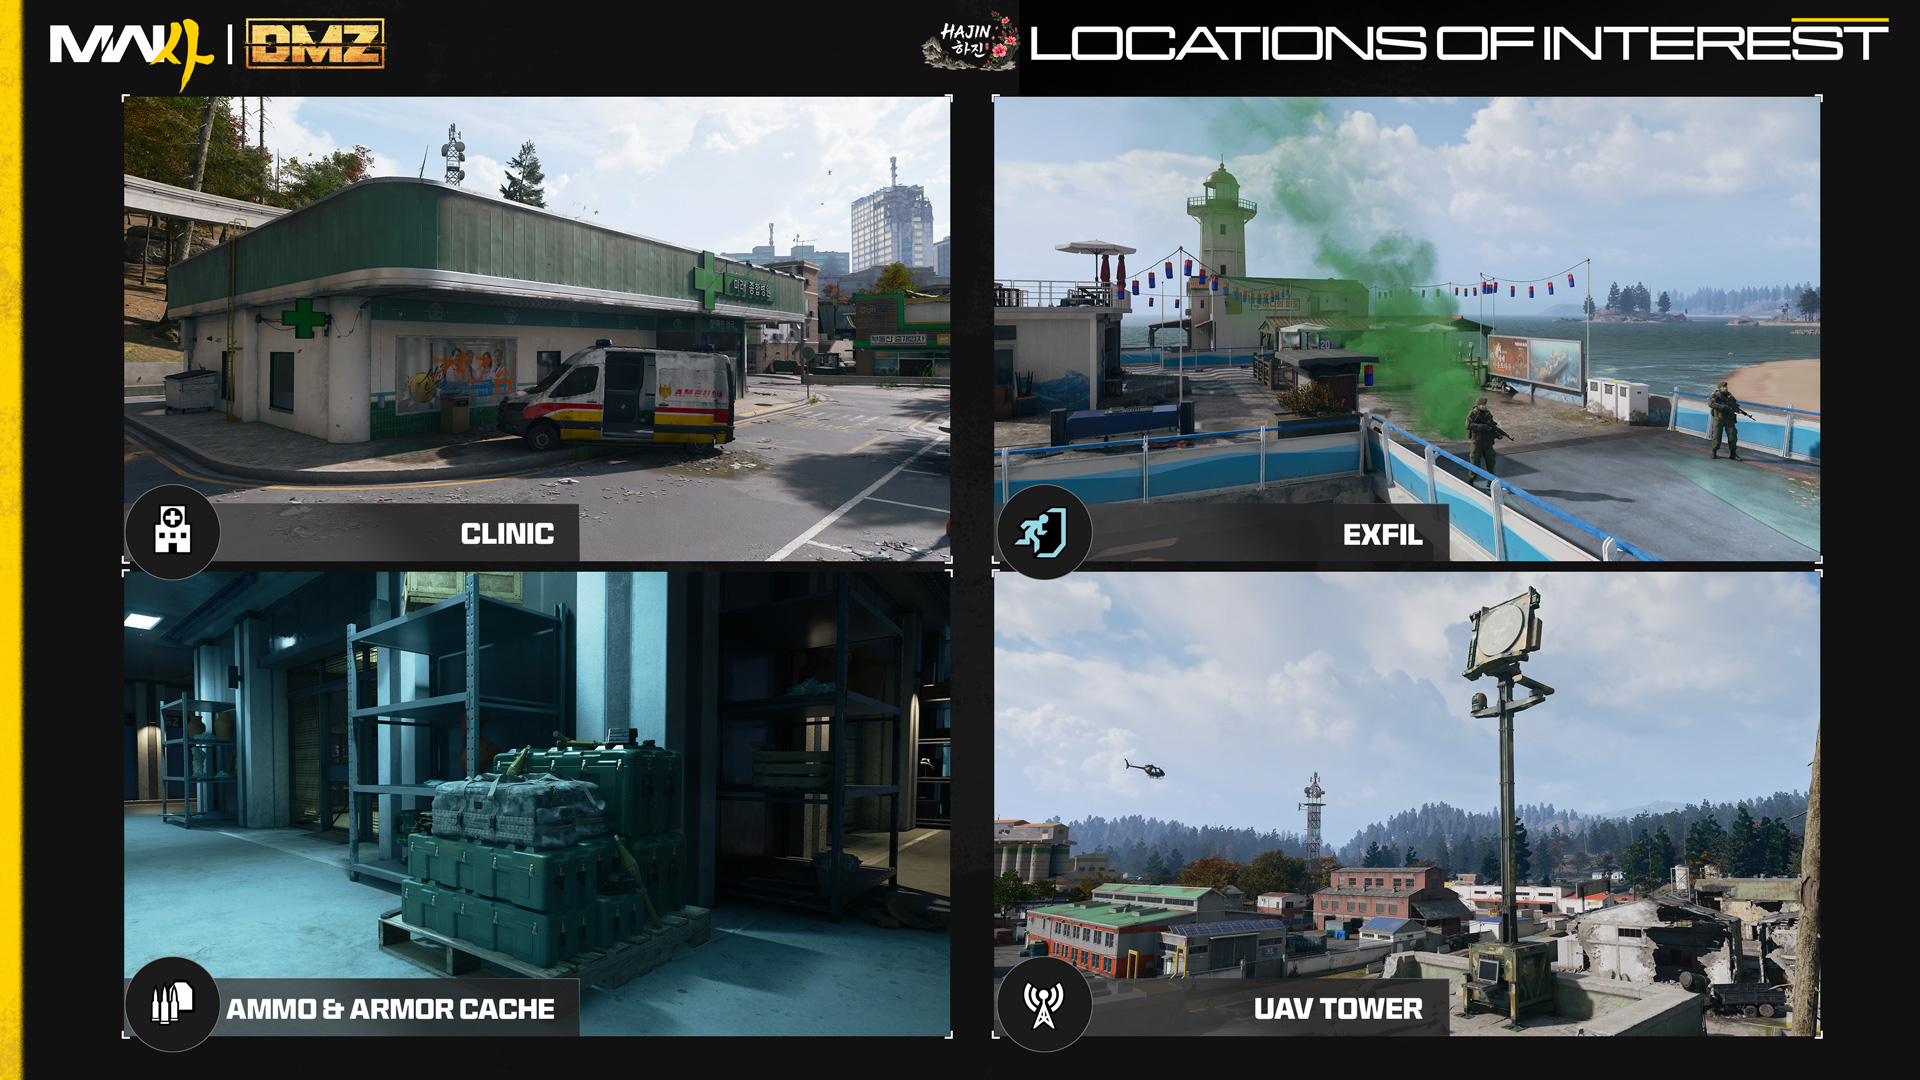
Clinics
Denoted by its predominantly green exterior facades, these modest clinics serve the local population and may contain useful medical loot. Stay alert for enemy presence, or Operators holed up, ready to ambush injured players.
Exfils
Exfil sites are enabled from a pool of locations across Hajin and marked by a plume of green smoke. Call in the Twin Heli Exfil helicopter, then hold the site until it arrives as enemy pressure intensifies. Board the helicopter to complete the deployment and secure your extraction.
Note: You can also use alternate exfil methods, such as a Fulton balloon or Flare.
Caution: Beware of Exfil sites, as they may be used as ambush points by other squads. Exfil flares are extremely loud and visible from great distances. Be ready for a fight.
Ammo & Armor Caches
Located across Hajin, and often located inside enemy-held compounds, Ammo Armor Caches let you replenish ammunition and gather Armor Plates, and are great to use in a pinch. After use, the cache enters a cooldown before it can be accessed again.
UAV Towers
A small, portable comms tower, usually defended by enemy forces. Activate one to complete a Side Op, gain DMZ Cash, and trigger a pulse that reveals nearby Operator and enemy positions.
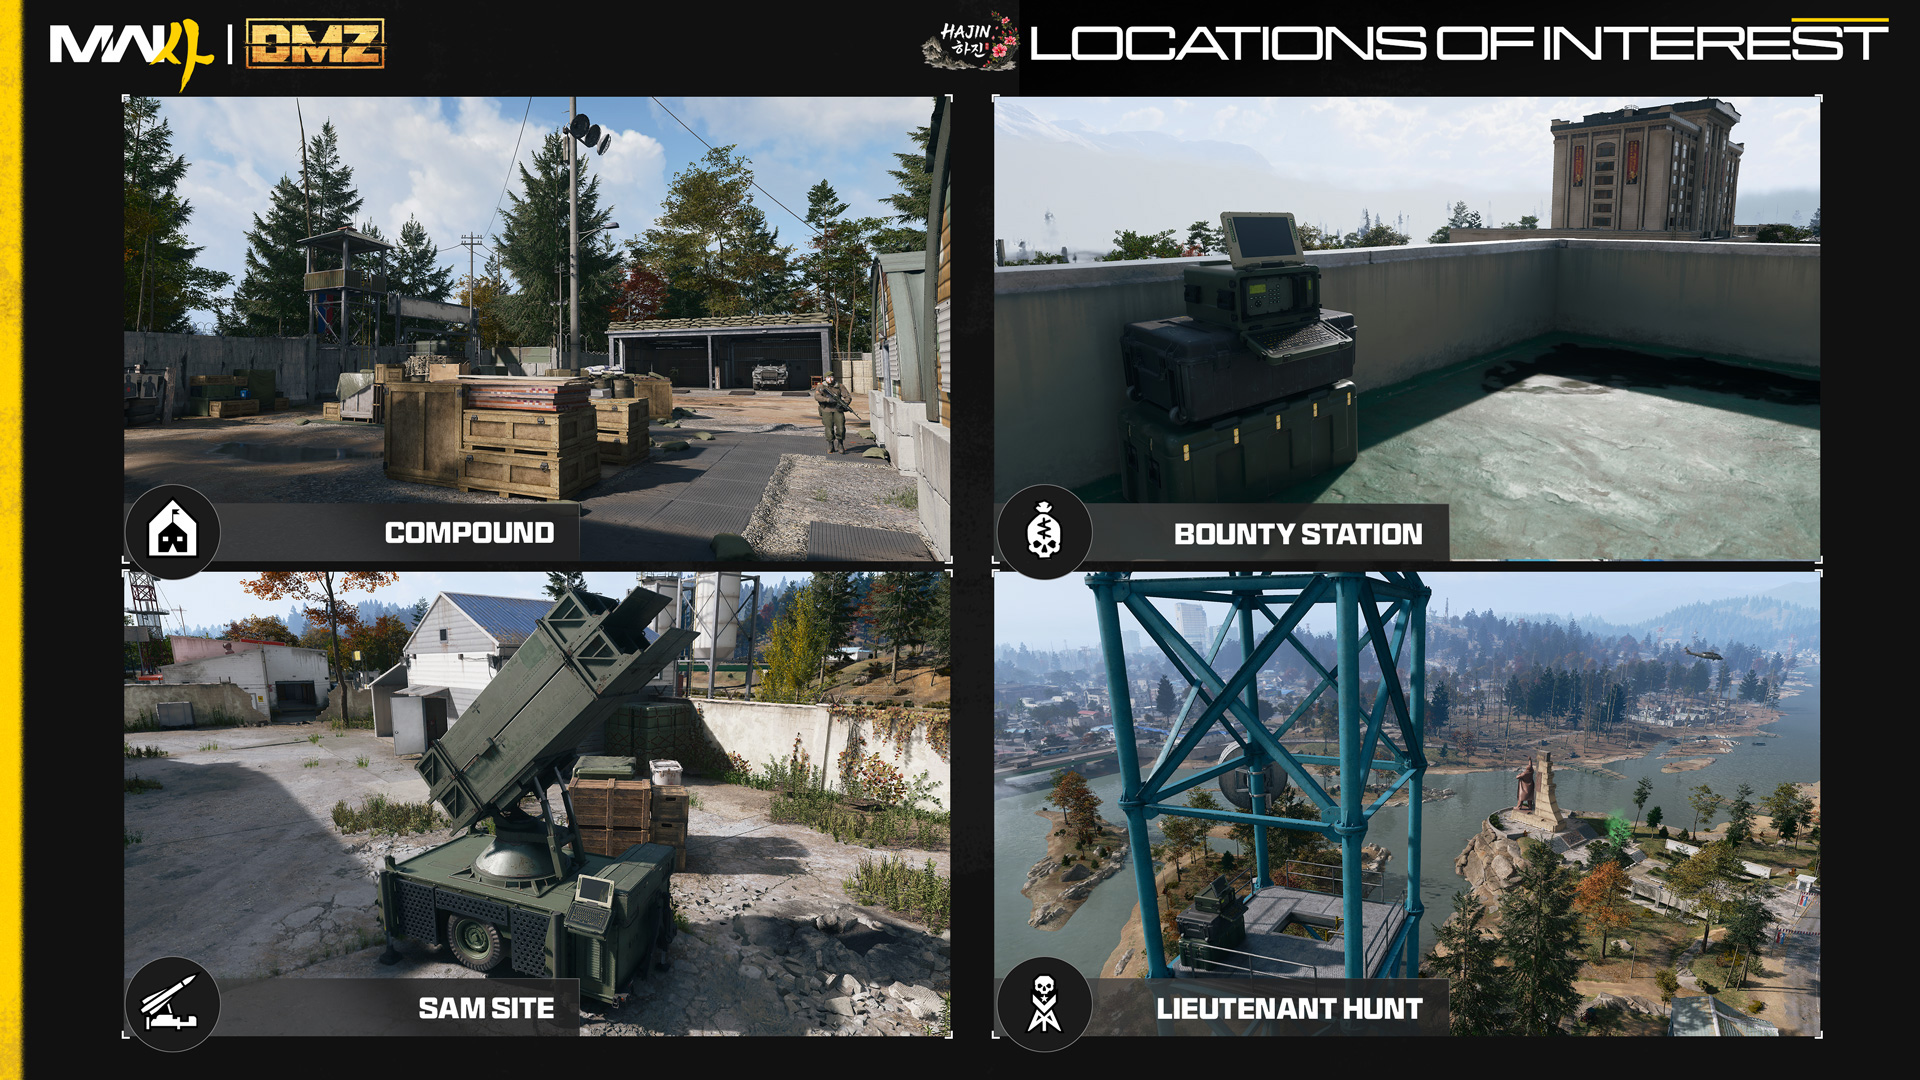
Compounds
These small- to medium-sized fortified military positions are heavily defended and offer improved loot and valuable intel. Expect fierce resistance, armored vehicles to utilize (such as the LTV), and more enemy forces within the compound fighting you simultaneously if you go in loud, if the compound is not secured quickly. A stealthier approach may be advantageous.
Bounty Stations (Leaderboard)
Access a rugged waterproof laptop and review available Bounties (on human Operators) before optionally hunting them down or use DMZ Cash to pay off your own Bounty during a deployment.
SAM Sites
A fixed surface-to-air missile battery you can capture as a Side Op by accessing the control computer. Once the hack begins, a siren sounds and forces in the area may react. Defend the site until the process is complete. Under your control, the battery automatically targets enemy aircraft, which is particularly useful against Deathstalkers. Move too far away, however, and enemy forces can reacquire the site.
Lieutenant Hunts
Climb a tall communications tower and access the laptop fixed to the top to obtain intel on a nearby Lieutenant, completing a Side Op in the process.
Incoming DMZ Coverage!
Stay tuned to the latest official Modern Warfare 4 information by checking the Call of Duty Blog through launch and beyond.
Pre-orders are available now at participating retailers, in-game, on platform stores, or at CallofDuty.com.
©/TM/ ® 2026 Activision Publishing, Inc.
For more information, please visit www.callofduty.com and www.youtube.com/callofduty, and follow @Activision, @CallofDuty, @CODLiveSeasons, and @InfinityWard on X, Instagram, and Facebook. For Call of Duty Updates, follow @CODUpdates on X.
Join Call of Duty's Official Discord to get the latest updates and maybe even meet your next squadmate!