VOER JE GEBOORTEDATUM IN
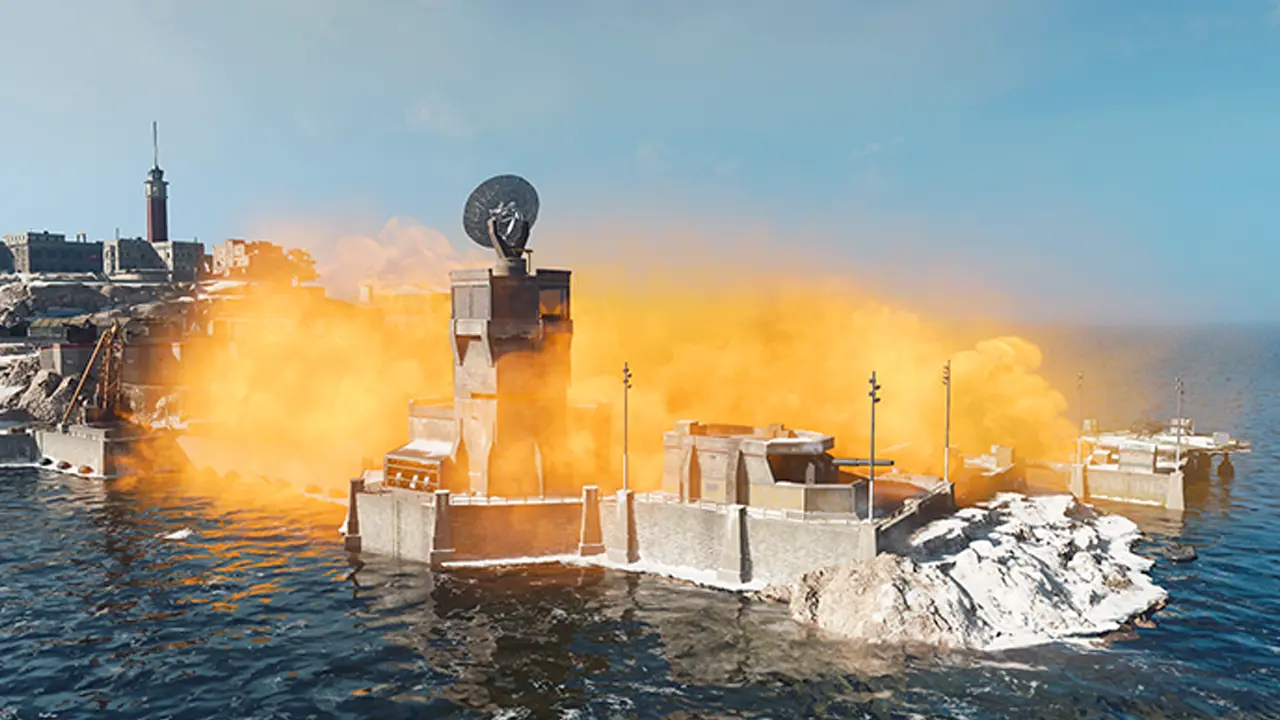
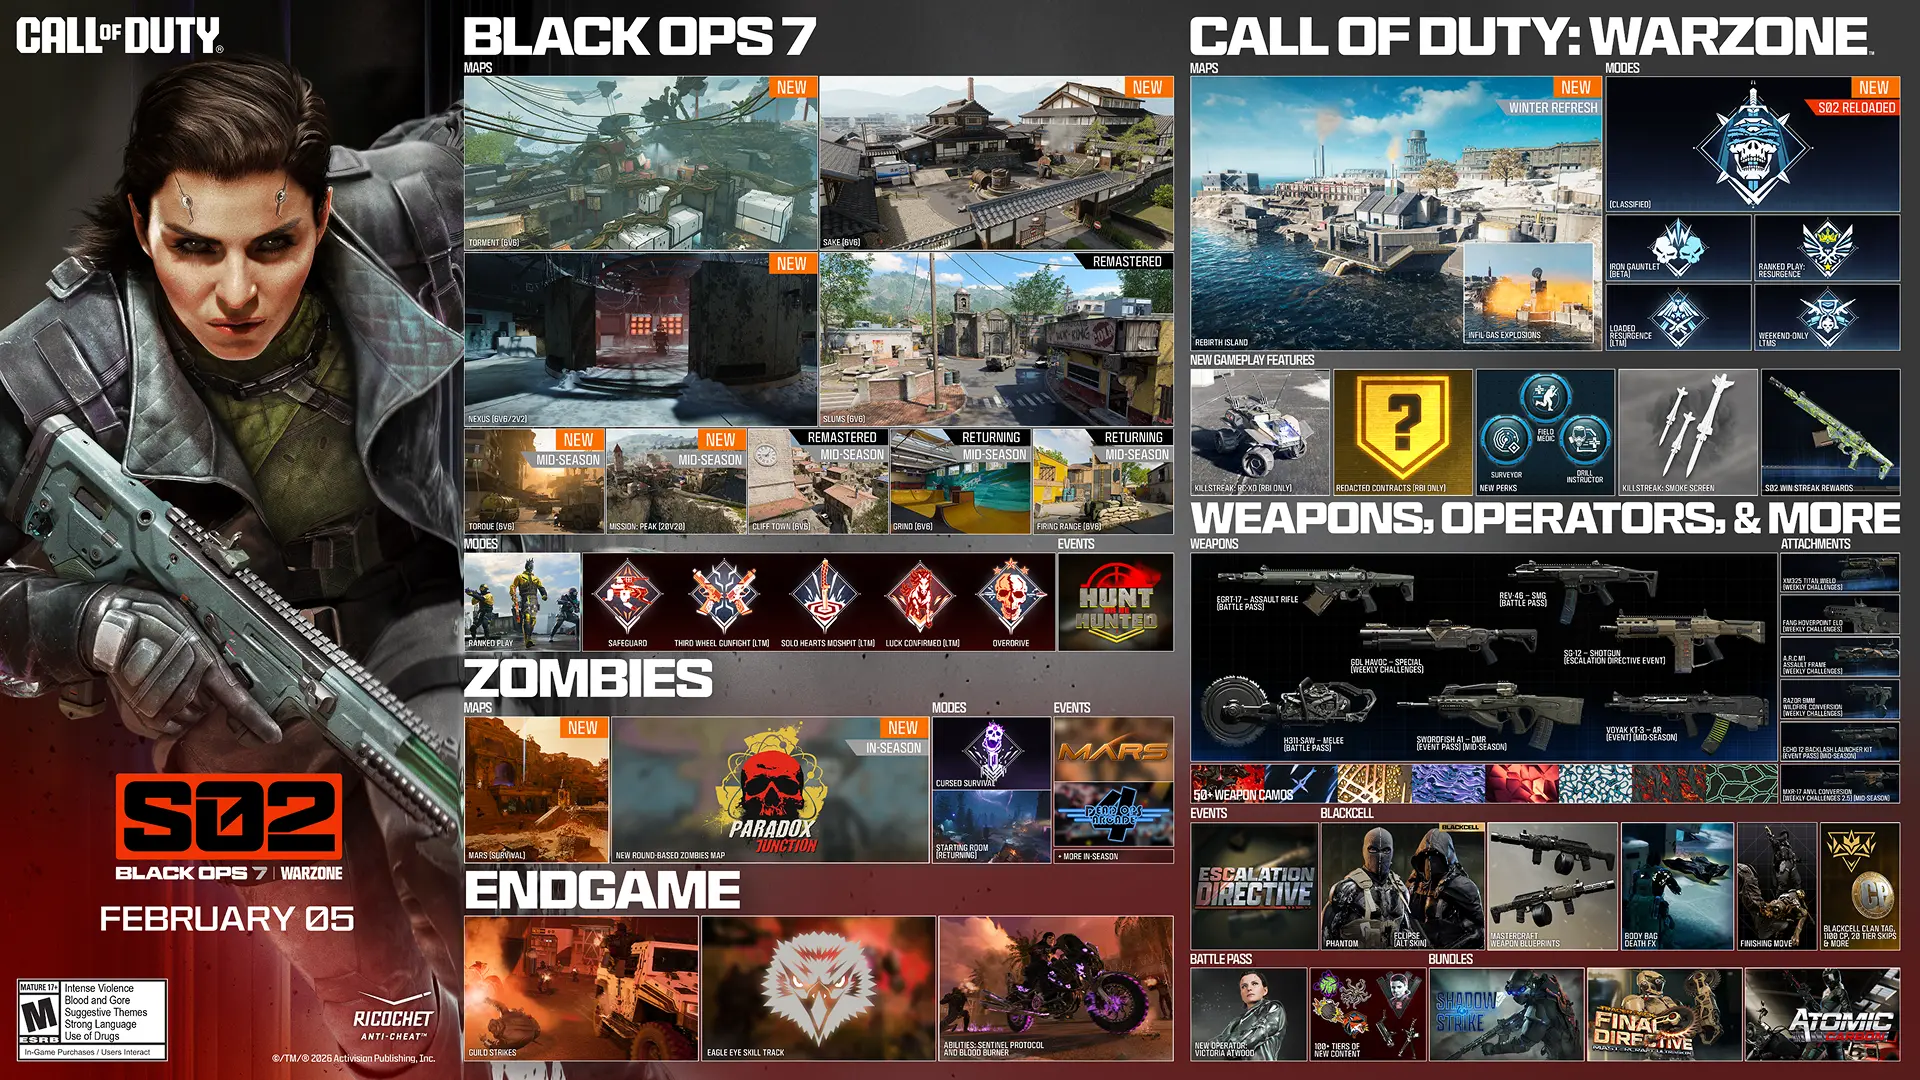
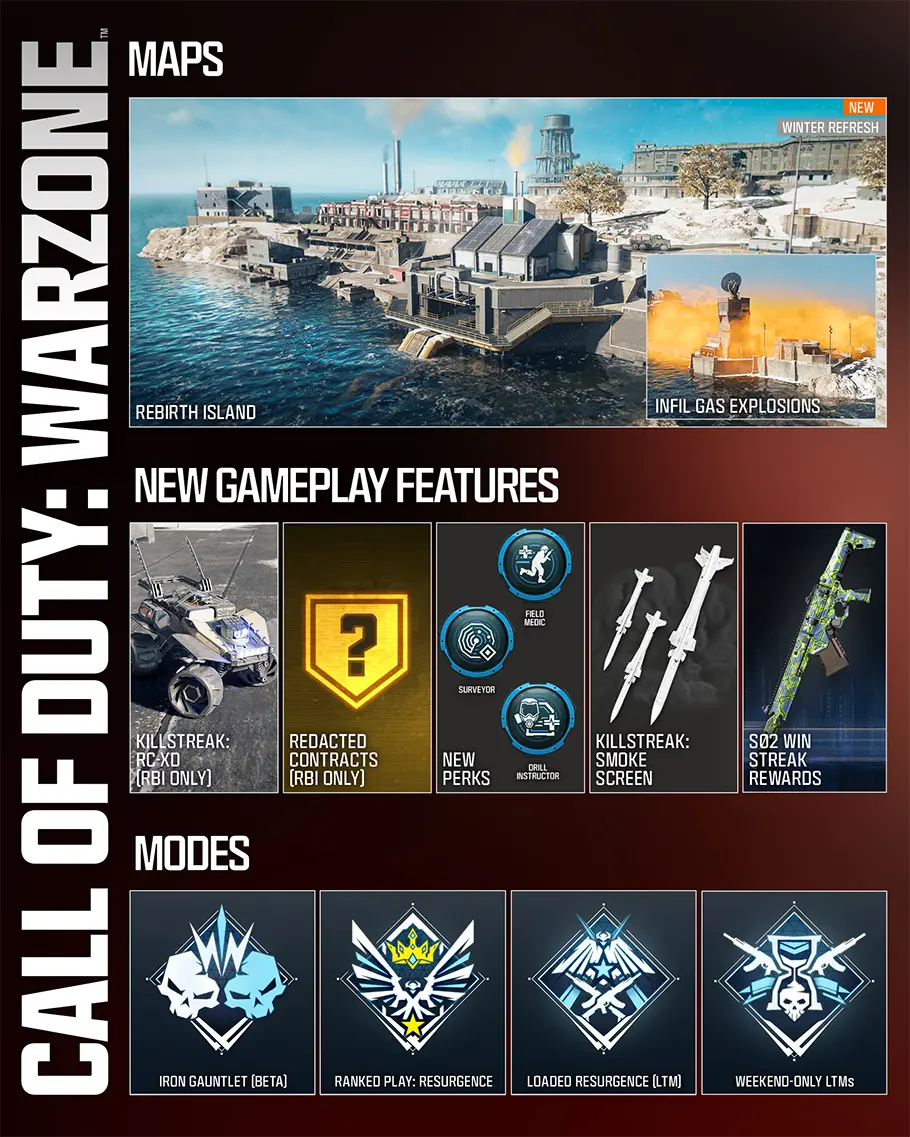
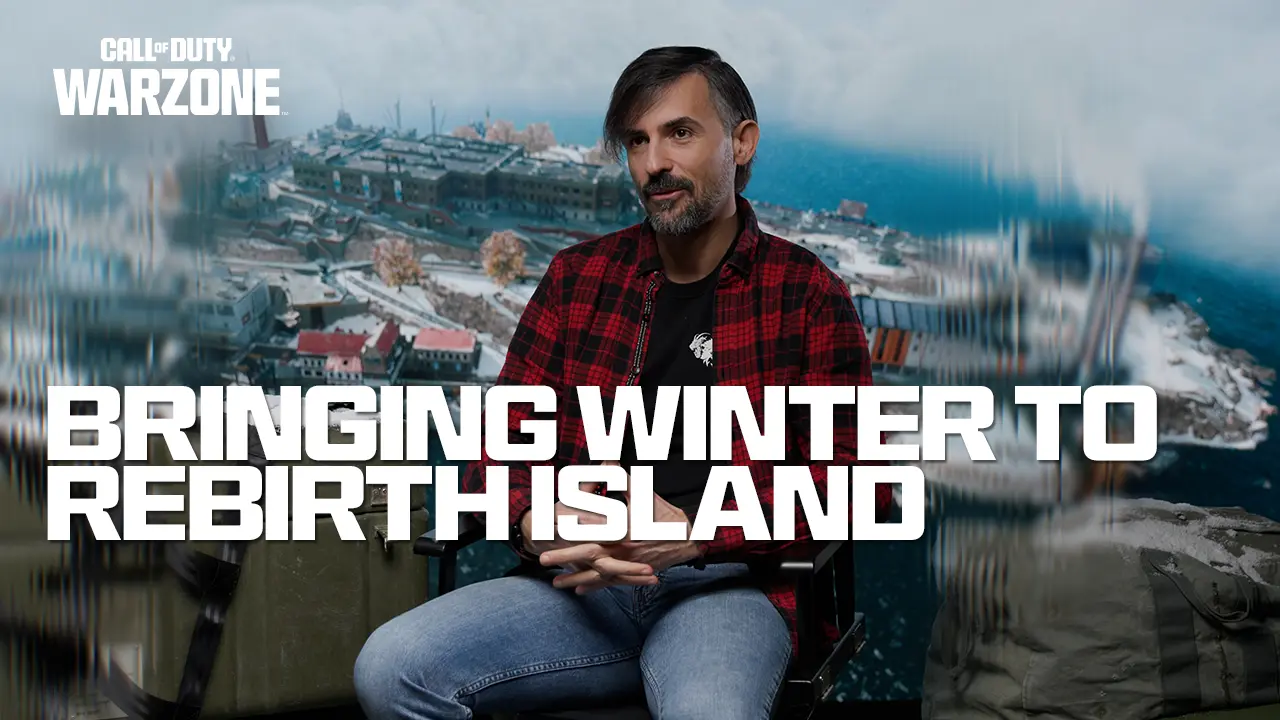
REBIRTH ISLAND
WINTER REFRESH
It may be cold out, but the drop zone’s still hot. Experience a snow-covered Rebirth Island, complete with a new POI, environmental updates, updated gameplay features, and a few more surprises along the way.