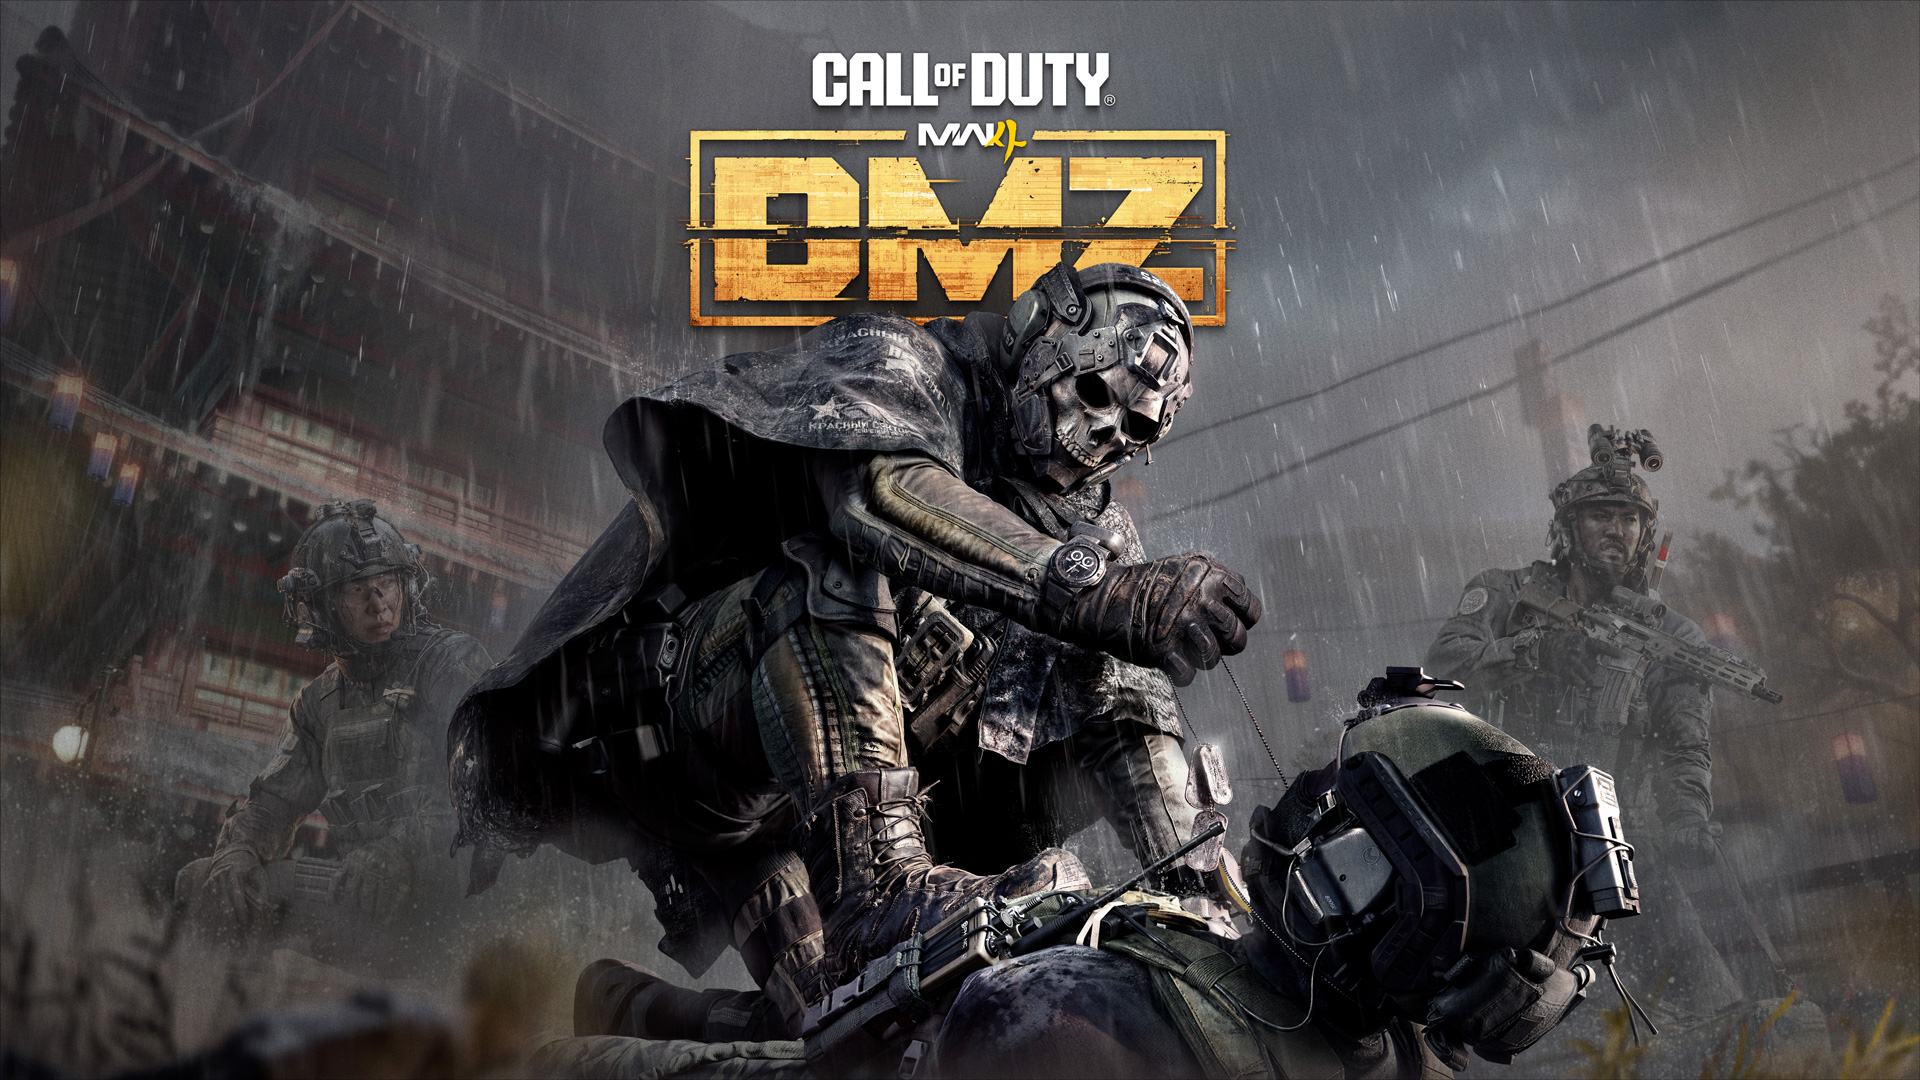

DMZ Early Access Launches October 20
Welcome to DMZ
Forward Operating Base (FOB): Overview
Operators Station: Active Duty
- Recruiting an Operator
- Understanding the Active Duty Basics
- MIA Operators
- Operator Dog Tag
- The Three Trait Trees
- Example Traits
Operators Station: DMZ Operator Prestige
DMZ Orders Station
Stash/Loadout Station
FOB Firing Range
Survival Kits Station
Bounty Leaderboard: PvP Hunters and Killers
- PvP Killer: Most Wanted System
- PvP Killer: Earning a Bounty
- PvP Killer: Losing a Bounty
- PvP Hunter: Claiming a Bounty
- PvP Hunter and Killer: Hunting Down Bounties
3D Printer
- Initial Unlocks: Your First Crafting Session
- Your First 3D Printer Recipes
- Upgraded Unlocks
- Crafting Gear
Boss Board: Lieutenants and Commanders
Vendor
Gunsmith
Dog Tag Case
DMZ Progression
Events
Deploy
Your DMZ Deployment is Almost Here!
Preorder Modern Warfare 4 Today
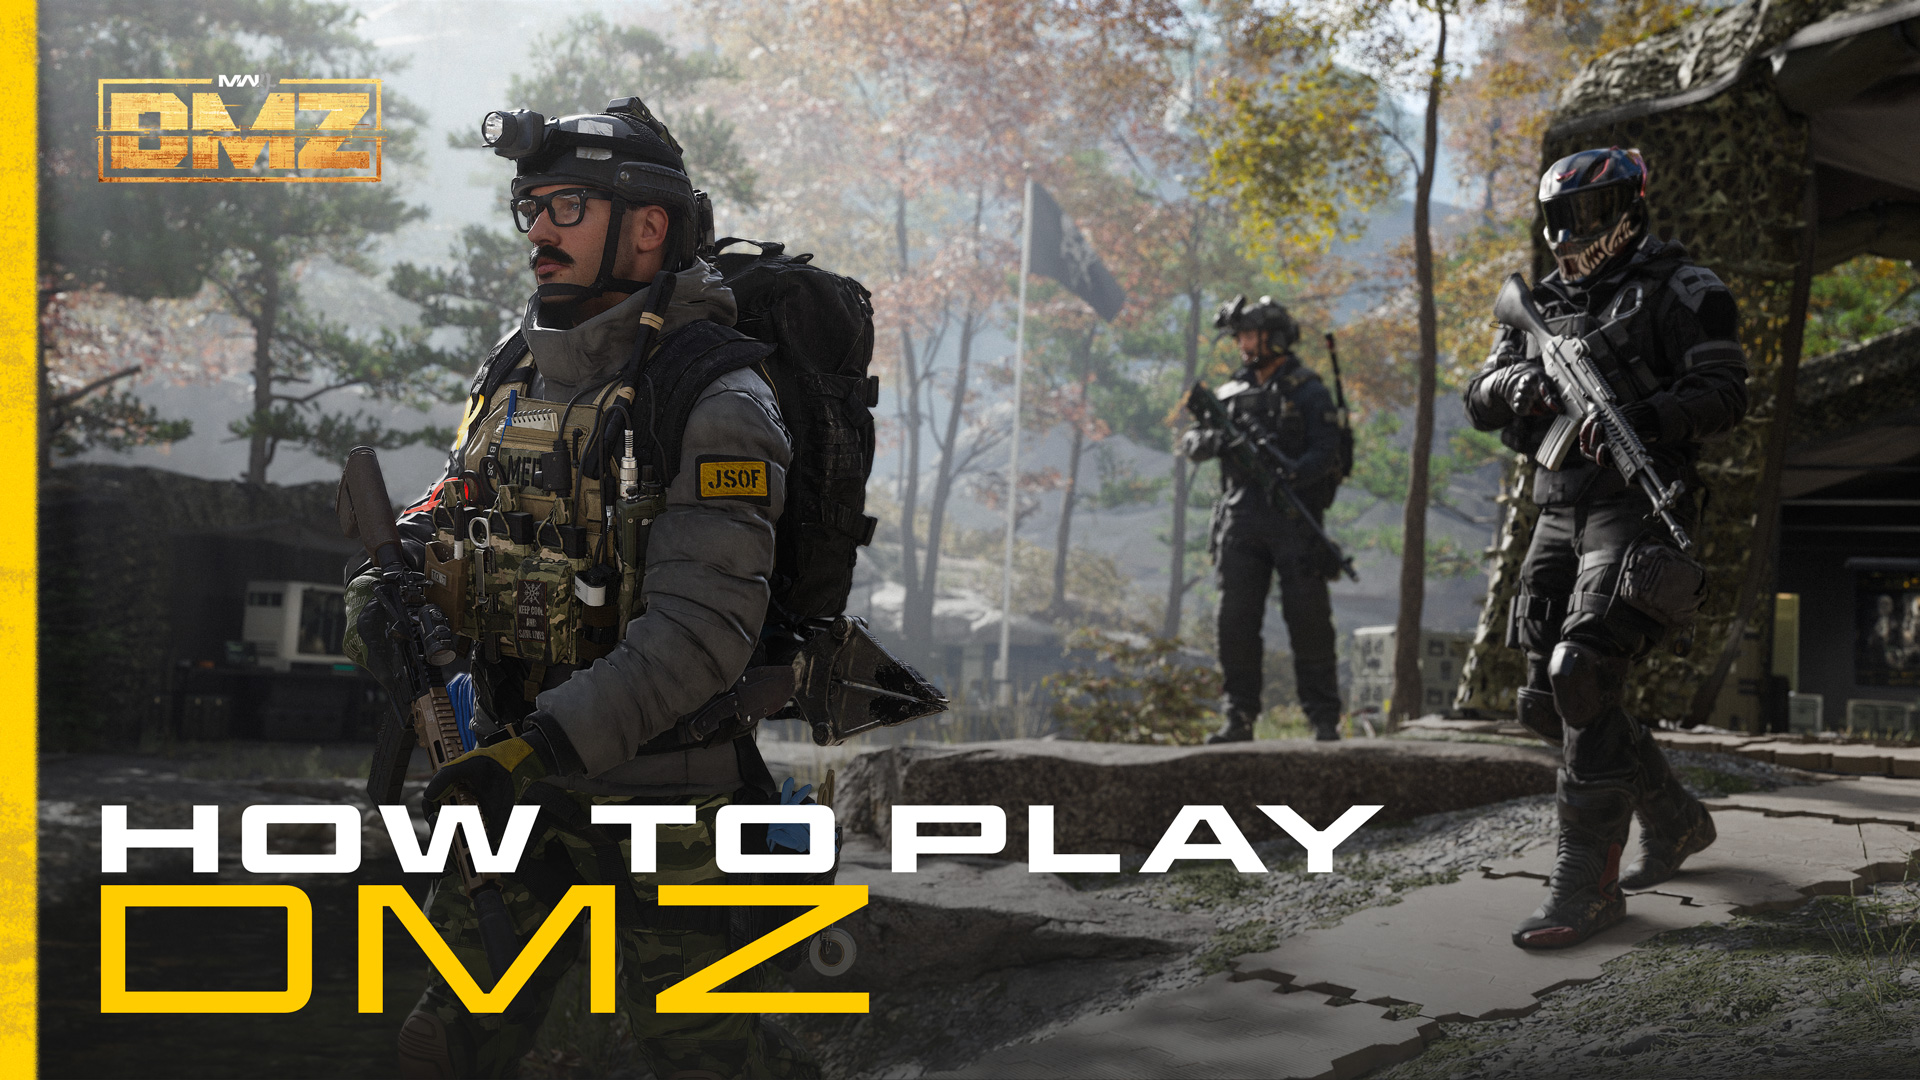
Explore the Forward Operating Base, your command center for DMZ deployments. Tour every Station, from Orders and Stash/Loadouts to the 3D Printer, Operators, Boss Board, and Deploy, while upgrading your FOB and preparing for the threats ahead. Then play DMZ Early Access, starting October 20!
Breaking News: Modern Warfare 4: DMZ Early Access Confirmed!
This is Warfare Without Limits. Experience the gripping story of Modern Warfare 4, as well as DMZ, Call of Duty’s action extraction shooter, before the October 23 launch. Campaign and DMZ Early Access are confirmed. Here’s the intel:
How Do I Access the Modern Warfare 4 Campaign and DMZ Early?
Starting on Friday, October 16, players who have digitally pre-ordered or pre-purchased Call of Duty®: Modern Warfare® 4 get Early Access to the game’s Campaign.
Then, starting on Tuesday October 20, players who have digitally pre-ordered or pre-purchased Call of Duty®: Modern Warfare® 4 can gain Early Access to all of DMZ.*
This benefit applies to those pre-ordering or pre-purchasing the Standard Digital Edition or Vault Edition of the game on XBOX Series X|S, XBOX on PC, PlayStation® 5, Battle.net, Steam, and Nintendo® Switch 2. See this blog for pre-order benefits.
* Campaign and DMZ Early Access start dates differ. Actual play time subject to possible outages and applicable time zone differences. Actual platform availability and start dates subject to change.
WELCOME TO DMZ
This is Call of Duty’s definitive extraction shooter experience, featuring persistent progression and open-world combat environment. You’re free to explore, engage AI forces and rival Operators, loot valuable items, craft gear, and complete objectives— all while keeping your eye on the final exfil, extracting with your rewards at the end of each deployment. How you approach each deployment, within a squad or acting alone, is entirely up to you.
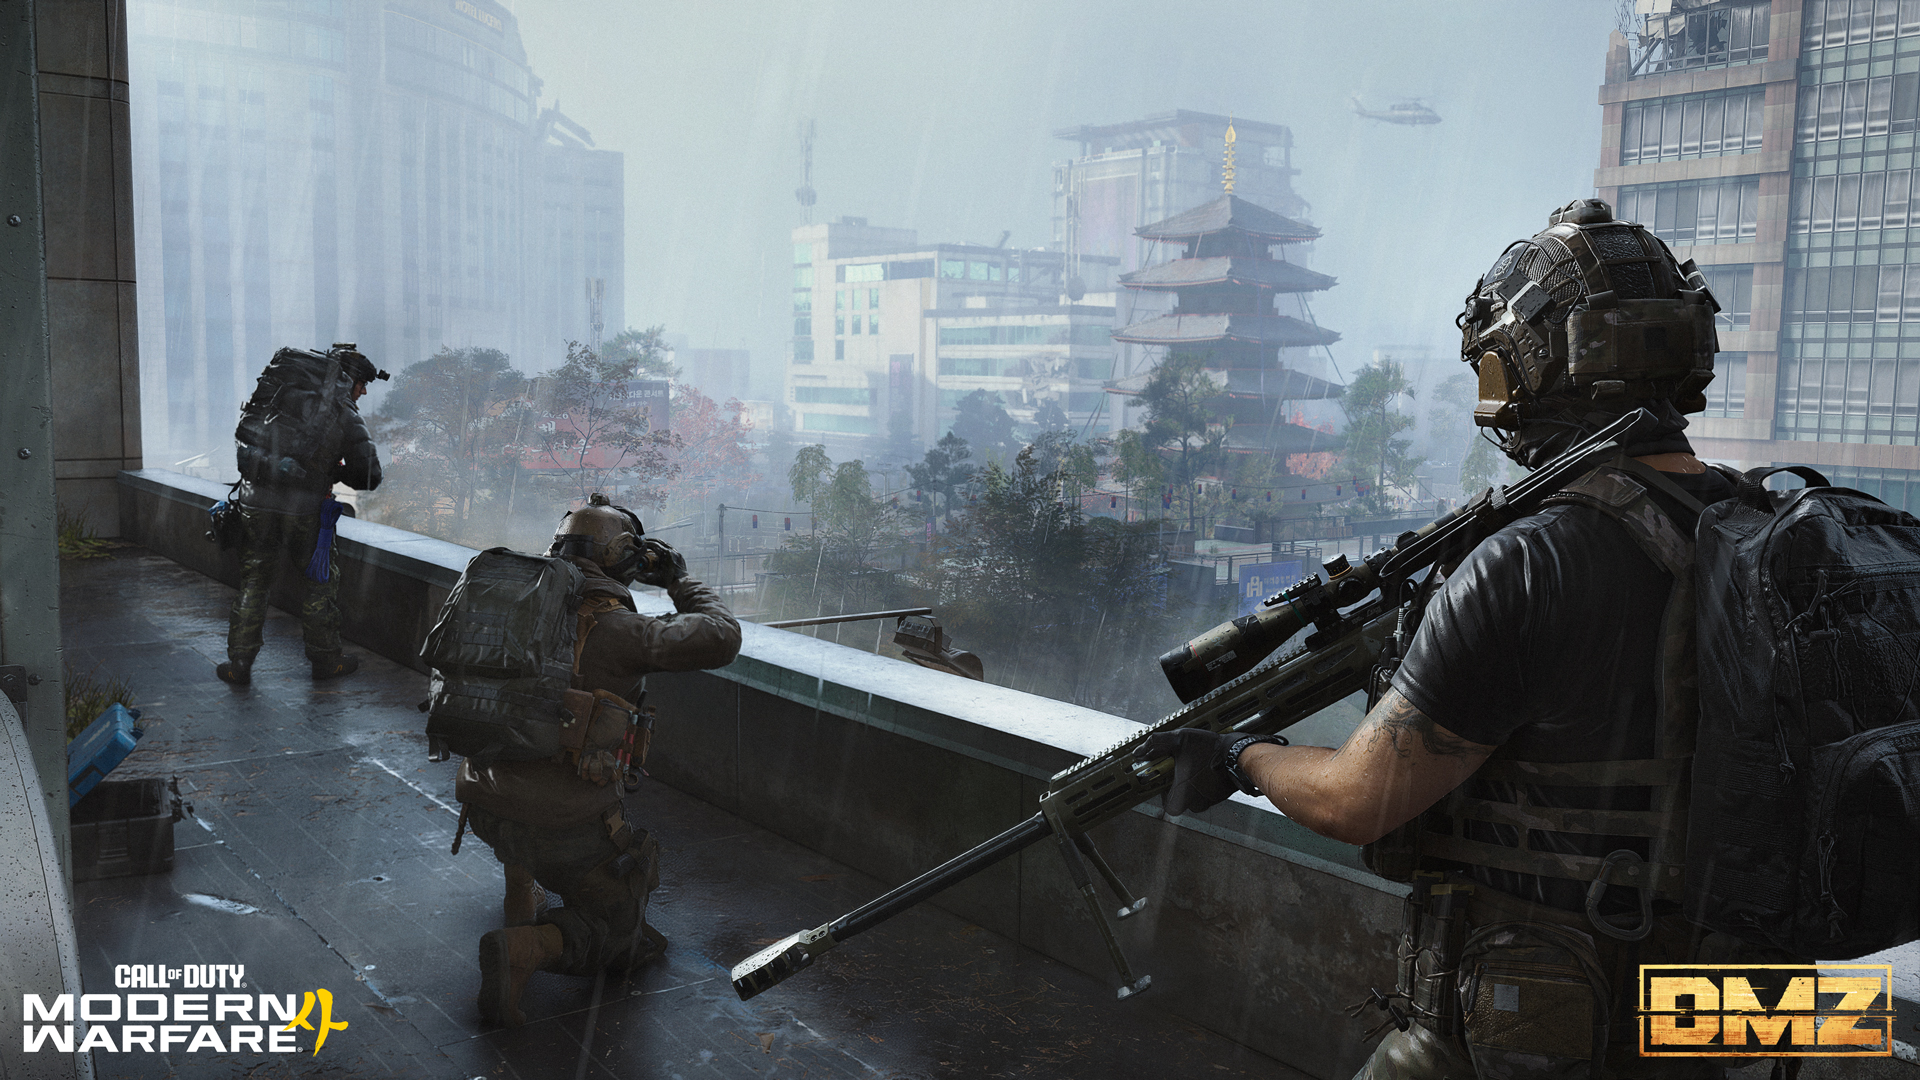
You’re here to learn everything there is to know about Modern Warfare 4’s DMZ. The intel has been separated into two blogs.
Part 1: Tour of Duty – Hajin Environments and Threats, Full Intel Guide
Think you’re ready to deploy into war-torn Hajin? Consult the Tour of Duty – Hajin blog for a full rundown of its points of interest, key buildings, vehicles, enemy threats, and trackable statistics. Click here to read this blog.
Part 2: Tour of Duty – Forward Operating Base (FOB) Full Intel Guide
A tour of the FOB stations, with information on 3D Printer crafting, Bounties, Weapon acquisition, Stashes and Loadouts, Active Duty Operators, DMZ Operator Prestiging, Permanent Prestige Traits, and DMZ Player Progression to Level 70. You’re reading this now!
Welcome to the Forward Operating Base.
Forward Operating Base (FOB): Overview
Available Immediately / Accessed from the DMZ Main Menu
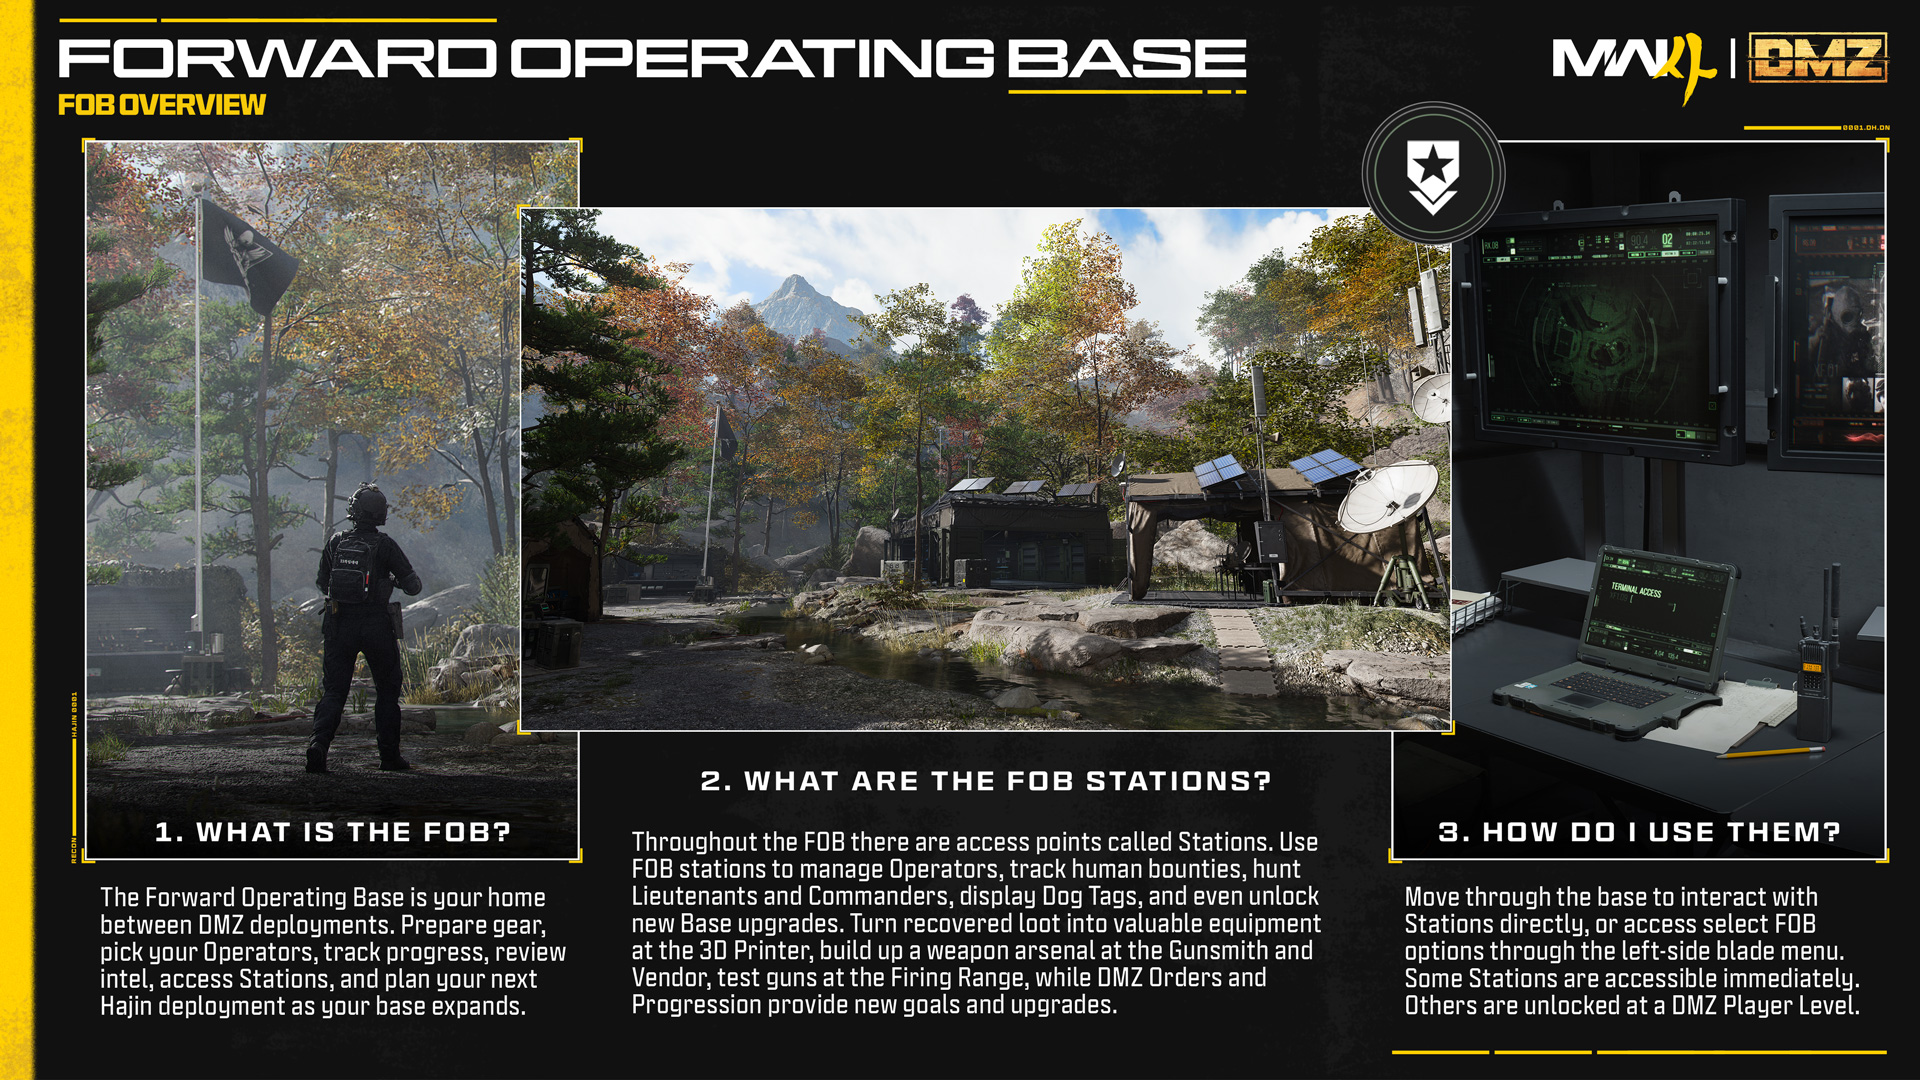
The Forward Operating Base (FOB) is your home between DMZ deployments. This navigable encampment allows you to offload your loot, gear up, receive your next Orders, before you head back into Hajin. The FOB is also home to DMZ’s permanent progression, including customizing your Active Duty Operators.
As you conduct further deployments into the Exclusion Zone, the FOB unlocks and upgrades into a fully established base.
Throughout the FOB, there are various stations, and they can be critical to your survival when deployed in the Exclusion Zone. Some stations are unlocked through playing DMZ and can then be upgraded using the 3D Printer station. These stations allow you to track down dangerous Lieutenants, build out your perfect weapon, swap out your Active Duty Operator, craft powerful gear, and more.
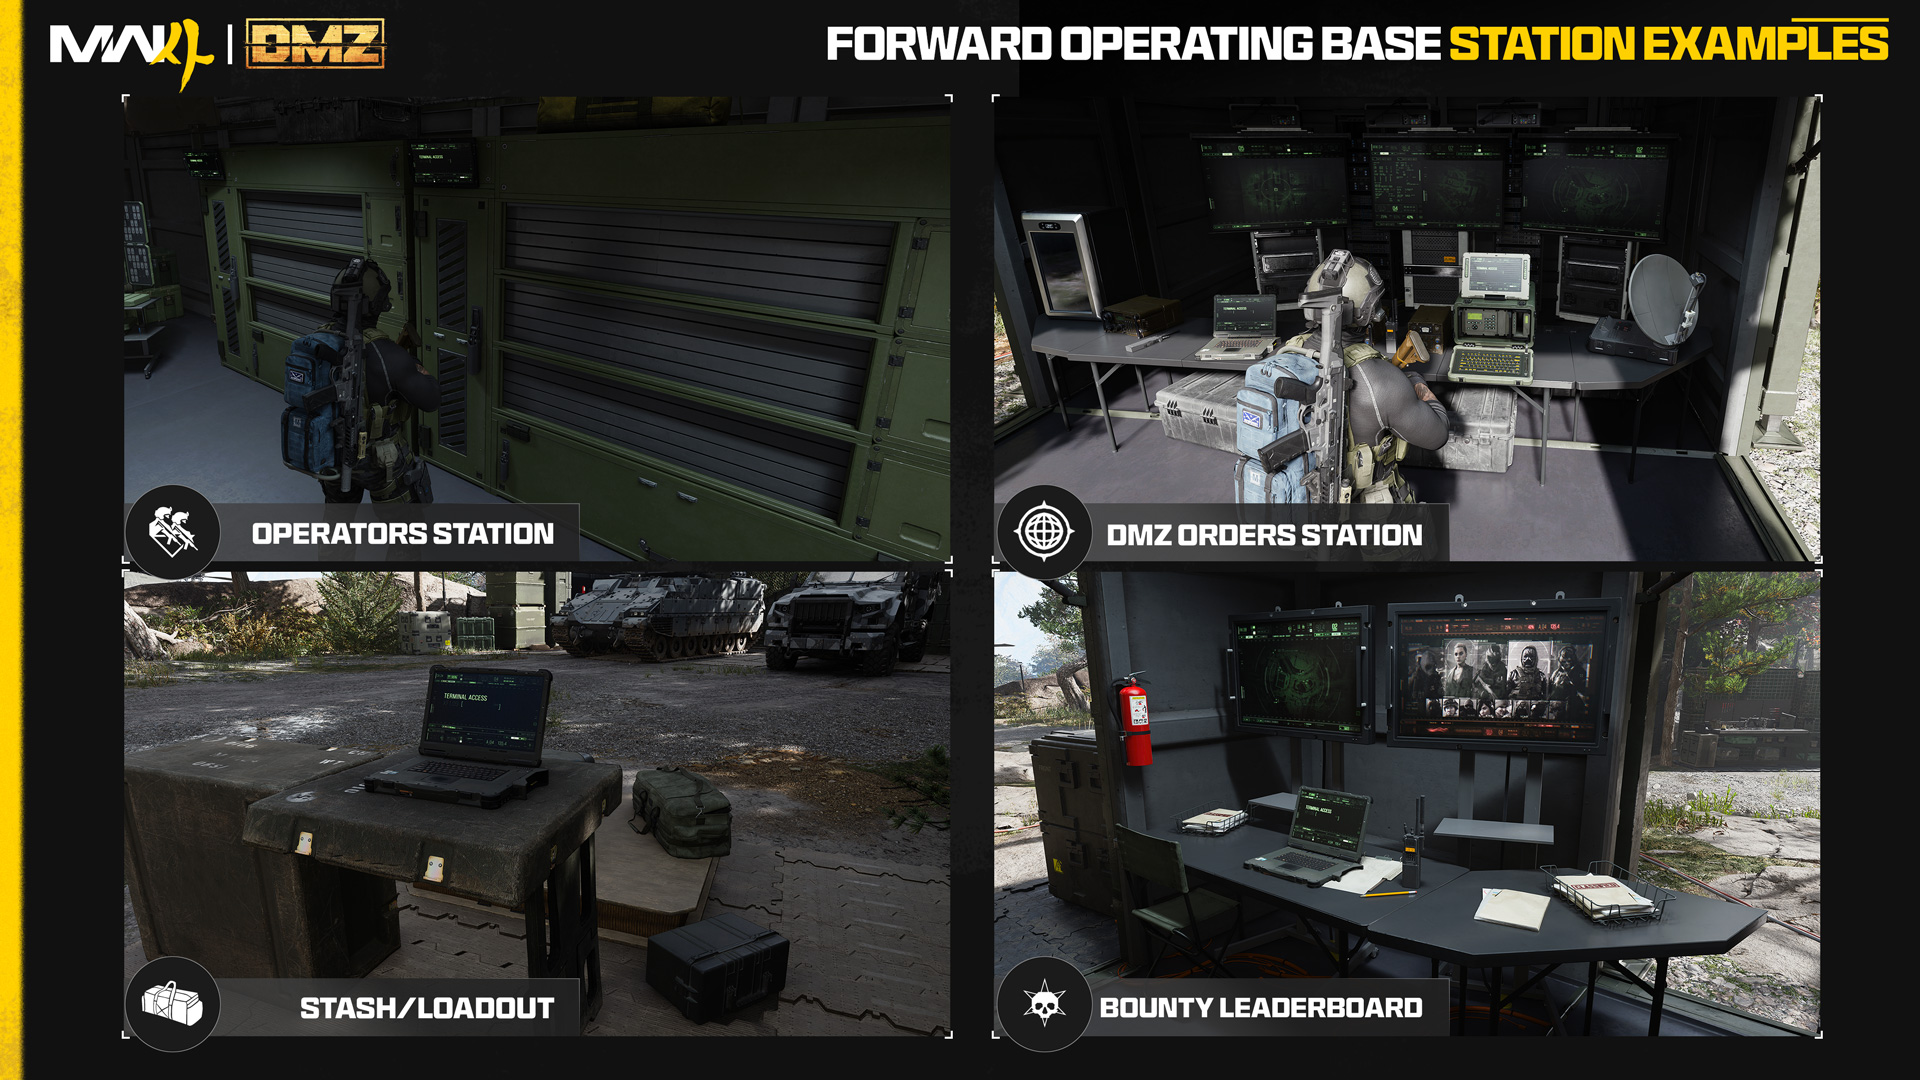
Here are the Stations that your FOB is comprised of, starting with those you should access first:
- Operators (Active Duty): Manage your available Operators, check their status, upgrade their Traits, and select one ready for deployment.
- DMZ Orders: DMZ Orders are your guiding Mission Directives in DMZ. These assist with getting you onboarded, telling the story of DMZ and challenging you to master the exclusion zone.
- Stash/Loadout: The Stash allows you to store a variety of loot types from Weapons to Gear to 3D Printer Ingredients and more! Every time you extract, make sure to offload items you'll need in future deployments. Equip weapons and gear in your Loadout, ready for the next infil.
- Firing Range: Test your weapons (especially your optics) and sharpen your aim in this wooded grove, with targets positioned from close to more than 100 meters away.
- Survival Kits: These are themed packs of loot items that can be opened and then used to gear up or used to craft.
- Bounty Leaderboard: Track the most successful PvP bounty hunters and killers across the Exclusion Zone.
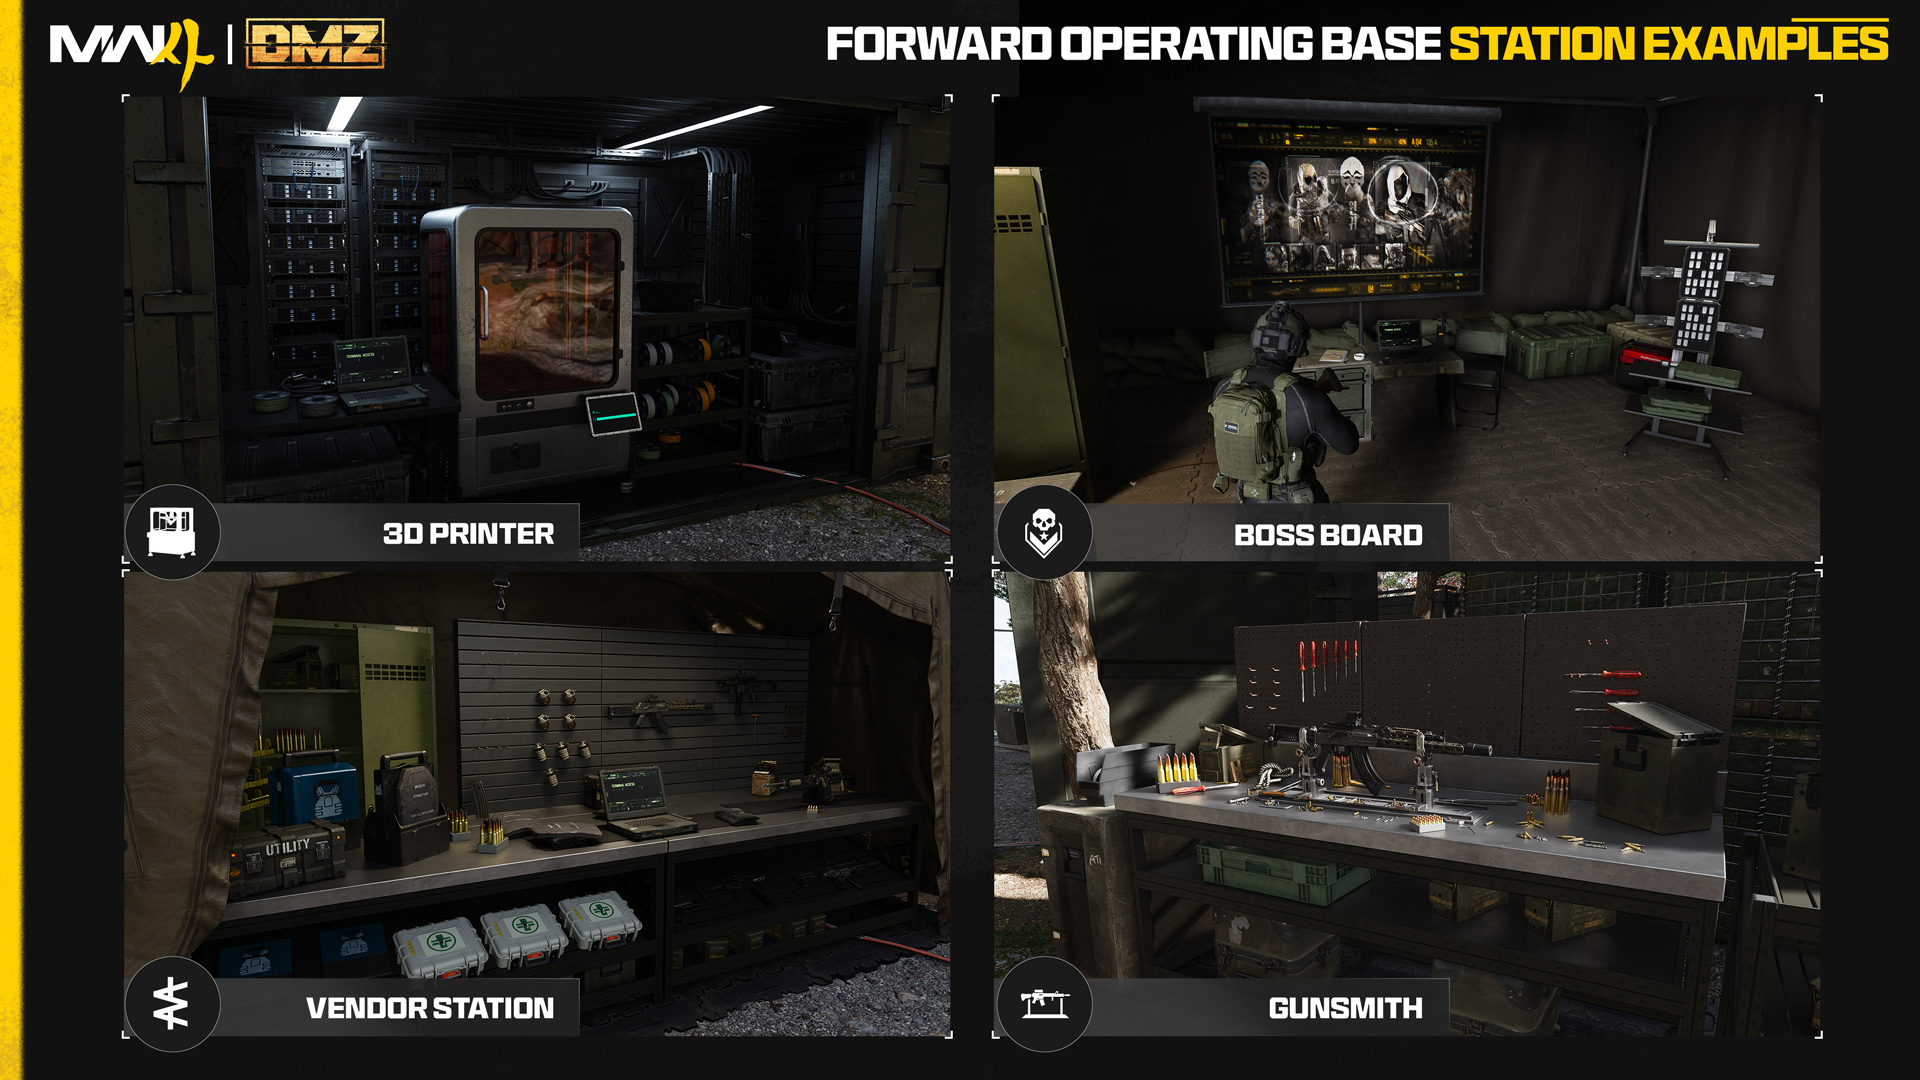
Continue your successful deployments across Hajin, and you’re soon able to expand your FOB, and unlock additional stations:
- 3D Printer (Unlocks at DMZ Player Level 2): This uses a mix of Printer Resources and 3D Printer Ingredients to craft a variety of gear. The 3D Printer is also used to upgrade various stations in the FOB provided you have the required loot items.
- Boss Board (Unlocks after you complete your second DMZ Order): Purchase intel on Lieutenants, then locate and prepare to hunt down Hajin’s most powerful adversaries. Additional information is also available for Commanders.
- Vendor (Unlocks at DMZ Player Level 5): The Vendor has a variety of weapons and other items for sale using DMZ Cash. The vendor’s wares rotate day to day so get this gear while it’s available!
- Gunsmith (Unlocks at DMZ Player Level 10): Use in-game DMZ Cash to purchase attachments for looted weapons and to build brand new weapons from scratch. The attachments you can build are related to the level of the weapon and the shared attachments unlocked for that weapon. To increase the weapons you can build in Gunsmith you need to find and extract Weapon Manuals.
- Dog Tag Case (Unlocks at DMZ Player Level 20): Display Dog Tags collected from defeated Operators and favorite the ones you don’t want to lose.
The last stations are immediately available, and detail your full DMZ Player Progression, as well as confirming your deployment into Hajin:
- DMZ Progression: DMZ has its own dedicated Progression Track which awards key Printer Recipes, Unlocks FOB stations, and awards various other content all the way up to level 70!
- Deploy: A threshold of razor wire leading to a heavy-lift military transport helicopter where you’ll begin each DMZ deployment.
Operators Station: Active Duty
Available Immediately / Accessed within the FOB, or the left side blade menu.
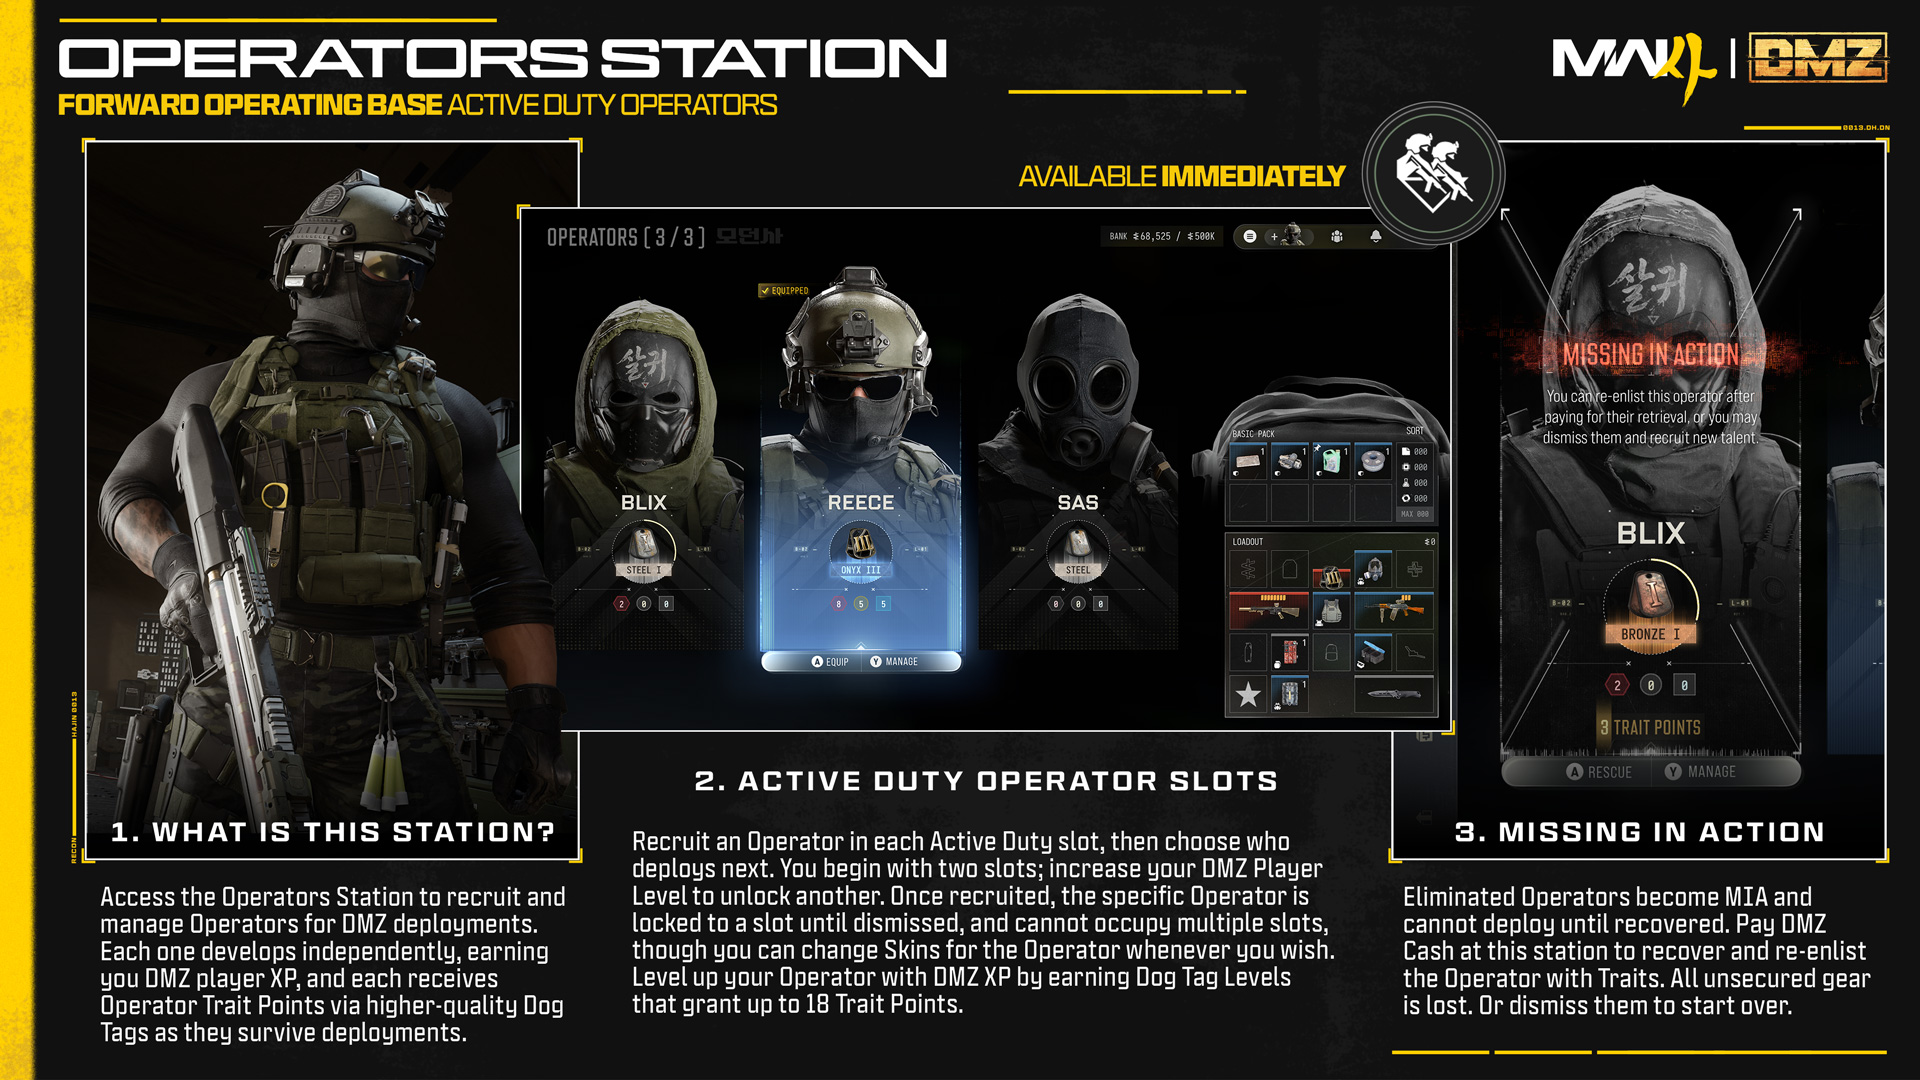
The Operators Station is where you can view, manage, and select your Active Duty Operators. In DMZ, Operators are generally a cosmetic preference, individual characters who grow stronger as you survive deployments and award them Traits. You earn DMZ Player Level XP with them.
Each Operator comes with a set of Dog Tags. As an Active Duty Operator progresses, the quality of these Dog Tags improves, and Trait Points are awarded. Trait Points can be spent across three Trait Trees, allowing you to specialize in different playstyles. Ultimately, your Active Duty Operator can earn permanent Prestige Traits that are tied to each individual Operator.
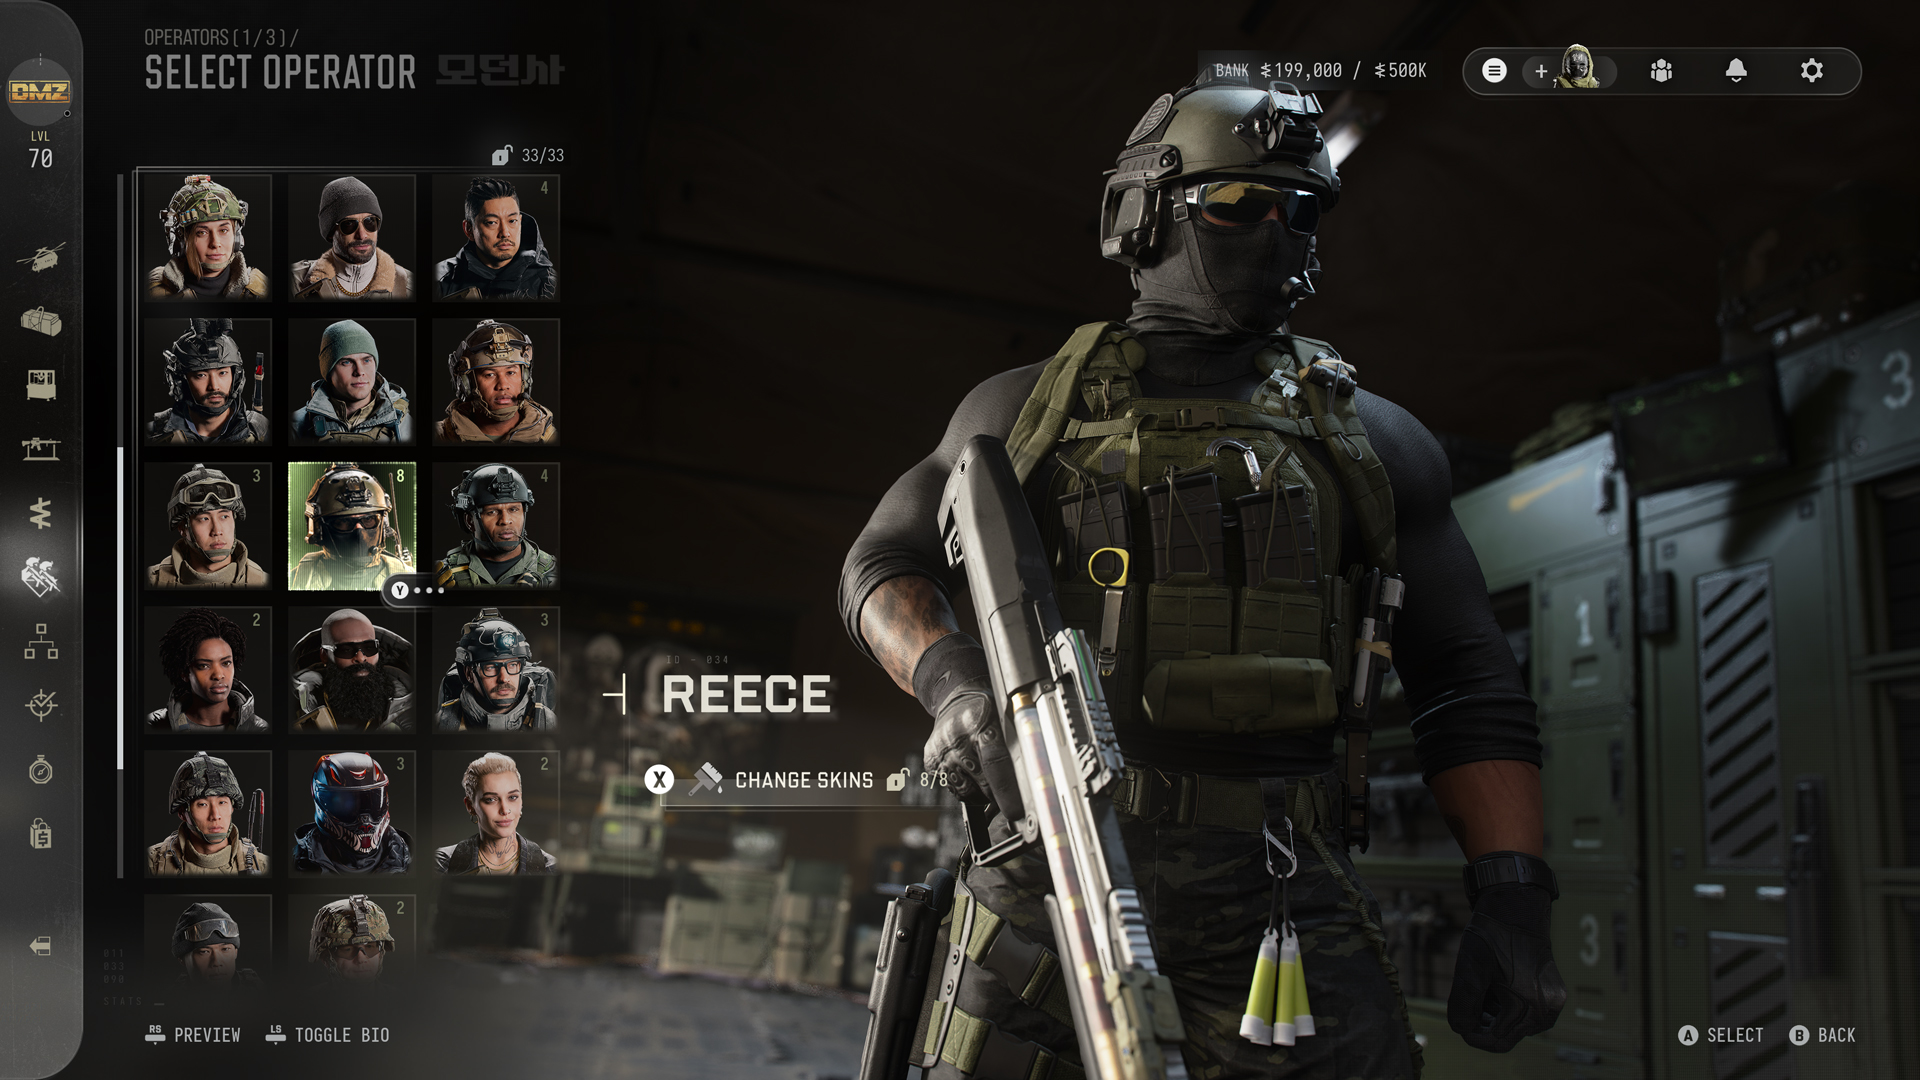
Recruiting an Operator
Firstly, recruit an Operator to an open slot. The Operator you pick for a slot is locked to that slot until they are dismissed by you in favor of a replacement.
- Example: If you select Reece as an Operator, you cannot change to another Operator. You also cannot choose Reece again in another Active Duty slot.
- Operator Skins: You can change Reece’s Operator Skin in this menu.
- You begin with two available Active Duty Operator slots and can unlock another slot by progressing your DMZ level.
Players with the Modern Warfare 4 Vault Edition have access to an additional Active Duty slot and start with three instead of two.
Understanding the Active Duty Basics
Keep these Active Duty basics in mind:
- Manage multiple Operators: Maintain multiple Active Duty Operators, giving you different builds to choose from.
- Earn Trait Points: Successfully earn DMZ XP with an Operator to upgrade their Dog Tags, receiving a Trait Point each time you level up your Dog Tags. Traits are used to improve that specific Operator in various ways.
- Choose your Traits: Spend Trait Points across three different playstyle Trait Trees; Warfighter, Scout, and Survivalist.
- Create specialized Operators: A single Operator can earn up to 18 Trait Points.
- Use your Active Duty slots and Trait selections to build Operators around different playstyles.
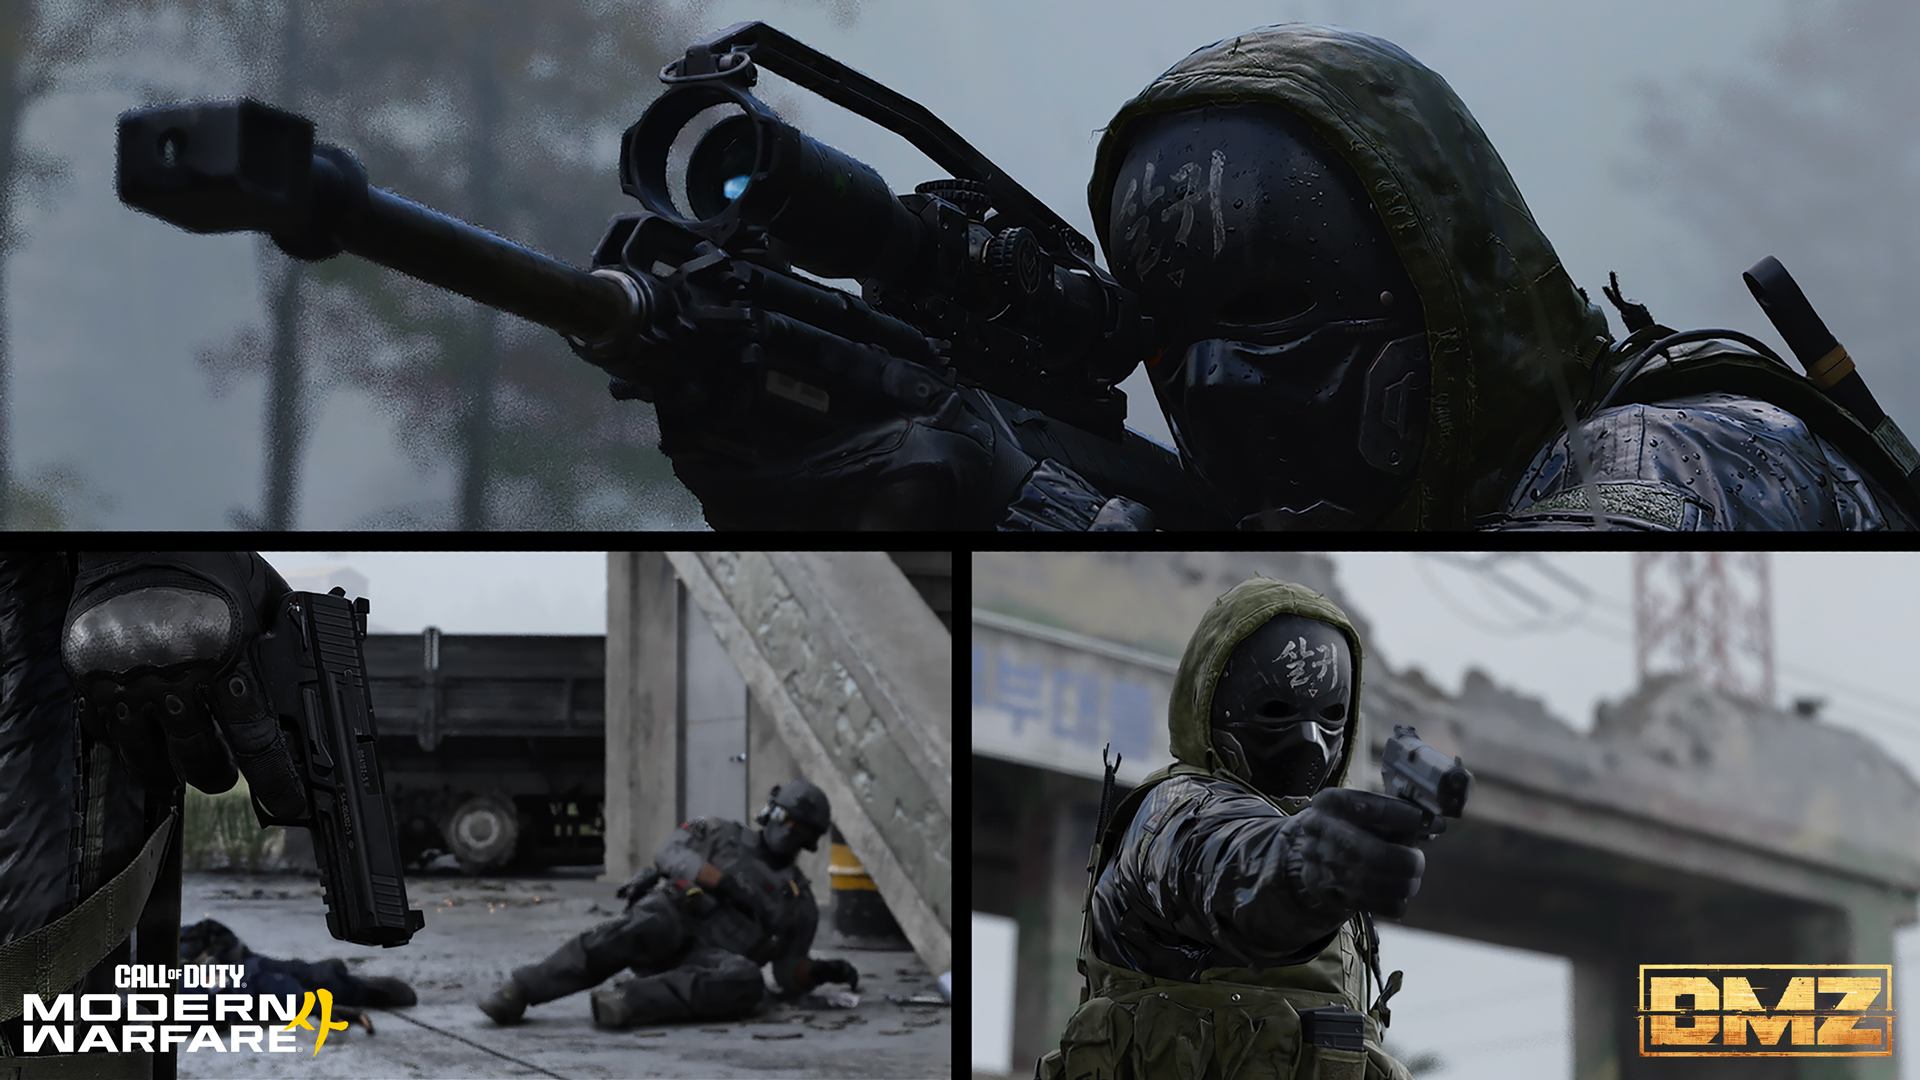
MIA Operators
If an Operator is eliminated during a deployment, they become MIA (Missing in Action) and cannot deploy again until they are recovered.
- Recover an MIA Operator: Spend DMZ Cash to bring an MIA Operator back while preserving all of their Traits. Access the Operators station and pay DMZ Cash from your in-game Bank to rescue them.
- Progression and Cost: The cost to recover an Operator is determined by their Trait Points. The more Traits, the more expensive their return.
- Reequip: Recovered Operators return without their gear, so equip a new Loadout before deploying again.
- Dismiss and start over: Instead of recovery, you can dismiss an MIA Operator and start fresh with a new Operator.
Operator Dog Tag
Each Operator has a Dog Tag available to inspect in your Loadout, that represents the progression of the Operator wearing it. It can be removed if the Operator dies during a deployment and is recovered if an MIA Operator is brought back to Active Duty. The higher the quality (or Level) of the Dog Tag, the higher the progression of the Operator. This Dog Tag also shows the Bounty status of the Operator, and the enemy Operator kill count.
As you progress and earn XP within DMZ, your Dog Tag’s Level progresses, allowing you to unlock Traits:
- Progression (18 Levels):
- Steel (I, II, III)
- Bronze (I, II, III)
- Silver (I, II, III)
- Gold (I, II, III)
- Damascus (I, II, III)
- Onyx (I, II, III)
- The Level of your Dog Tag is worth noting, as rival Operators can defeat you in combat, and loot your belongings, including your Dog Tag, to display in their Dog Tag Case (see later in this Blog).
- Earn XP to increase your Dog Tag Level, receiving a Trait Point every time you reach a new Dog Tag Level. This is the key to accessing Traits.
- An Operator’s level (indicated by their Dog Tag quality) and a player’s overall DMZ level are independent. An Operator is considered fully leveled up when the Onyx III is reached, and 18 Trait Points have been earned. At this point, you can Prestige the Operator (see below).
The Three Trait Trees
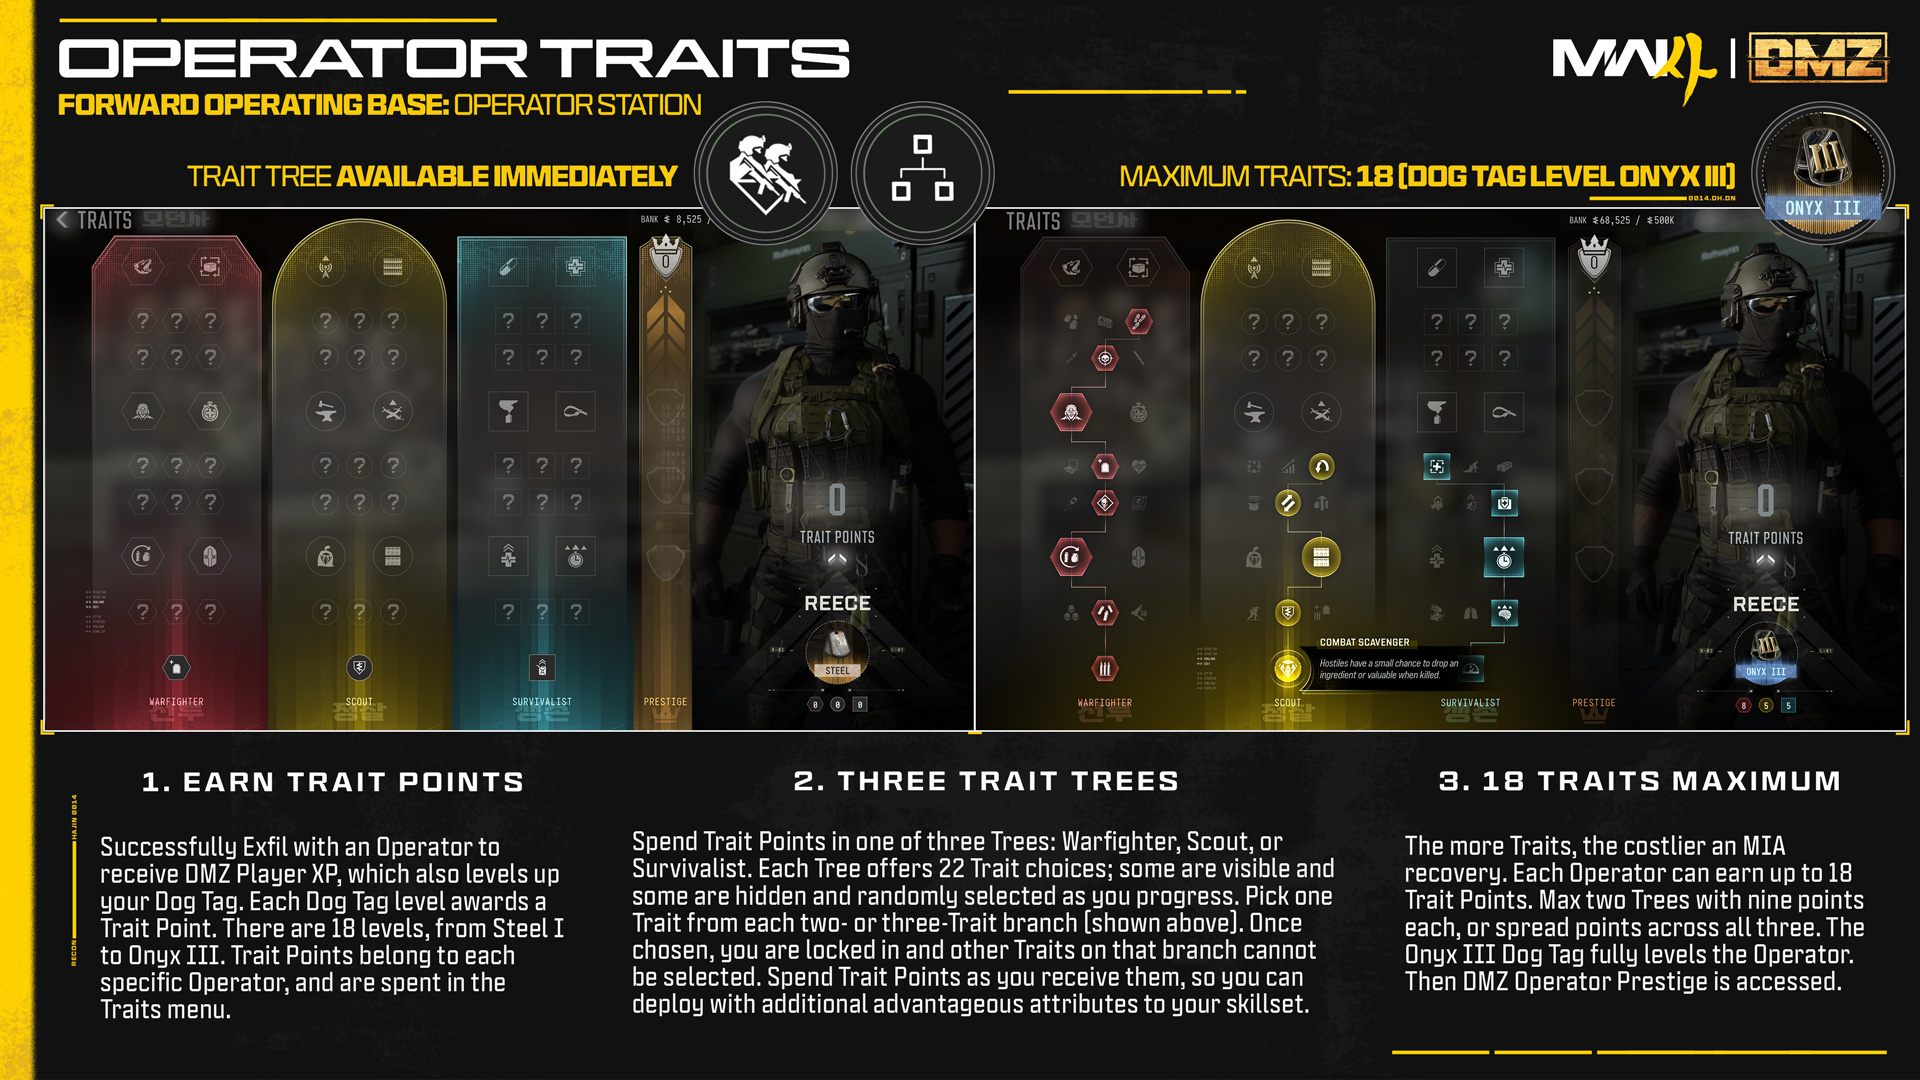
These are accessed from the quick navigation left-blade menu for your currently equipped Operator and is also accessible via the Operator menu. Any Trait Tree Points you earn after successfully earning a Dog Tag level up after an exfil as that Operator are accessible here. You can have multiple Operators active (as many as you have slots) with each individually earning Trait Points. Spend Trait Points to acquire Traits from one of three Trees:
- Warfighter
- Scout
- Survivalist
There are 66 Traits available in DMZ, spread equally across the three Trees. Not all of them can be accessed by your Operator, as you can only have a maximum of 18 Trait Points before you fully level up your Operator and reach Onyx III Dog Tag status. Here’s how this works:
- Every successful exfil awards you DMZ XP, and the level of your Dog Tag is affected by this. Acquire enough and you level up your Dog Tag, earning one Trait Point each time. If you’ve done particularly well during a deployment, you may level up your Dog Tag more than once.
- When you’ve acquired your first Trait Point, study the three Trait Trees closely. Each Tree has a total of 22 different Traits you can access.
- Each Trait Tree consists of the following:
- Seven Major Traits (always visible, arranged in groups of two aside from the initial Trait pick).
- 15 Minor Traits (randomized, only visible if you’ve unlocked the previous Main Trait below the Minor group and arranged in groups of three).
- Plan ahead to pick your preferred Main Trait, and then the available Minor Traits that complement your overall goals or playstyle along the way. Choose to unlock more Traits from an existing Trait Tree, or Traits from a different tree.
- Spend your first Trait point on the initial Major Trait for that tree. The remaining Traits are in branches of two (Major) and three (Minor).
- Unlock one of the Traits from a previous branch to reach the next branch. Then choose a single Trait from that branch.
- Continue until you’ve either completed unlocking a Tree (unlocking a maximum of nine Traits, one per branch) or unlocked a variety of branches from multiple Trees, as shown in the adjacent Trait menu screenshot.
- Once you pick a Trait, it is locked in and can’t be substituted.
- Therefore, with 18 Trait Points before you maximize your Operator level (and no more Trait Points are awarded), you can elect to max out two of the three Trait Trees or open all three to varying degrees of completion.
- Remember: The more Traits you have, the more expensive your Operator is to rescue if they are downed during a deployment.
Example Traits
There’s a great deal of variety of Traits to uncover as you progress your Operator, especially as these can (eventually) become permanently unlocked if you decide to Prestige in DMZ. Here are examples of the seven Main (visible) Traits for each of the three Trait Trees:
Main Warfighter Traits
- Adrenaline Burst: Killing an enemy resets tactical sprint.
- Equipment Professional: Slowly recharges equipped Lethals and Tacticals after use.
- Combat Resistance: Reduces damage from explosives and the effects of enemy Tacticals.
- Viper Sense: Conceals you from thermal optics and AI targeting systems.
- Quick Fix: Reduces health regeneration delay when an enemy operator or hostile is killed.
- Possum: Allows a Self Revive into Last Stand from death, restoring health to maximum, once per match.
- Adaptive Restock: Enemy hostile drop one additional item.
Main Scout Traits
- Investor: Slightly increases cash amount extracted.
- Hostile Looter: Enemy hostiles sometimes drop an Uncommon printer ingredient, with a very small chance for a Rare printer ingredient.
- Container Looter: Chance to get extra piece of loot in containers.
- Thermal Padding: Hides from UAVs and downgrades Advanced UAVs to UAV detection.
- UAV Upgrade: Increases the range and duration of UAVs. Also upgrades them to Advanced UAVs.
- Overwatch: UAV towers you activate never expire.
- Field Crafting: Allows crafting items directly out of Common printer resources while deployed.
Main Survivalist Traits
- Air Superiority: Extends the duration of UAV towers and SAM sites.
- Faster Revive: Increases Revive speeds.
- Consumable Duration: Increases the duration of consumables.
- Impact Smokes: Releases smoke when downed.
- Free Revive: Automatically repairs your first Wound.
- Numb the Pain: Applies Painkillers and Smelling Salts effects on revives.
- Die Hard: Approaching an exfil while in Last Stand calls the exfil automatically. Also grants infinite bleed out time while in Last Stand.
Operators Station: DMZ Operator Prestige
Available after an Active Duty Operator earns 18 Trait Points / Accessed at the Operators station or Traits side menu
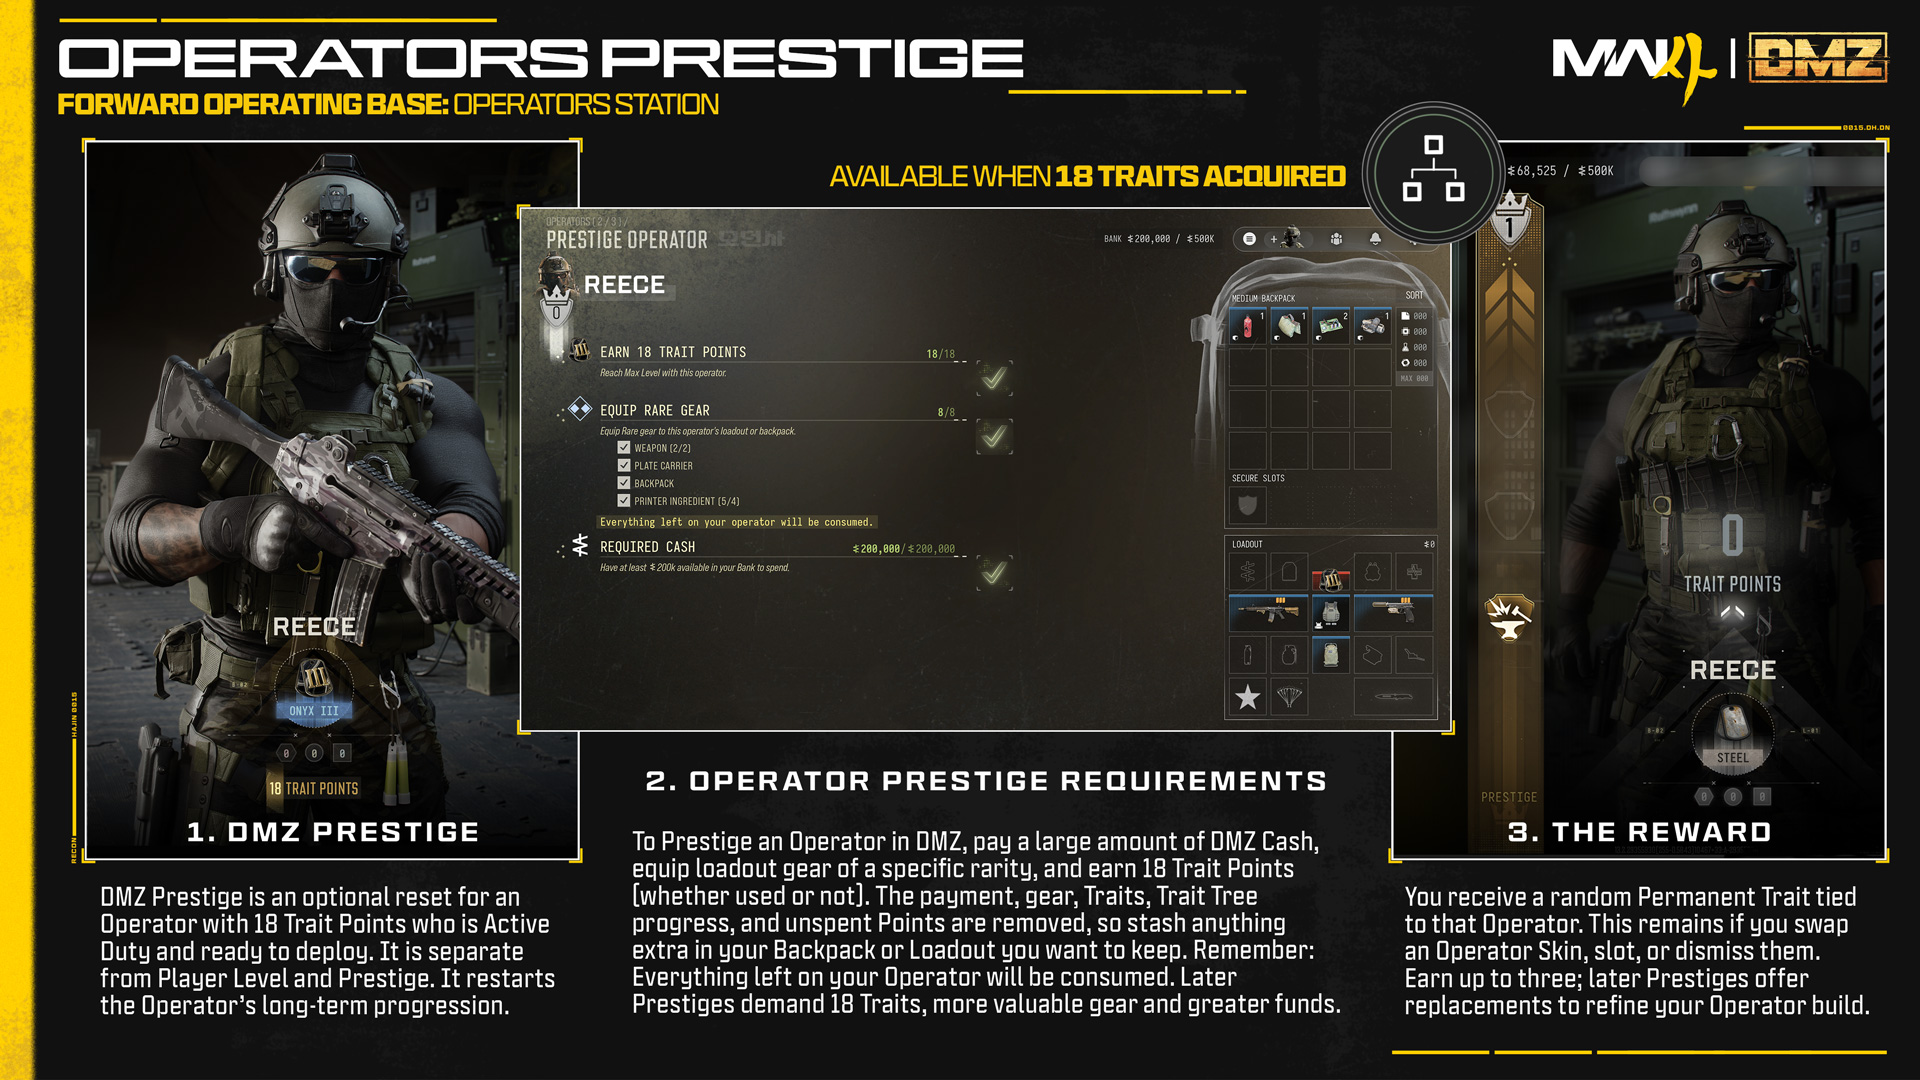
Once an Active Duty Operator earns 18 Trait Points, you can Prestige the Operator as long as they aren’t MIA and require rescuing. DMZ Operator Prestige is separate from the standard Level 1–55 Player Progression, the 1-70 DMZ Player Progression and other MW4 Prestige systems. It is tied to a specific Operator.
DMZ Operator Prestige is optional, the requirements to Prestige can be a challenge, but the reward is worth it: With each Operator Prestige, a special random Prestige Trait is equipped permanently to that Operator. Operators can earn up to three Prestige Traits.
Here are the requirements for your Operator to Prestige for the first time:
- Requirement 1: Maximum Operator Level: You must have earned a total of 18 Trait Points with the Operator. The Trait Points don’t need to be spent, though it is recommended you do so.
- Requirement 2: Equip Gear of Specific Rarity: Acquire and equip high Rarity Loadout equipment to the Operator’s Loadout and Backpack. For the first Prestige, you need:
- Two Weapons (Rare Rarity or higher, each with three Attachment slots)
- Plate Carrier (Rare Rarity or higher)
- Backpack (Rare Rarity or higher)
- Printer Ingredients (4 total, Rare Rarity or higher)
- Remember to remove any items you don’t want to sacrifice from your Backpack or Loadout too; these are lost when you Prestige.
- Requirement 3: Required Cash: You must have sufficient DMZ Cash funds, deducted from your in-game DMZ Cash Bank.
Meet all three requirements, and once you place your Gear in your Loadout and select Prestige in DMZ, all the required Gear is removed, the payment of in-game Funds occurs, and your Operator’s Traits are removed and reset.
Then, a random, Permanent Prestige Trait is granted to your Operator.
Permanent Prestige Operator Traits
Here’s what you need to know about Permanent Prestige Traits:
- The Operator (and only that Active Duty Operator) gains the Prestige Trait.
- This is randomly selected from the available Trait pool.
- Permanent Prestige Traits are just that: They remain tied to the Operator, even if you dismiss them, assign them to a different Active Duty slot, or change their Operator skin.
At this point, you can continue developing your Operator, working towards a specialized soldier, supremely skilled in various acts of modern warfare.
DMZ Prestige: Levels 2 and 3
After Prestiging, you earn Trait Tree Points over again as before. If your Active Duty Operator reaches maximum level again (18 Trait Tree Points) you can Prestige for a second time.
The requirements increase depending on the Operator Prestige level:
- DMZ First Prestige:
- Two Weapons with three Attachment Slots.
- One Plate Carrier (Rare Rarity)
- One Backpack (Rare Rarity)
- Four 3D Printer Ingredients (Rare Rarity)
- 200,000 DMZ Cash
- DMZ Second Prestige:
- Two Weapons with four Attachment Slots.
- One Plate Carrier (Epic Rarity)
- One Backpack (Epic Rarity)
- Four 3D Printer Ingredients (Epic Rarity)
- 300,000 DMZ Cash
- DMZ Third Prestige (and every Prestige thereafter):
- Two Weapons with four Attachment Slots.
- One Plate Carrier (Legendary Rarity)
- One Backpack (Legendary Rarity)
- Four 3D Printer Ingredients (Legendary Rarity)
- 500,000 DMZ Cash
- Each time you Prestige, you receive an additional, random Permanent Prestige Trait.
Your Operator can have a maximum of three Permanent Prestige Traits.
Beyond Prestige Level 3
Once you’ve received your third Permanent Prestige Trait, the third set of prestige requirements remain in place for every subsequent Prestige.
You can continue to Prestige almost indefinitely. However, instead of receiving a new Prestige Trait, the following occurs at Level 4 (or higher):
- You receive another Permanent Trait, different from the three you already have.
- Discard one of your three existing Permanent Traits, and replace it with the one you received.
- Or, keep all three of your current Permanent Traits and discard the newly offered one.
Continue to Prestige your Operator, begin to hone your Trait talents once again, and build a roster of elite, tier one specialists, each honed to your favorite playstyles, and ready to take on Hajin’s toughest deployments.
[CLASSIFIED] Additional Prestige Rewards
Aside from Permanent Traits tied to an Operator, Prestiging multiple Operators earns additional Calling Cards and [CLASSIFIED] rewards.
DMZ Orders Station
Available Immediately / Accessed within the FOB / Orders Available in the Top Corner of your FOB HUD.
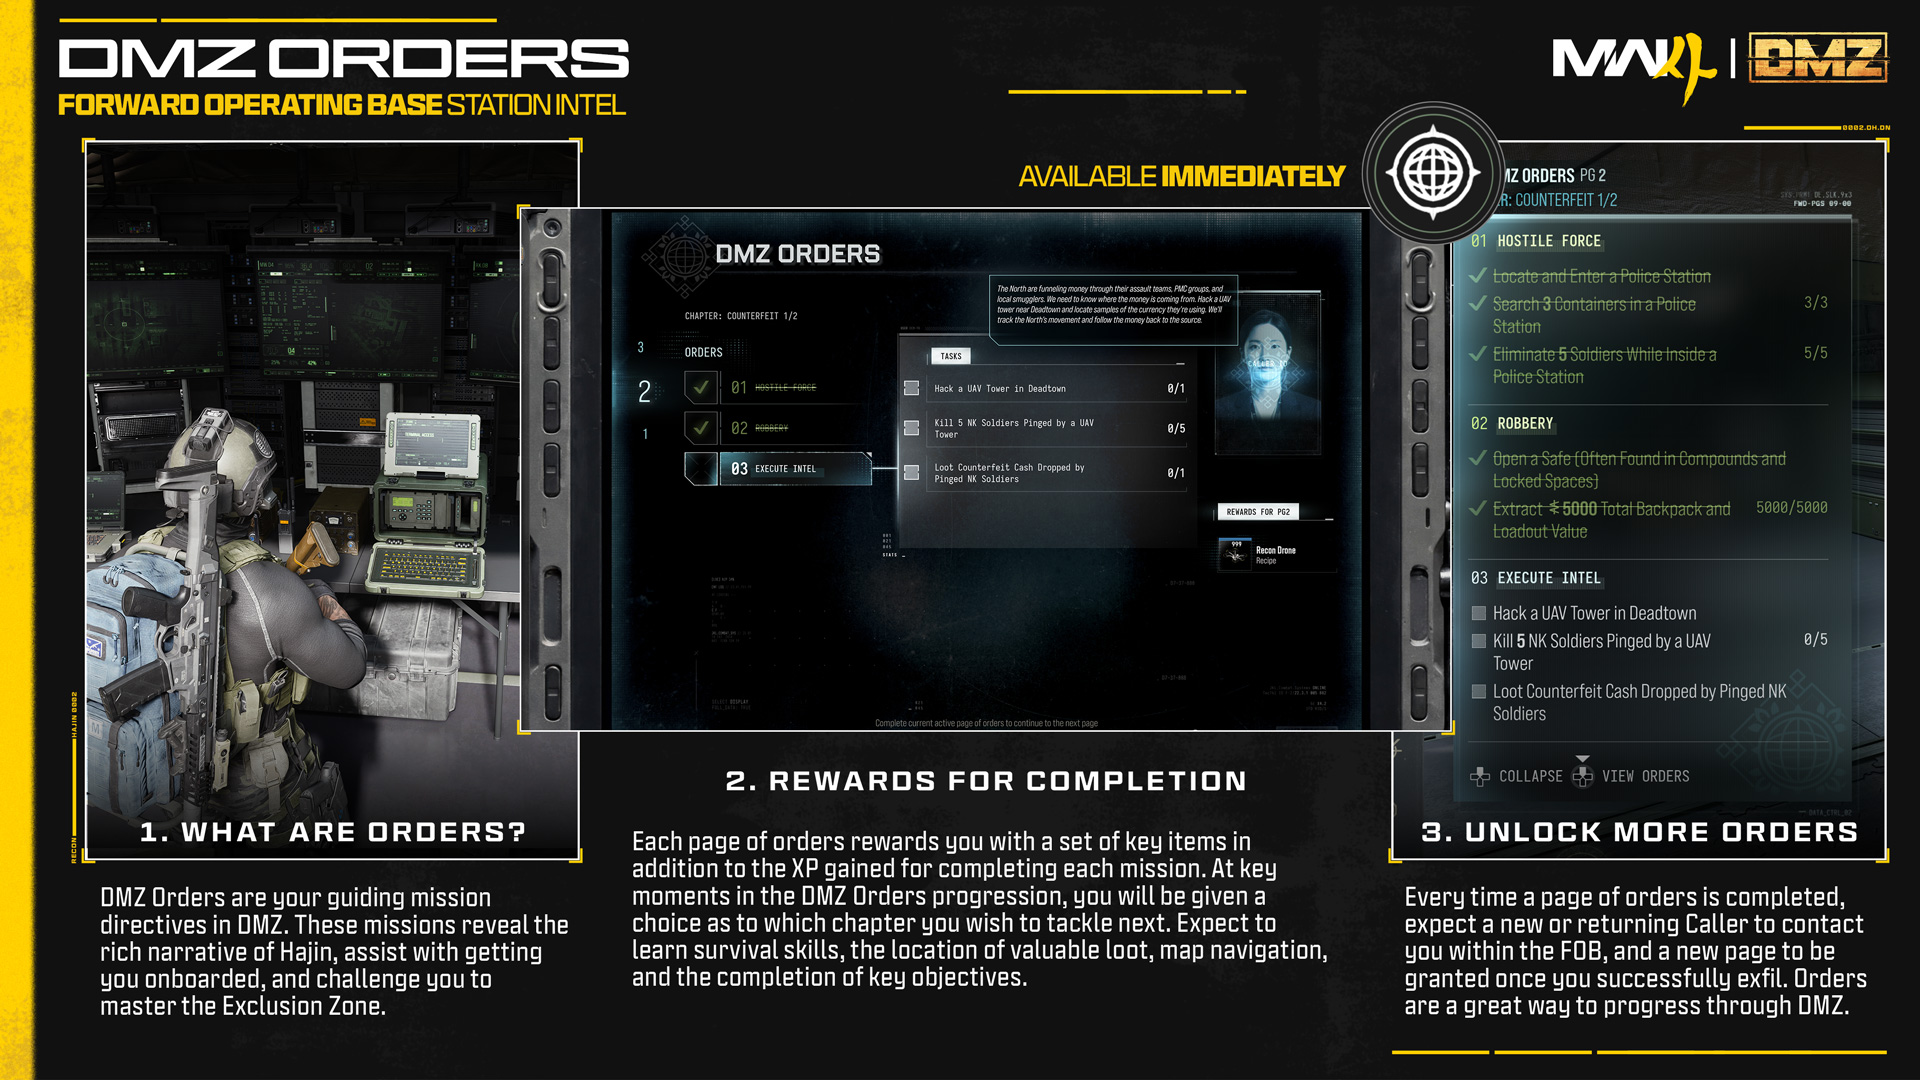
Visit the DMZ Orders station to view your current objectives— organized in Pages — and the rewards available for completing them. DMZ Orders are your guiding mission directives throughout DMZ, training you, helping you upgrade your Operator and FOB, deliver narrative intel, and offer challenges. Learn these fundamentals to help you succeed in future deployments.
Completing DMZ Orders will earn you resources, loot and cash to complete objectives. Rewards will get you geared up for future deployments as you upgrade your FOB. Orders are always available and are a great way to progress through DMZ.
Stash/Loadout Station
Available Immediately / Accessed within the FOB, or the left side blade menu.
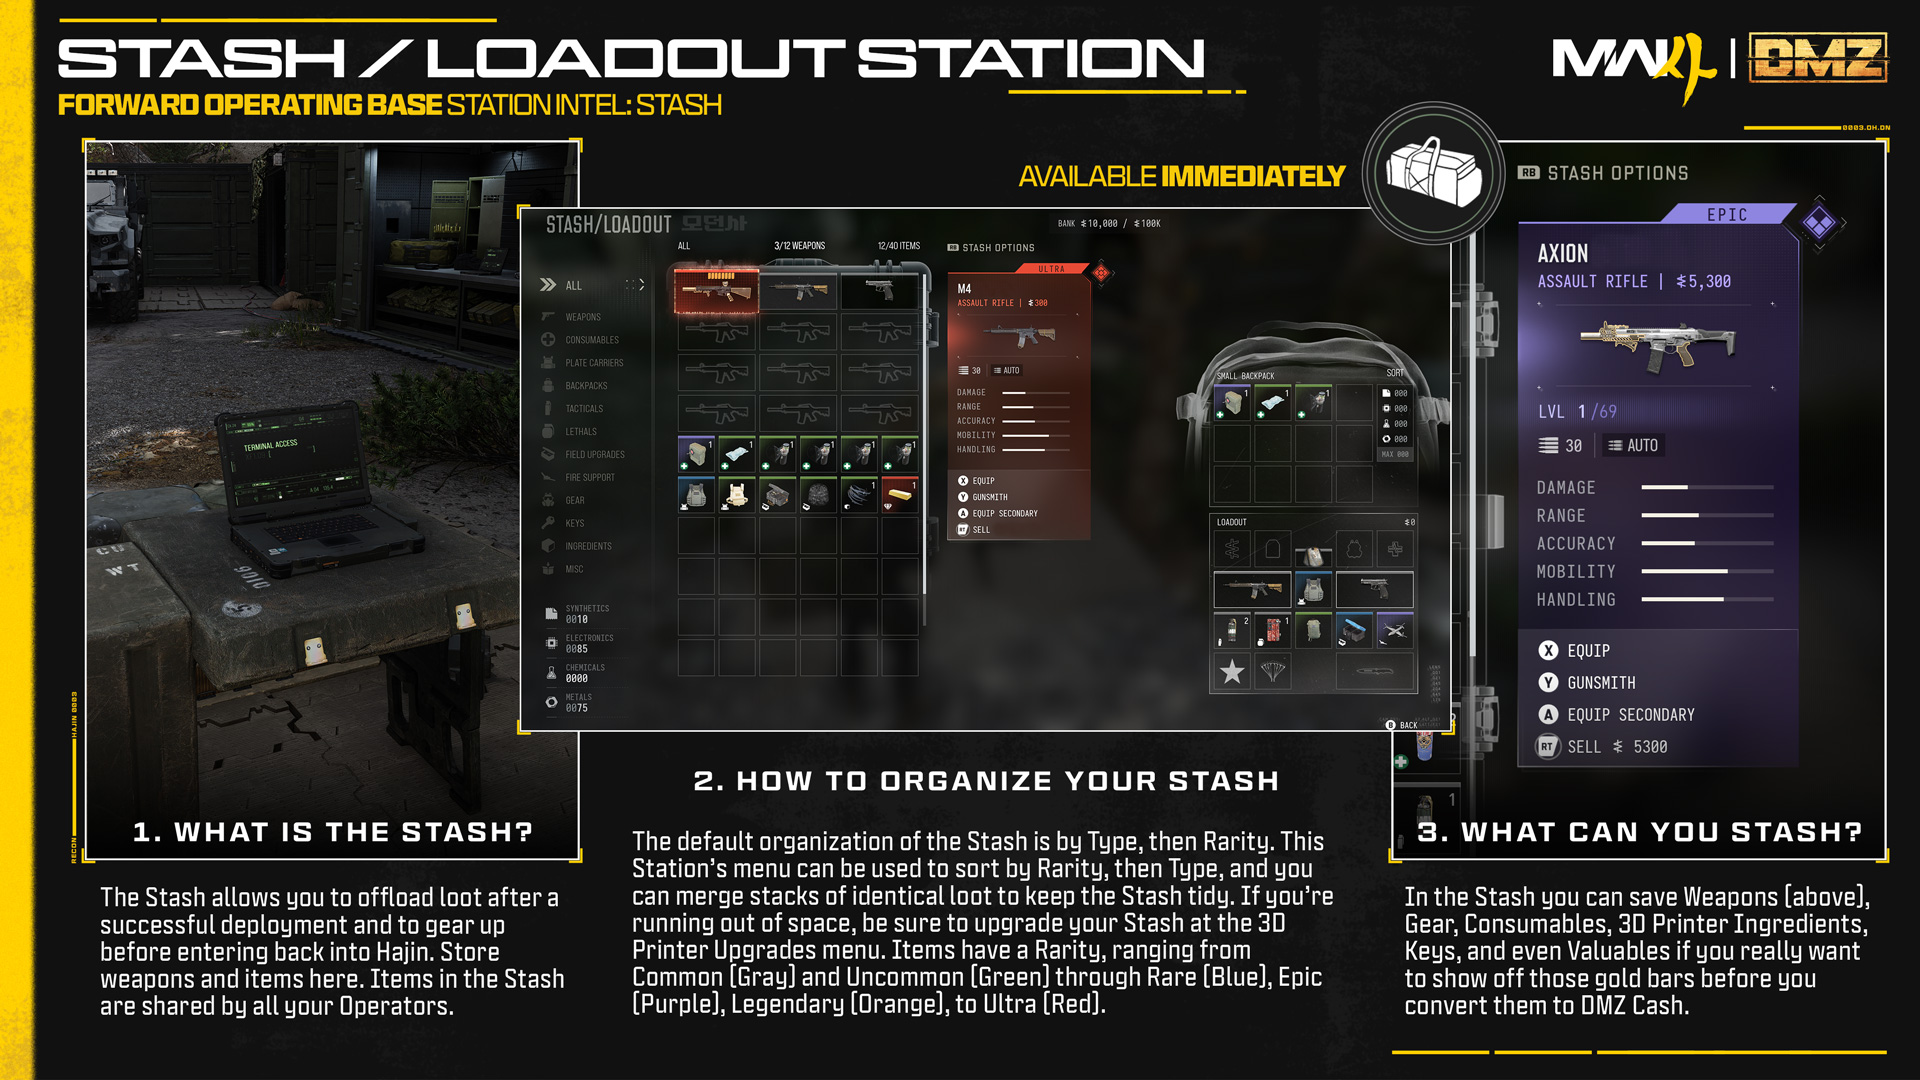
The Stash/Loadout station is separated into two areas:
Stash allows you to offload loot after a successful deployment, where it is shared by all your Active Duty Operators. It also allows you to gear up before entering back into Hajin. Items in the Stash remain in the FOB.
Backpack: Items and equipment, as well as spaces for weapons and Secure Slots once you upgrade your Backpack, are stored here. These are accessible during deployment, and anything not placed in a Secure Slot is lost if you fail to Exfil.
The Loadout is the equipment your Operator carries and actively uses in a deployment and returns with after a successful exfil.
Keep these Stash and Loadout basics in mind:
- Build your Loadout: Select weapons and items from your Stash to equip your Operator before deploying.
- Store items and weapons: Remove any unwanted Loadout items and place them in the Stash. Any 3D printed items are also stored in the Stash. Your Stash initially holds up to 40 items and 12 weapons, with weapons counted separately from general items. In DMZ you can save Weapons, Gear, Consumables, 3D Printer Ingredients, Keys, and even valuables you don’t want to sell.
- Manage your inventory: Successful deployments can quickly fill your Backpack, so it’s wise to offload your loot into the Stash. Review what you want to keep, sell, discard (in the rare event you run out of Stash room and your Bank is capped at maximum saved funds), or use for crafting. The Stash always shows items by Type, then Rarity. There are options to sort by Rarity and then Type, or you can Merge loot stacks to keep your Stash organized.
- Crafting Resources: There are four types of Resources — Synthetics, Electronics, Chemicals, and Metals — that you automatically break down during looting. The totals of these materials are shown in the bottom left corner of the Stash Menu, and don’t take up Stash slots. Use them at the 3D Printer station.
- 3D Printer Ingredients: Other items collected during a deployment that don’t automatically break down are known as 3D Printer Ingredients and are stored in your Backpack during a deployment. After a successful exfil, move these to your Stash to free up Backpack space, and use the 3D Printer Ingredients to craft new gear, and to upgrade stations in the FOB in the 3D Printer Upgrade menu. Use them wisely.
TIP: All DMZ Cash, Resources, 3D Printer Ingredients, and other content you acquire in DMZ, is shared by all your Active Duty Operators. Think about gathering loot using an Operator skilled in finding valuable items thanks to their Traits and bring these back for other Operators you are utilizing.
Initial Deployment: Basic Pack and Loadout
Basic Pack
Without a proper Backpack equipped, you begin with the Basic Pack, with eight available slots. Each item has a defined stack size, meaning you can carry multiples of smaller items in a single slot. All backpacks include a specific pouch for Resources to collect; this way you don’t have to manage your Chemicals, Electronics, Metals, or Synthetics (all of which are automatically broken down from items you loot during a deployment and used along with 3D Printer Ingredients to craft items at the 3D Printer). Additional types of Backpacks add to the number and type of item slots.
Loadout
This details the weapons and gear you have immediate access to and are carrying with you into Hajin.
- DMZ Cash: This is always empty prior to deployment as it shows the available funds found during a deployment. These are added to your Bank after a successful exfil.
- Armor: This is always empty prior to deployment. Once you infil, your Armor Slot is automatically filled with plates. The only way to bring in more Armor Plates is by choosing Traits that expand the Armor Slot capacity, and/or by bringing in the Armor Box Field Upgrade.
- Dog Tag: Your Dog Tag, Bounty, and Operator Kills ratings.
- Headgear: Items worn on the head, such as Gas Masks or NVGs.
- Self-Revive: A specific slot for Self-Revive Kits.
- Weapons Slot 1: Your main Primary or Secondary Weapon.
- Plate Carrier: Your equipped Armor Vest.
- Weapons Slot 2: Your additional Primary or Secondary Weapon.
- Tactical, Lethal, Backpack, Field Upgrade, Fire Support (Killstreak): Instantly accessible equipment goes here. Store extra in your Backpack.
- Mission Item: This is always empty prior to deployment. When focused on a Story Mission or Dynamic Op, any important items are automatically added to this slot. This way you and your squad don’t have to make room for critical mission items.
- Parachute: Whether you have a parachute equipped.
- Melee Weapon: Allows you to equip melee weapon variants, such as the “Sombra Besada” Combat Knife Blueprint from the Vault Edition’s Signature Weapons Collection.
FOB Firing Range
Available Immediately / Accessed within the FOB
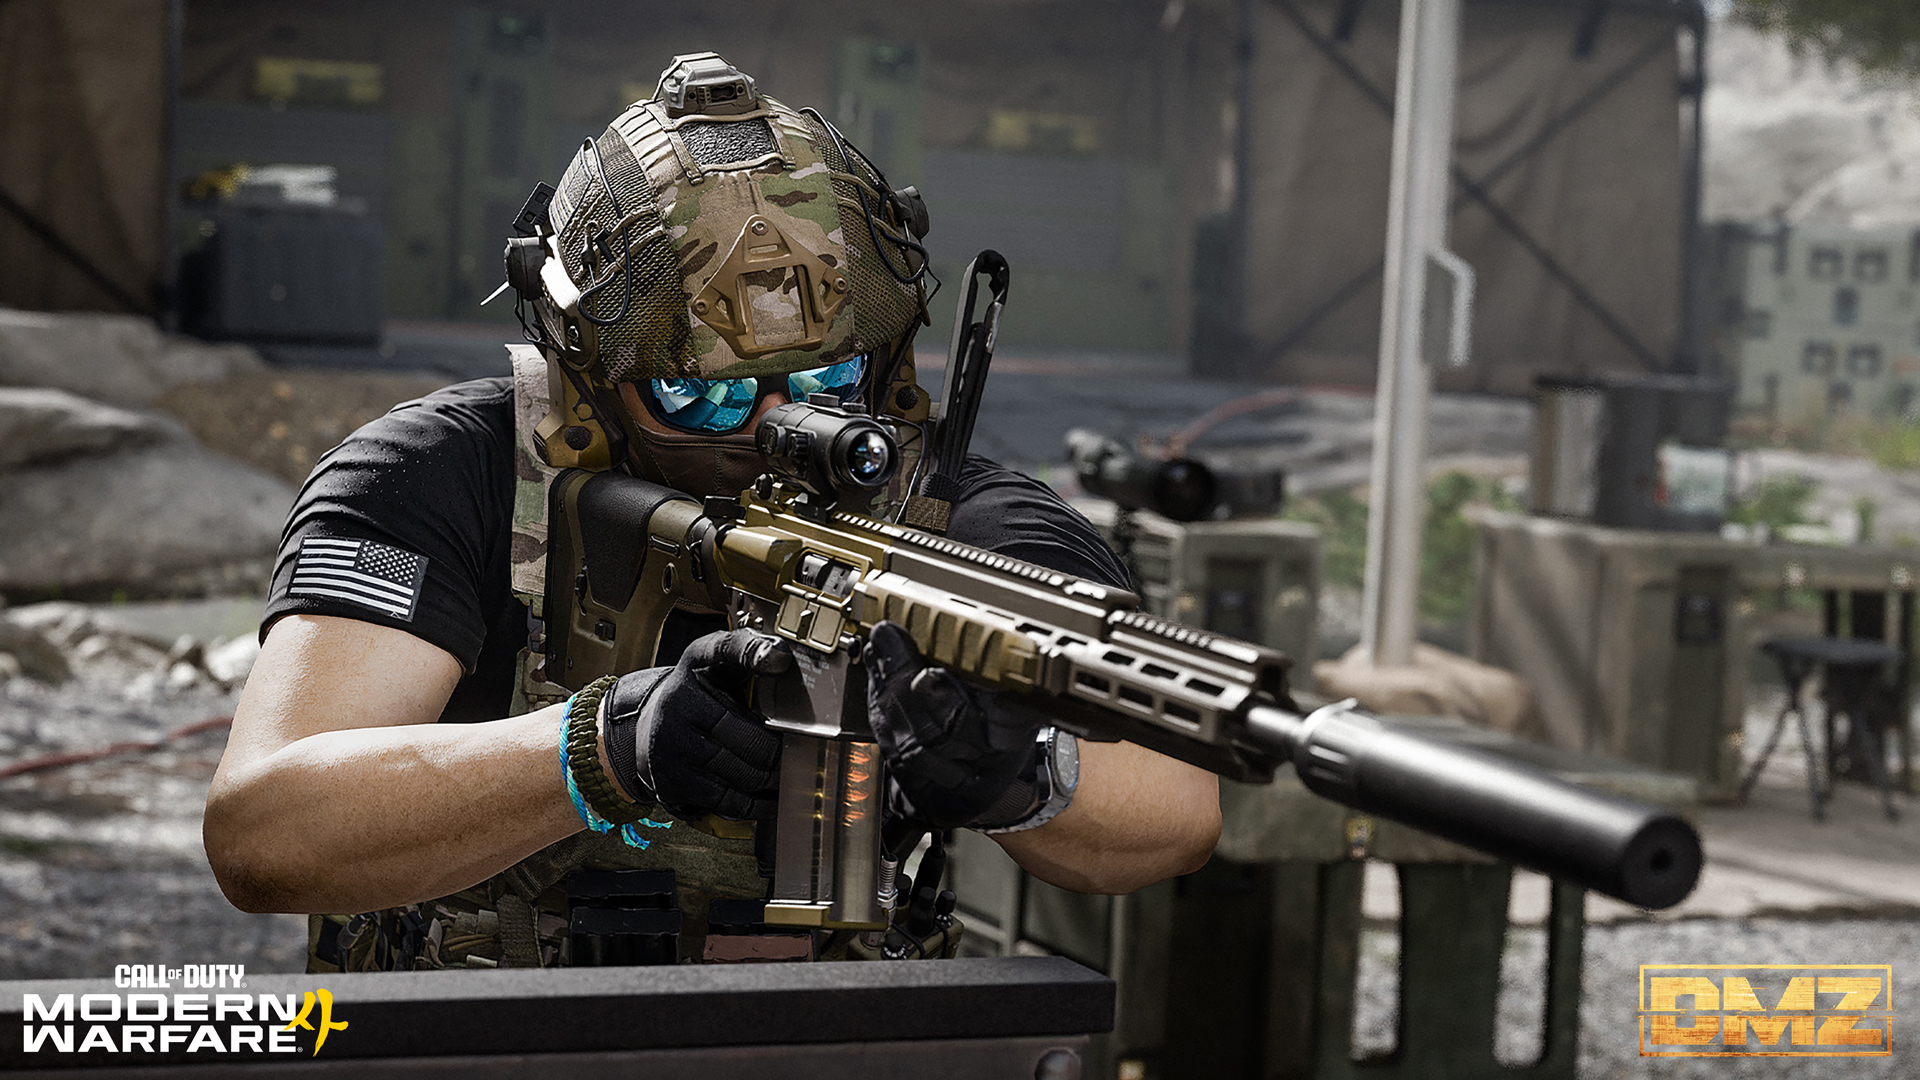
Bring any ranged weapon in your Loadout to the Firing Range, a wooded grove nestled between the Gunsmith and Vendor Stations and test out your build.
- The Firing Range offers multiple walls to crouch or drop into a prone stance, as well as to mount to.
- Targets (both circular and bottle-shaped) are available at multiple ranges, from less than 10 meters to over 100.
Survival Kits Station
Available Immediately / Accessed within the FOB
Survival Kits contains a selection of supplies for use during deployments. Kits focused on medical support, armor, equipment, restocking, or general preparation.
Interact with a Survival Kit to unpack it and add all the contents to your Stash. Unopened kits remain stored within the Survival Kits station menu, where they can stack indefinitely until you are ready to use them.
There are several types of Survival Kits, each with a variety of contents. Examples include: Deployment Kits (essential supplies), Triage Kits (medical), Armor Kits (protective items), Equipment Kits, and SERE Kits for high-risk recoveries.
- Acquire Survival Kits as rewards for DMZ Player Leveling, by completing DMZ Orders and Missions, and as Event rewards.
Survival Kit Example: Deployment Kit
Vault Edition Reward: Players with the Modern Warfare 4 Vault Edition will gain access to the Vault Edition Deployment Kit containing:
- Weapon Insurance Contracts (x2)
- Operator Rescue Beacons (x2)
- Fulton Drop Marker (x2)
- Medium Backpacks (x2)
- 2-Plate Carriers (x2)
Bounty Leaderboard: PvP Hunters and Killers
Available Immediately / Accessed at a physical Station within the FOB
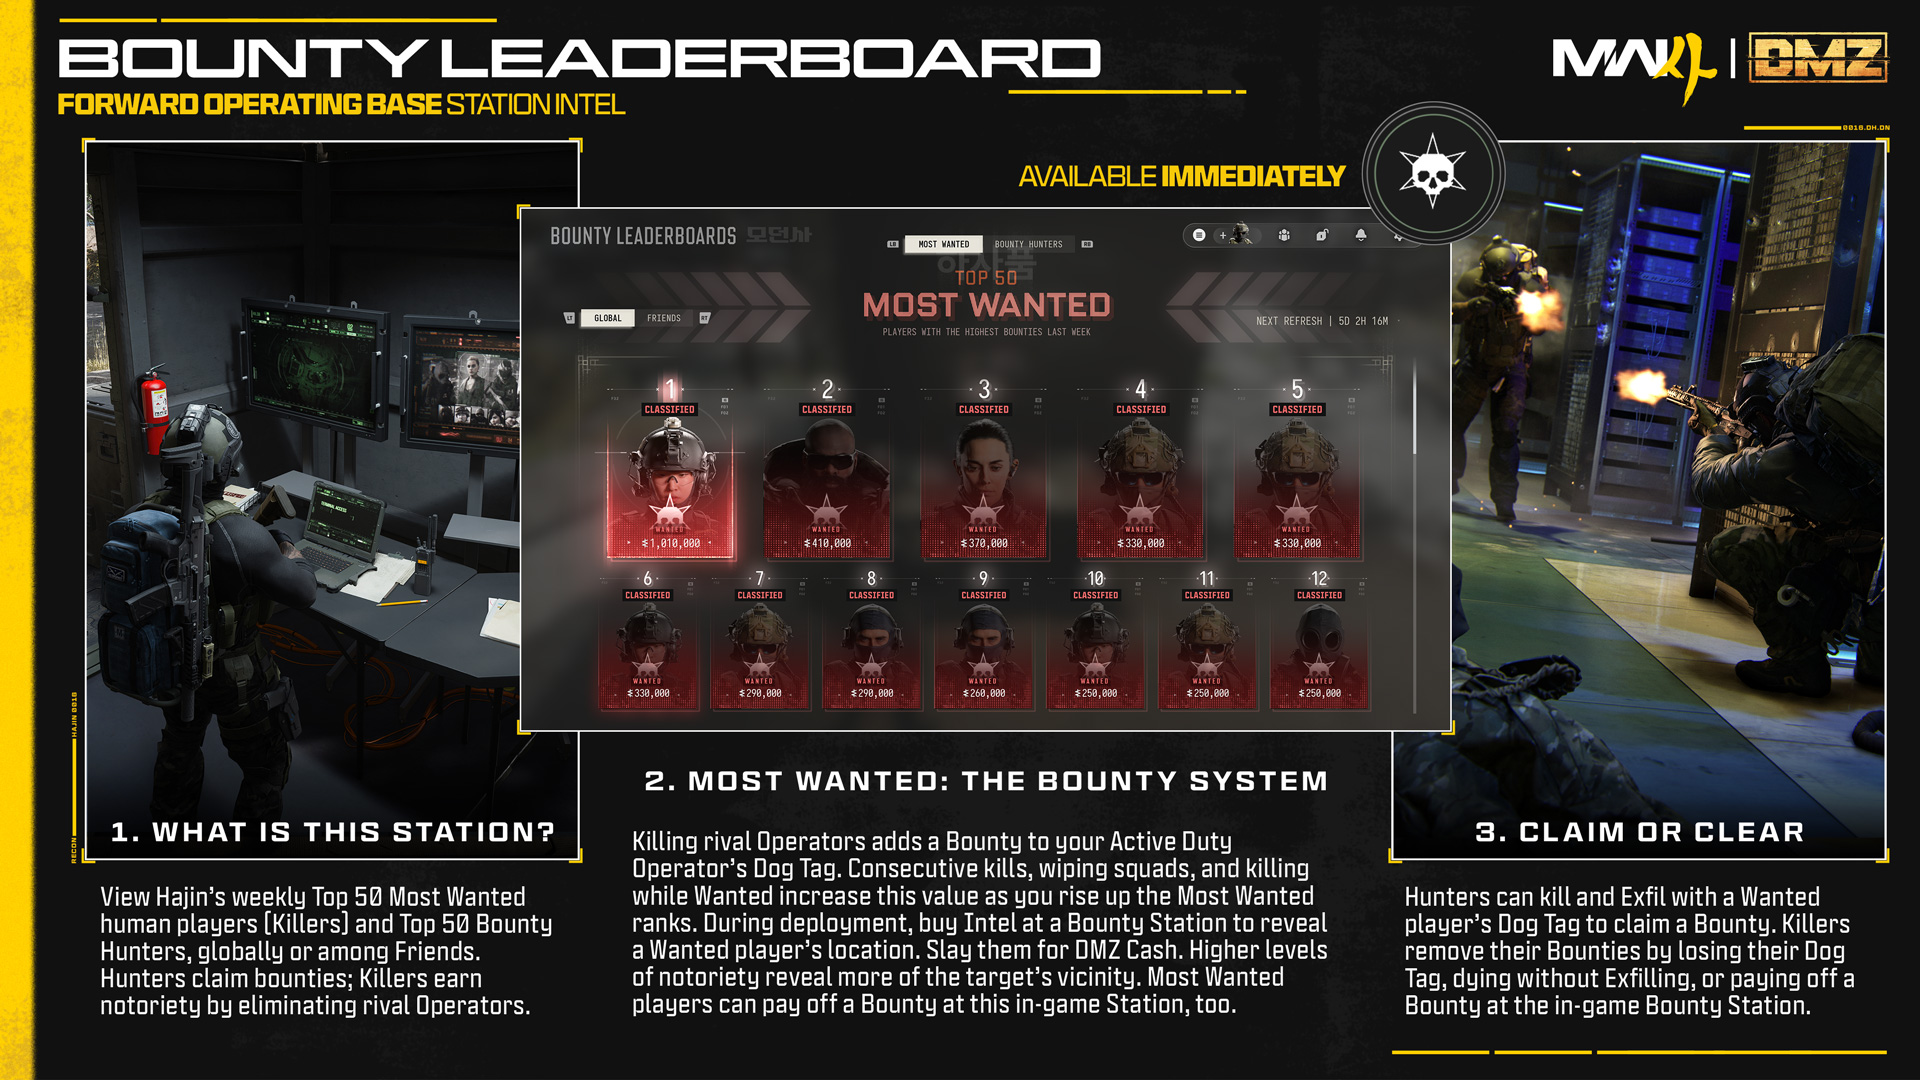
Once you’ve learned the basics about surviving in the Hajin Exclusion Zone, you can focus on your continued Operator progress. During deployments, you may find yourself in a situation where a rival Operator presents a clear and present danger to your ongoing activities. You can elect to engage and be as active or as passive when engaging other human Operators as you wish.
Killers: Operators who hunt down and kill rival players will eventually earn a Bounty, and are unofficially known as “Killers”. A Killer player’s Bounty (valued in DMZ Cash) continues to increase as more rival Operators are slain. Take down four Operators across deployments, and you become Wanted.
Note: When a Wanted Operator comes within proximity, nearby Operators are automatically alerted to their presence.
Hunters: Another optional role is that of “Hunter”, allowing you to track down and remove notorious Killers within Hajin. During Deployment, visit a Bounty Station, and use funds from your FOB Bank to locate Wanted Operators in your deployment. Then hunt them down for considerable DMZ Cash rewards. To collect the reward, you must kill the Operator and extract with their Dog Tag.
Within the FOB is the Bounty Leaderboard Station, showing the Top 50 Most Wanted Operators, and the Top 50 Bounty Hunters:
- The Top 50 Most Wanted Players: Updated weekly, this shows a player’s status (Wanted or Eliminated) and the Bounty on their heads.
- The Top 50 Bounty Hunters shows their status (Bounties claimed, and DMZ Cash earned for Killer player takedowns).
- You can view players Globally, or those on your Friends list.
PvP Killer: Most Wanted System
Here’s how the Wanted System operates:
- When an Operator kills another player, they immediately earn a Bounty, listed on their own Dog Tag, visible within your Loadout. The number of human Operators you’ve slain is tracked on your Dog Tag.
- As the Operator continues to slay other human Operators, the Killer’s Bounty level rises. When four players are slain, as described above, the Operator becomes Wanted.
- There are various Bounty thresholds that increase the value in slaying the killer; the “Wanted” state.
- There are multiple “Wanted” states as the killer increases their takedowns.
- The biggest Bounties are known as “Most Wanted”. Most Wanted players are severe threats, and displayed on the Bounty Leaderboards station in the FOB.
- If an Operator dies, their Bounty and Wanted status is lost.
PvP Killer: Earning a Bounty
- Engage in PvP activities, and your Bounty level increases. This is a long-term system that tracks players across multiple deployments. Various factors are tracked into increasing your Bounty level, including who fired first, if you were outnumbered, and other factors. Keep taking down rival Operators, and you’ll start to appear on the Wanted Board. To increase your Wanted rating, you need to gain notoriety, and continue to engage other players.
PvP Killer: Losing a Bounty
Once your Operator has a Bounty, your notoriety is difficult to expunge. Try the following:
Exfil from a deployment without your Dog Tag, losing it to another player taking and extracting with it (after slaying you, whether you are subsequently revived or not).
- You are killed during a deployment, and fail to Exfil.
- Use DMZ Cash funds to pay your own Bounty off at a Bounty Station within Hajin.
PvP Hunter: Claiming a Bounty
There is DMZ Cash for extracting with a bountied player’s Dog Tag.
- The amount received is relative to the Bounty Level of the target Operator. If a Bounty is at maximum Wanted level, expect an additional increase in the reward.
- The more players a Bounty target eliminates, the larger the DMZ Cash reward. Slay a Bounty target, and your cut of the Bounty in DMZ Cash will be added to your Bank after exfil.
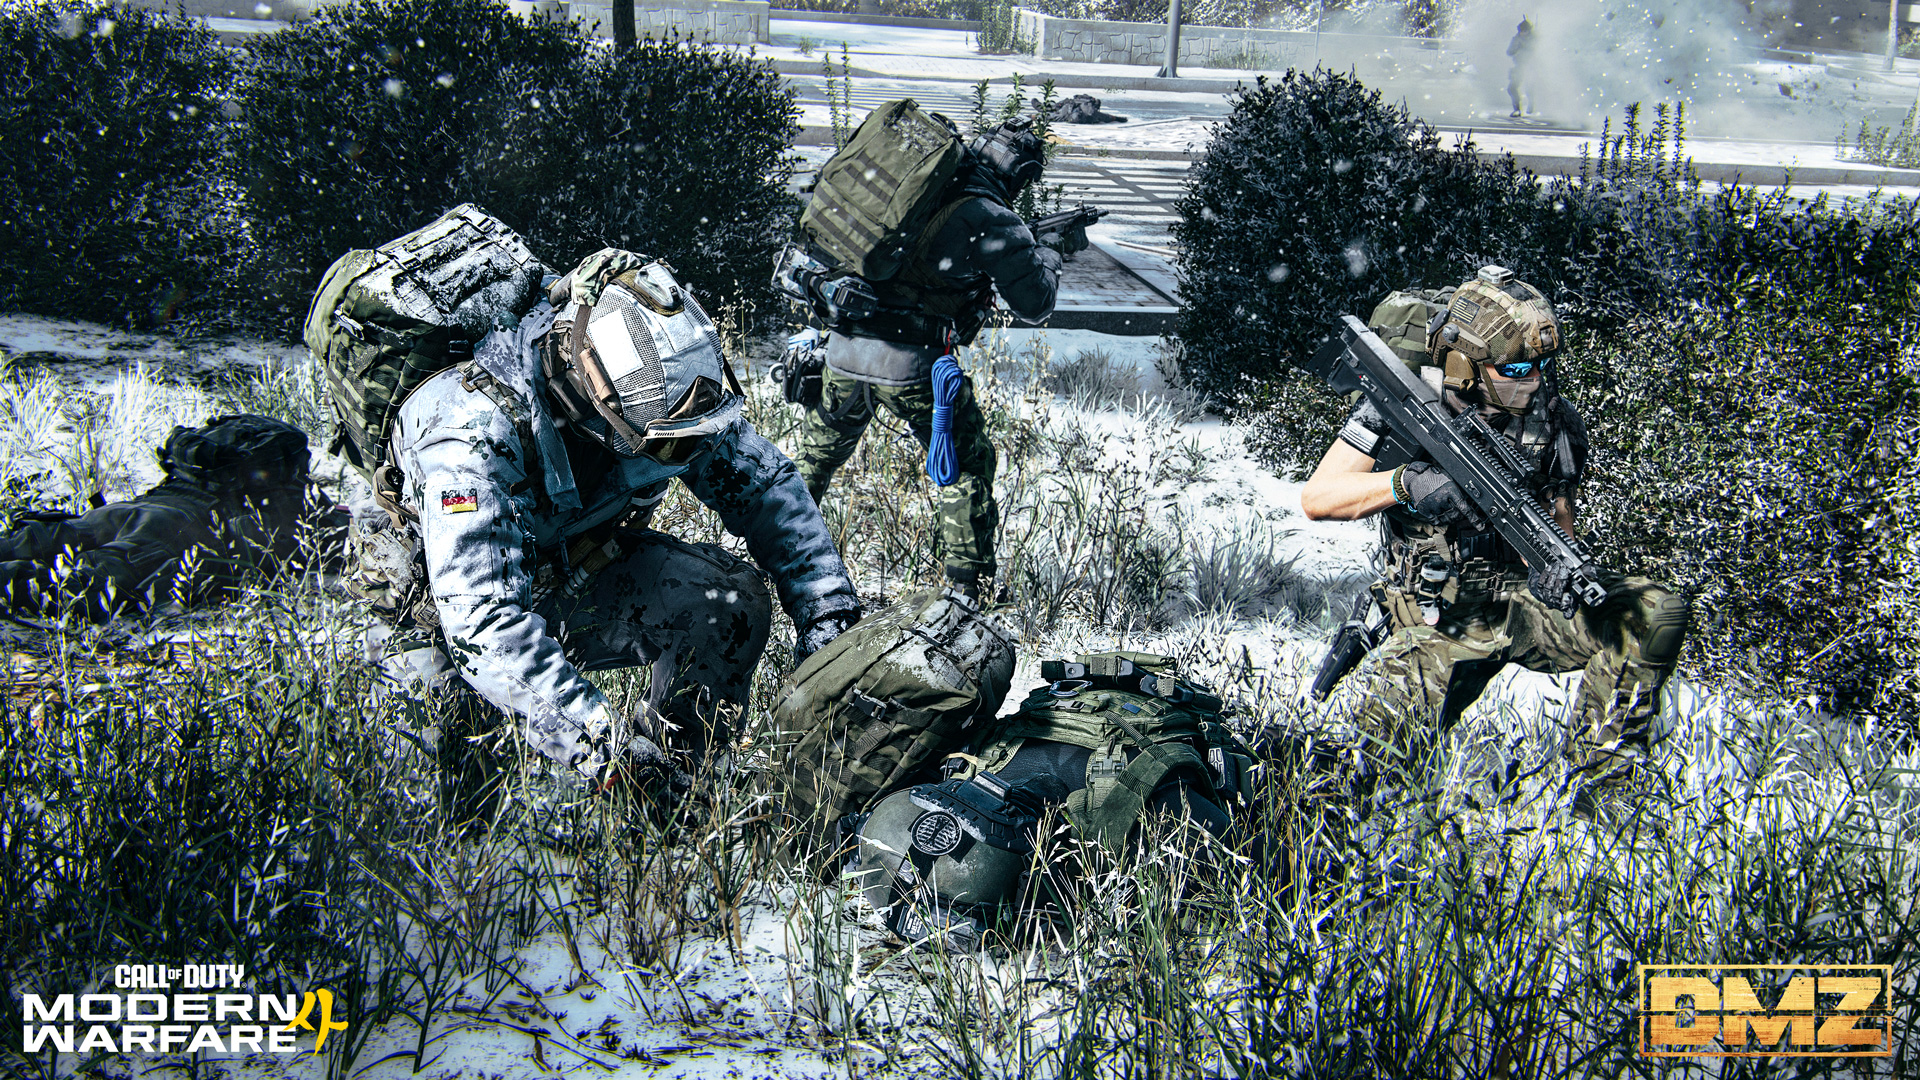
PvP Hunter and Killer Gameplay: Hunting Down Bounties
During a deployment, you can open your Tac Map and locate a Bounty Station within Hajin, and use DMZ Cash to Buy Intel helping to pinpoint any Wanted players on the map. The higher the Killer’s Wanted Level, the more DMZ Cash you need to pay for this intel.
Note: This is in addition to a list of Wanted Operators on the current deployment, which is freely available once you access the Bounty Station, whether you pay for specific Bounty Intel or not.
Killer Visibility
With intel gained, the Bounty target’s whereabouts is indicated on your Tac-Map:
- Expect a circle on the Tac Map around the general area where the Wanted player is. This shrinks and updates more rapidly, the more Wanted the player is.
- At the highest Wanted level, a Killer’s general vicinity is likely visible to all Operatives within Hajin, not just those who have bought Bounty Station intel.
3D Printer
Unlocks at DMZ Level 2 / Accessed within the FOB, or the left side blade menu.
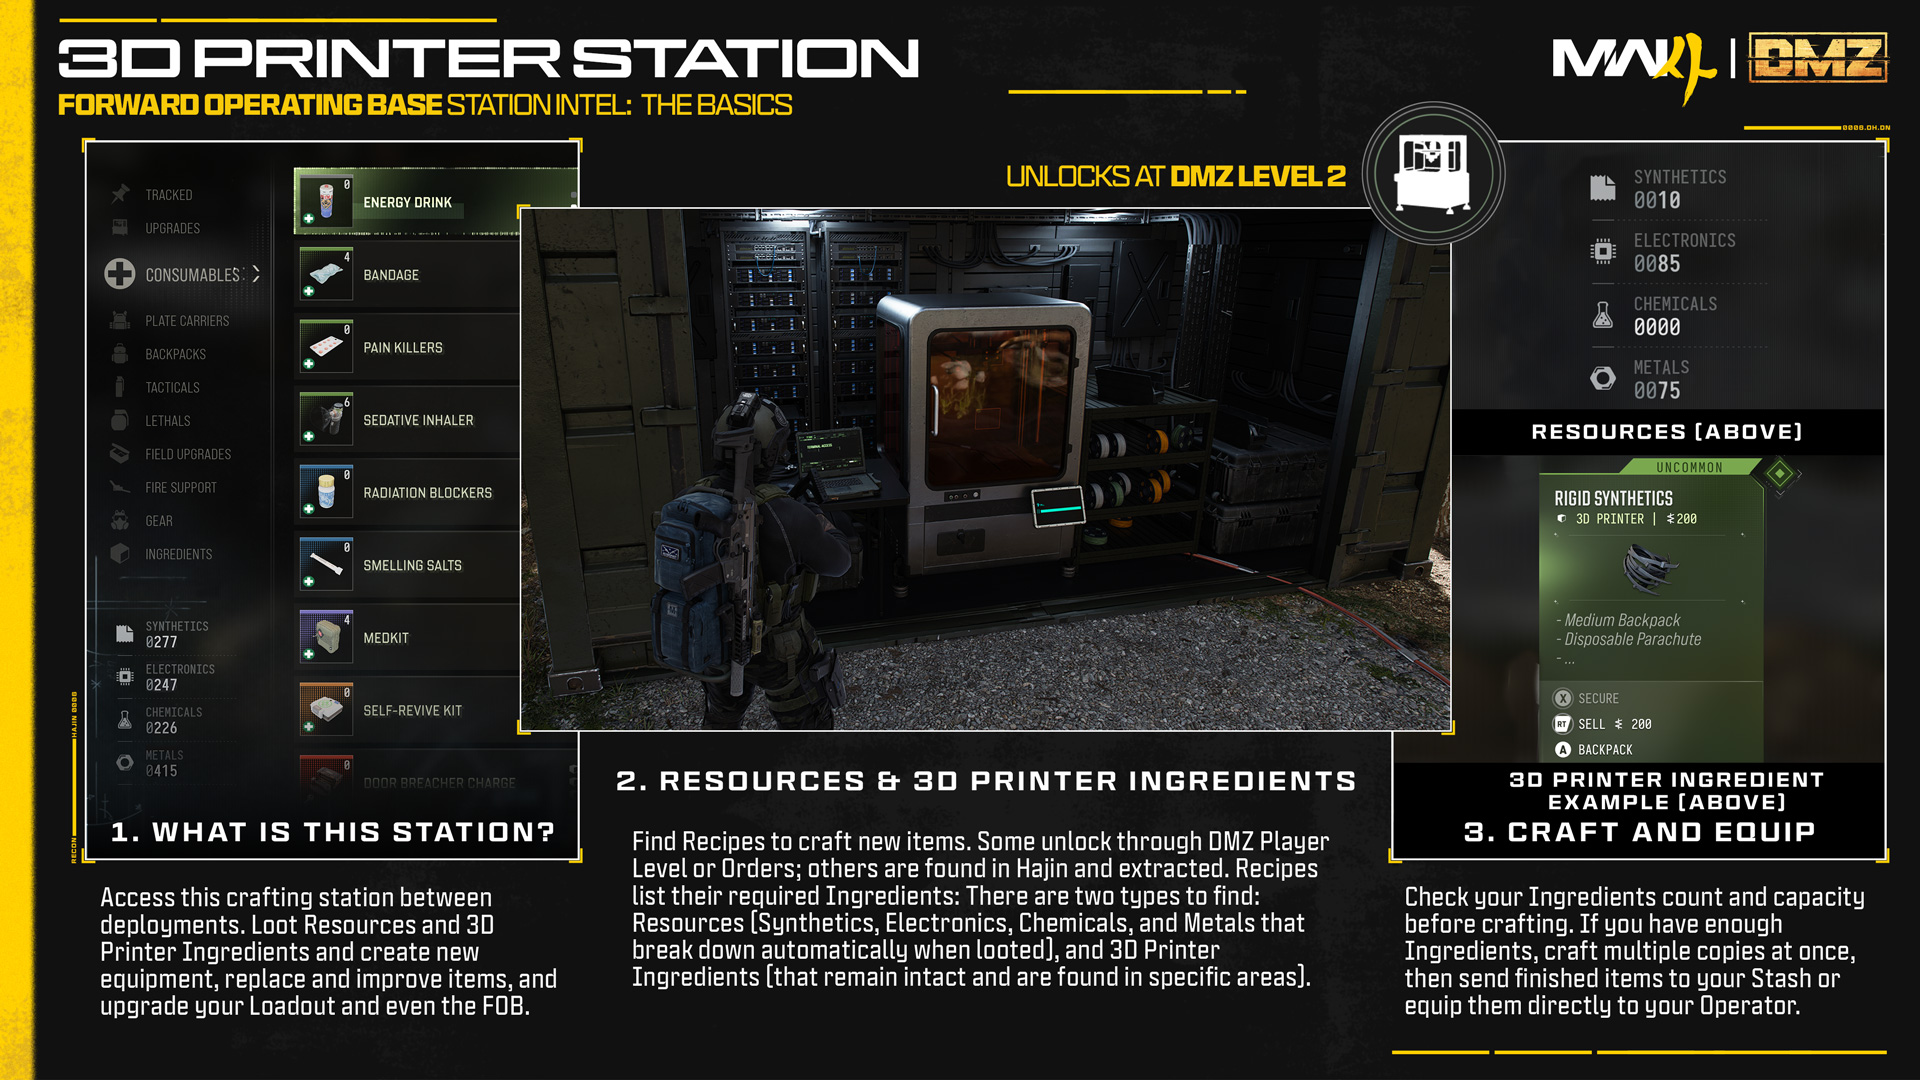
The 3D Printer is used to craft Gear and special 3D Printer Ingredients, and is also used to upgrade other stations within the FOB, using items found across the Exclusion Zone.
Note: As soon as the 3D Printer unlocks, you can start to craft different items and upgrades. Most require a Recipe, some are single-use items (like medical supplies) while others remain on you until removed or upgraded (like Backpacks and Armor Vests), or used (like Tacticals and Field Upgrades).
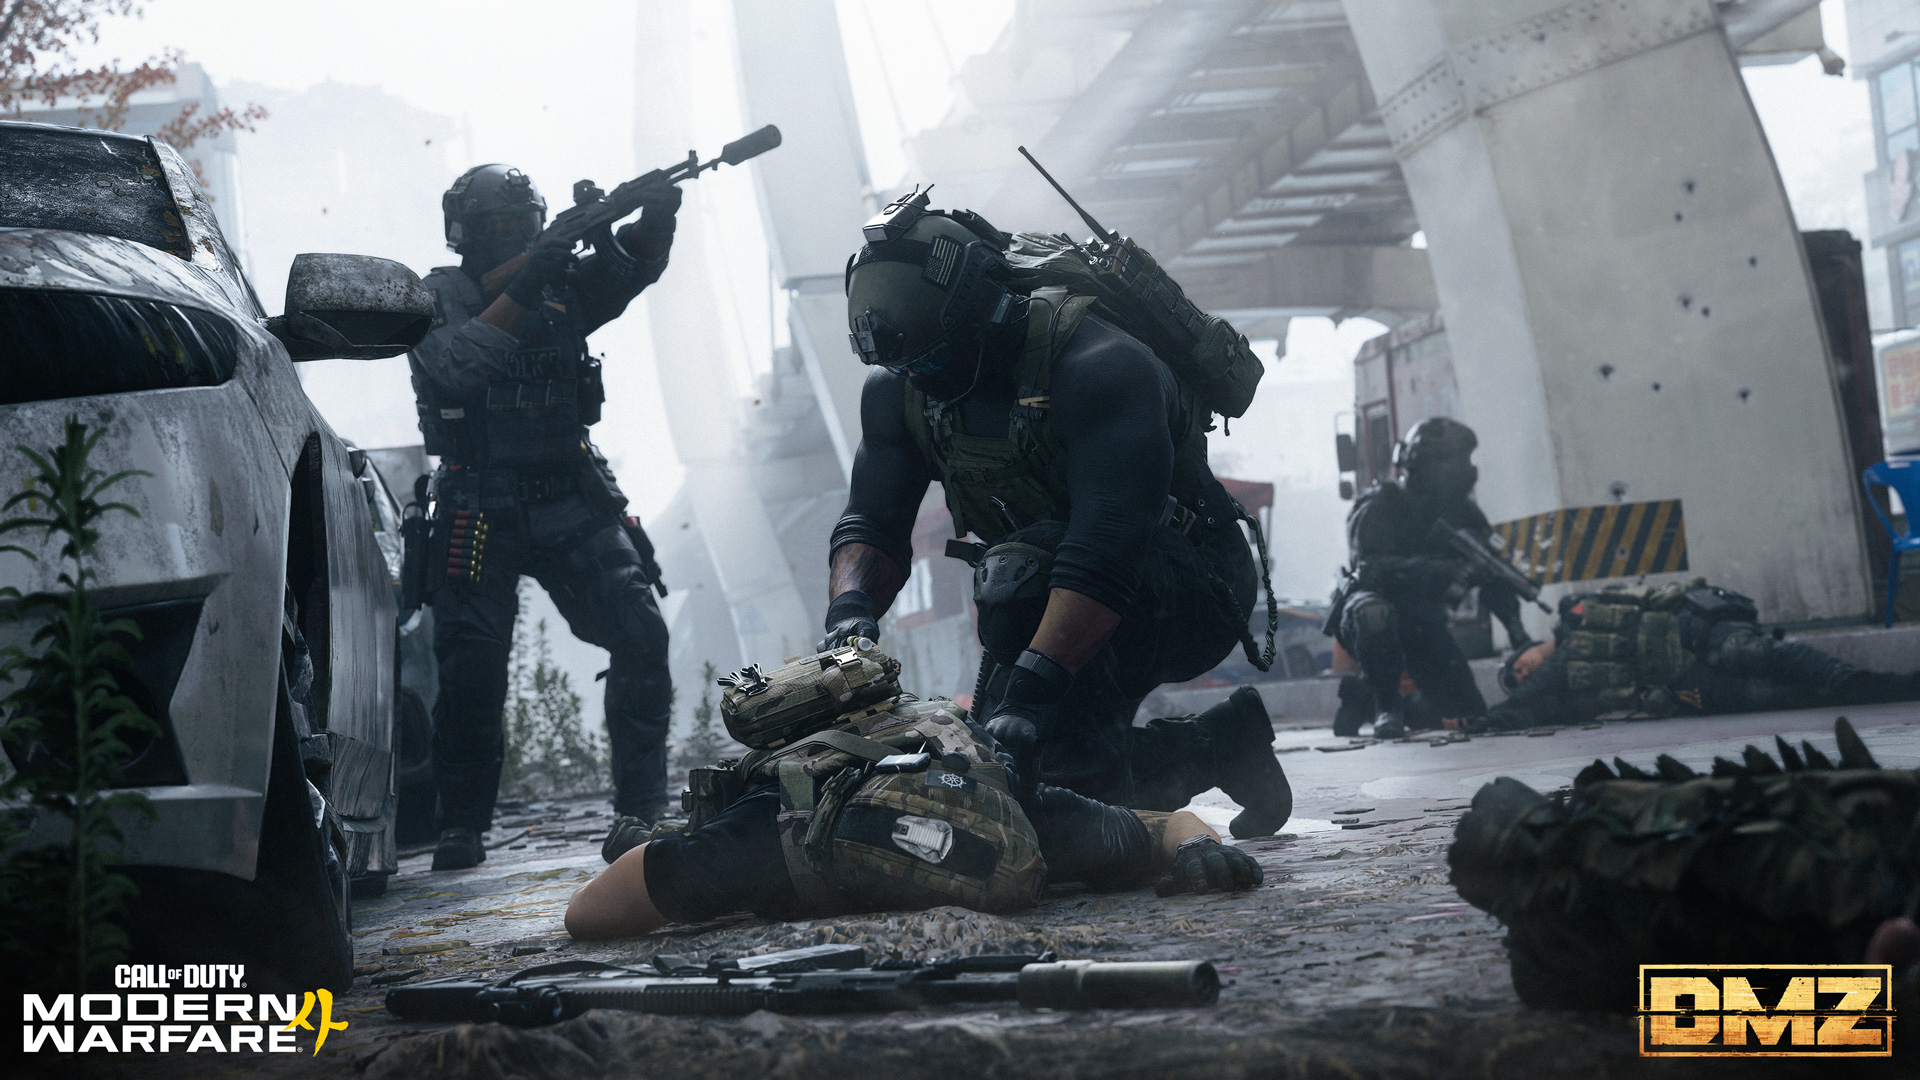
Not everything is available to craft right away. As you progress, you unlock new crafting options and upgrades for the 3D Printer and even the FOB itself. To produce equipment to improve your Loadout, survive in Hajin, and to upgrade your FOB, there are three types of items you need. These are:
- Recipes
- Resources
- 3D Printer Ingredients
Recipes: The 3D Printer menu shows all your available Recipes. These are the foundation of DMZ crafting. To start with, the majority of 3D Printer Recipes are locked. Your main objective is to unlock new Recipes. Here’s how:
- Progressing your DMZ player level.
- Completing DMZ Orders.
- Looting and successfully extracting with the Recipe, after which it is automatically added to your 3D Printer menu.
TIP: Recipes are always consumed at exfil and automatically added to your 3D Printer as an unlocked Recipe. They also always pay out 5,000 DMZ Cash. The same is true for Weapon Manuals (see Gunsmith, below).
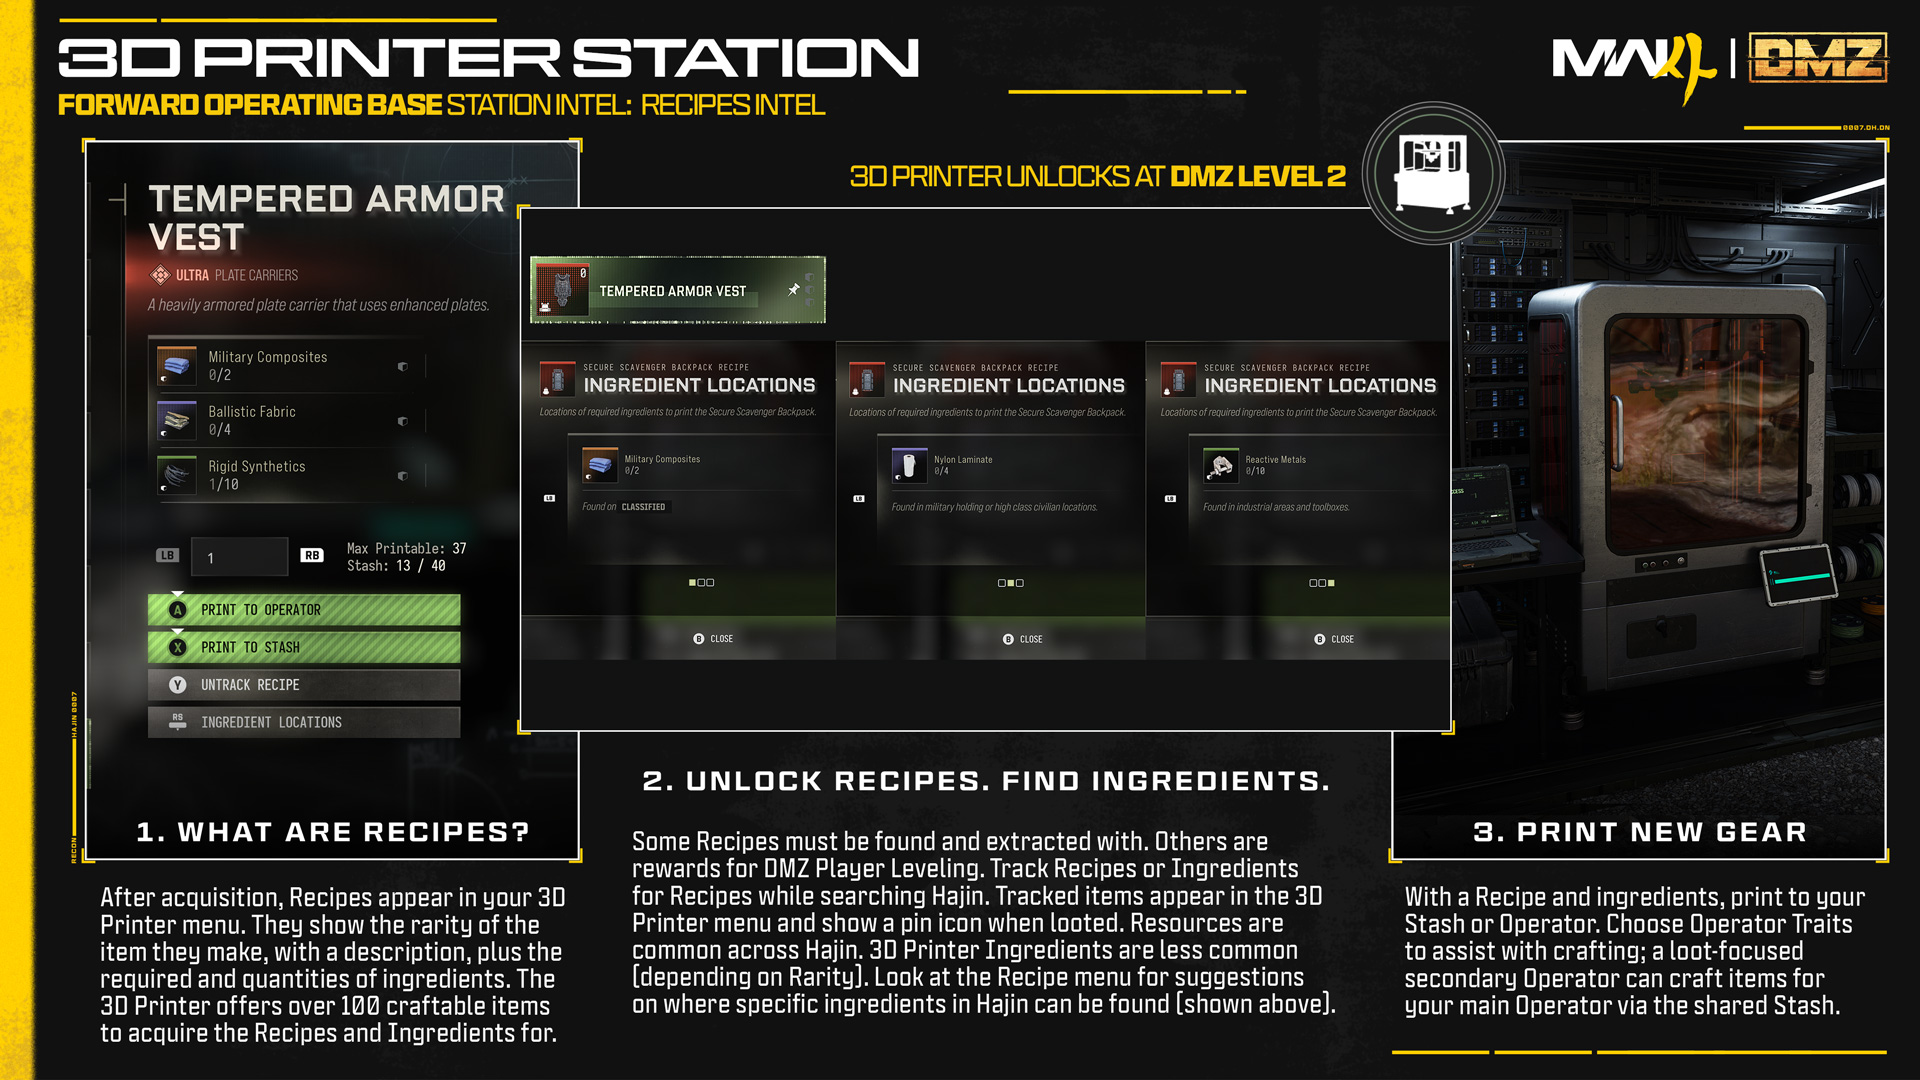
Resources and 3D Printer Ingredients: With a few new Recipes available, highlight the item you want to craft in the 3D Printer menu to see all the Resources and 3D Printer Ingredients required to craft it.
Resources are the four basic elements you can find: Synthetics, Electronics, Chemicals, and Metals. When you loot throughout Hajin, resources you find are immediately broken down into these four types, and shown in the bottom-left corner of the 3D Printer menu.
3D Printer Ingredients are items found in specific areas of the map and are extracted intact. All are valuable as an ingredient to make a new Item. Examples of 3D Printer Ingredients include Binding Catalyst, Biomaterials, Detonators, and Control Units.
Resources and 3D Printer Ingredients: Collectively, these two sets of items are used in DMZ crafting.
- Track your Stash: The 3D Printer shows how many of each ingredient you already have. The number changes to green when you have enough to craft a highlighted item.
- Craft multiple items: If you have enough resources and ingredients, select how many copies of the item you want to craft at once.
- Choose where crafted items go: Send completed items to your Stash for later or equip them directly to your Operator.
- With Upgrades to the 3D Printer, you can craft 3D Printer Ingredients (from Resources and other 3D Printer Ingredients) as well as regular items like Plate Carriers and Backpacks, providing you have the Recipes.
As you progress through DMZ, the 3D Printer becomes increasingly important. Upgrade your printer to continue unlocking more types of gear to craft.
Initial Unlocks: Your First Crafting Session
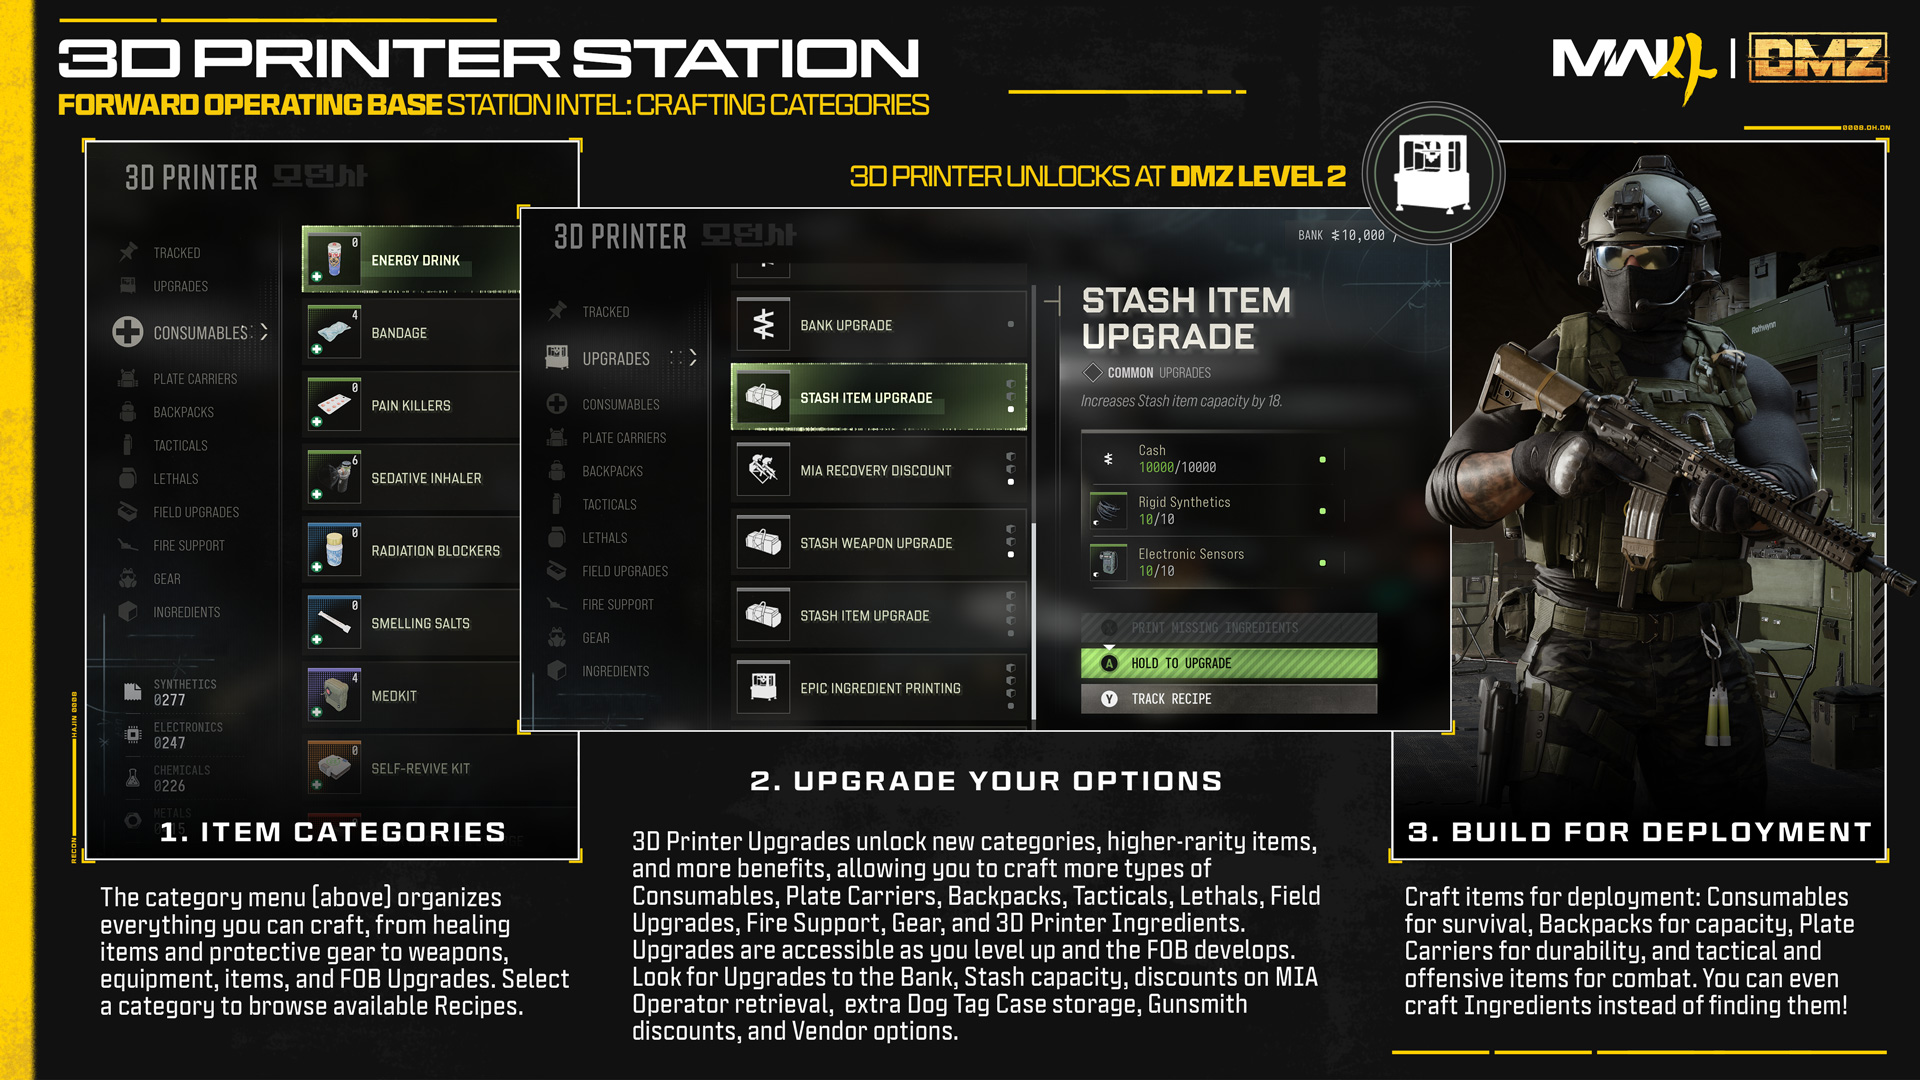
After unlocking the 3D Printer at DMZ Player Level 2, immediately familiarize yourself with the items you can print, and why they are helpful.
3D Printer Crafting Information
Every single item you can 3D print has a stat screen with the following important details:
- Name and Rarity
- Description
- The two or three sets of Resources and/or 3D Printer Ingredients needed, along with the number required:
- Example: The Medkit requires three sets; 30 Chemicals (Resource), 1 Binding Catalyst (Ingredient) and 5 Biomaterials (Ingredient)
- Print to Operator (Backpack or Loadout) or Stash
- Track/Untrack: You can “pin” any Recipe or Ingredient to Track them.
- Tracked elements appear with a pin icon in the Tracked category of the 3D Printer menu so you can quickly check the most important items you’re searching for.
- Tracked ingredients also have the pin icon next to them when you loot them during your deployment.
- 3D Printer Ingredient Locations: If you’re unsure of the general loot locations to find a certain ingredient, check for a recommendation of where to explore. Does not apply to Resources, as these are more commonly found across Hajin.
Your First 3D Printer Recipes
At DMZ Player Level 2, the first set of Recipes unlock. Make sure to find ingredients and start to print the following:
Consumables
Bandage
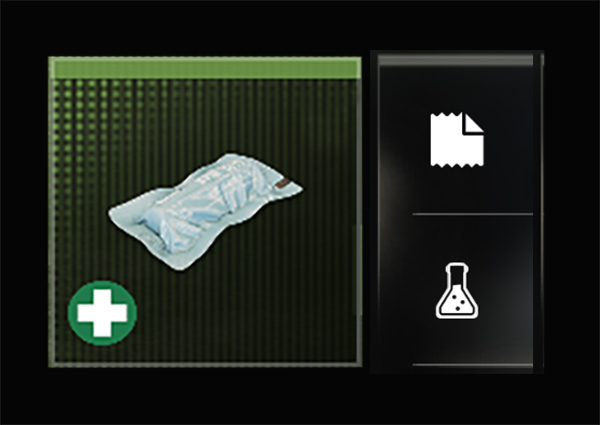
Temporarily restores max health when wounded.
Bandage
Synthetics
15
Chemicals
15
Medkit
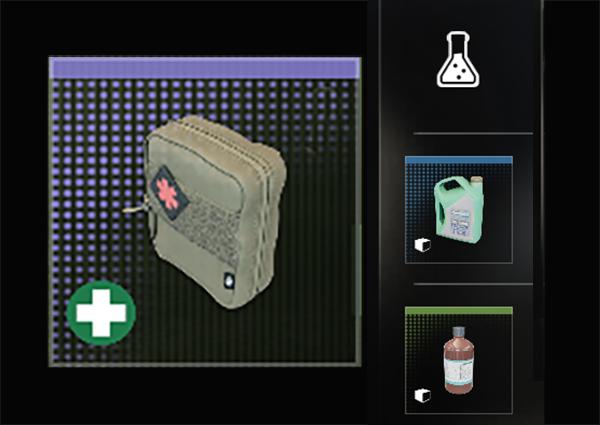
Repairs your wounds, restoring full health and allows you to use the tourniquet to get back up to your feet from Last Stand.
Medkit
Chemicals
30
Binding Catalyst (Rare Loot)
1
Biomaterials (Uncommon Loot)
5
Plate Carriers
1-Plate Armor Vest
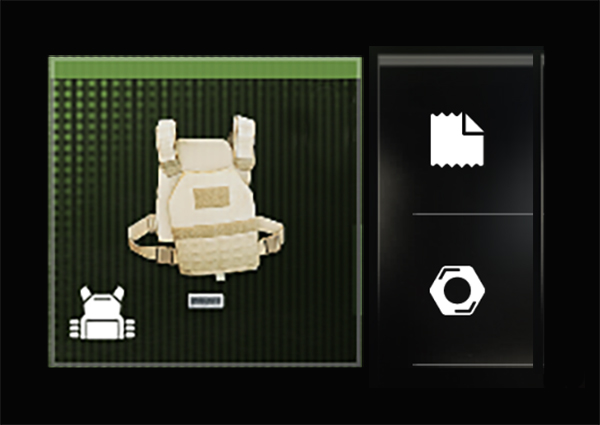
An armor plate carrier with slots for a single armor plate.
1-Plate Armor Vest
Synthetics
25
Metals
25
2-Plate Armor Vest
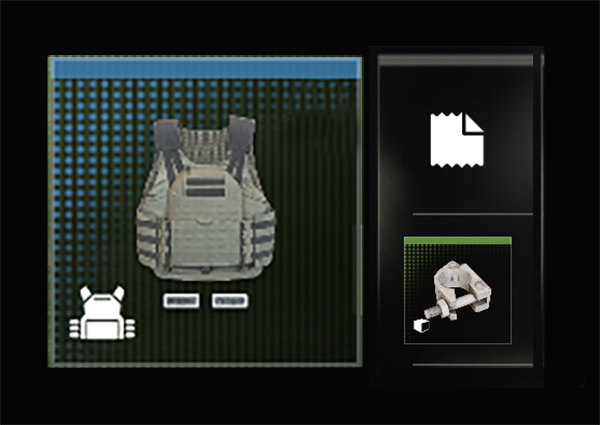
A more durable armor plate carrier with slots for 2 armor plates.
2-Plate Armor Vest
Synthetics
50
Reactive Metals (Uncommon Loot)
5
Backpacks
Small Backpack
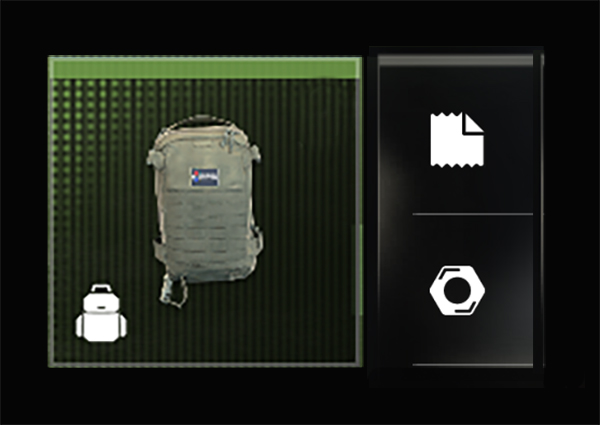
A backpack with extra item slots.
Small Backpack
Synthetics
25
Metals
25
Medium Backpack
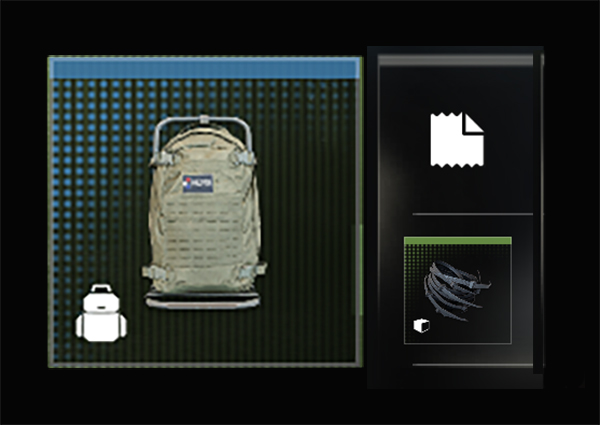
Upgraded backpack with extra item slots, and Secure slots, insuring you don’t lose an item if you fail to exfil.
Medium Backpack
Synthetics
50
Rigid Synthetics (Uncommon Loot)
5
Upgraded Unlocks: Unique, Single-Use Crafting Sessions
Select the Upgrades category to check out craftable enhancements to the entire FOB available at the 3D Printer Station. These FOB upgrades are permanent, and each of them requires multiple prints to fully complete, and include:
- Bank Upgrades
- Stash Item Capacity Upgrades.
- MIA Recovery Discounts
- Stash Weapon Capacity Upgrades
- Increasingly Rare Ingredient Printing
Crafting Gear
The left side of your 3D Printer menu contains all of the categories of equipment, items, and gear you can craft, with some content requiring your 3D Printer to be upgraded, unlocked via DMZ Player Level Progression.
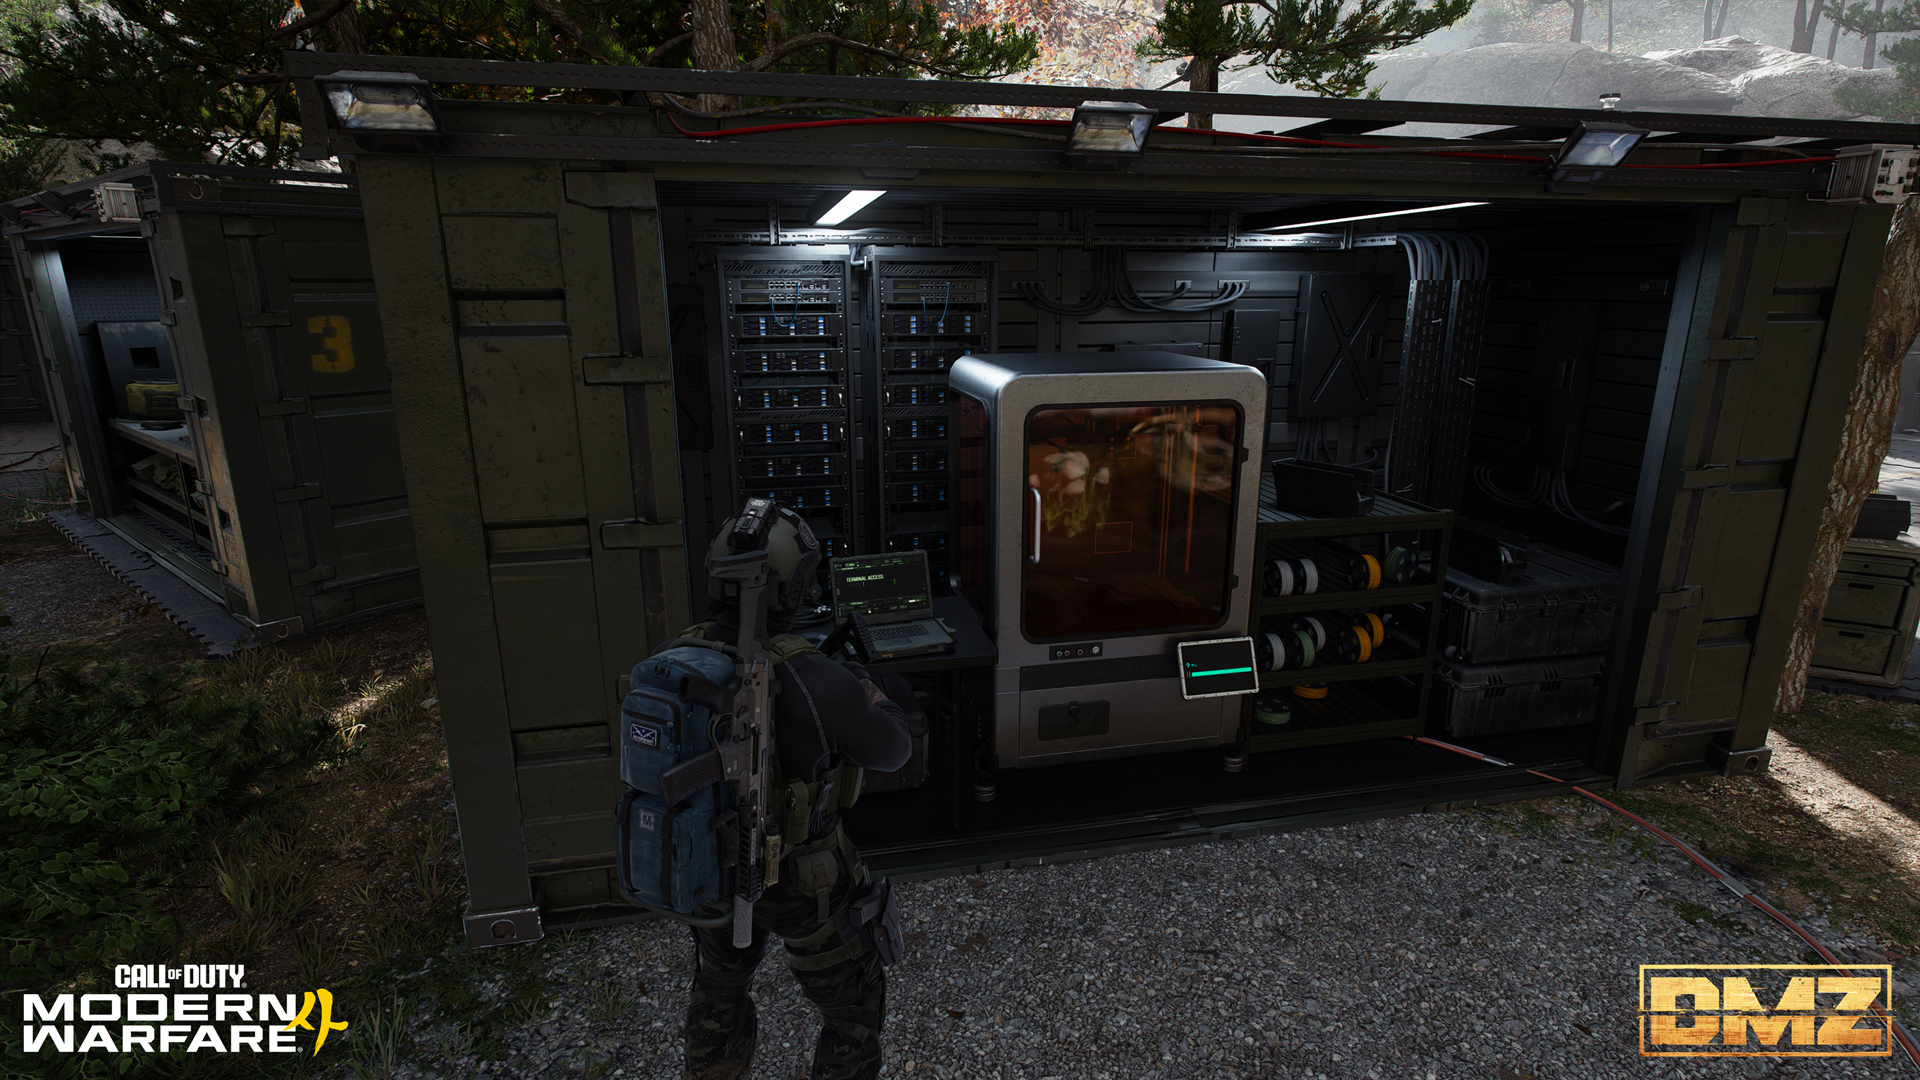
Here’s what you can build, and why:
- Upgrades: Use DMZ Cash, Ingredients, and Valuables once you’ve progressed enough to unlock extra Dog Tag Case storage, Gunsmith discounts, and additional Vendor purchase options. You can also upgrade your 3D Printer resources to craft Uncommon or Epic rarity Components, such as Rigid Synthetics and Alloyed Plating.
- Consumables: Craft single-use items to heal, boost performance, survive radiation, and breach secured doors.
- Plate Carriers: Increase your armor capacity and protection in the field. Note that some Plate Carriers (Vests) have additional Plate capacity, are more durable and protect from one-shots, or use enhanced plates for extra tempered protection.
- Backpacks: Expand your carrying capacity for weapons, gear, and supplies both in the field, and in the Stash/Loadout Menu. Note that some Backpacks have slots for additional weapons and secure slots that protect the items in them from being lost if you fail to exfil.
- Tacticals: Deploy utility equipment to disrupt enemies, heal, and gain an advantage.
- Lethals: Craft offensive equipment to eliminate threats and clear positions.
- Field Upgrades: Deploy tactical equipment that supports ongoing utility during an operation.
- Fire Support: Call in powerful Killstreaks to help turn the tide of an engagement.
- Gear: Craft facial gear to mitigate gas or darkness, as well as parachutes.
- Ingredients: Craft specific ingredients which previously had to be looted and extracted.
Note: Tracked Items: Any Recipes or Ingredients you have a particular interest in can be tagged and are tracked, so you can quickly check which Recipes you’re particularly in need of finding.
TIP: Most of the items you store in your Stash and/or use in the 3D Printer have category icons shown in the bottom-left corner of their slot image. This quickly allows you to understand which items are which, and how they are best used. These icons mostly correspond with the category menu icons along the left side of the Stash/Loadout screen, except for valuables (indicated by a gem icon) that can be immediately sold for DMZ Cash, but are also used for FOB Upgrades at the 3D Printer.
Boss Board: Lieutenants and Commanders
Unlocks after you complete your second DMZ Order / Accessed at a physical Station within the FOB
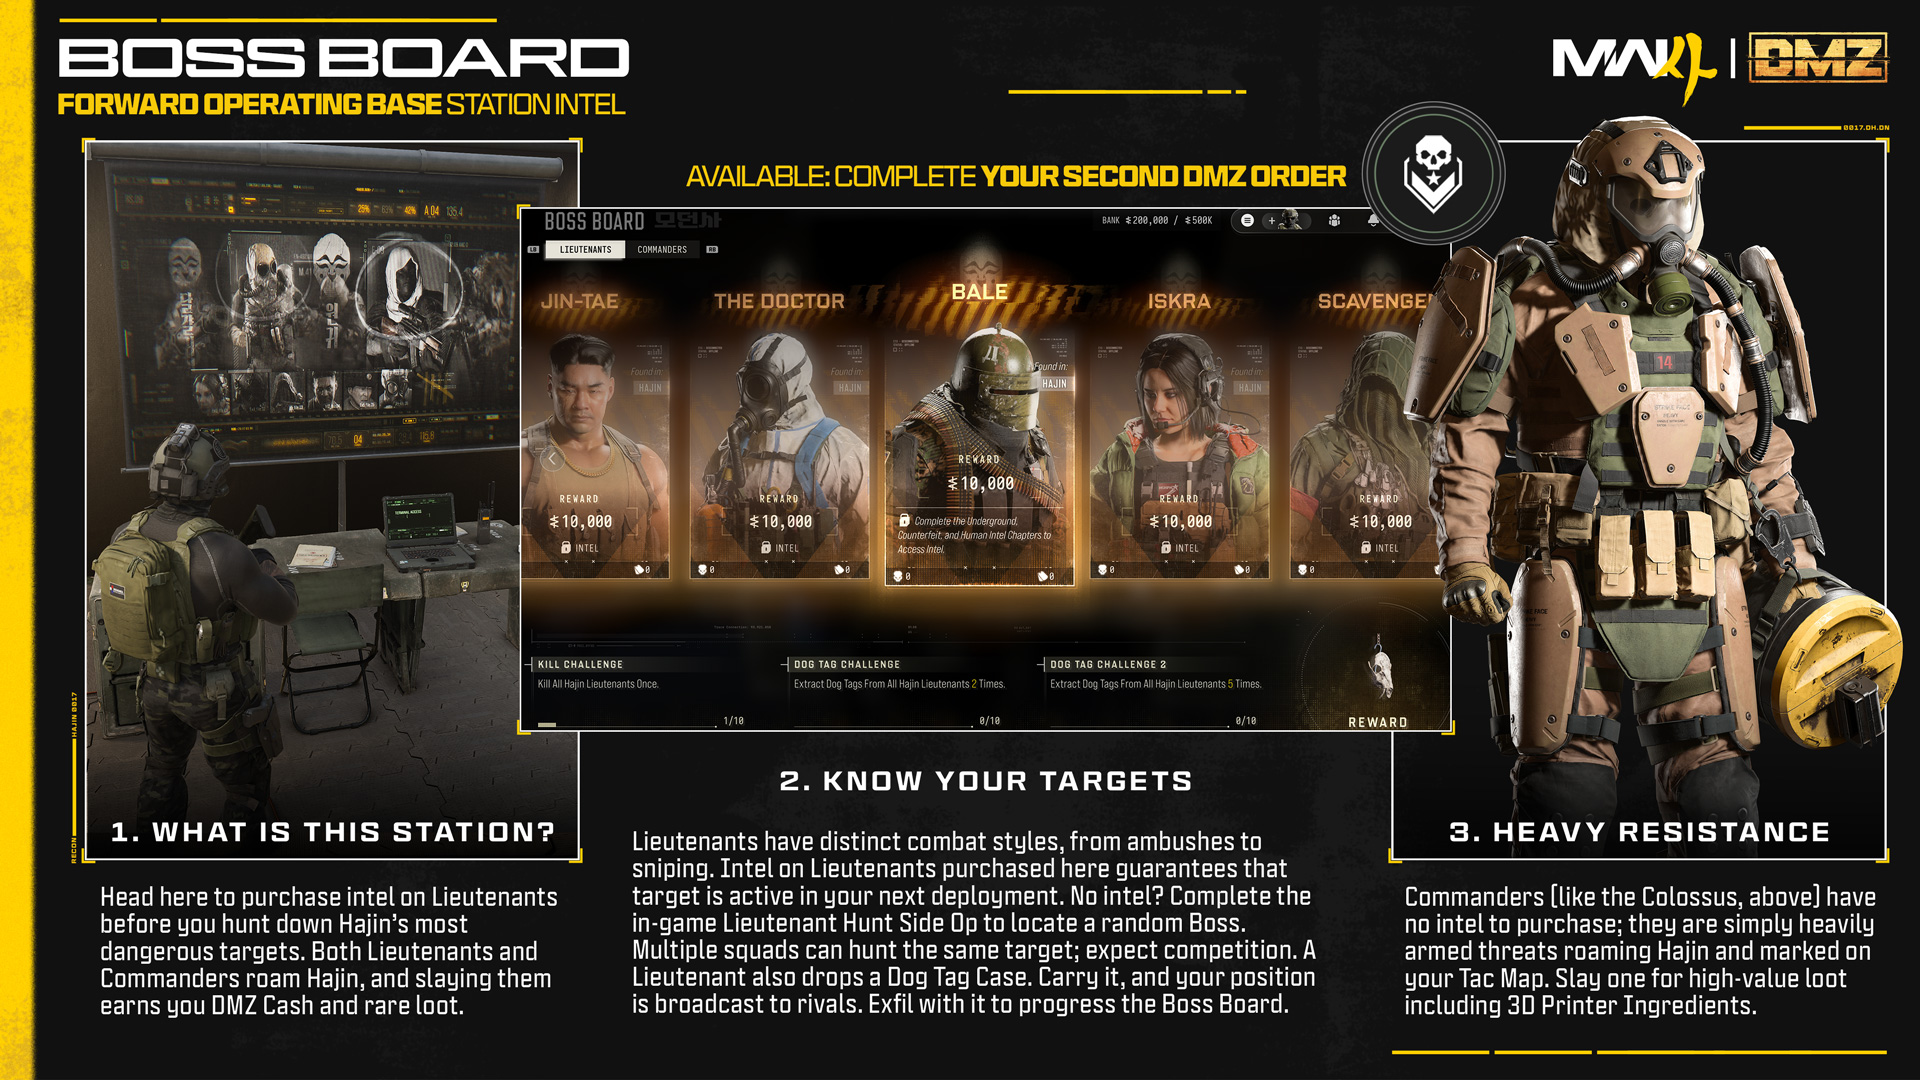
Visit the Boss Board for recon on the toughest opponents inside Hajin. Gain valuable intel (for a price) on Lieutenants, and free information regarding Commanders, before you decide to hunt either Boss type down for sizable DMZ Cash rewards.
The following is available at the Boss Board, regarding the two different Boss types:
Lieutenants
Find and kill Lieutenants for valuable rewards. Purchase intel to hunt a specific Lieutenant. Extract with a Lieutenant’s Dog Tag Case for additional rewards, and for an even greater challenge, earn unique rewards for completing these challenges multiple times.

Lieutenants are battle-hardened military operatives, each with a profile indicating a success in high-casualty engagements, and a distinct method of dealing with adversaries. These high-value targets carry a unique loadout, are sometimes spotted with a small cabal of loyal troops, making their takedowns problematic and much more tactically focused.
Does Hajin have a Lieutenant (or multiple) active during your deployment? It’s time to find out:
- To help locate Lieutenants, complete a specific set of challenges in prior deployments to gain access to available intel on the Lieutenant.
- Once you unlock the ability to purchase Intel at the Boss board, pay for it using DMZ Cash, and then deploy and hunt the target Lieutenant down.
- Each Lieutenant’s iconic weapon as a rare change to drop after the kill. Lieutenants can also drop a special key to their own personal locked location.
- Purchased Lieutenant intel is good for one deployment, so make it count.
- Side Ops: Another excellent way to locate Lieutenants across Hajin is to climb a Lieutenant Hunt tower located on your Tac-Map. Access an Upload Station at the top, and the tower marks the closest Lieutenant to you and your squad.
- Lieutenant Loot: Dog Tag Case: Aside from a substantial DMZ Cash bonus after a confirmed kill, and a distinct weapon, it is important to focus on the Lieutenant Dog Tag Case a Lieutenant always drops after being dispatched.
- Pick this up, and your position is broadcast, alerting rival squads. An immediate exfil is critical. Exfil with a Lieutenant’s Dog Tag Case to progress the Boss Board, whether the Dog Tag Case was acquired by killing the Lieutenant or taken from another player.
- Expect additional [CLASSIFIED] rewards for players who focus on slaying Lieutenants.
Commanders
Commanders are always present in the Exclusion Zone, and offer rare rewards for those skilled enough to eliminate them. Intel cannot be purchased for Commanders.
Commanders are present across Hajin, and you must be situationally aware of them. These are heavily armored and dangerous foes.
- Commanders are marked on your Tac Map when they are close by. Your Team Leader also warns you of their proximity, so pay attention.
- Expect a DMZ Cash reward the first time you take down a specific Commander, as well as valuable 3D Printer Ingredients for killing a Commander and extracting.
- Expect additional [CLASSIFIED] rewards for slaying multiple Commanders.
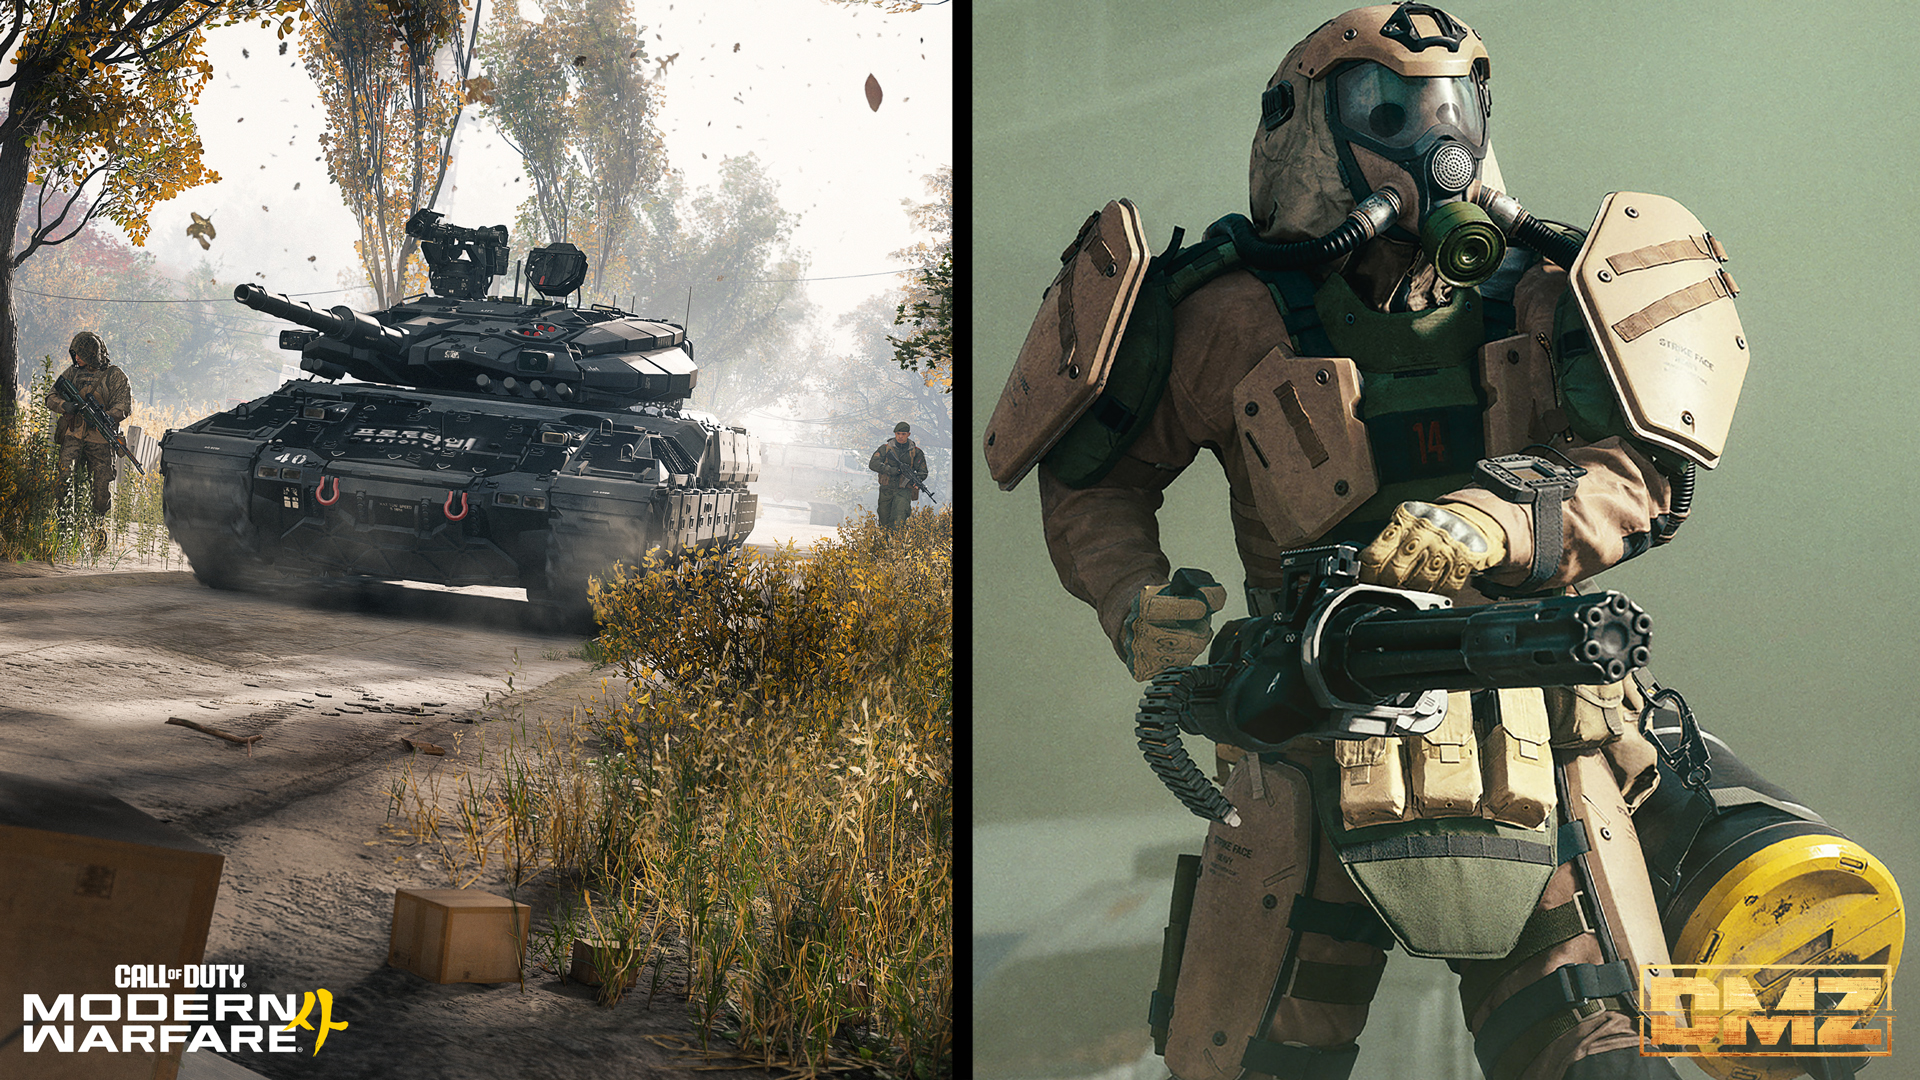
Commanders include the following:
- Colossus: A seven-foot tall, heavily armored soldier built for the conditions in Hajin, equipped with a Minigun firing depleted uranium rounds.
- Deathstalker: There are four types of enemy drones active in Hajin. This is a helicopter-sized Autonomous drone adversary mounted with dual machinegun turrets.
- Tank: A North Korean battle tank on high alert, patrolling Hajin.
Vendor
Unlocks at DMZ Level 5 / Accessed within the FOB, or the left side blade menu.
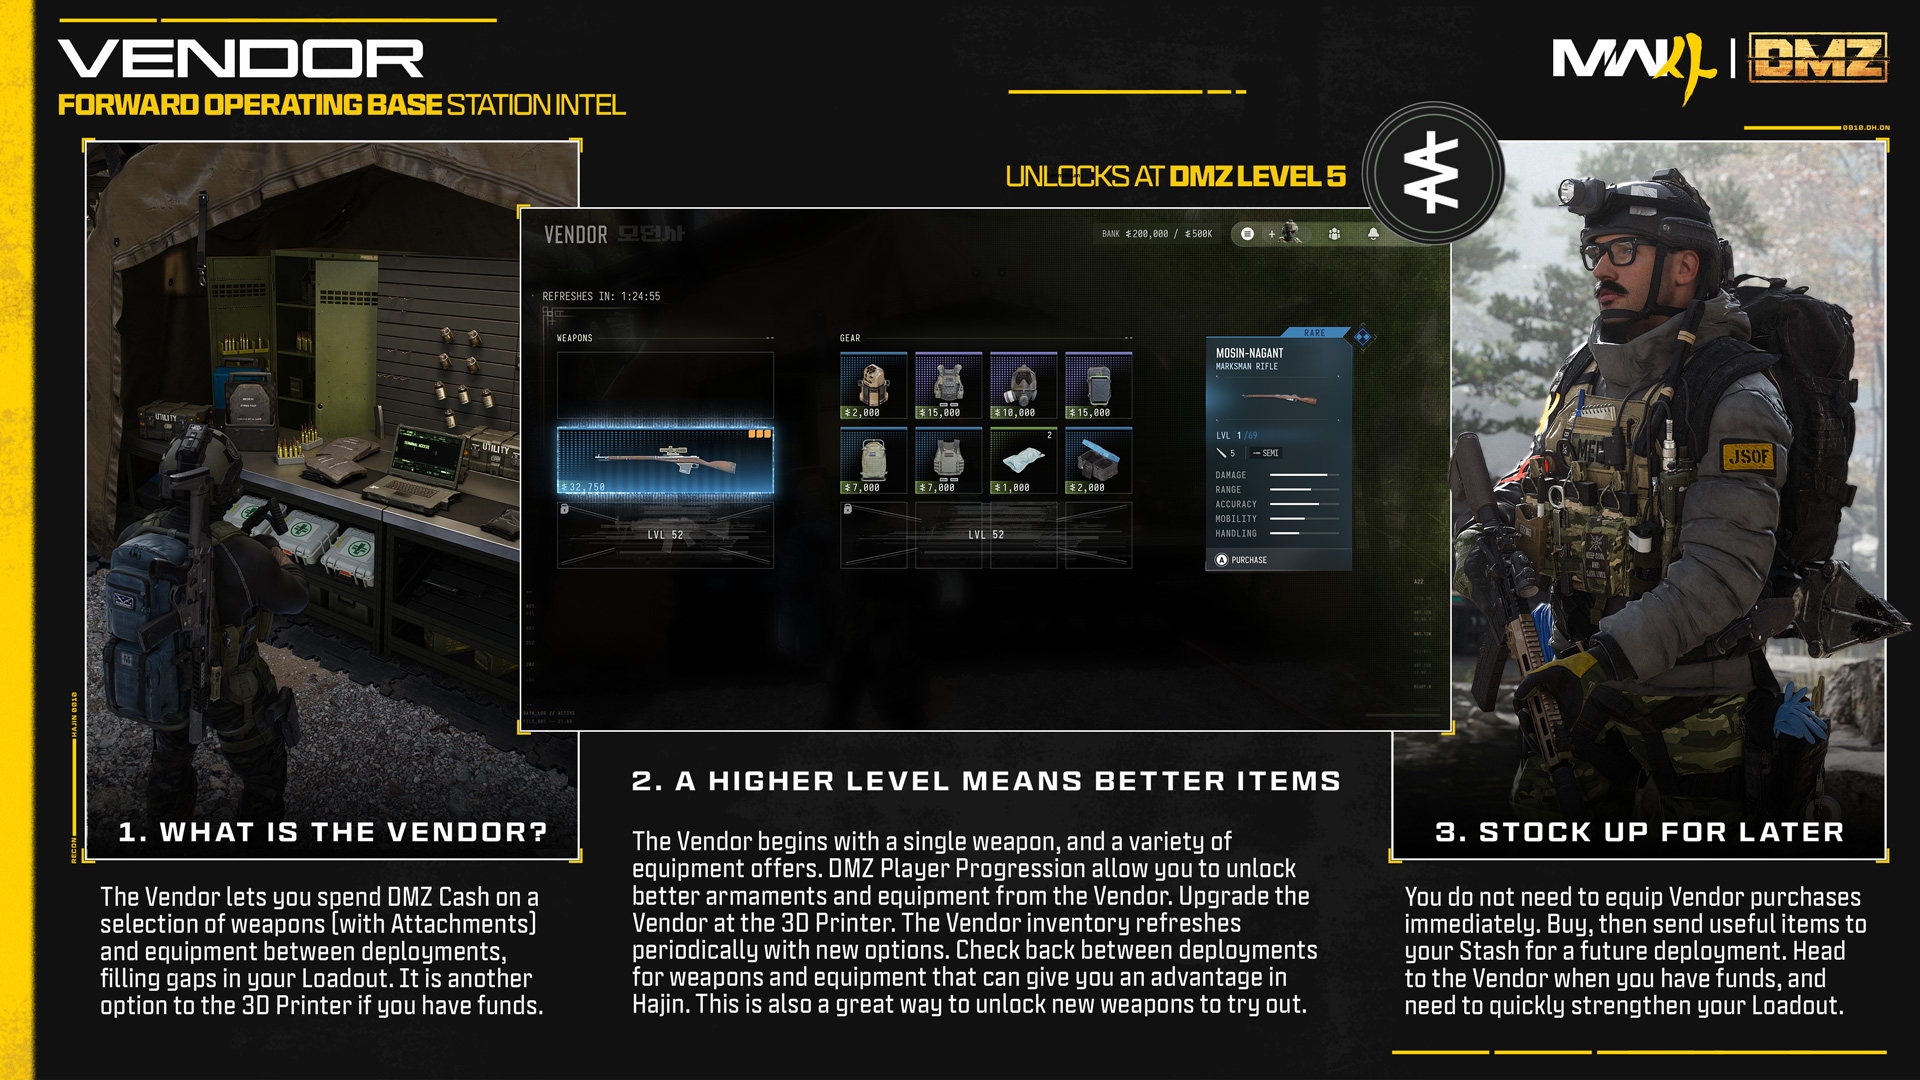
The Vendor is a rapid way to purchase weapons and equipment, especially useful when you want to get back into the action quickly, fill gaps in your Loadout, or haven’t unlocked printable options yet. Ifyou have the cash, the vendor has you covered.
As your DMZ Level increases, you’ll gain access to higher-level gear from the Vendor. The Vendor offers the chance to purchase better equipment and build a stronger kit. You can choose to print additional upgrades to the Vendor (via the 3D Printer) which add even more options available for purchase. Vendor offerings refresh periodically so spend your DMZ Cash accordingly.
Gunsmith
Unlocks at DMZ Level 10 / Accessed within the FOB, or the left side blade menu.
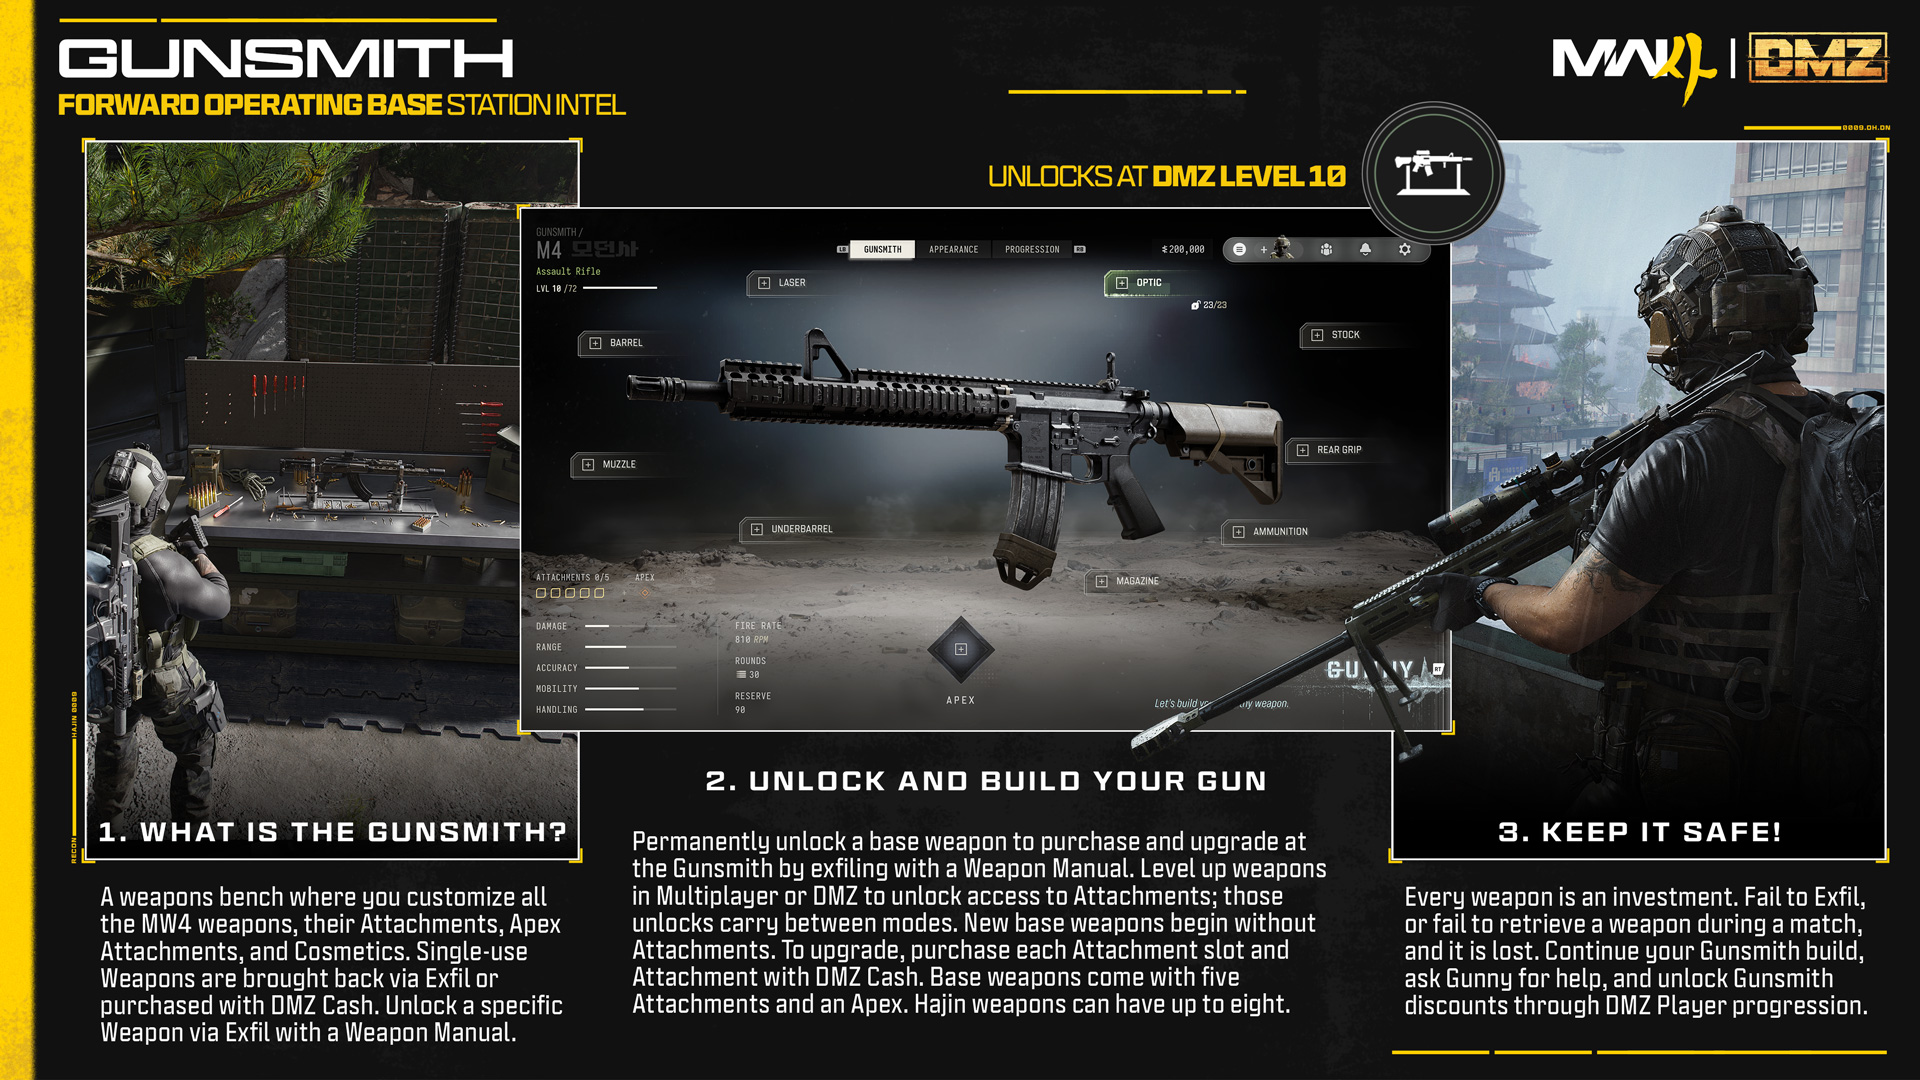
The Gunsmith is where you build and customize weapons for your DMZ Loadout, both functionally and cosmetically. The Gunsmith works similarly to Multiplayer: level up specific weapons to unlock attachments along their progression tracks, weapon progression counts across both MP and DMZ. Any compatible attachments you’ve already unlocked through Multiplayer or other means are also available to use in DMZ.
The major difference In DMZ is that Gunsmith weapons are purchased and built using in-game DMZ Cash.
- The Attachments available to buy for your weapon are unlocked by leveling the chosen weapon, and the Weapon level is shared between Multiplayer and DMZ modes.
- In the Gunsmith, you can add up to five Attachments to a weapon. However, weapons found across Hajin can have up to eight Attachment slots.
- Any weapon you extract with can be brought into the Gunsmith as a single instance weapon. However, if it is subsequently lost during a deployment, that weapon type (the M4, for example) is still locked.
- However, to purchase a weapon within the Gunsmith, you must first locate the Weapon Manual for that weapon, and extract with it. Complete this, and you can purchase the weapon as often as you wish to.
- Cosmetics for weapons, like Weapon Camos and Stickers do not require DMZ Cash to apply.
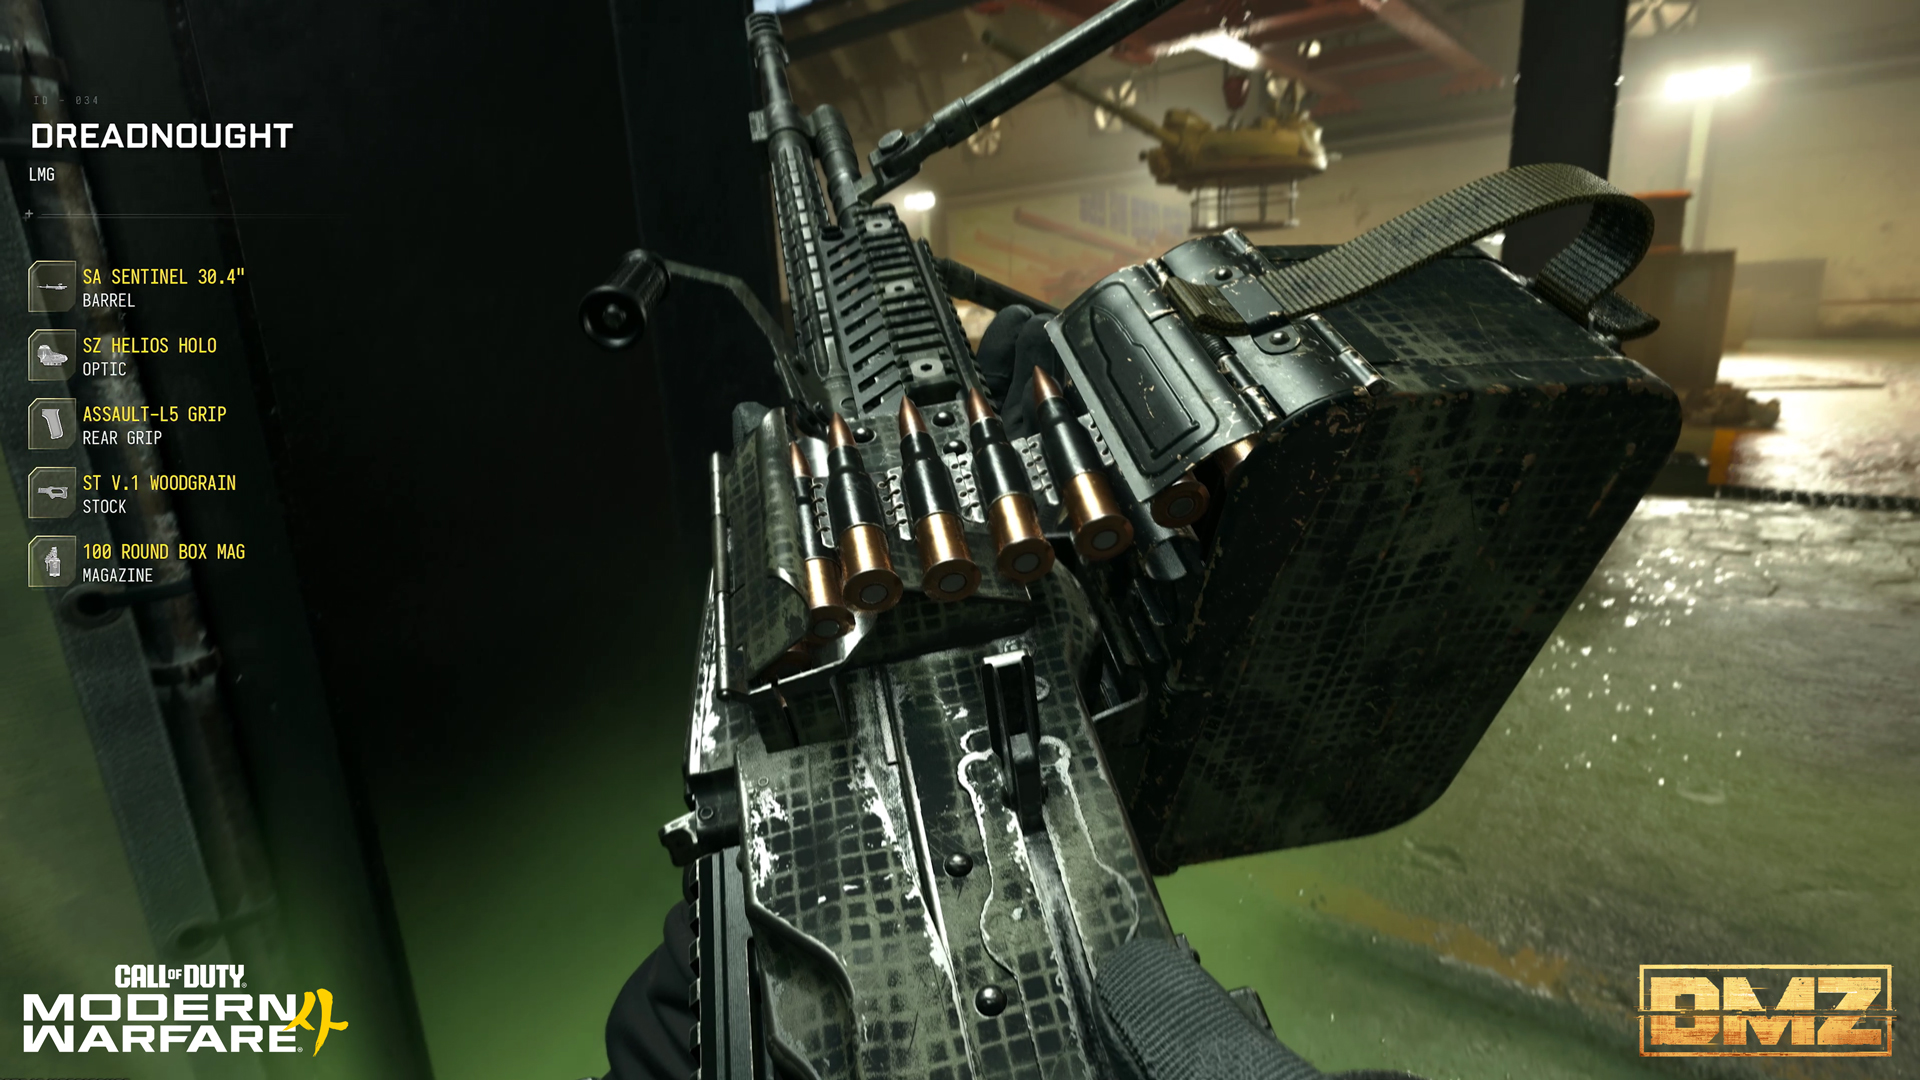
Where can weapons be located and used by your Operator? Here’s a quick run-down:
- From the Free Loadout when you deploy.
- Weapons located in your Stash.
- Weapons purchased and built within the Gunsmith.
- Via Weapon Manuals you must loot and extract with. These are the key to unlocking more weapons to purchase within the Gunsmith.
- From the FOB Vendor.
- Collected from enemies or Lieutenants during a deployment.
- Looted from slain players.
- Looted from military containers across Hajin, located in Police Stations, Compounds.
- From Weapon Blueprints.
- And more!
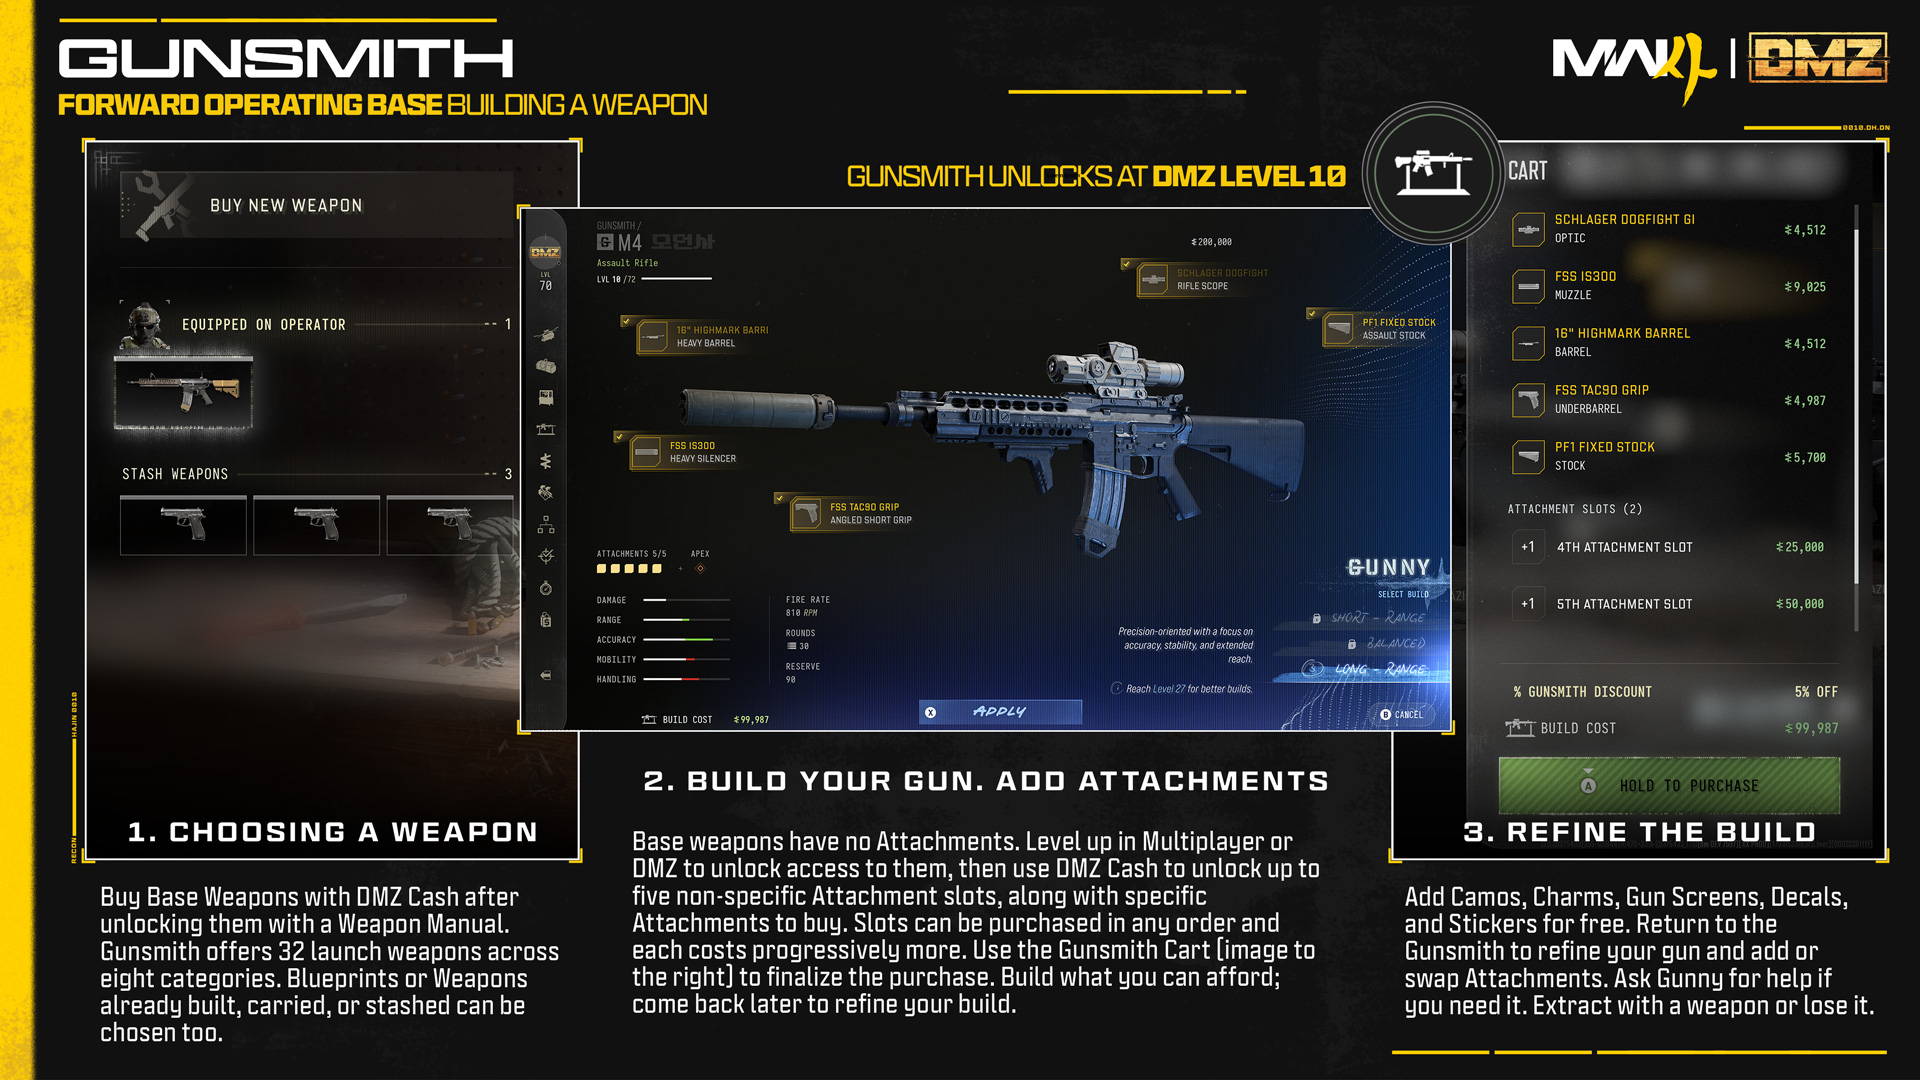
Gunsmith Basics
Keep these DMZ Gunsmith basics in mind:
- A single-use Weapon can be upgraded: Any weapon you exfil with can be augmented at the Gunsmith.
- However, to purchase a Base Weapon and keep unlocking more weapons, you must find and exfil with a Weapon Manual.
- Access attachments through weapon progression: Level up weapons in MP or DMZ to gain access to their attachments.
- Go to “Buy New Weapon” and view all 32 launch weapons in the following eight categories:
- Assault Rifles (8 types)
- SMGs (5 types)
- Shotguns (2 types)
- LMGs (3 types)
- Marksman Rifles (3 types)
- Sniper Rifles (3 types)
- Pistols (4 types)
- Launchers (4 types): Launchers do not come with Attachments or Apex Attachments.
- For example, a base M4 Assault Rifle costs around 5,000 DMZ Cash. It comes with five Attachment slots (each requiring DMZ Cash to unlock) and an Apex Attachment slot (always available without DMZ Cash expenditure, providing you’ve leveled up the weapon to access it).
- Go to “Buy New Weapon” and view all 32 launch weapons in the following eight categories:
- Purchase Attachments and Attachment Slots: Spend DMZ Cash to add attachments you’ve unlocked, including Apex Attachments.
- Attachment Slots: These allow you to access a slot within the Gunsmith and can be purchased in any order. Unlocking each consecutive slot requires a greater DMZ Cash payment each time. Unlocking one Attachment Slots means you can then purchase and fix a single Attachment of any type to your weapon. The Attachments you choose have a cost value and also must have been unlocked via weapon levelling.
- Add Cosmetics: Access the Appearance Menu to add any Weapon Camo, Accessory (Charm or Gun Screen), Decal, and Stickers you’ve acquired or unlocked. No DMZ Cash is needed for cosmetic changes, excluding Blueprints (see below).
- Attachment Slots: These allow you to access a slot within the Gunsmith and can be purchased in any order. Unlocking each consecutive slot requires a greater DMZ Cash payment each time. Unlocking one Attachment Slots means you can then purchase and fix a single Attachment of any type to your weapon. The Attachments you choose have a cost value and also must have been unlocked via weapon levelling.
- Build your Arsenal: Upgrading a weapon can be expensive, but a stronger build will give you better tools for surviving deployments. Add to your Loadout with a back-up Primary or Secondary Weapon to cater to all kinds of encounters.
- Get help from Gunny: Not sure how to build your weapon? Gunny can help put together a build to get you deployed again.
- Upgrade your Gunsmith: Ensure you continue Progression through DMZ levels to unlock a Gunsmith Discount (available at the 3D Printer), reducing purchase pricing.
Using Weapon Blueprints in DMZ
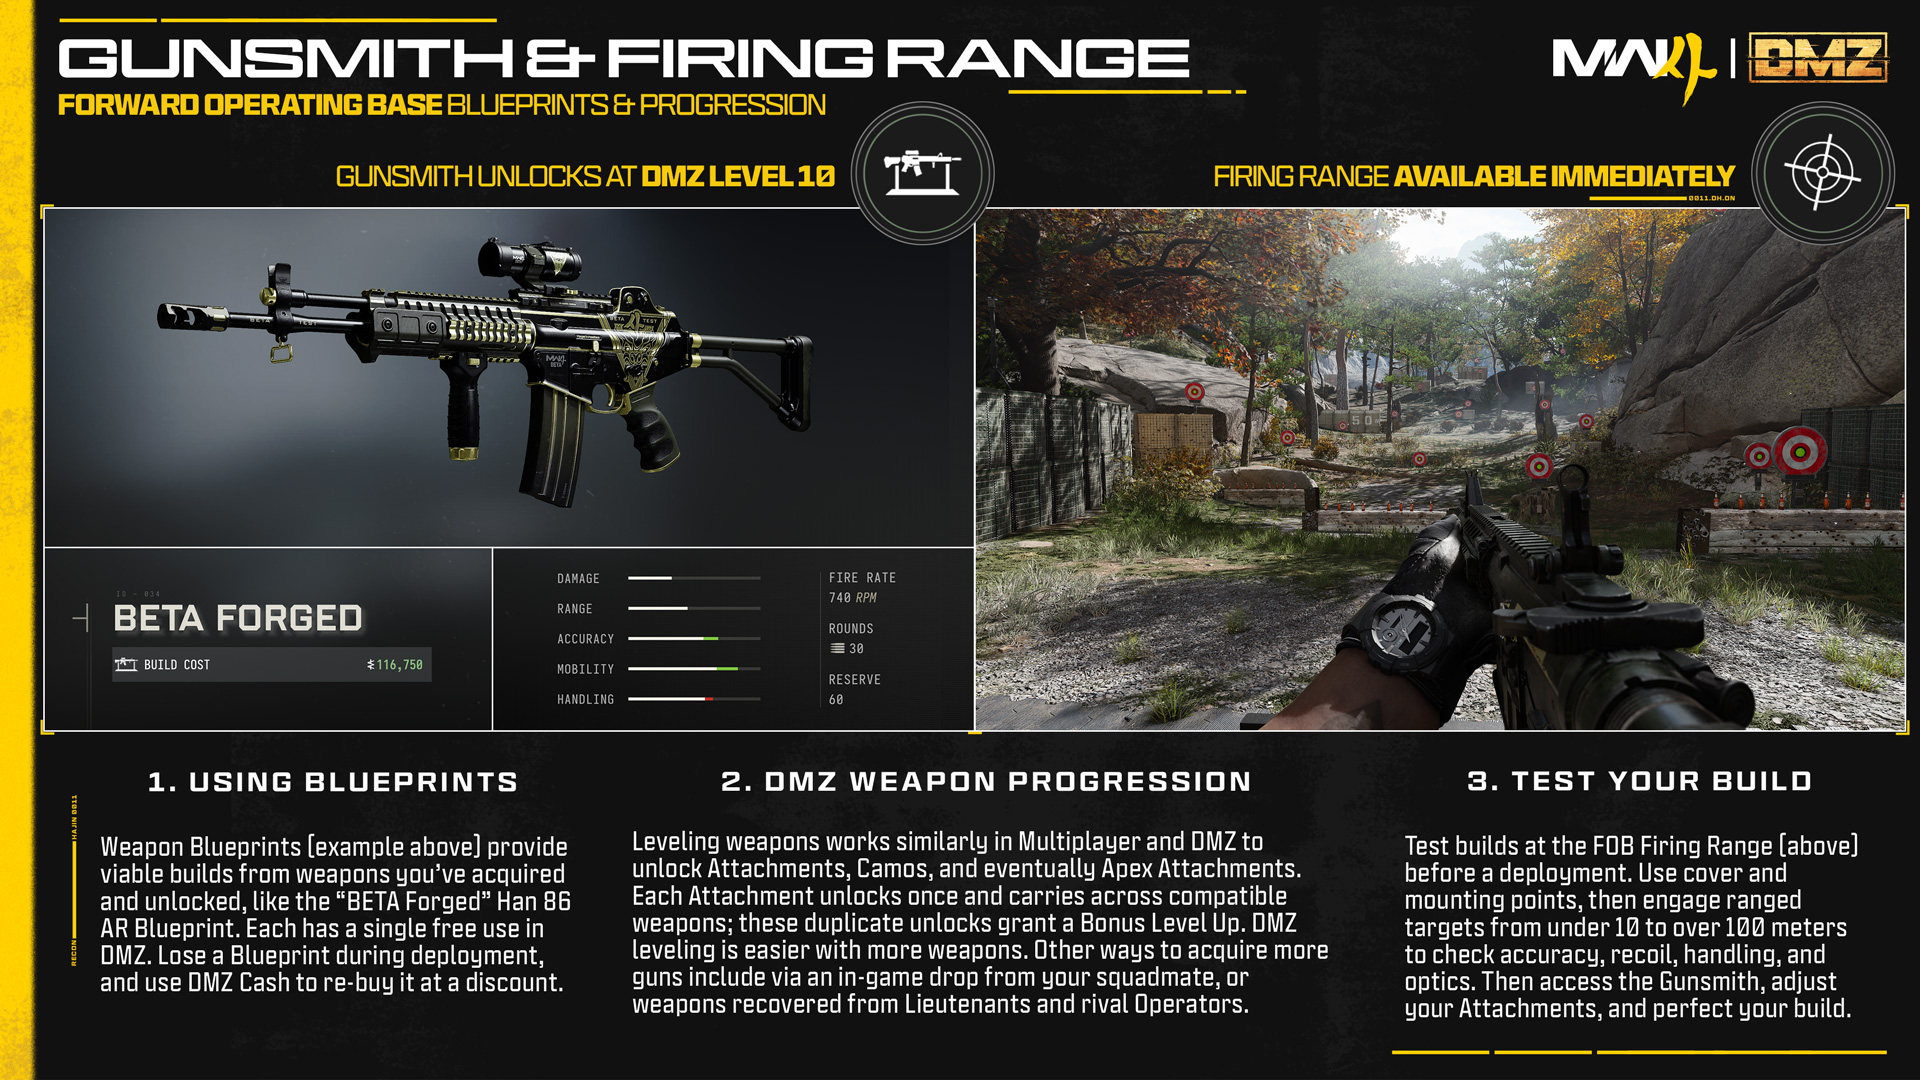
In DMZ, when you acquire any Weapon Blueprint – like the Beta Forged Han 86 Assault Rifle Blueprint awarded for completing the MW4 Beta – you can utilize it once for free within the DMZ Gunsmith menu. If you lose this Blueprint during your deployment, that instance of it is lost permanently.
Should you wish to use that same Blueprint again, you can elect to buy it (using DMZ Cash) at a discount compared to the normal cost of building the weapon. This applies to any Blueprints you own; all Blueprints can be purchased at a discount compared to building the same weapon in the Gunsmith.
Vault Edition Reward
Players with the Modern Warfare 4 Vault Edition have a one-time access to the Vault Edition Signature Weapon Collection Blueprints, which appear in your DMZ inventory. Should any of those Blueprints be lost during a DMZ deployment, you receive a discount on acquiring them again at the Gunsmith.
Here are the available Signature Weapon Collection base weapons and Blueprints. All have five Attachments at an Apex Attachment, aside from the Combat Knife:
- Kastov 762 Assault Rifle and “Voltspine” Blueprint
- ISO Nightshade Submachine Gun and “La Sombra Venenosa” (“The Poisonous Shadow”) Blueprint
- Rezi 12 Shotgun and “Shattered Code” Blueprint
- Oris 8.6 Marksman Rifle and “Volt-Edge” Blueprint
- Combat Knife (Melee) and “Sombra Besada” (“Shadow’s Kiss”) Blueprint
DMZ Weapon Progression
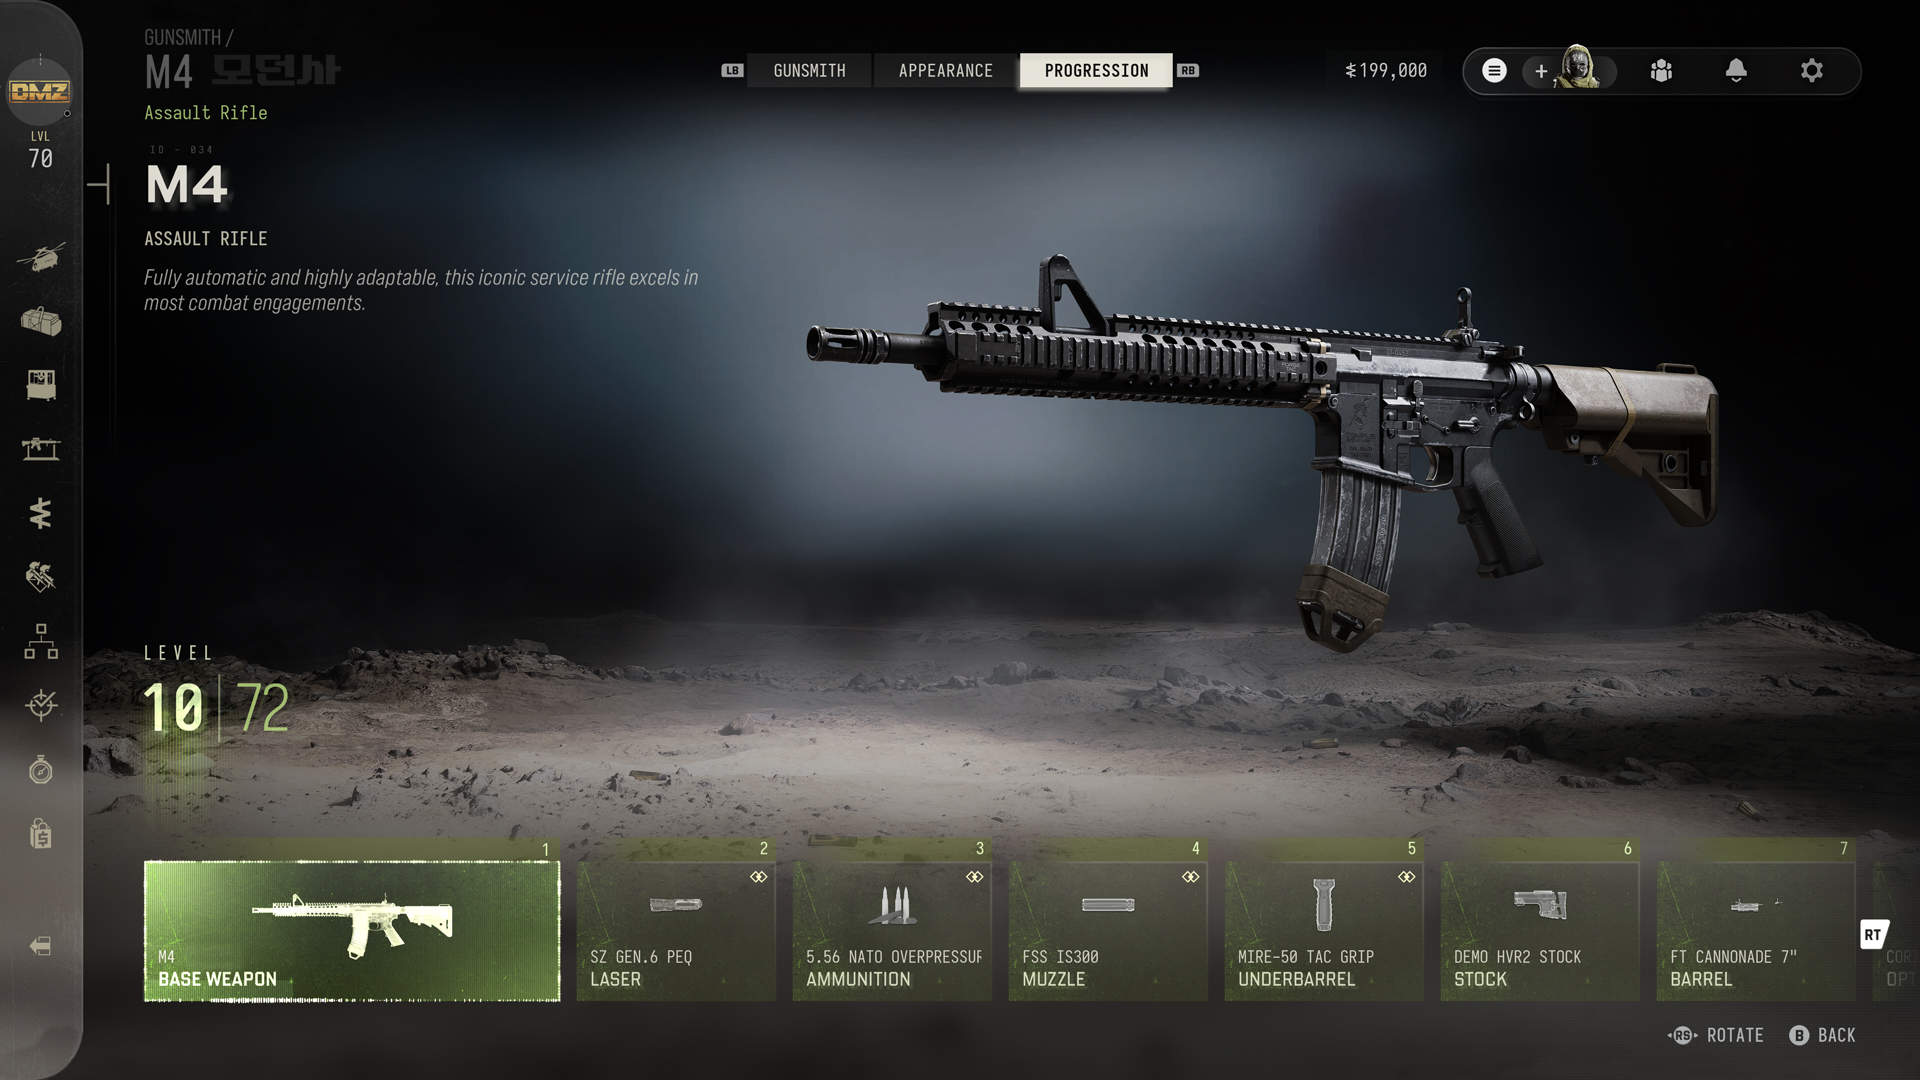
Access the Progression menu to view the leveling path for any weapon. This is a global system, so any Progression you achieve across Multiplayer and DMZ is counted. Here’s how this works:
- The number of levels — in the case of the example M4, that would be 72 — are shown along with any Attachment unlocks and Weapon Camos available at each level.
- Each Attachment available across all compatible weapons – known as a “Shared Attachment” – is only unlocked once, meaning there is no redundant grinding. If a weapon level would award an Attachment you already own, you skip that level with a Bonus Level Up.
- The Apex Attachment(s) for the Weapon is also available once you complete all of the weapon’s levels.
- Weapon Prestige is also available for each weapon.
Tip: Experienced players can build weapons for their squadmates, as well as utilizing Weapon Backpacks that allow an additional weapon slot, and drop that weapon for a squadmate once deployment is under way in Hajin.
Tip: Players can only carry two weapons in and out of a deployment. To maximize growing your arsenal, it is recommended you find or 3D Print one of the Weapon Backpacks, so you can always bring out an additional one or two extra weapons (one in your Secondary Loadout slot, and a third in your Backpack).
Tip: More impressive and rare weapons may be looted from player Operators you’ve taken down, as well as from the bodies of slain Lieutenants. If a Lieutenant doesn’t drop their weapon, inspect the corpse for a Lieutenant’s key to a named loot room where their weapon can usually be found.
Dog Tag Case
Unlocks at DMZ Level 20 / Accessed at a physical Station within the FOB
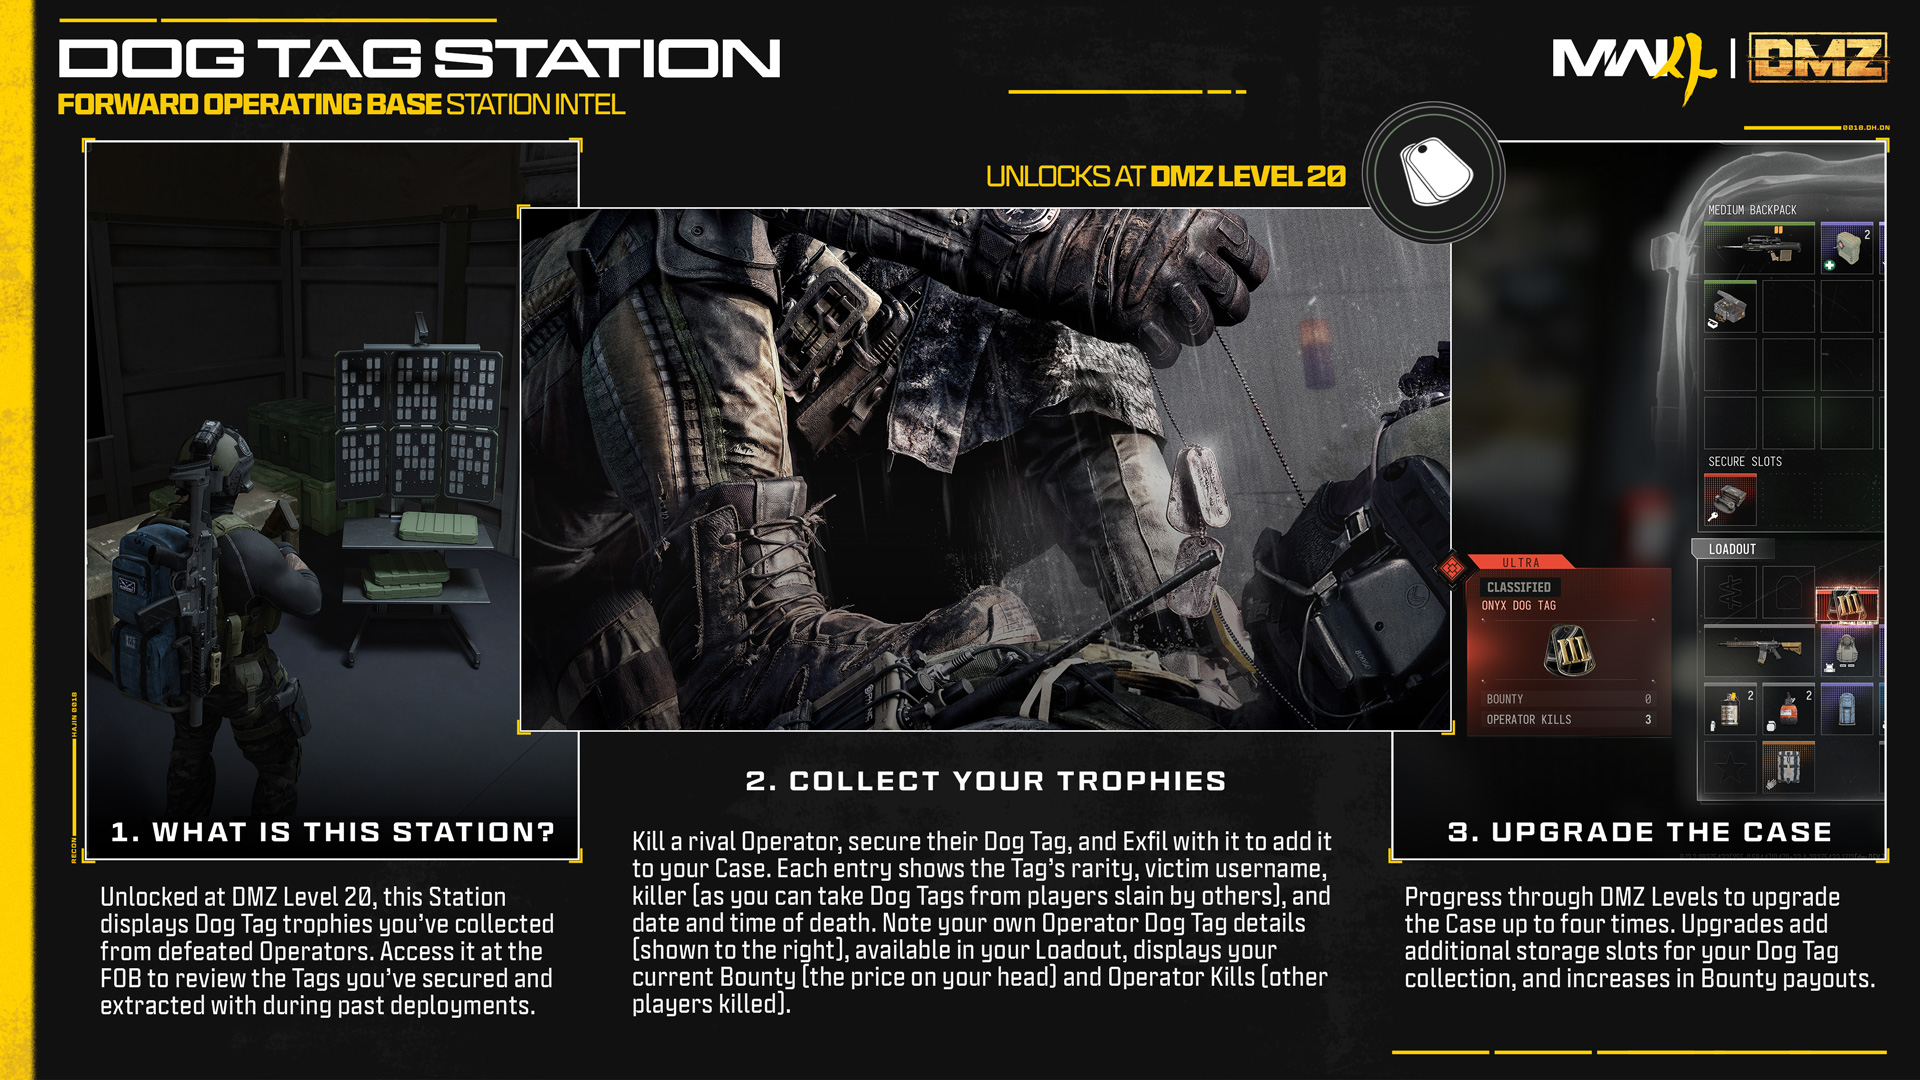
Wanting to reminisce about a particularly satisfying takedown? Collecting trophies of high value Operator targets you’ve slain? Visit the Dog Tag Case.
Slay a player, locate and exfil with their Dog Tag, and this is added to your Dog Tag Case in the FOB.
Inspect your collected Dog Tags, with the following information imparted:
- Dog Tag Rarity (Steel, Bronze, Silver, Gold, Damascus, or Onyx)
- Victim’s username
- Name of the Killer
- Death time and date
Your DMZ Player Level unlocks the Dog Tag Case station at level 20. Continue your DMZ Player Level journey to add further upgrades to this station, increasing the DMZ Cash you receive from bounties (though not all players you slay will have a bounty on their heads), and access the 3D Printer Upgrade menu to increase the slot count of the Dog Tag Case.
DMZ Progression
Available Immediately / Accessed at a FOB Station, the left side blade menu or the Career > Progression Menu.
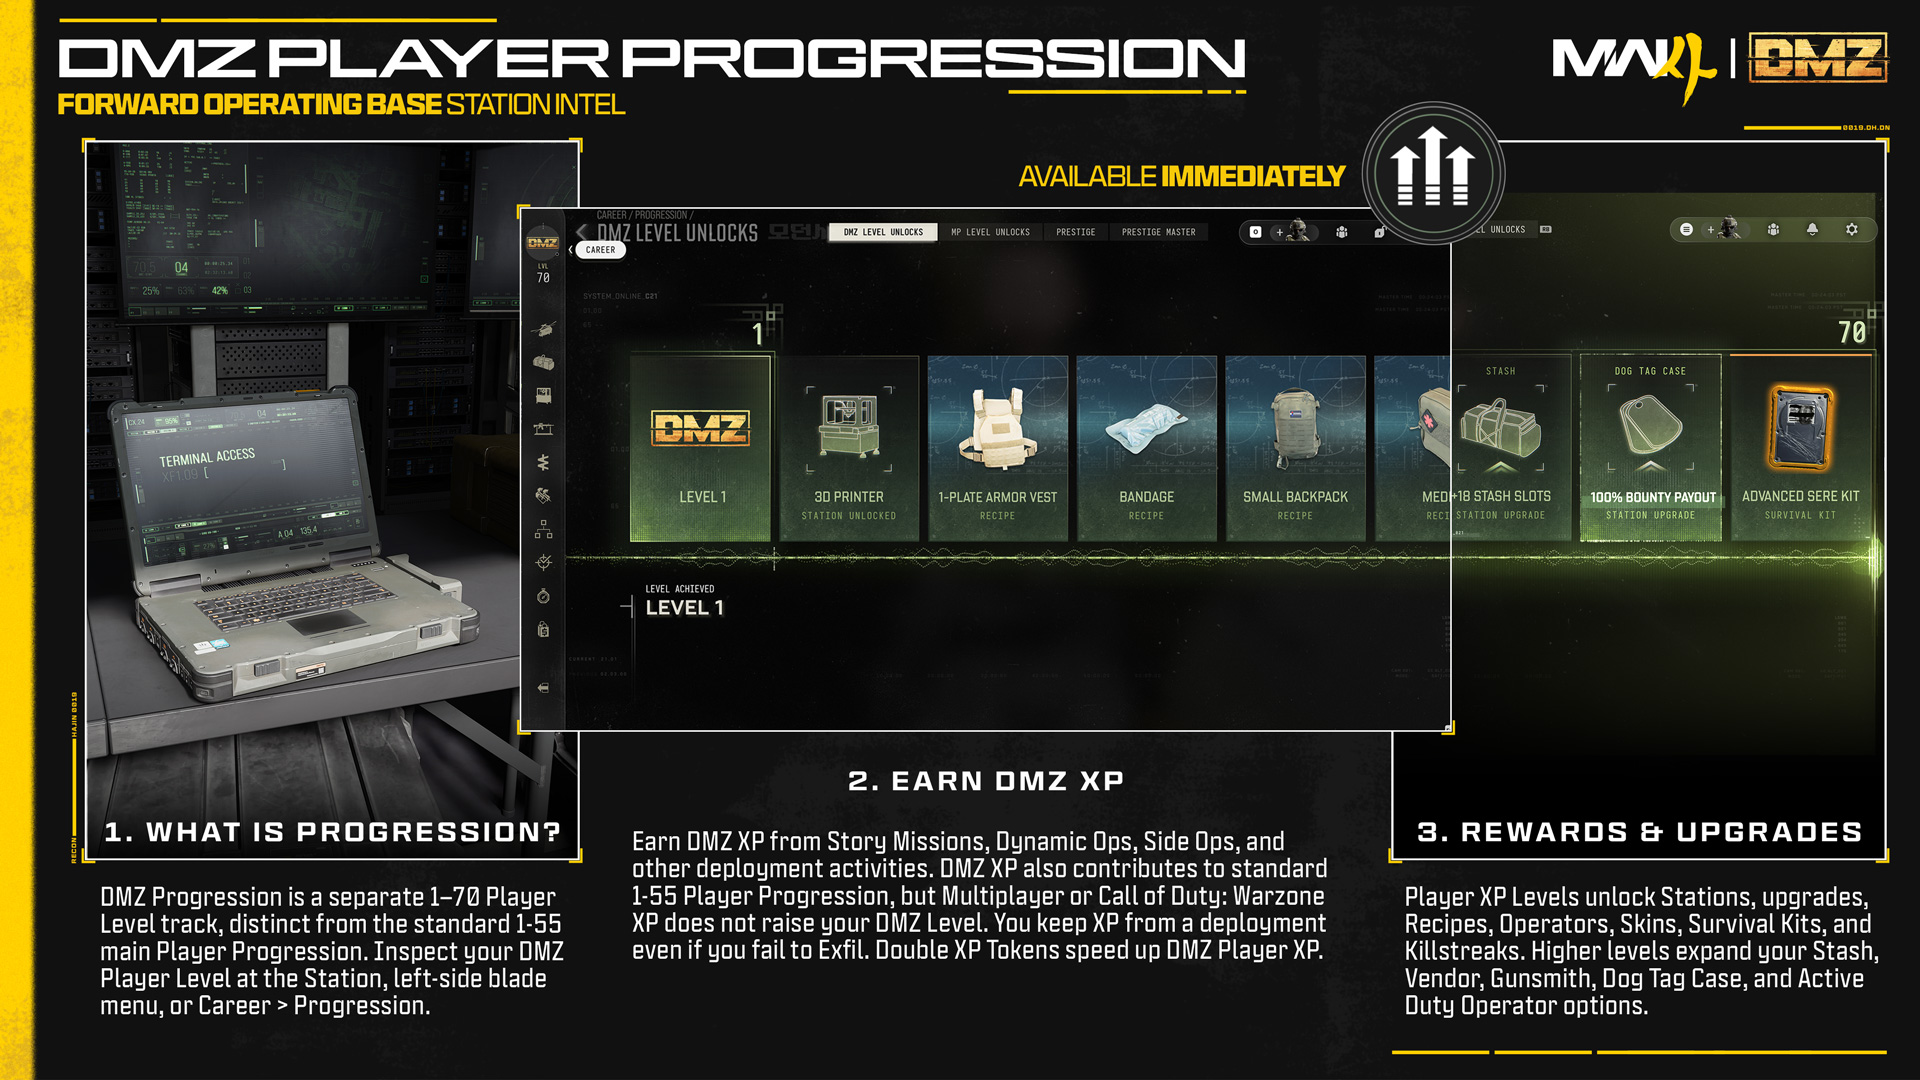
DMZ features its own distinct Player Level Unlock progression track, separate from the Level 1–55 Player Progression system that is also present in Modern Warfare 4. The DMZ Level Unlocks offers more unlockable acquisitions and occurs across 70 Levels.
Earn DMZ XP by completing Story Missions, Dynamic Operations, Side Ops, and other activities during deployments.
XP earned in the 1-70 DMZ Player Progression also contributes to your overall 1-55 Player Progression, but XP earned in Multiplayer or Call of Duty: Warzone™ does not contribute to your DMZ Level. Even if you fail to exfil, the DMZ XP earned during your deployment still counts toward your progress.
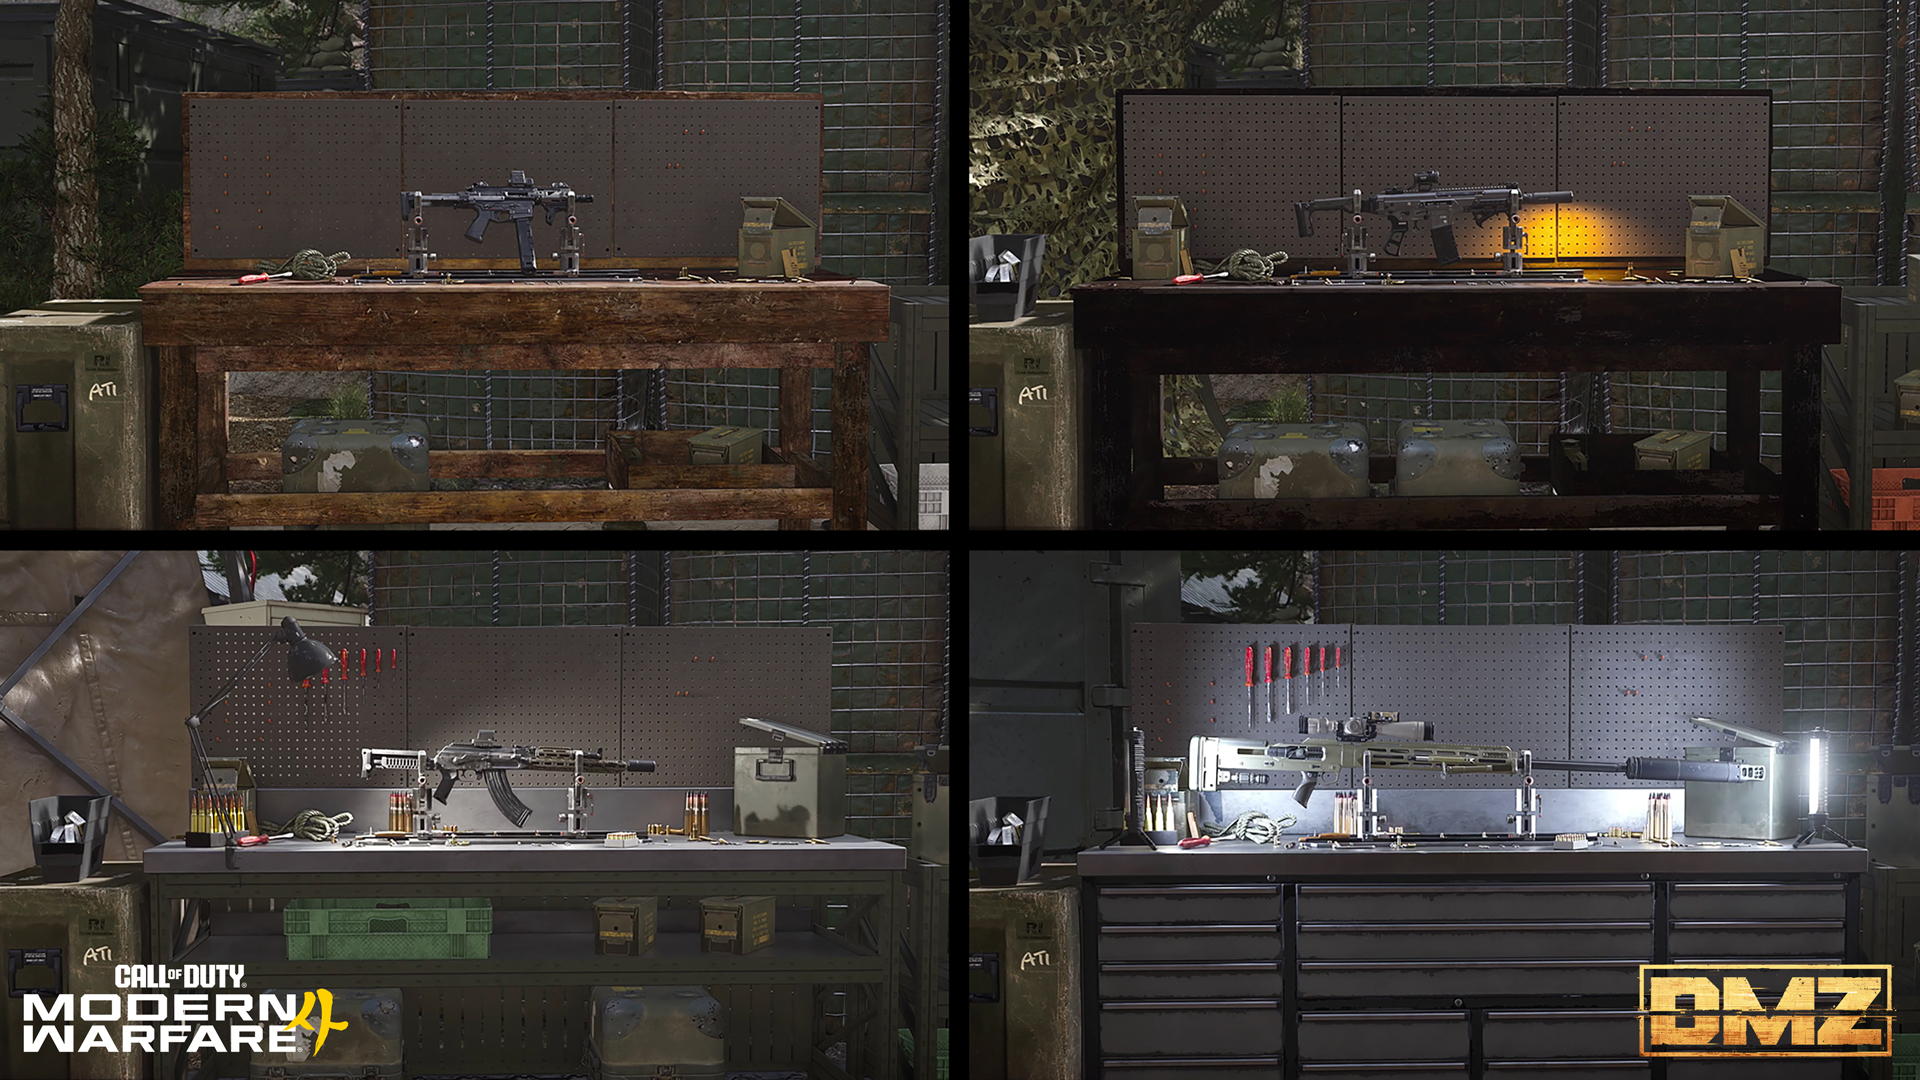
As your DMZ Level increases, you unlock new FOB stations, upgrades, and rewards that expand your access to the Forward Operating Base and help you prepare for future deployments.
The types of rewards are as follows:
- FOB Station Unlocks: Gain access to new stations
- FOB Station Upgrades: Gain additional benefits to your FOB stations as you level up, such as the following upgrades:
- 3D Printer Upgrades: Ability to print new Equipment types
- Active Duty Upgrade: Additional Operator Slot
- Bank Upgrades: Additional DMZ Cash Capacity
- Gunsmith Upgrades: Discounts to weapon purchases
- Stash Slots: Additional Slots for your Stash/Loadout equipment
- Weapon Stash Slots: Additional Slots for your Weapons
- Dog Tag Case: Bounty Reward Payout Increases
- FOB Vendor: Additional Weapon Offers and Item Slots
- Recipes: Unlock new items you can craft at the FOB’s 3D Printer.
- Operators and Skins: Customize an Operator’s appearance with new Operators and cosmetic outfits earned through DMZ progression.
- Consumables: Earn 3D Printer Ingredients, like Rigid Synthetics that are used to craft functional inventory items.
- Survival Kits: Obtained from the Survival Kit station in the FOB, containing bundles of equipment to use during deployments.
- Fire Support: Access powerful Killstreak
The DMZ Level Unlocks provide a progression path that gradually unlocks and improves the mode’s core systems.
Events
Available Immediately / Accessed within the FOB, or the left side blade menu.
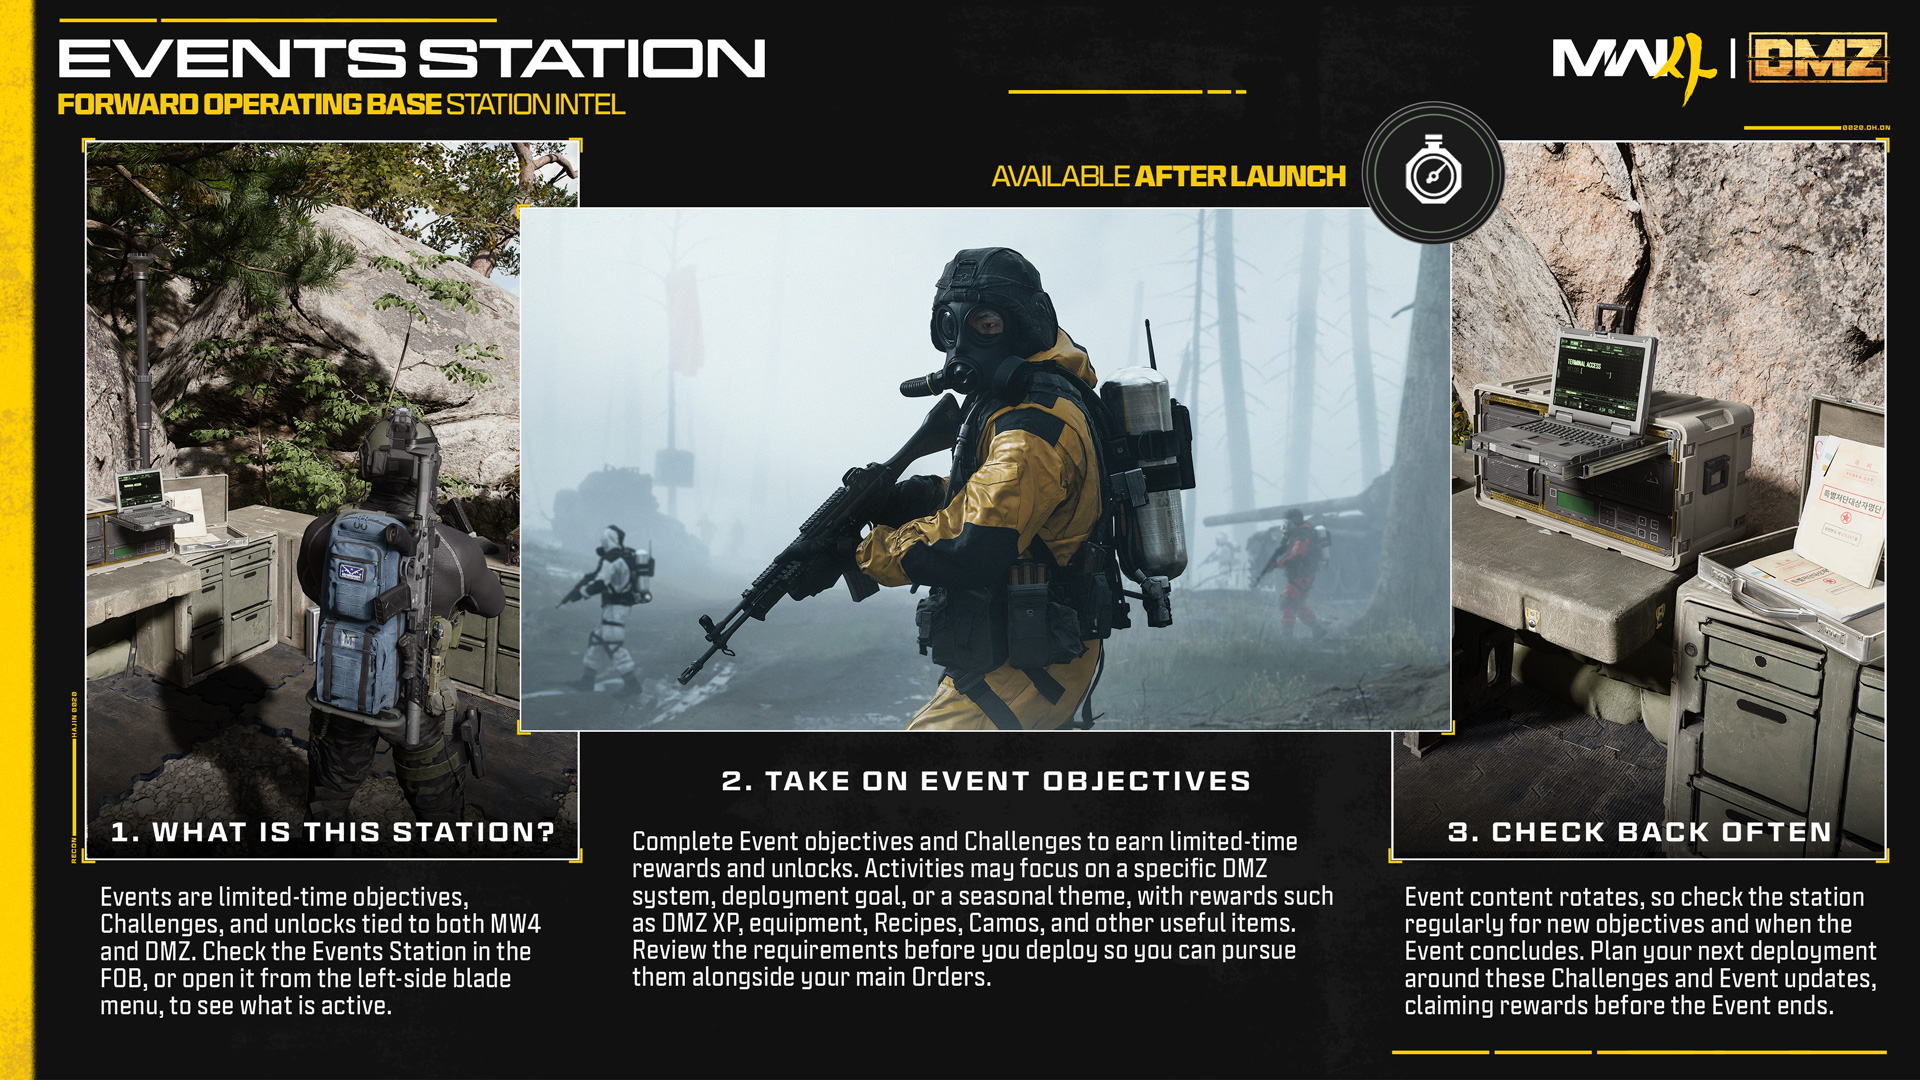
Check this station when an Event is active in Modern Warfare 4. Challenges, or other unlocks are currently available, many of which may be only available for a limited time.
Deploy
Available Immediately / Accessed via the Deploy menu or the Deploy area (razor wire and helicopter access).
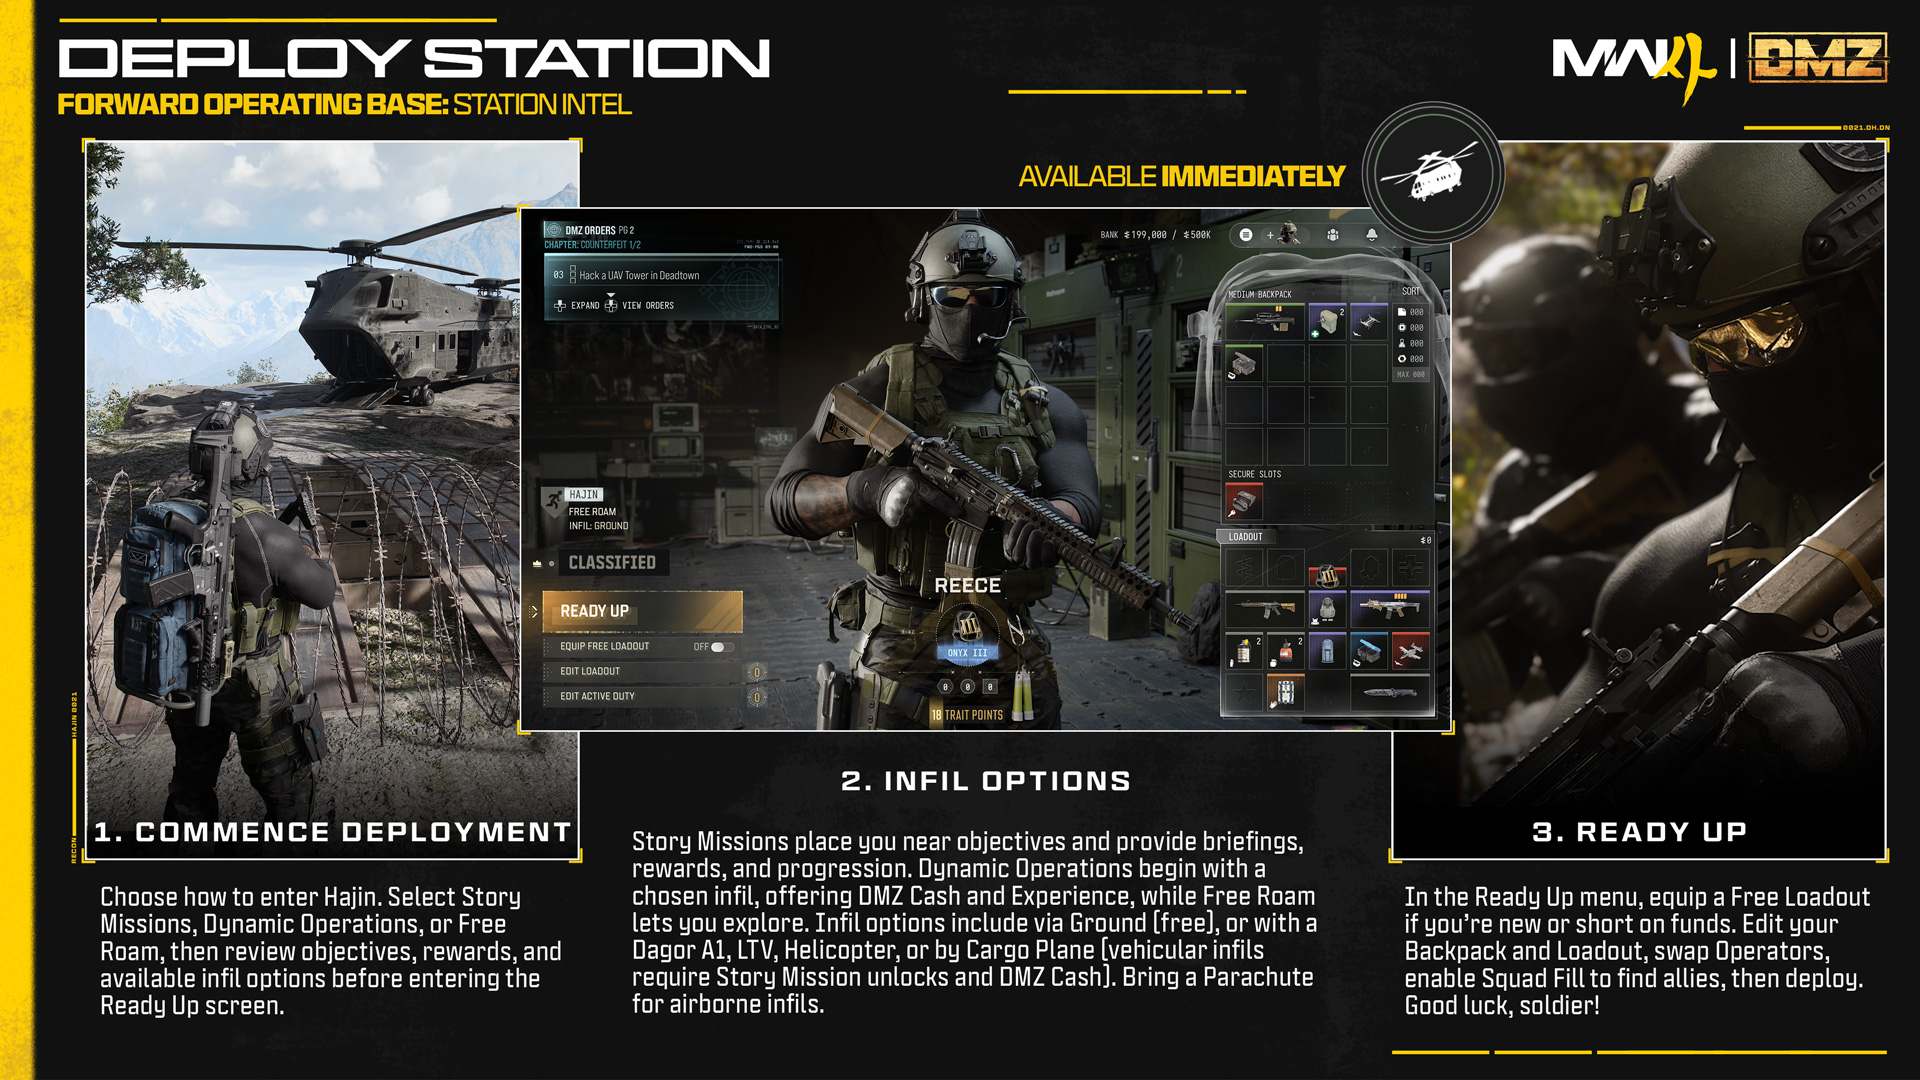
When you and your squad are ready to drop into Hajin, access the Deploy menu, and choose one of three deployment options:
- Story Missions: There is a power vacuum in Hajin. Follow orders, unmask the new threat, and destroy their operations across the DMZ.
- Dynamic Operations: Deploy directly into a Dynamic Op to earn DMZ Cash and Experience. Every completed Operation provides a Supply Drop of increasing rarity for your squad.
- Free Roam: Deploy without a mission and explore Hajin City.
Story Missions Deployment: Preparation.
Select “Story Missions” to access the following:
- A selection of missions you can complete or replay.
- Intel and objectives via a mission briefing.
- Mission Rewards (usually high value gear and DMZ Cash).
- The ability to choose a random Story Mission.
- Additional rewards for specific completion milestones. Tip: Check your Story Mission with you and your squadmates’ current DMZ Orders, as they may have objectives you can complete simultaneously.
Ready Up: Once your mission is chosen, you enter the Ready Up Menu.
Dynamic Operations and Free Roam Deployment: Preparation.
Select “Dynamic Operations” or “Free Roam” to access your infil options (some requiring funds or progression to unlock):
- Ground (Free): The deployment begins in a random part of Hajin, with you and your squad on foot.
- Polaris Dagor A1 (5,000 DMZ Cash): Your team appears in a random part of Hajin, with a lightly armored vehicle air-dropped into your location. The vehicle provides a rapid response.
- LTV (25,000 DMZ Cash): Your team appears in a random part of Hajin, with this heavily armored vehicle air-dropped into your location.
- Helicopter (50,000 DMZ Cash): Your squad embarks from the FOB in a helicopter, before appearing over a random part of Hajin, with one of you piloting a helicopter and the others in passenger seats.
- Cargo Plane (100,000 DMZ Cash): Your team drops from a large cargo plane. This allows you to pinpoint an exact location within Hajin to drop into and explore.
- Selecting Free Roam is an excellent decision if you’re focusing on looting for 3D Printer Ingredients, hunting down Wanted Operators, and most importantly; it is excellent for working on completing your
Ready Up: Once your method of infil is chosen, you enter the Ready Up Menu.
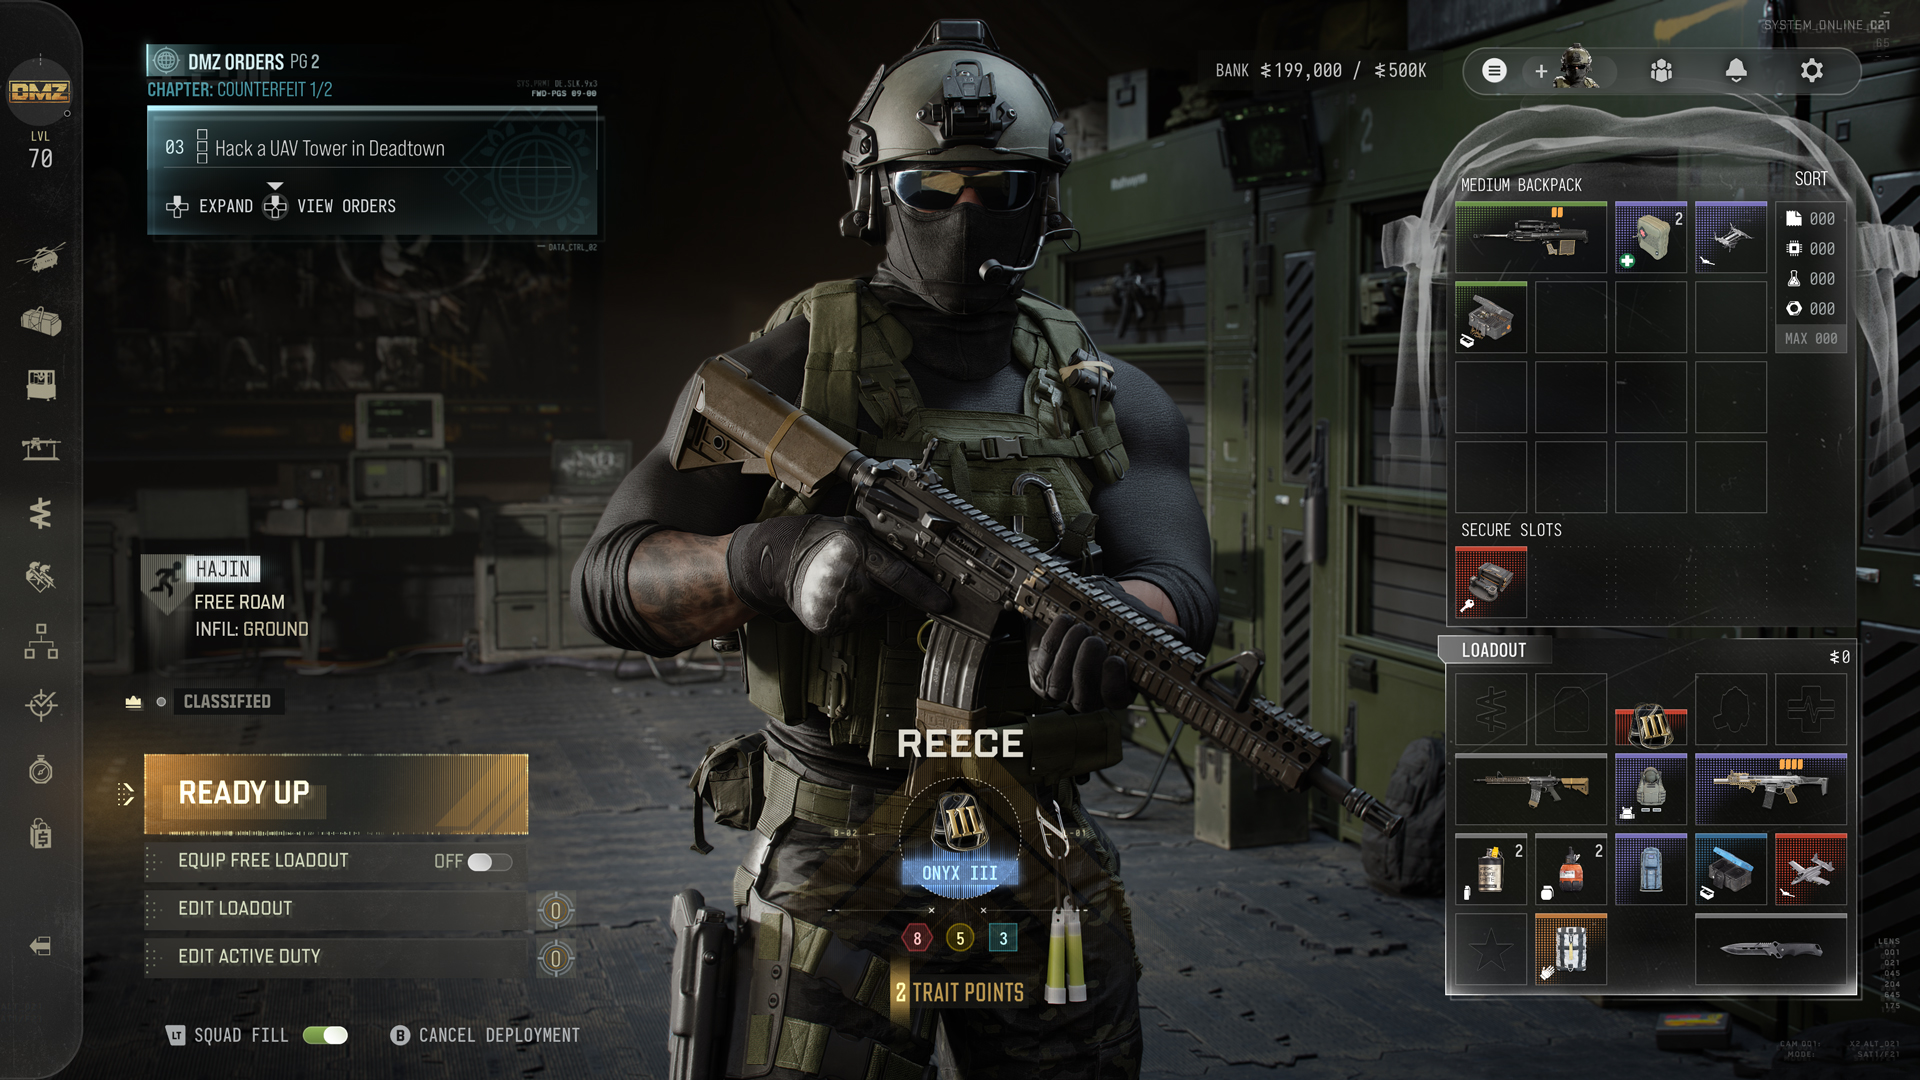
Deployment: Ready Up
The Ready Up Menu is the final time you can prepare for your deployment. Here you can:
Equip Free Loadout: Although a set of basic gear might be helpful for those Operators without in-game funds or 3D Printer capabilities to fill out their Loadouts, the Free Loadout is an excellent way to get into a match quickly, and work towards building up your Stash reserves. Extract and you keep these Loadout items.
Edit Loadout: Update your Backpack and Loadout items to include key items you missed packing. The following are recommended to add to an Infil Loadout:
A Plate Carrier (for armor)
A Backpack (for items)
A Weapon (for offense)
A Medkit (to repair wounds)
Edit Active Duty: Swap in another Active Duty Operator for your deployment .Squad Fill and Cancel Deployment: You can elect to have “Squad Fill” on or off.
Squad Fill automatically drops you into your deployment with two other allied players. This is recommended if you don’t have a squad of friends to deploy with.
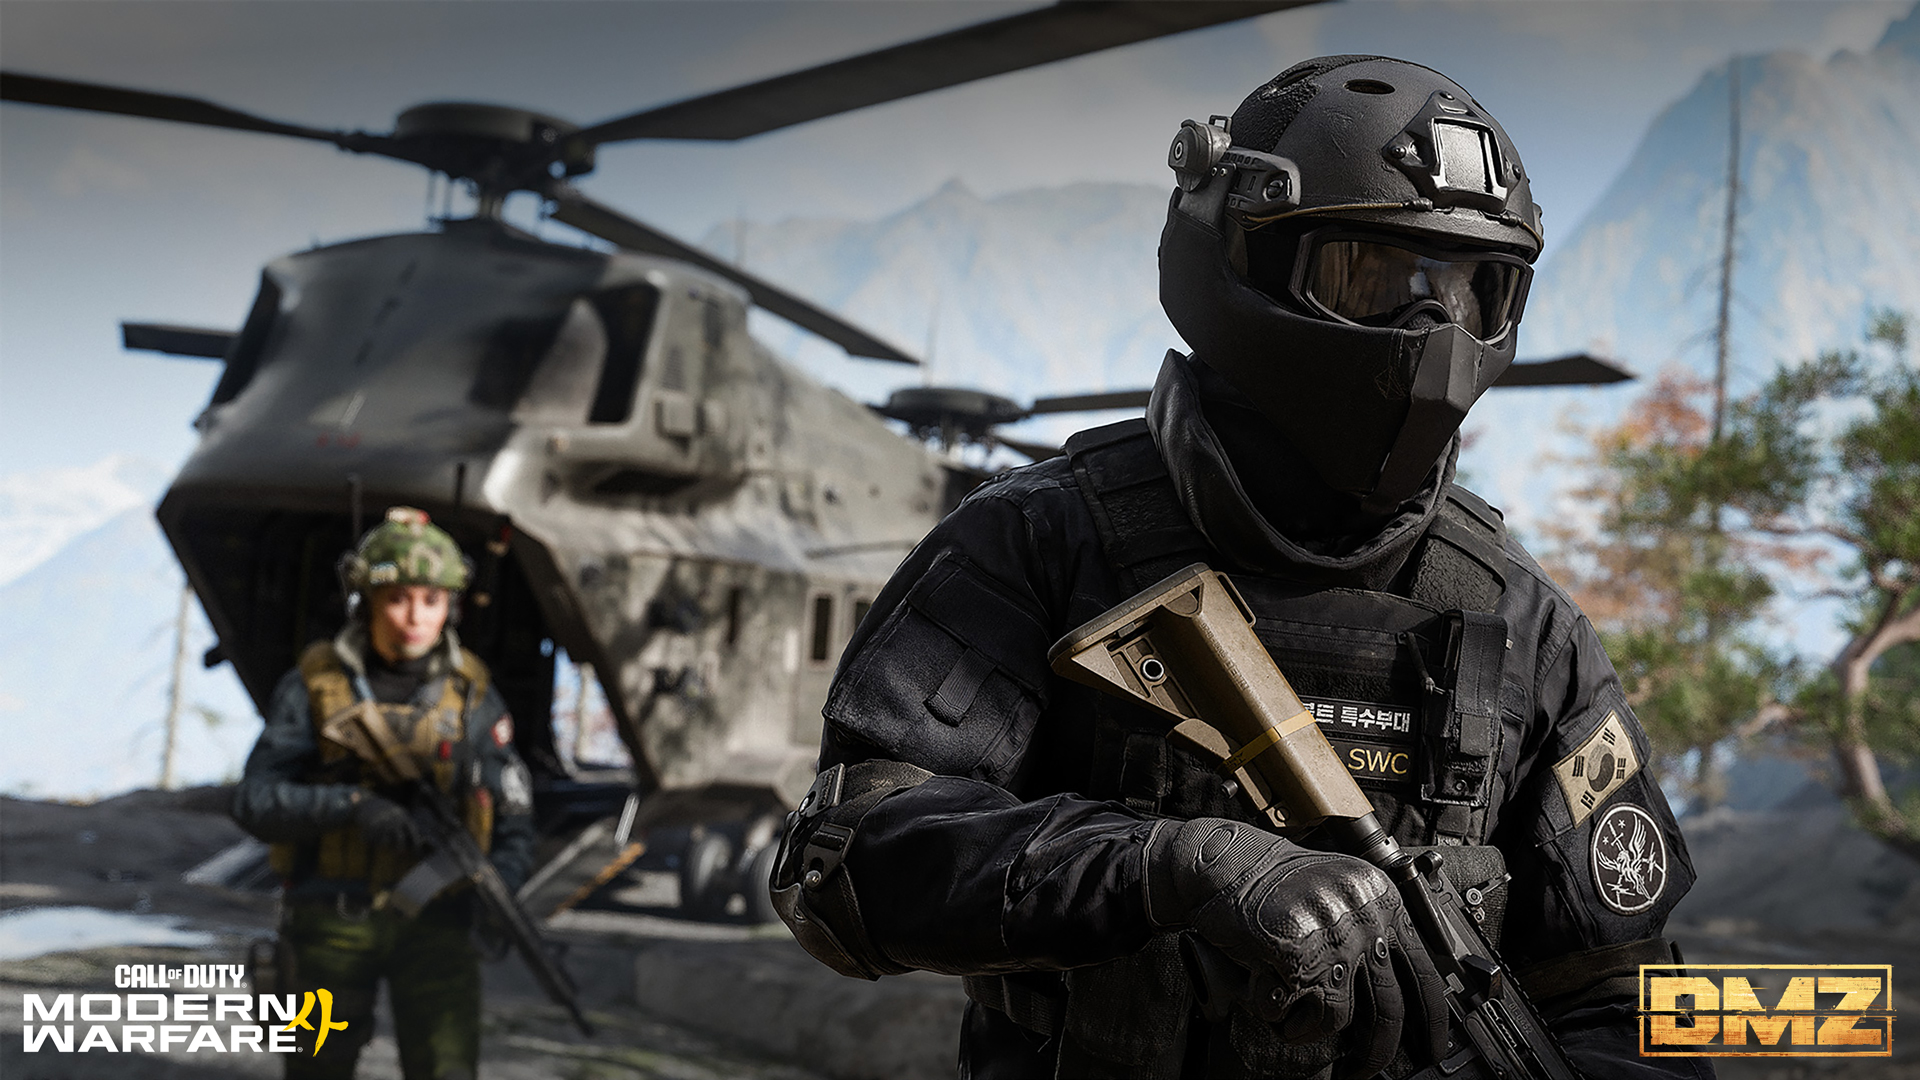
Your DMZ Deployment is Almost Here!
With your newfound FOB knowledge, and a tactical overview of the theater of operators at your fingerprints courtesy of the Hajin: Tour of Duty Blog, you’re almost ready to deploy into war-torn Hajin. Remember; DMZ Early Access begins, starting October 20* for anyone who pre-orders a digital version of Modern Warfare 4!
Preorder Modern Warfare 4 Today
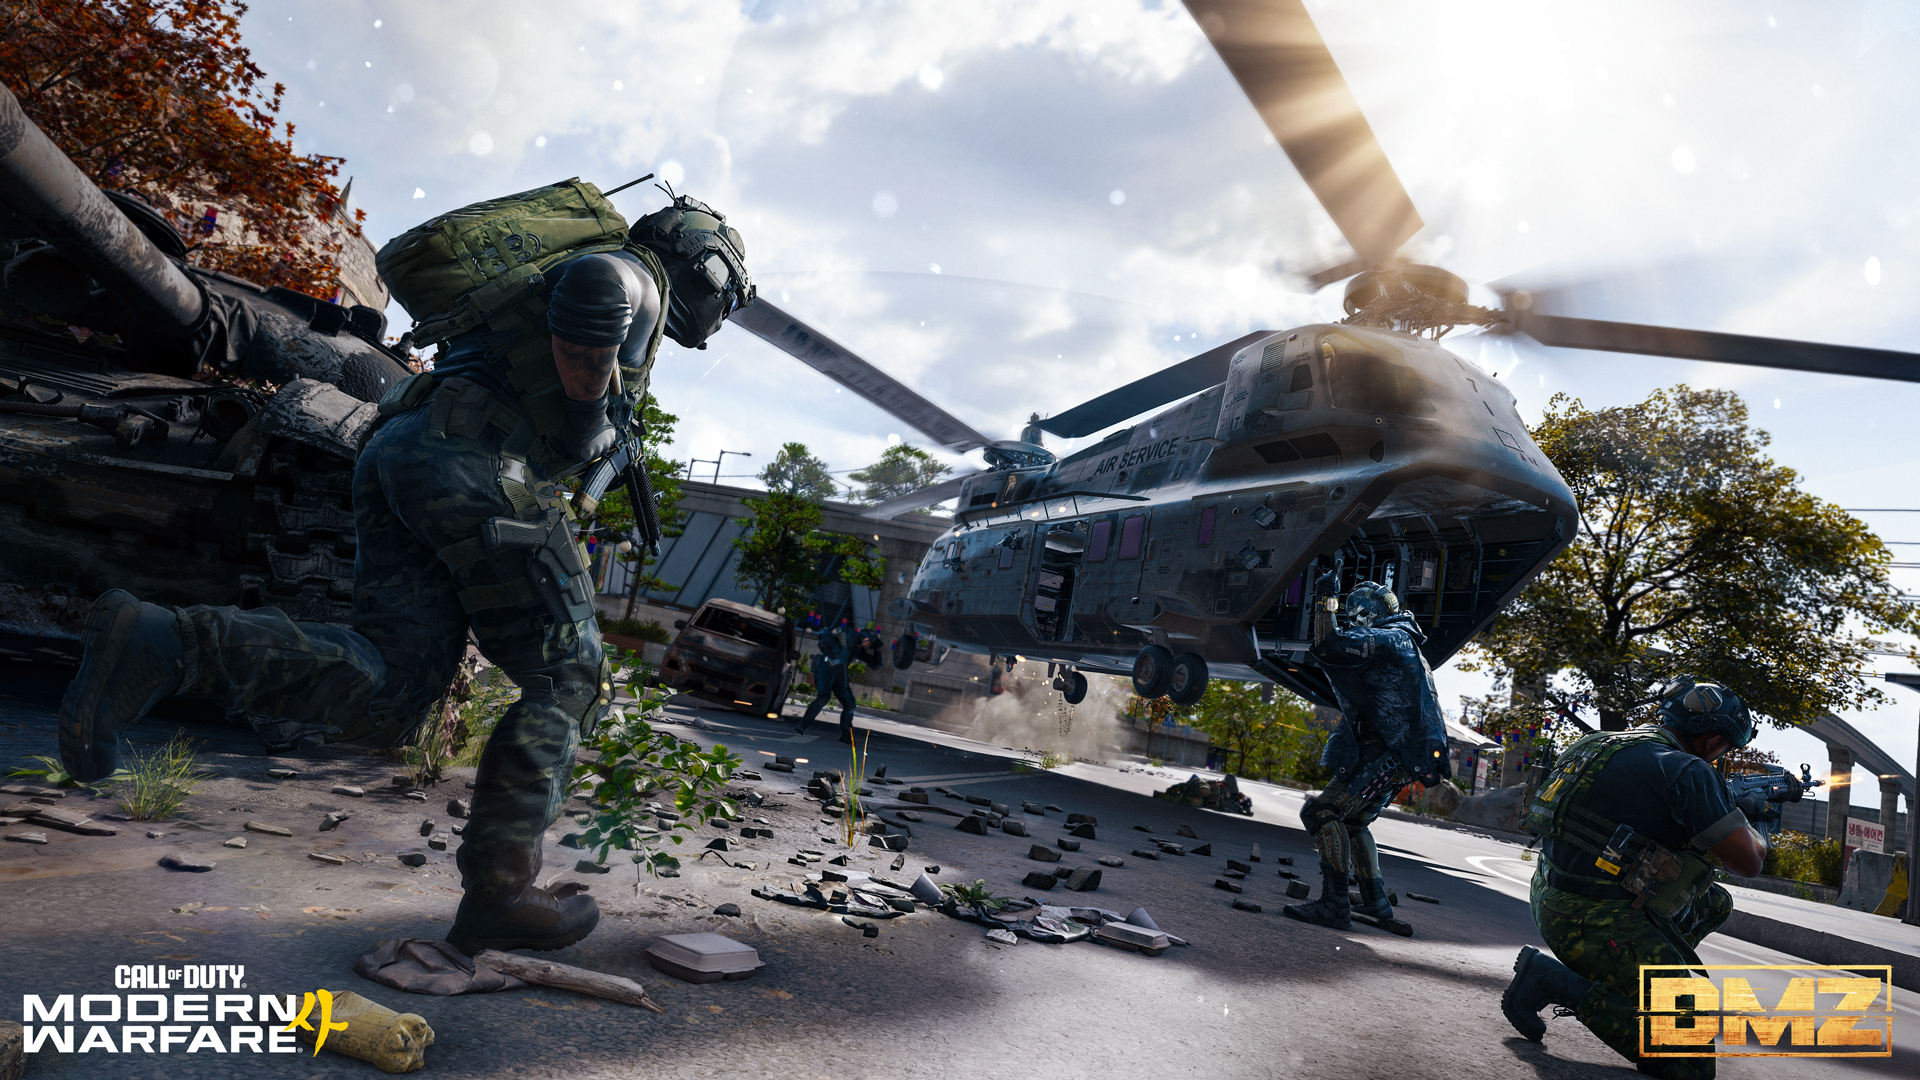
Stay tuned to the latest official Modern Warfare 4 information by checking the Call of Duty Blog through launch and beyond.
Preorders are available now at participating retailers, in-game, on platform stores, or at CallofDuty.com.
©/TM/® 2026 Activision Publishing, Inc.
* Campaign and DMZ Early Access start dates differ. Actual play time subject to possible outages and applicable time zone differences. Actual platform availability and start dates subject to change.
For more information, please visit www.callofduty.com and www.youtube.com/callofduty, and follow @Activision, @CallofDuty, @CODLiveSeasons, and @InfinityWard on X, Instagram, and Facebook. For Call of Duty Updates, follow @CODUpdates on X.
Join Call of Duty's Official Discord to get the latest updates and maybe even meet your next squadmate!