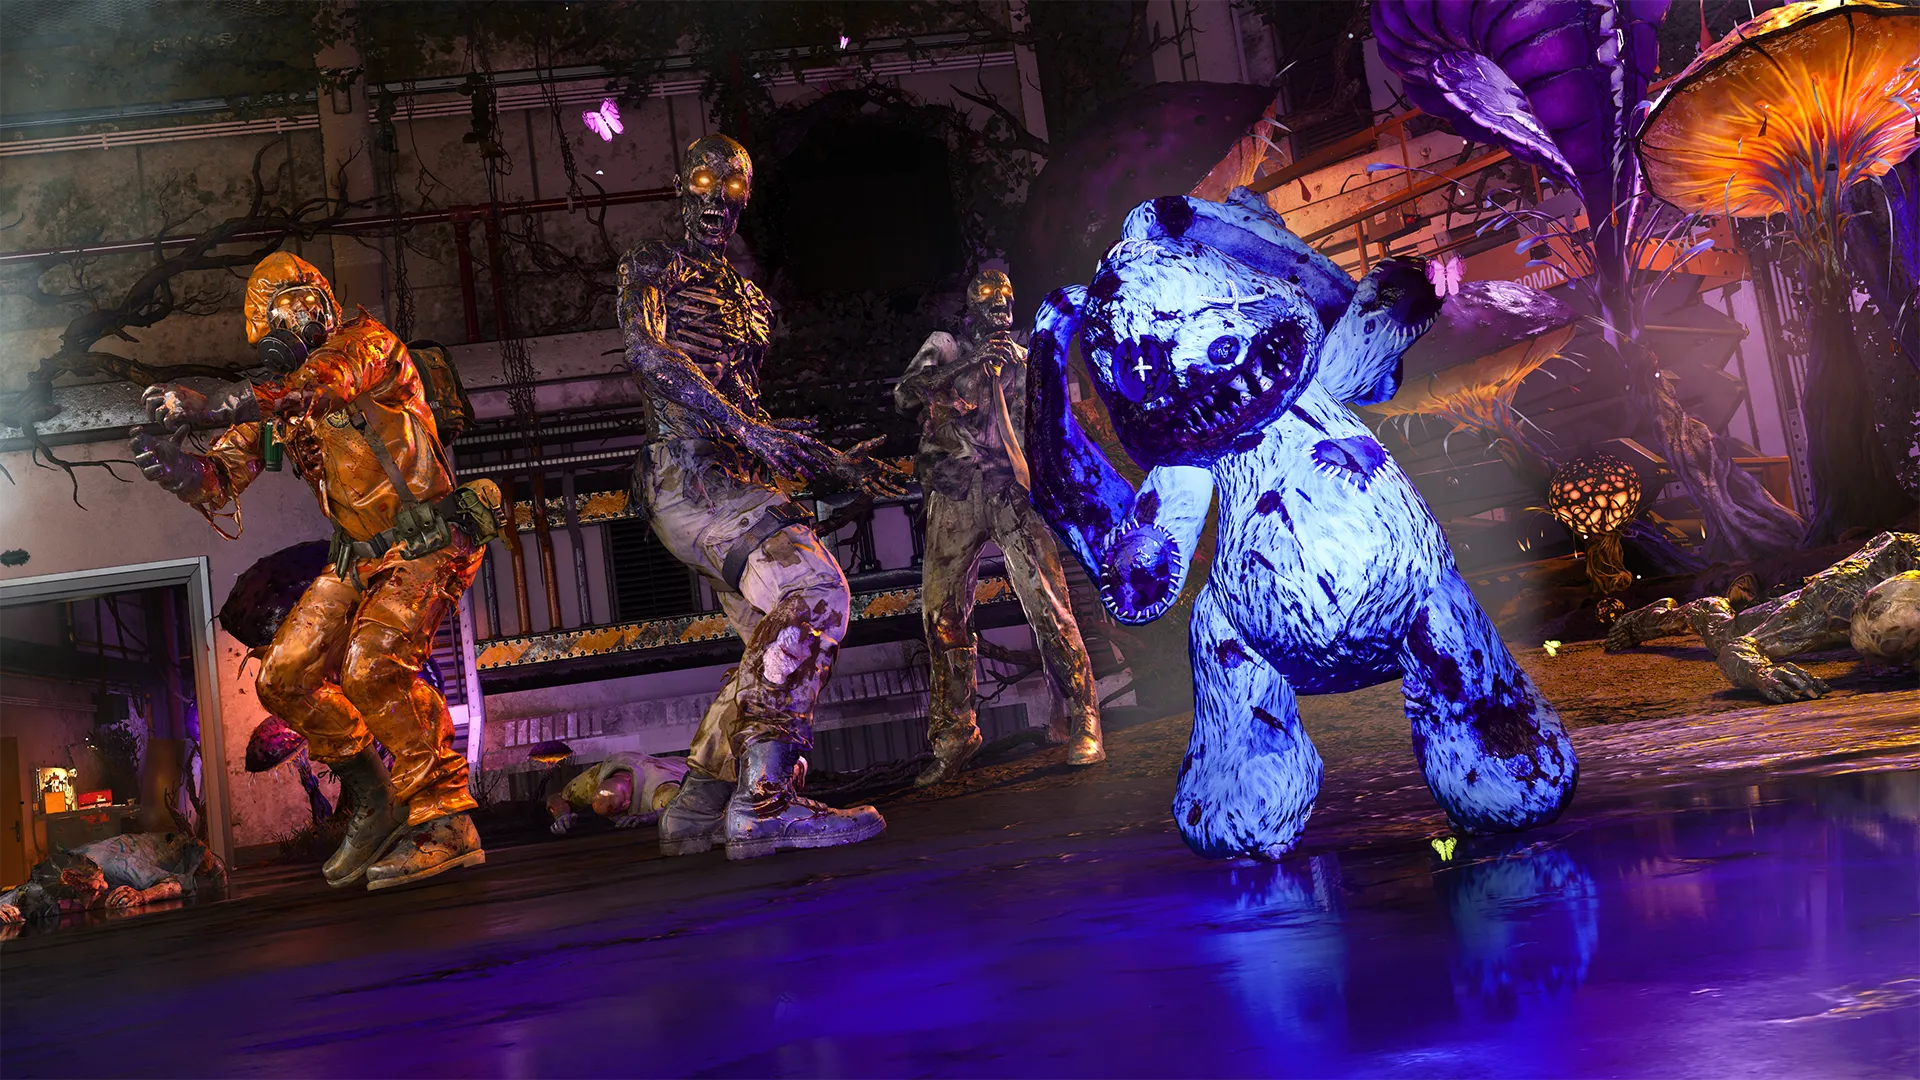
Reckoning
Reckoning: The Ten-Round Guide to Directed Mode
- T1 Project Janus Reception
- T1 Quantum Computing Core / Quantum Computing Lab
- T1 Mutant Research Lab / T1 Mutant Research Test Area
- T2 Android Assembly
- T2 Dark Entity Containment
- T1 Executive Suite / Director's Office
- T2 Sublevel 10
Keep Progressing
Prebrief

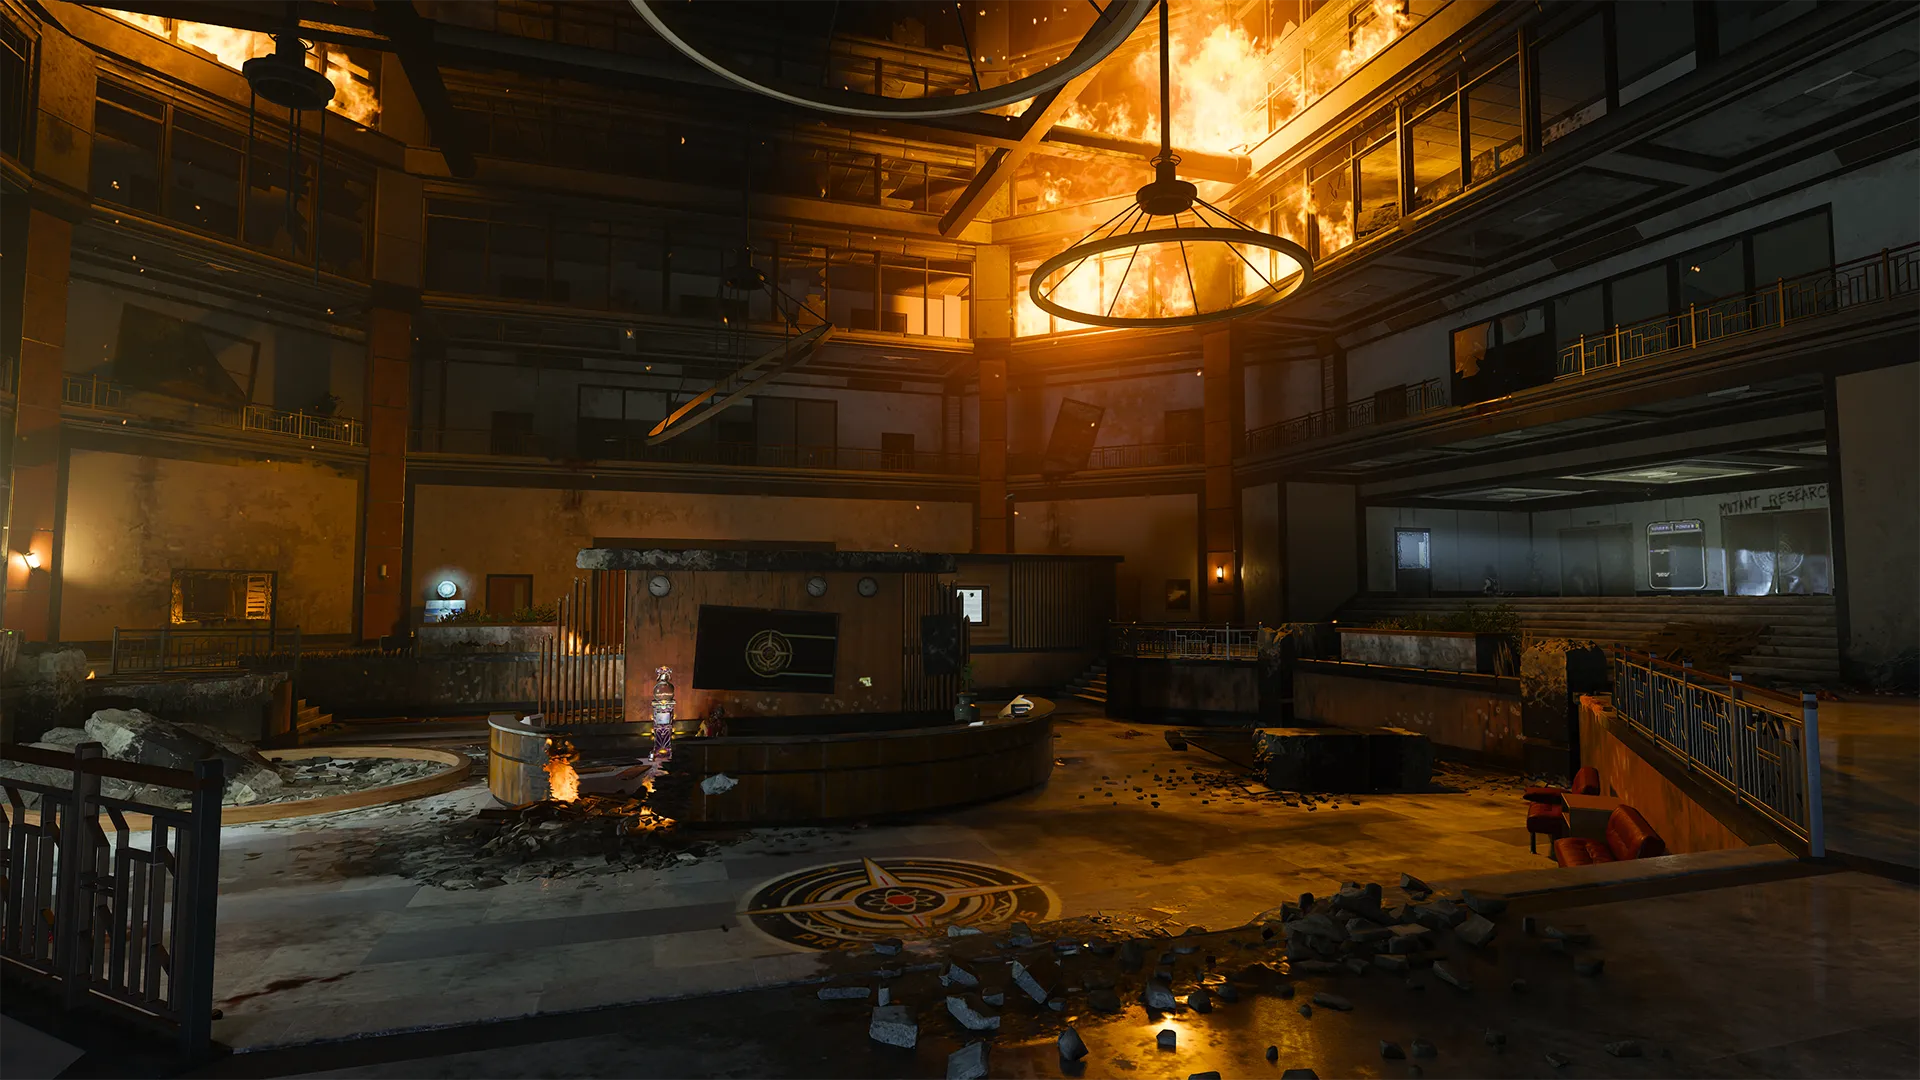
Just as the crew emerges from Sam Colton Hall, barely escaping certain death, they are faced with a new target: Project Janus Headquarters itself, known to the locals of Liberty Falls simply as Janus Towers. The buildings are heavily damaged, with a greater catastrophe on the horizon if the team doesn’t hurry to stabilize its deteriorating Aether Reactors.
Without a second to recuperate, the crew moves in. To succeed, they’ll need every advantage they can get, utilizing the towers’ advanced technology to rapidly move through the headquarters, preventing its imminent failure. But that’s only the start of their problems. Welcome to the final chapter of Call of Duty®: Black Ops 6 Zombies. Use this Guide to get your bearings on the new map so you’re at your best when facing the cosmic chaos within.
What is Directed Mode?

For players looking for extra guidance in completing the Main Quest objectives within Reckoning, Directed Mode is for you. If you want a little less pressure while you experience the story and everything that the narrative has to offer, Directed Mode will guide you from objective to objective while limiting the maximum round number, letting you play at a reasonable pace.
You’ll still fight the zombie hordes; however, you won’t have to worry much about escalating difficulty as you look to complete the quest. Each objective, or milestone, will increase the round limit to help control the pace of the chaos around you, reaching a maximum of Round 15 until the Main Quest is complete.
What is in This Guide?

This Guide will walk you through the general layout of the Reckoning map. Think of it as a tactical tour of Janus Towers and the basics of what Reckoning has to offer. Covering the first ten rounds of Reckoning, it won’t take you through the entirety of the Main Quest, but it will set you up for success so that as you follow the directed objectives, you’ll gain a strong foundation and understanding of the map.
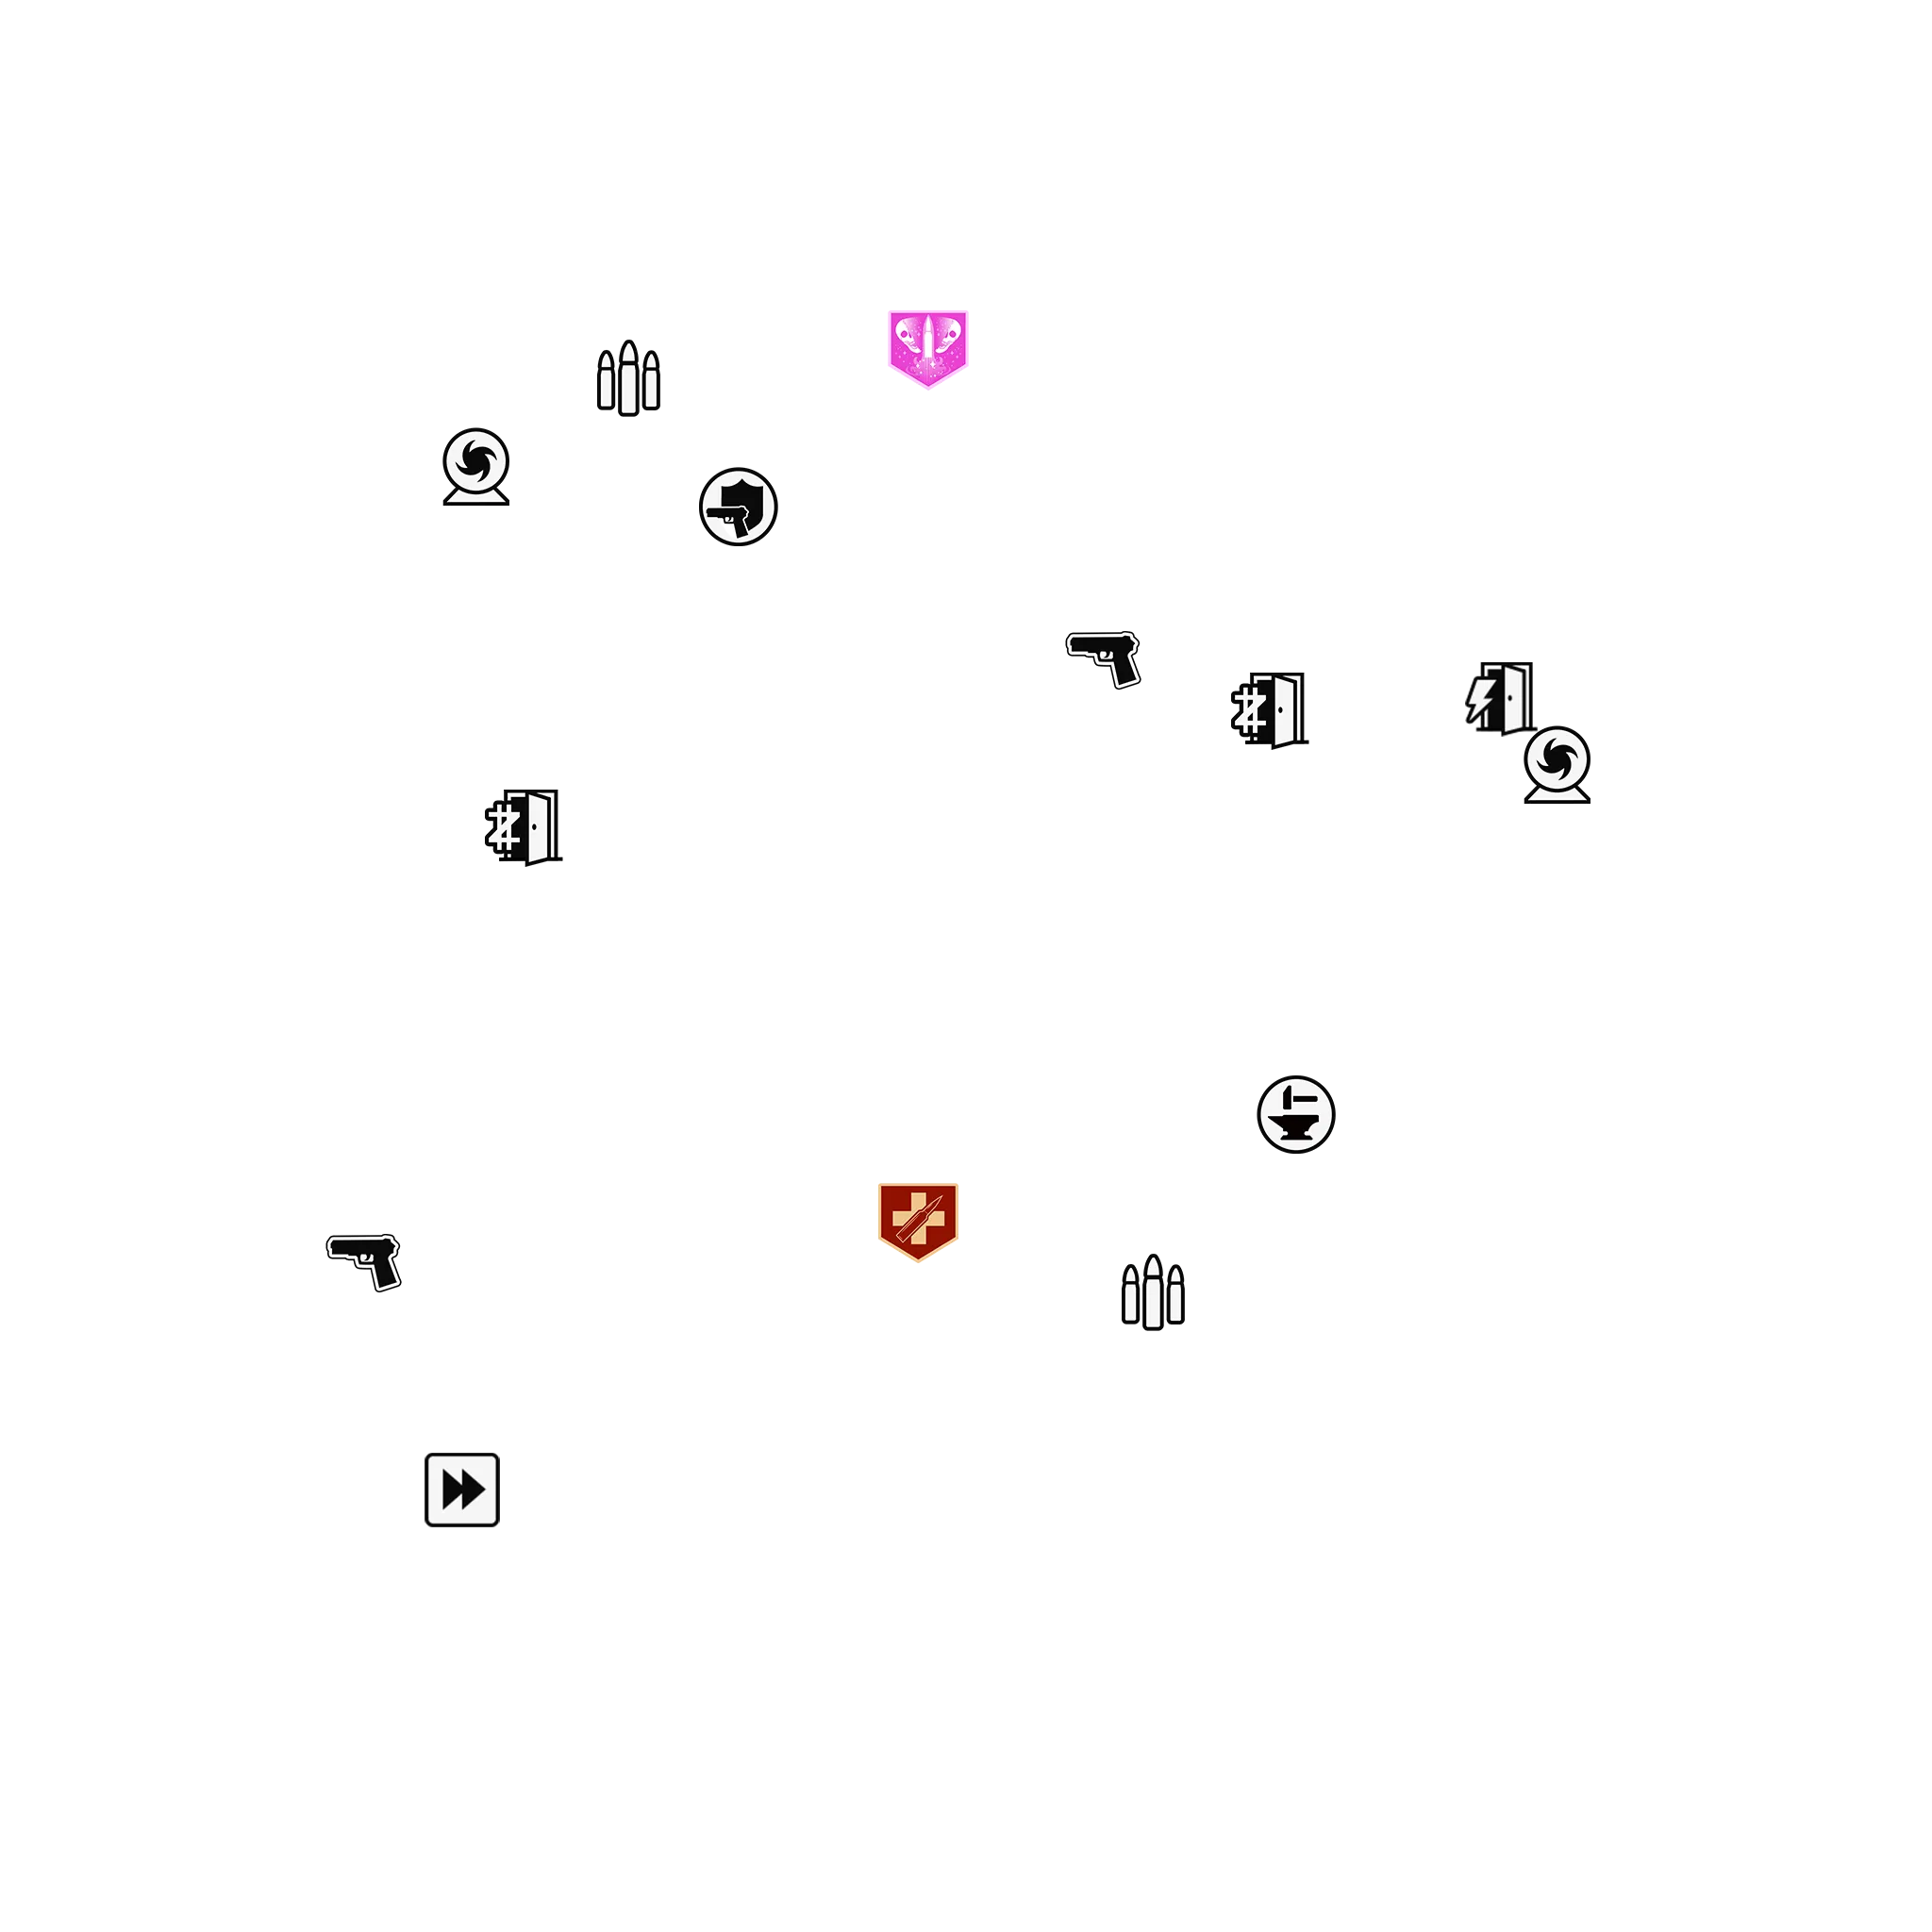
The Guide will break down each Point of Interest in Reckoning and show the locations of each of the important upgrade stations, such as Pack-a-Punch Machines, Perk Machines, Arsenal, Ammo Caches, and more. Before starting your next run in Reckoning, look through the general layout detailed in this Guide so that you have an idea of where you may want to progress, or what you may want to save your Essence for. Use the Recommended Round Pace breakdowns for a general idea of where you should be as the match progresses. If you’re a little behind, or even ahead of the Recommended Round Pace, that’s okay, too.
CALL OF DUTY® INTEL CARD
- BO6
Reckoning
// ZOMBIES // MAPS

Vast verticality: Reckoning takes place in Janus Towers. They’re tall and have some substantial holes in the ceilings and floor that allow you to parachute as you jump through to the bottom floor if needed, at least in Tower One (T1). Otherwise, in Tower Two you can always use the Aether Elevators and other quick travel methods to escape the hordes in both a horizontal and vertical fashion.
Let Mister Peeks seek: Season 05 introduced Mister Peeks as a Field Upgrade to Black Ops 6. Set him down and let him go to work destroying nearby enemies. Let Mister Peeks watch your back while you attempt to complete objectives and focus on the task at hand. The best cover is the rest of your crew, but when you don’t have that available Mister Peeks makes for a great backup member.
Jump the towers: Instead of needing to travel all the way down to the ground floor, Project Janus has created a convenient people launcher system that provides quick travel from one tower to another. There are a few of these Anti-Grav Personnel Launchers, each launching your crew member to a designated area of the adjacent tower. It’s a great way to get around and to escape a horde that’s just a bit too concentrated.
Reckoning: The Ten-Round Guide to Directed Mode
The first ten rounds of any Zombies map have the basic pacing that will get you and your squad to the Pack-a-Punch Machine. There’s no wrong way to play Round-Based Zombies, so long as you play to survive. Making it to Round 10 is an important accomplishment, and powering up your weapons and gear becomes even more important after that point. It's also where the first chance of exfilling from the map to end your run and earn some survival XP becomes available. Use each of the following sections to get the full intel on what you can access in each area of the map. Plan your route and progress through the objectives while preparing to fight the hordes.
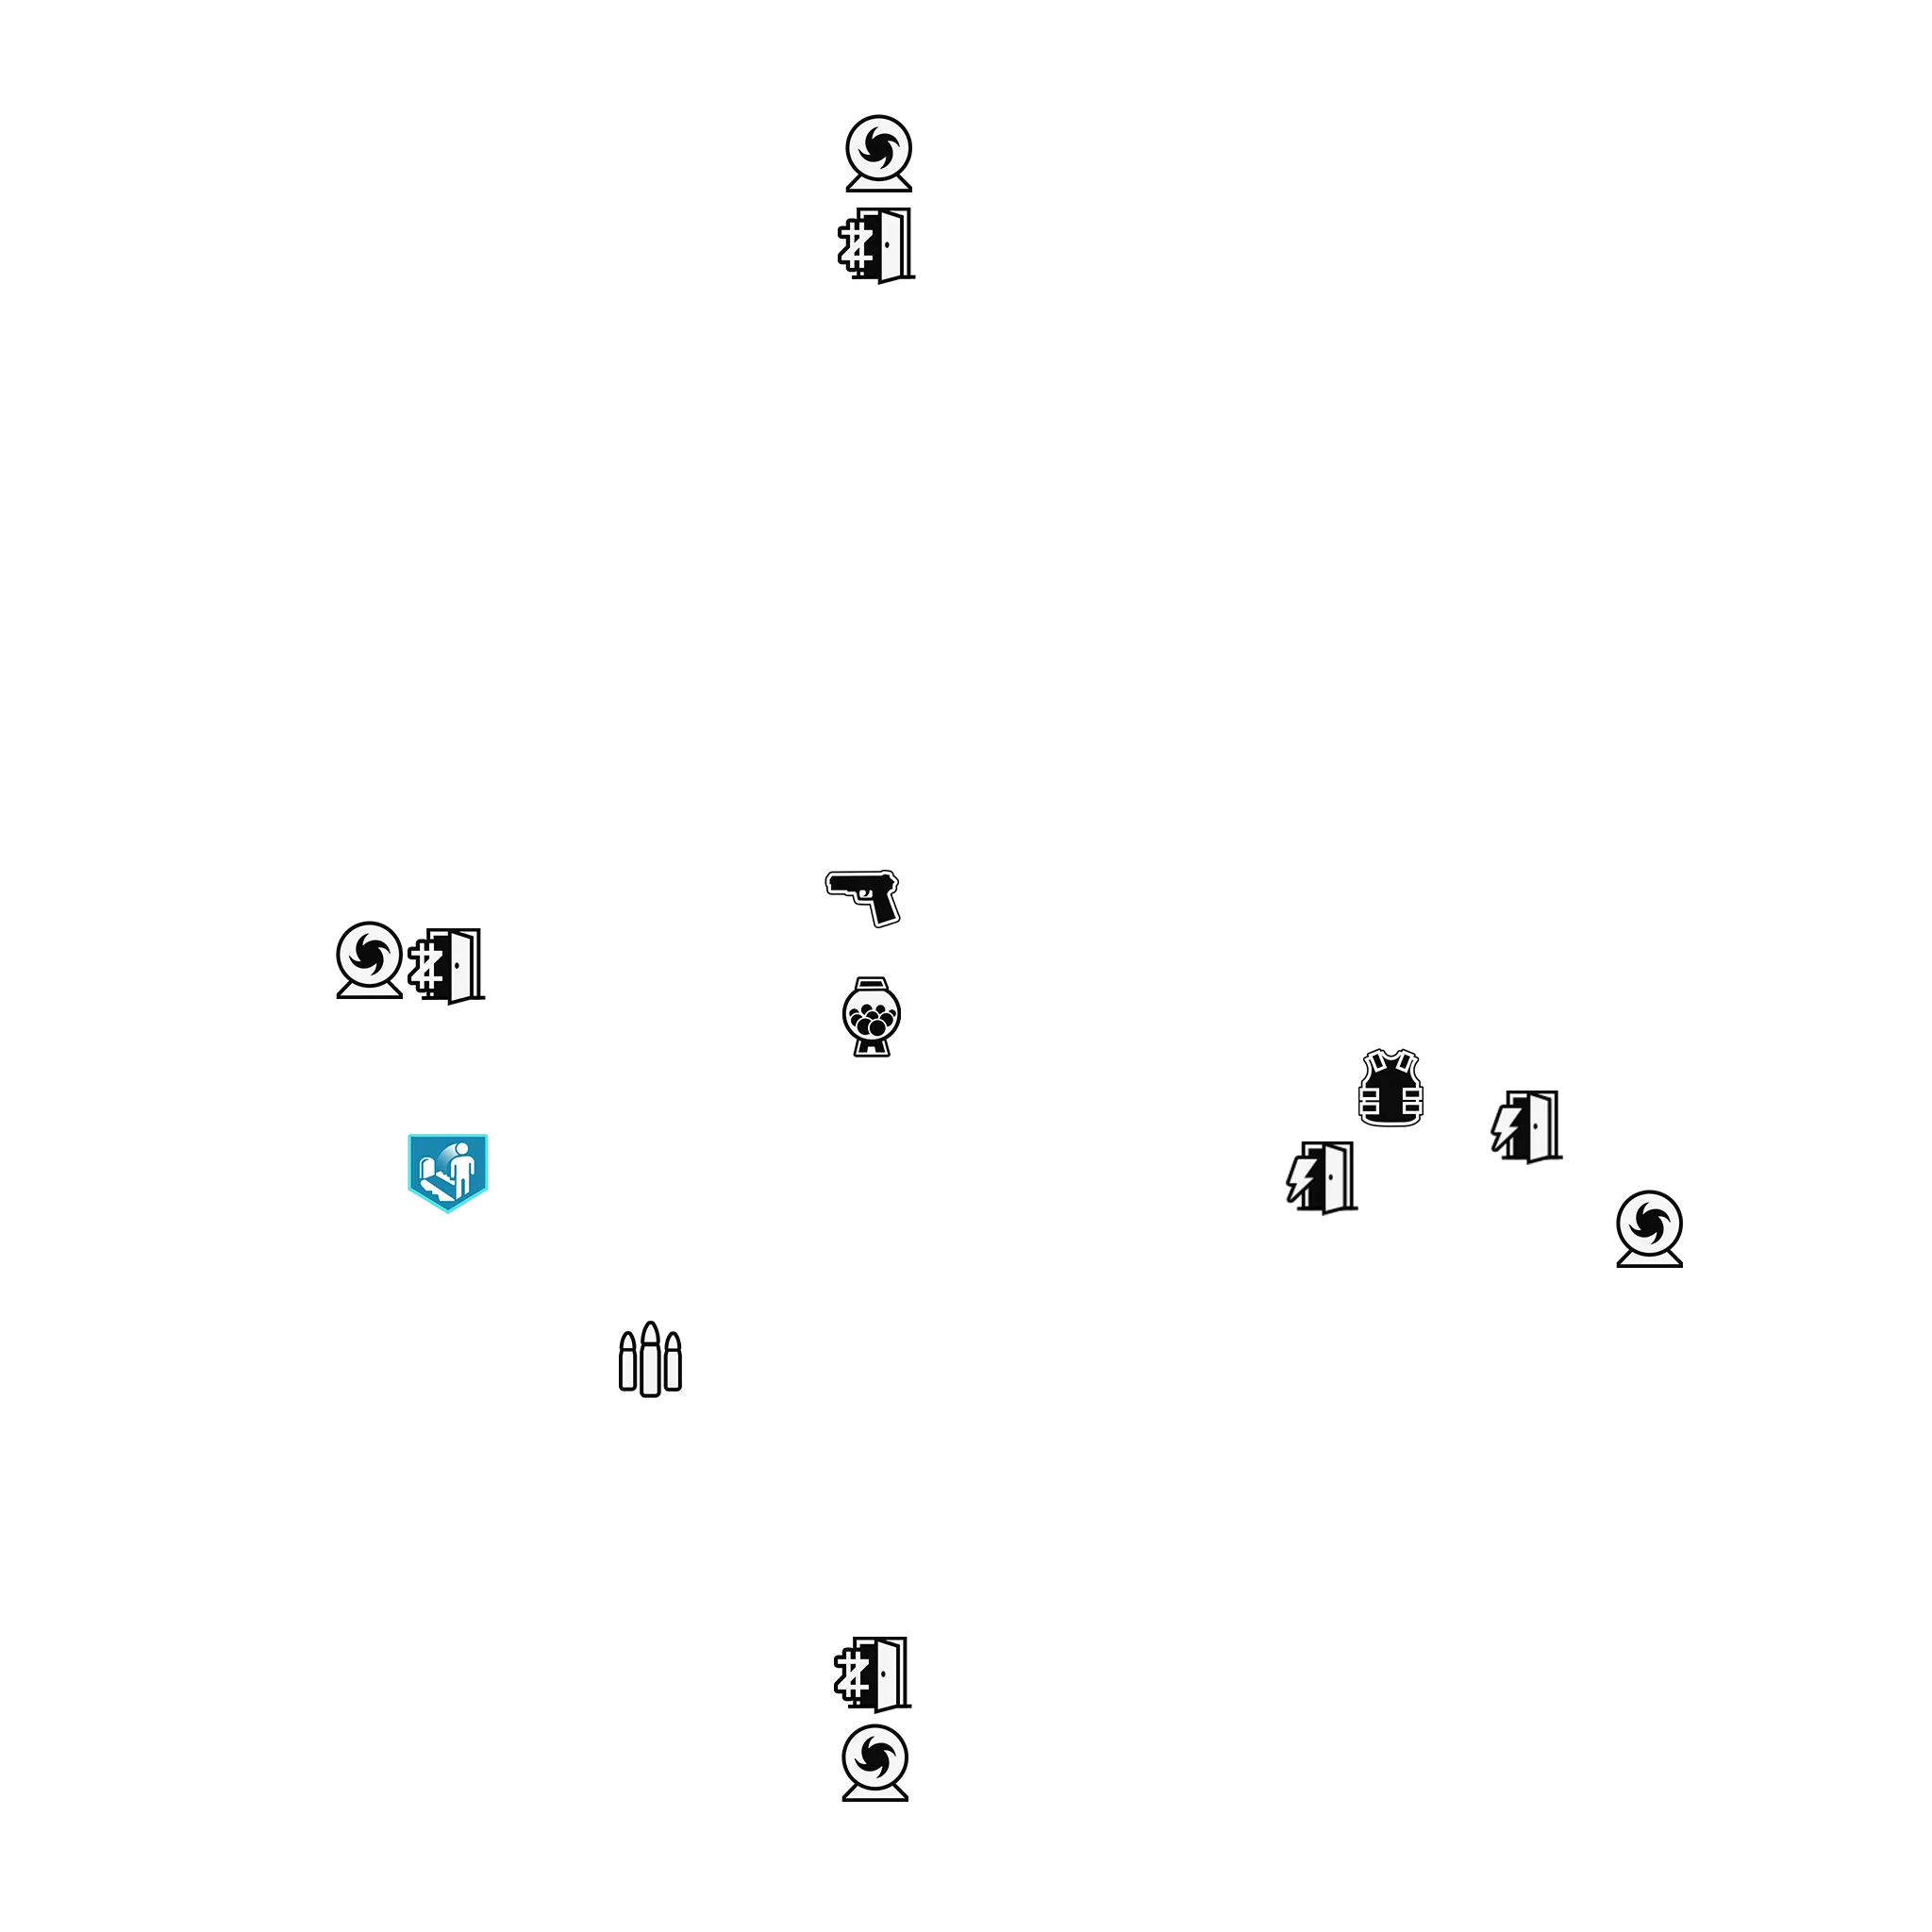
T1 Project Janus Reception
-
Show spawn points

-
Reset all overlays

Recommended round pace when exploring: 1 - 3
Tasks and Available Power Ups
Task
Gain Essence
Perk
Quick Revive Perk Machine
Weapon
GS45 (Pistol) Wall Buy
Armor Vest
Level II Armor Vest
Ammo
Ammo Cache
GobbleGum
GobbleGum Machine
Fast Travel
Portal x2
Janus Towers has seen better days. The Project Janus Reception area is where you and your squad begin your journey into Tower 1, denoted by T1 on your HUD. The area is loaded with enough resources and upgrades to get your squad outfitted with everything you need to feel prepared for the final mission. Don’t be afraid to spend 3-4 rounds in the Project Janus’s Reception area gaining some Essence and possibly even purchasing your first Armor Vest Upgrade. It’s never a bad idea to have that extra damage mitigation early on.
You have two forward paths to choose from when moving on from the T1 Project Janus Reception area. Check the map posted next to either elevator shaft to get more info on where the Mystery Box might be as well as the general Tower layout.
T1 Quantum Computing Core / T1 Quantum Computing Lab
-
Show spawn points
-
Reset all overlays
Recommended round pace when exploring: 4
Tasks and Available Power Ups
Perk
Melee Macchiato Perk Machine
Perk
Speed Cola Perk Machine
Weapon
TANTO .22 (SMG) Wall Buy
Weapon
AGS-89 (Shotgun) Wall Buy
Upgrade
Arsenal
Upgrade
Crafting Table
Ammo
Ammo Cache
Trap
C.A.S.T.E.R. Turret
Mystery Box
Possible Mystery Box Location
As soon as you enter this floor there are two routes you can take. Move directly forward toward the Quantum Computing Core or head left toward the Quantum Computing Lab for some fresh air. Keep in mind that to get to the Computing Lab, you’ll have to spend a bit more Essence on the door buy.
In the Quantum Computing Core, you’ll find a plethora of goodies to get your Loadout to a powerful spot, namely the Arsenal as well as the Mystery Box, if it’s here. Once you’re able to unlock the door to the Computing Lab, do so and you will have access to the entire floor which comes with another Perk Machine, another weapon Wall Buy, as well as a Crafting Table to spend your Salvage.
Mind the gap: Be careful of the large hole in the ground on the southeastern end of the Core room created by some of the destruction that happened here. Falling through this hole isn’t instant death and in fact can be used for quick travel down to the bottom floor. Don’t worry, though: all crew members are equipped with a parachute to ensure a smooth landing.
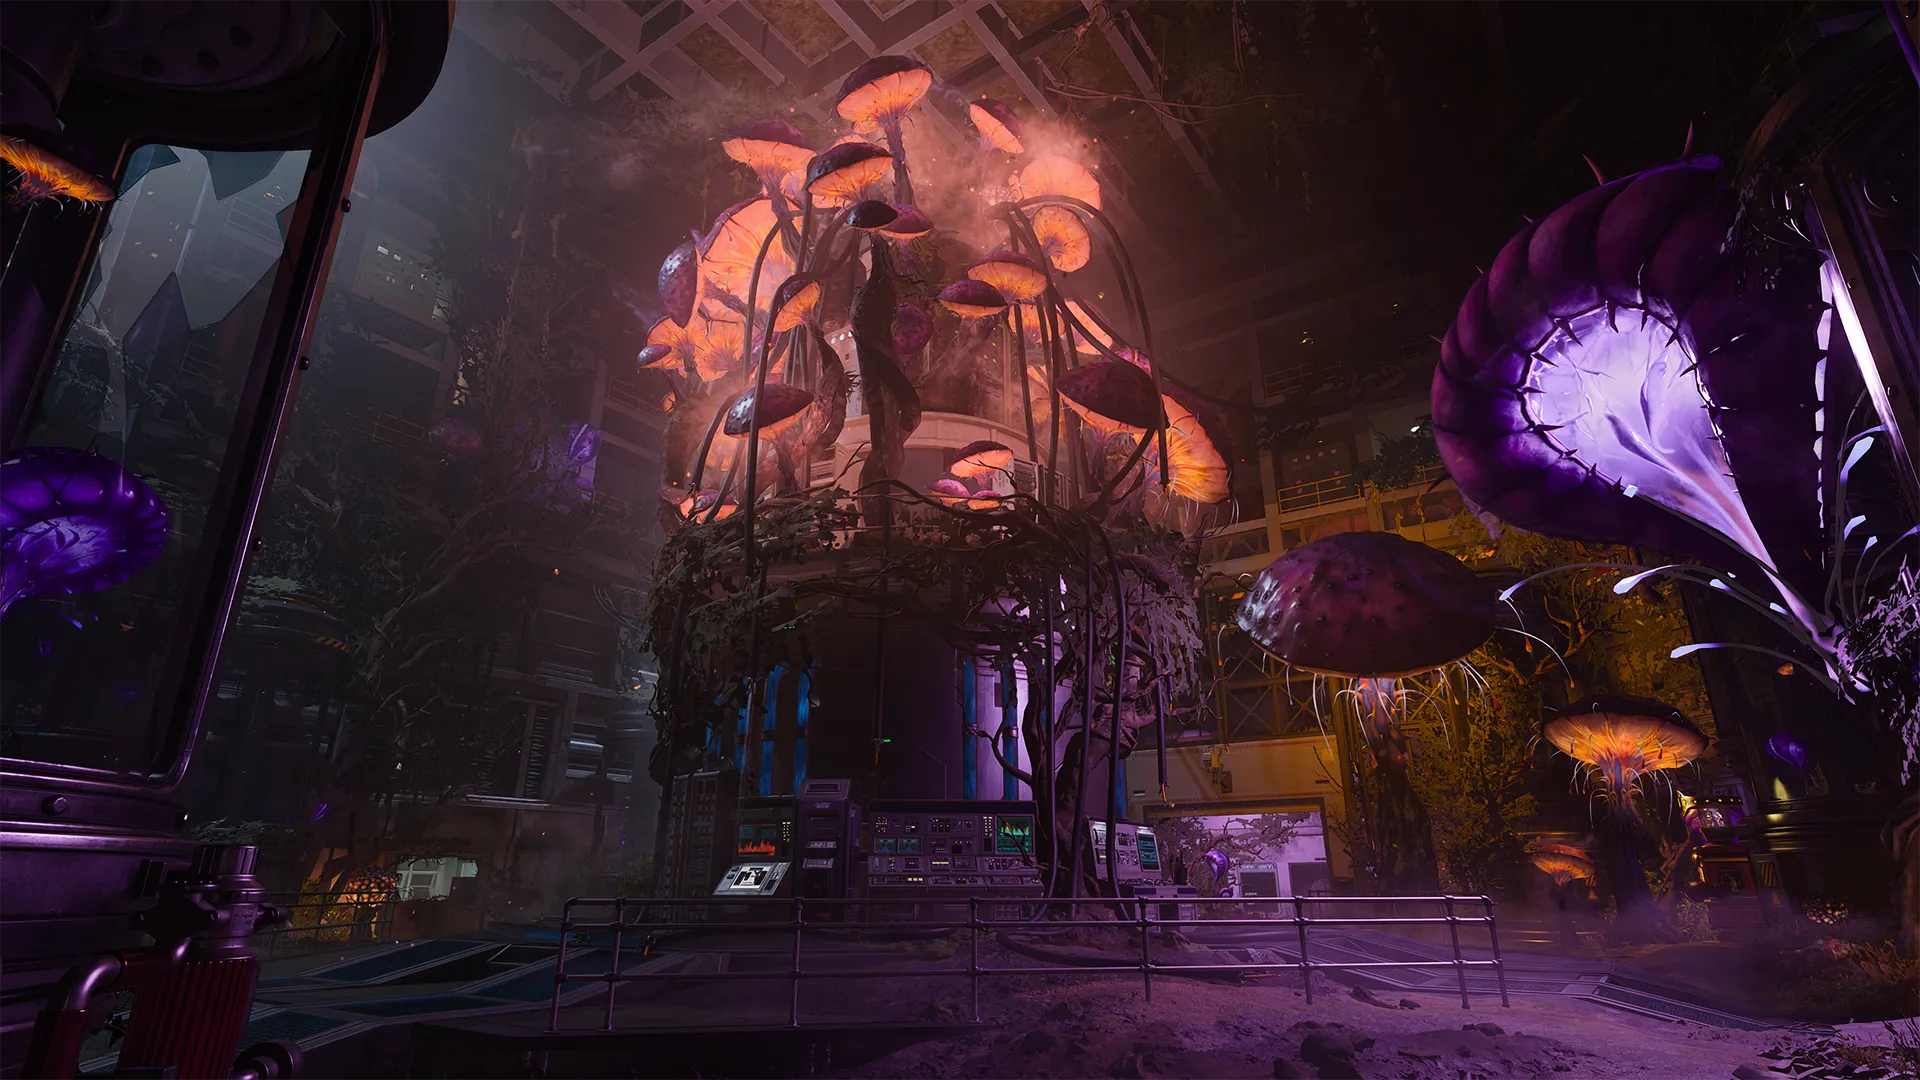
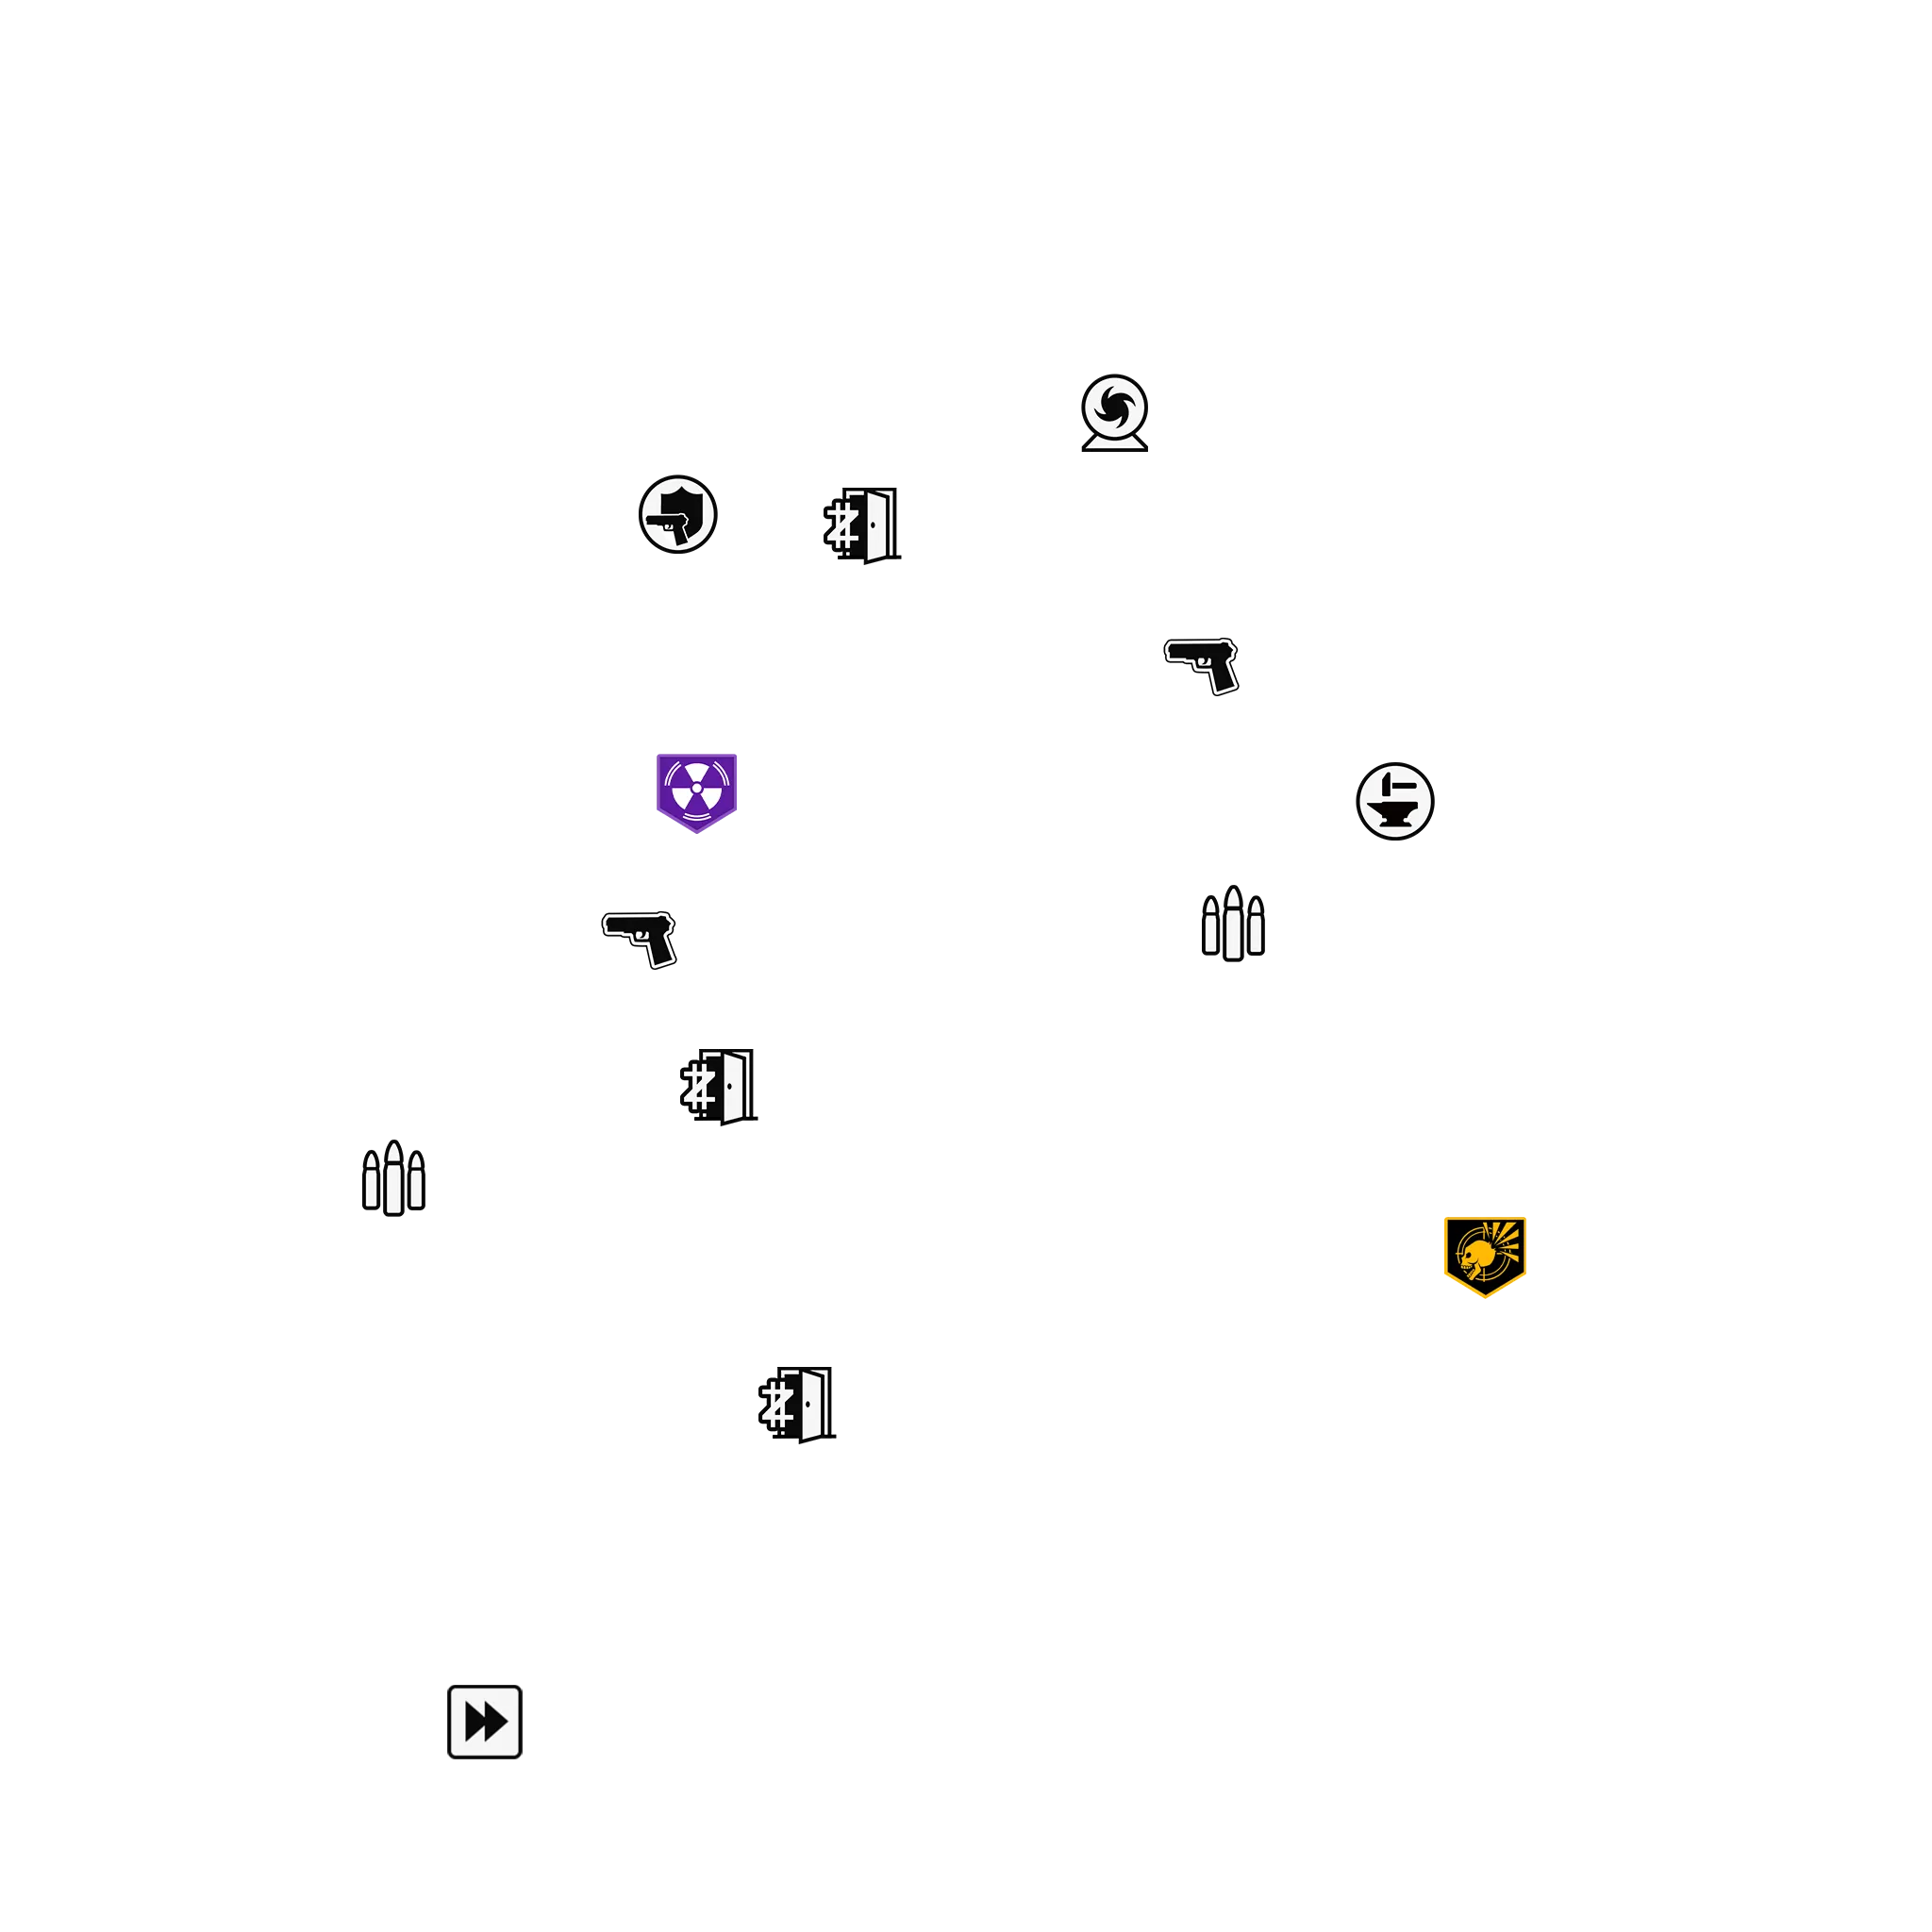
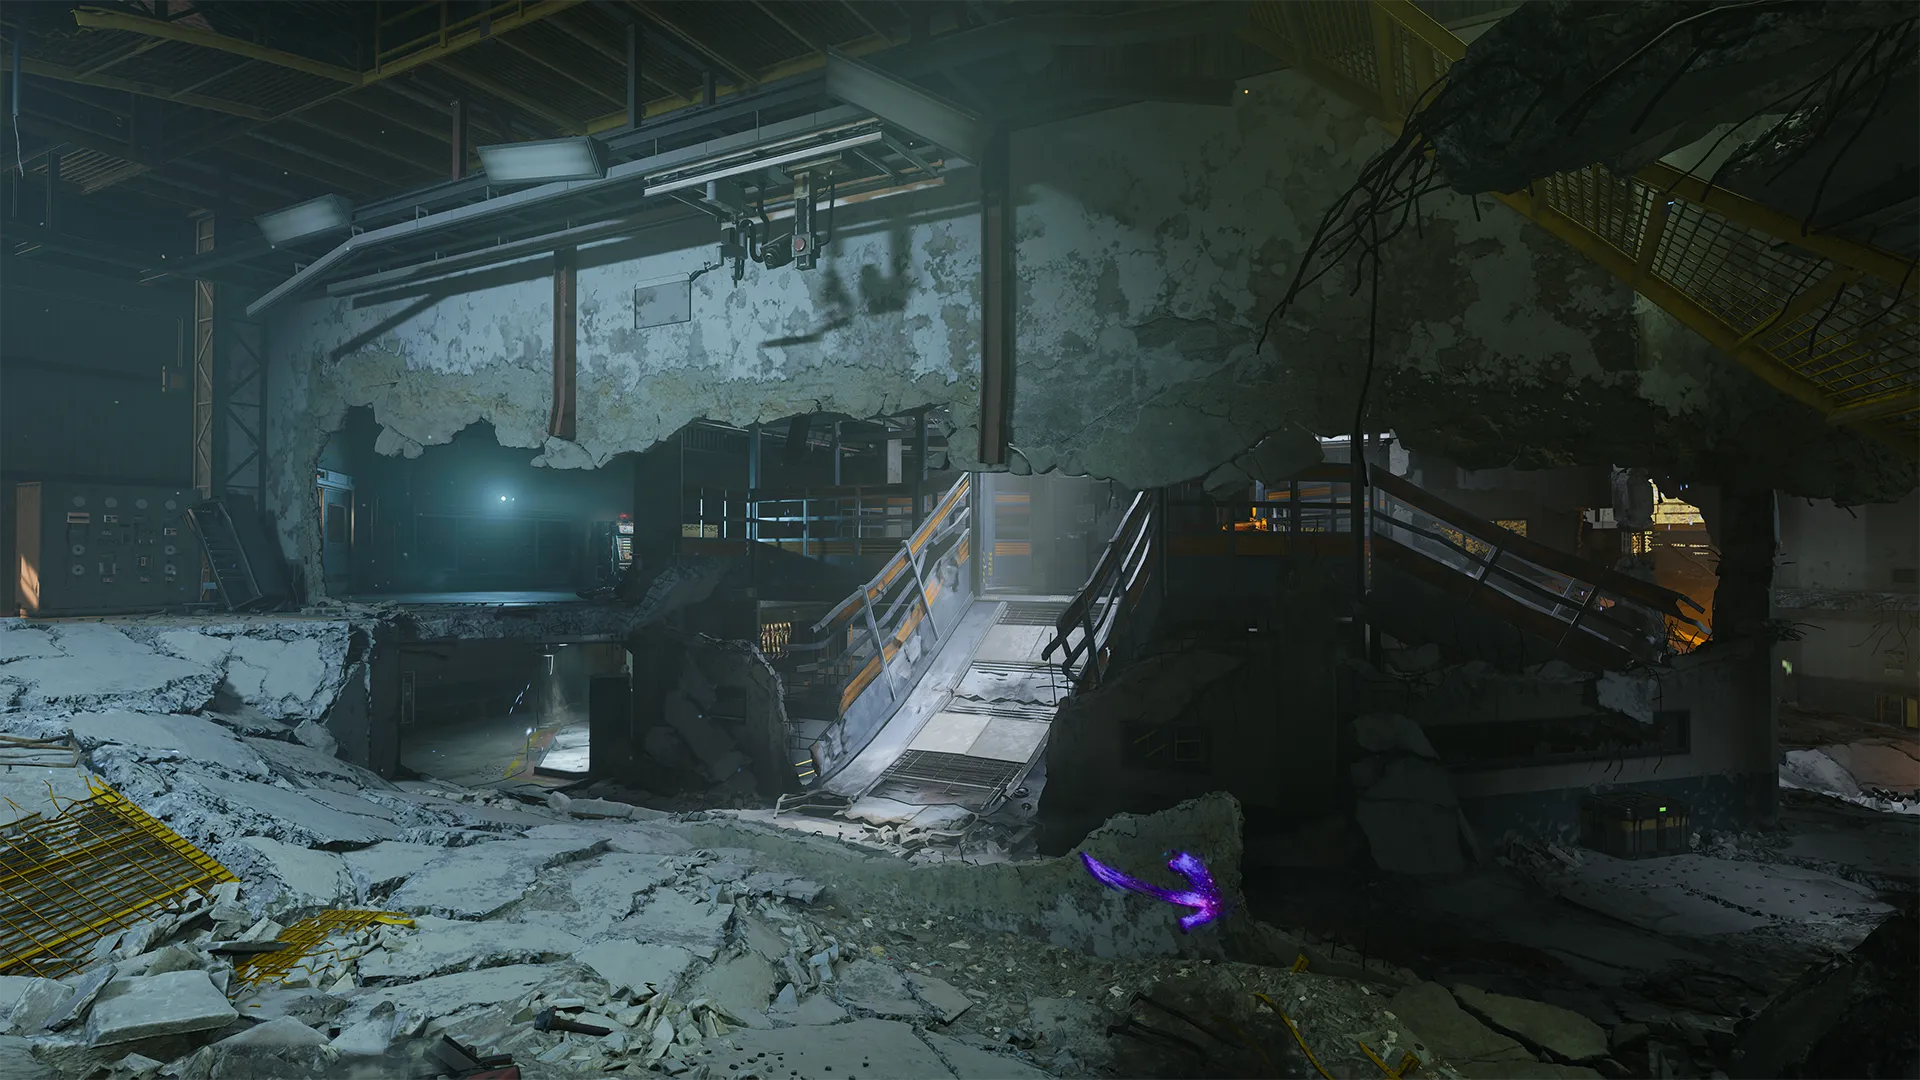
T1 Mutant Research Lab / T1 Mutant Research Test Area
-
Show spawn points
-
Reset all overlays
Recommended round pace when exploring: 4
Tasks and Available Power Ups
Perk
Deadshot Daiguiri Perk Machine
Perk
PhD Flopper Perk Machine
Weapon
PP-919 (SMG) Wall Buy
Weapon
Marine SP (Shotgun) Wall Buy
Upgrade
Arsenal
Upgrade
Crafting Table
Ammo
Ammo Cache
Mystery Box
Possible Mystery Box Location
While the monsters growing in vats are certainly disquieting, it’s the ones chasing after you that you need to watch out for. The Research Lab portion of this area features a narrow walkway circling the central vats. Watch your step near the flaming pipes just below the surface of a drop point back to the Quantum Computing Core. If you’re getting pressured on the outer path, cut through the middle to create some space or move to the outer Test Area. The upper walkway in the Research Lab is inaccessible, though you can land on it when descending from the Executive Suite above.
The Test Area wraps around the western portion of the Research Lab, offering a good pivot away from the cramped middle section. Considering the abundant verticality throughout the map, it’s not a bad idea to pick up the PhD Flopper Perk while you’re in the area.
T2 Android Assembly
-
Show spawn points
-
Reset all overlays
Recommended round pace when exploring: 5-6
Tasks and Available Power Ups
Perk
Double Tap Perk Machine
Perk
Der Wunderfizz Perk Machine
Weapon
AK-74 (Assault Rifle) Wall Buy
Armor Vest
Level II Armor Vest
Equipment
Crafting Table
Upgrade
Arsenal
Ammo
Ammo Cache x2
GobbleGum
GobbleGum Machine
Mystery Box
Possible Mystery Box Location
The Android Assembly is in tatters with its floor caved in all around. Thankfully, the devastation has also knocked down two of the central metal ramps, providing easy access to the upper floor where essential goods like the Double Tap Perk Machine, Arsenal, and an Ammo Cache reside. You might also hit up the Level II Armor Vest upgrade if you skipped it in Reception.
The upper level provides the most room to move around, the walkway is in better shape compared to the ground floor. There are also fewer areas where you run the risk of getting squeezed in by the horde. The automated assembly room to the south further expands your range of motion, featuring the Der Wunderfizz Perk Machine for those with extra Essence on hand.
Once you get the hang of moving around the collapsed structure, it will become easier to navigate both levels of the Android Assembly, seamlessly combining them into one massive route that can be used to navigate even the unruliest hordes.
T2 Dark Entity Containment
-
Show spawn points
-
Reset all overlays
Recommended round pace when exploring: 7-8
Tasks and Available Power Ups
Perk
Stamin-Up Perk Machine
Weapon
XM4 (Assault Rifle) Wall Buy
Upgrade
Arsenal
Upgrade
Crafting Table
Trap
C.A.S.T.E.R. Turret x2
Ammo
Ammo Cache x2
GobbleGum
GobbleGum Machine
Mystery Box
Possible Mystery Box Location
There’s room to breathe here with three levels to explore including the main floor circling the large containment unit, a lower level filled with static screens and computer terminals, and an upper walkway traversing a corner of the interior with access to a Crafting Table. Helpfully, the upper walkway is not so high as to inflict fall damage should you need to bail and get back down to the main floor fast.
The main floor is the only space that wraps all the way around. Grab a drink from the Stamin-Up Perk Machine to add some zip to your step and guide the horde toward the rows of computer terminals; while you can mantle over the whole section, zombies are forced to climb over the low portion, helping to slow down big hordes.
When it’s time to move on, you’ve got two options, both free of an Essence cost. Drop down the Aether Elevator shaft back to the T2 Android Assembly or activate the Anti-Grav Personnel Launcher to barrel into the T1 Executive Suite.
This is a prime area for kiting zombies, with the main floor wide enough to weave past stragglers and the central container forcing them to stick to the circular path. If things get hairy, just dip below or climb the stairs to the upper walkway to split up the train. Divide and conquer.
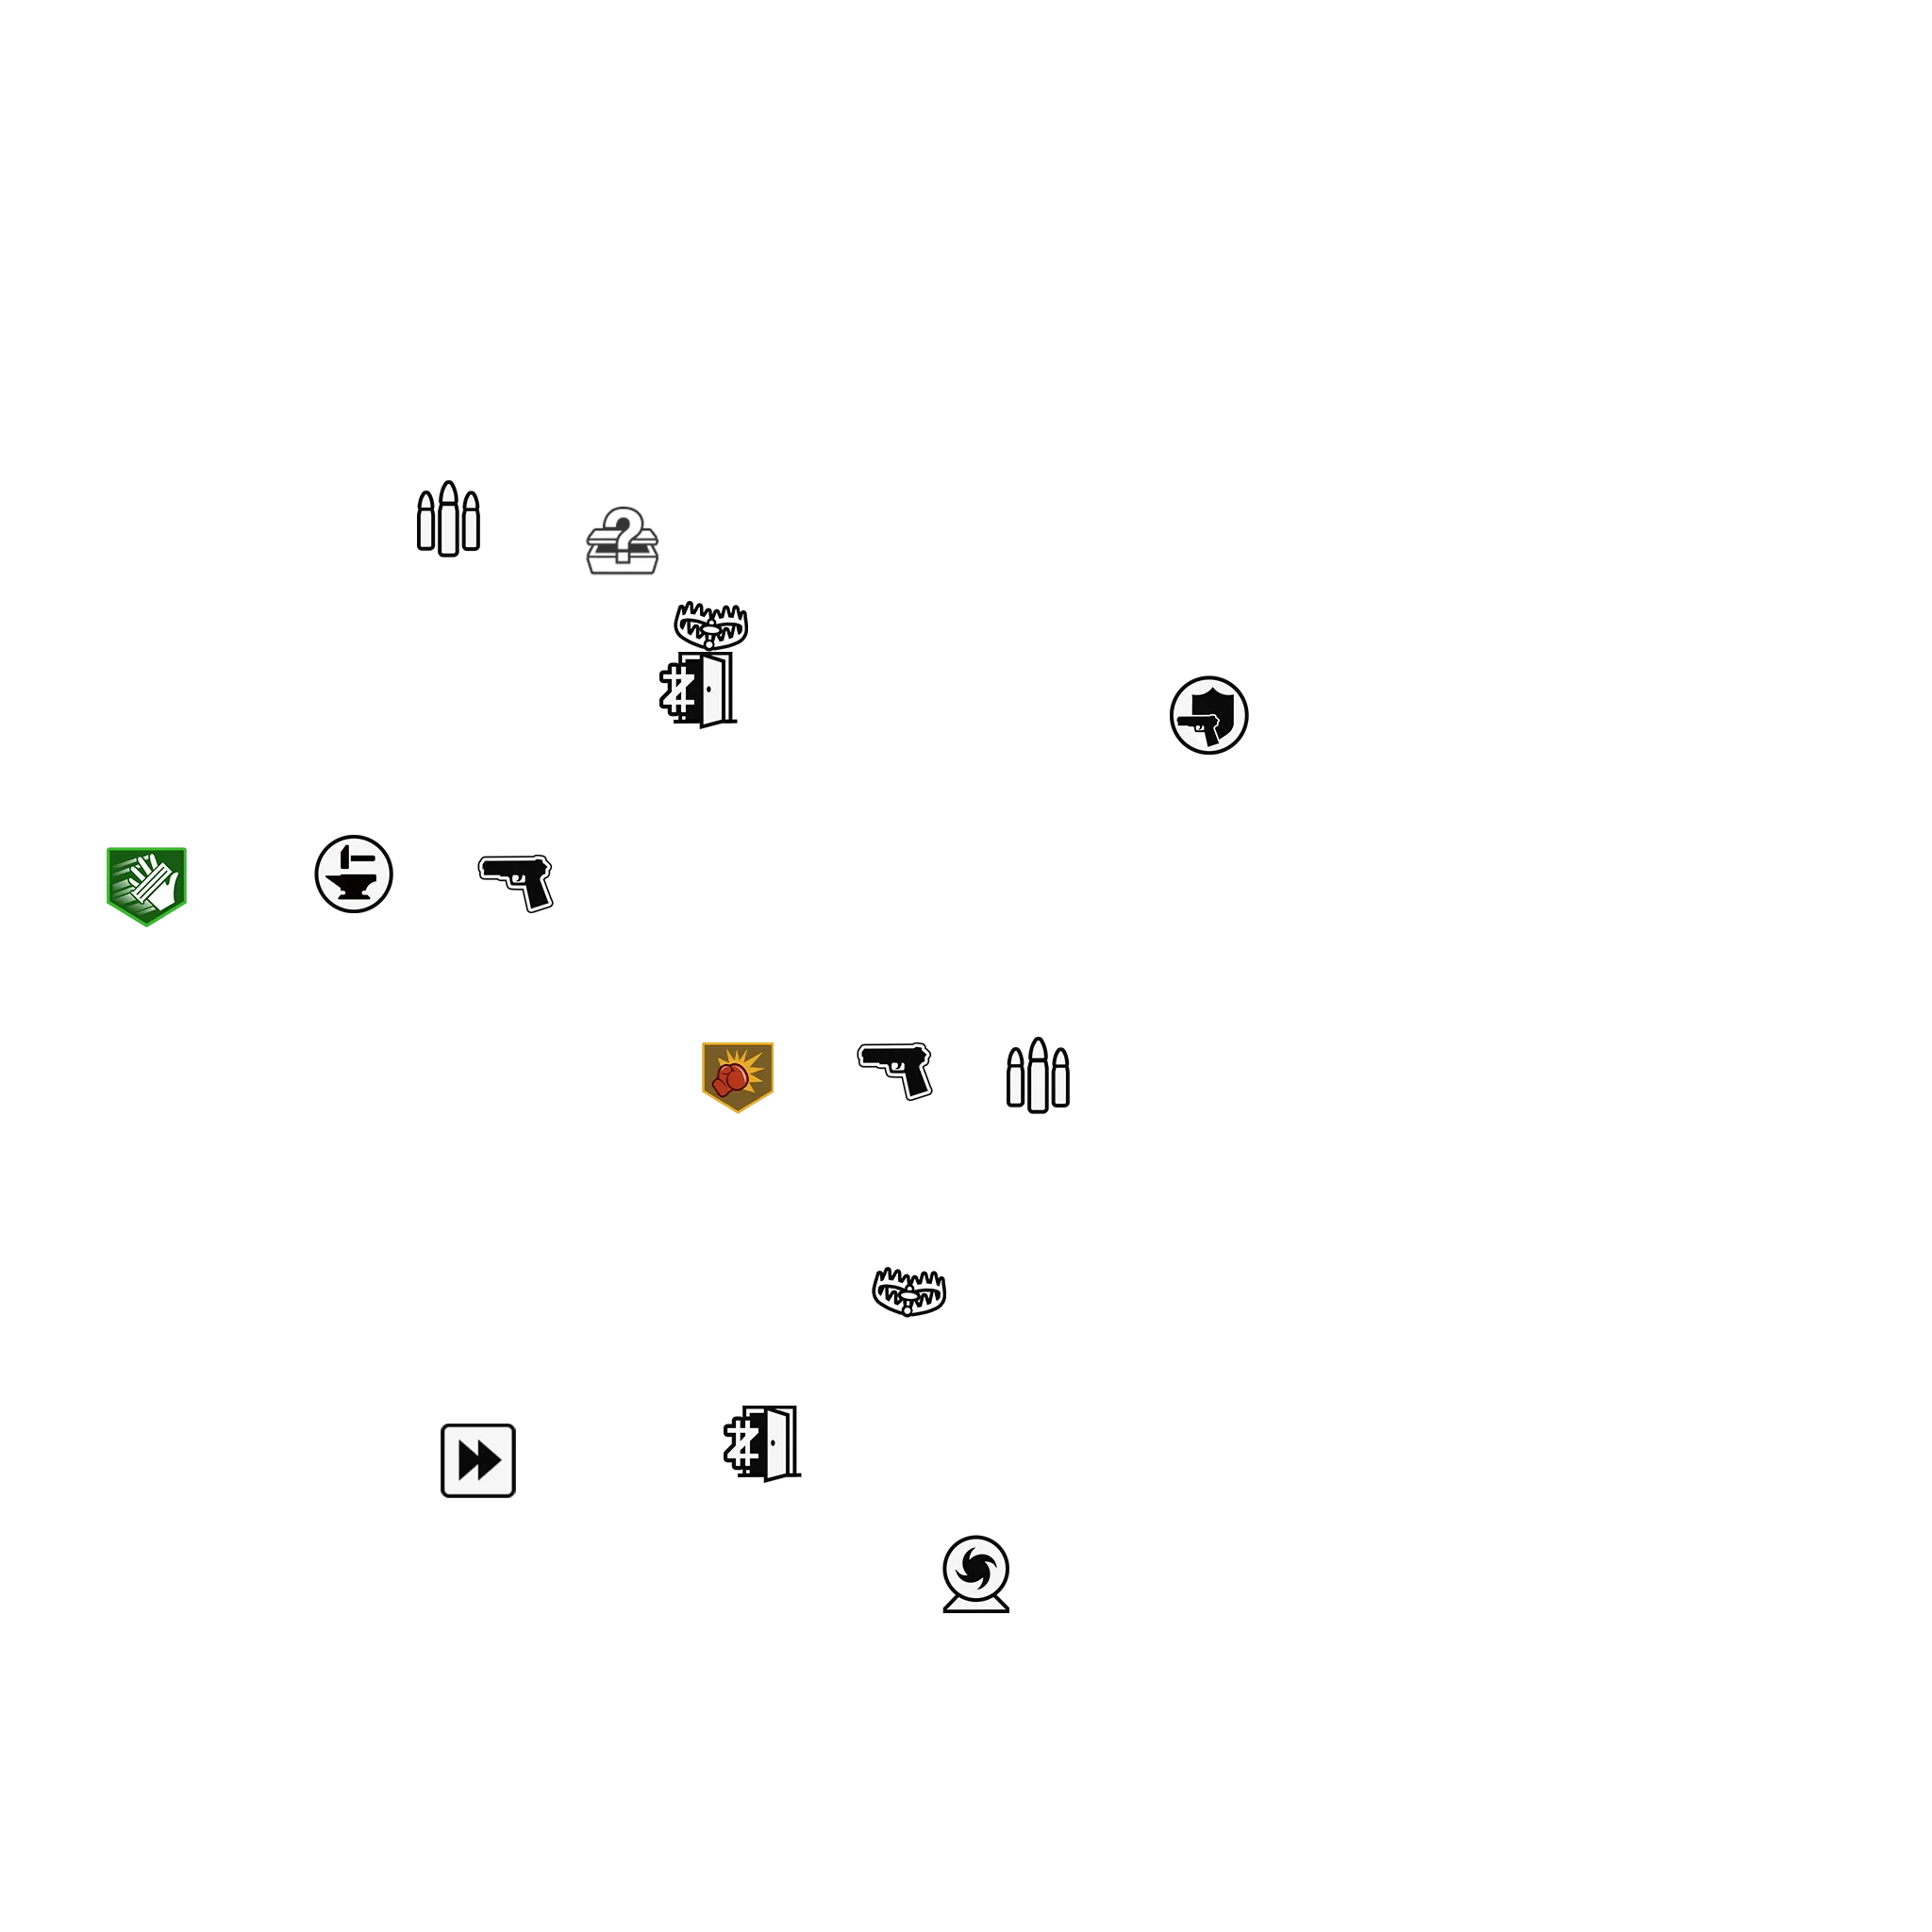
T1 Executive Suite / Director’s Office
-
Show spawn points
-
Reset all overlays
Recommended round pace when exploring: 8
Tasks and Available Power Ups
Task
Activate the teleporter to Sublevel 10
Perk
Jugger-Nog Perk Machine
Perk
Elemental Pop Perk Machine
Weapon
Tsarkov 7.62 (Marksman Rifle) Wall Buy
Weapon
SVD (Sniper Rifle) Wall Buy
Upgrade
Arsenal
Upgrade
Crafting Table
Ammo
Ammo Cache x2
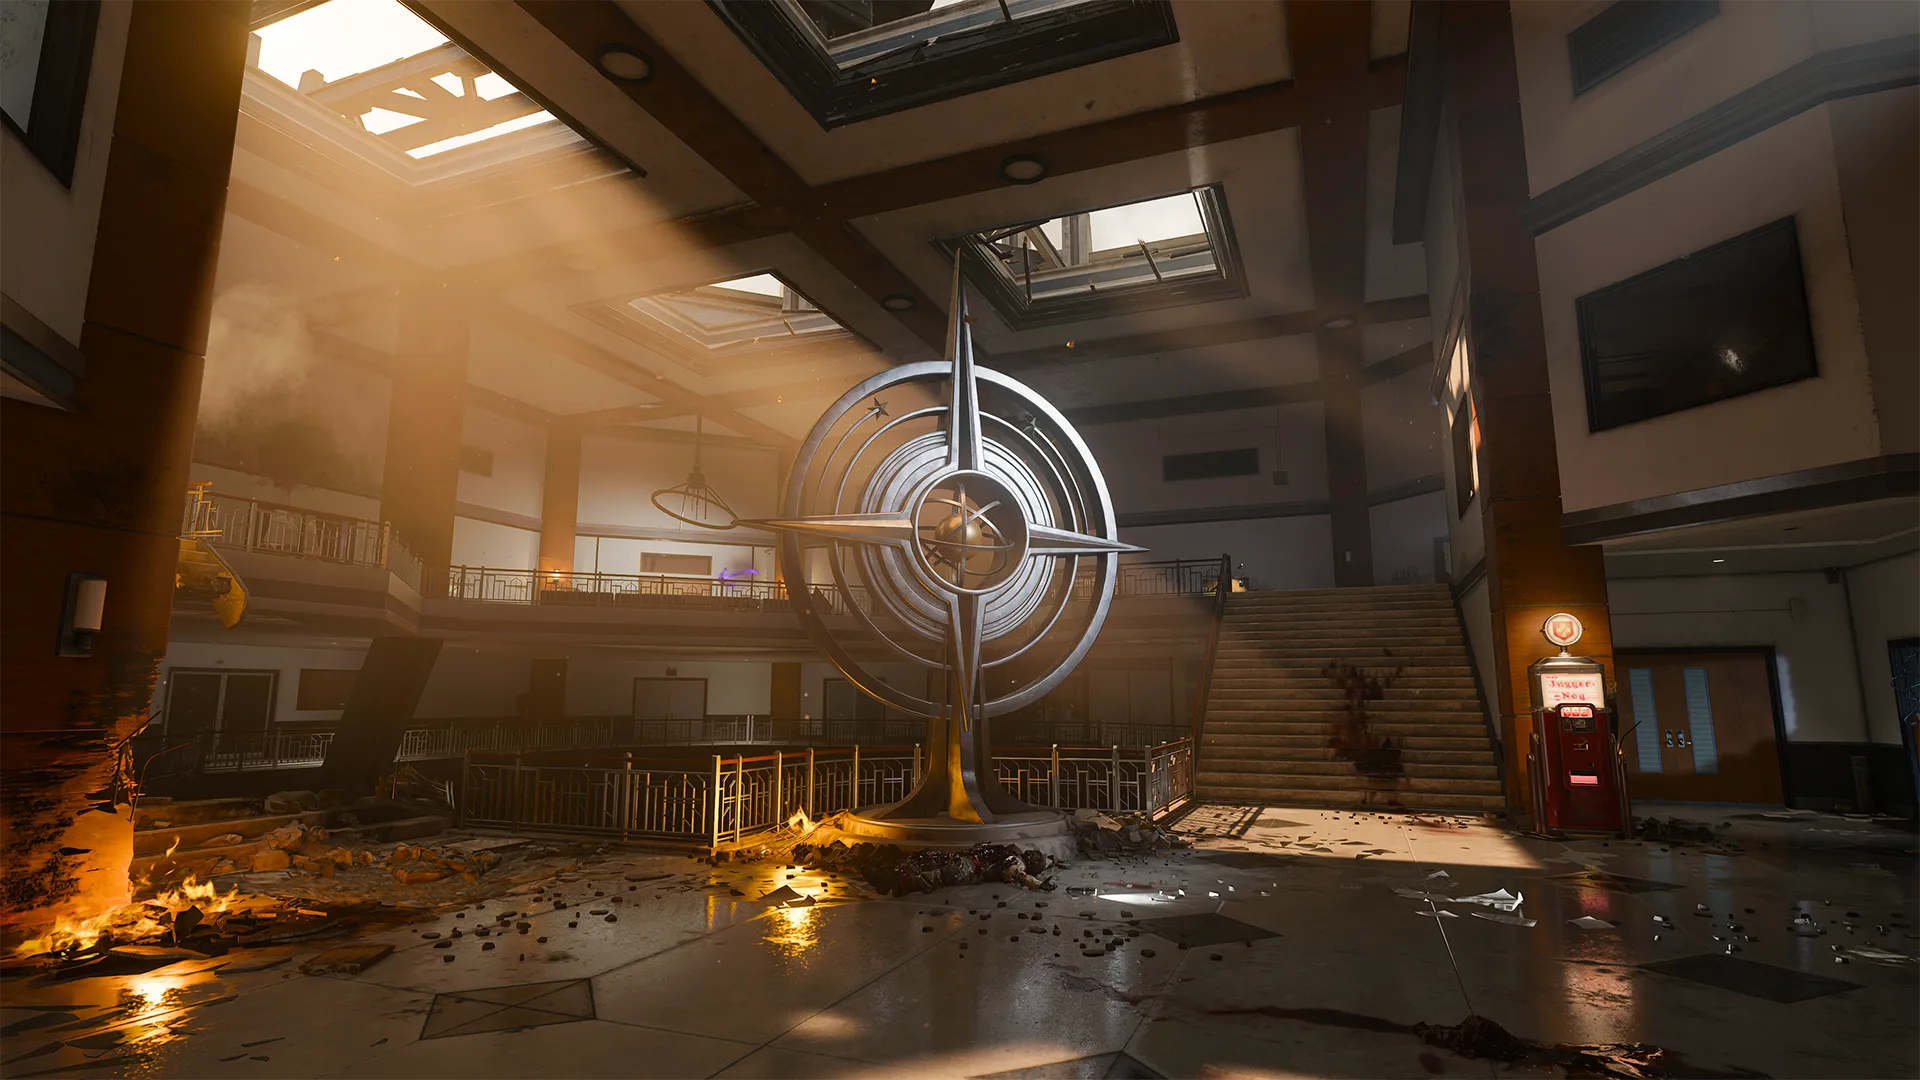
The Executive Suite isn’t as expansive as the larger areas you’ve encountered along the way. From the Anti-Grav Personnel Launcher, you’ll enter the lobby connected to some rec rooms and a staircase giving access to the upper landing. Though there once were two paths up, one staircase has collapsed, its missing portion broadening the large central gap that drops back down to the Mutant Research Lab. If things get tight, keep in mind that you can always jump and make your way back up.
Blast open the door on the upper landing to access the Director’s Office, simultaneously opening a door in the lower rec room adding the newly accessed office to the area’s overall flow, a great boon increasing the amount of navigable terrain. More importantly, this is where you’ll open access to T2 Sublevel 10, the final location revealed in this guide.
Muscle Up: Not to pick favorites, but Jugger-Nog sure is nice to have. Stock up some Essence before launching into this area or be willing to stick around long enough to acquire the needed amount. That is, only if you want to live a longer life.
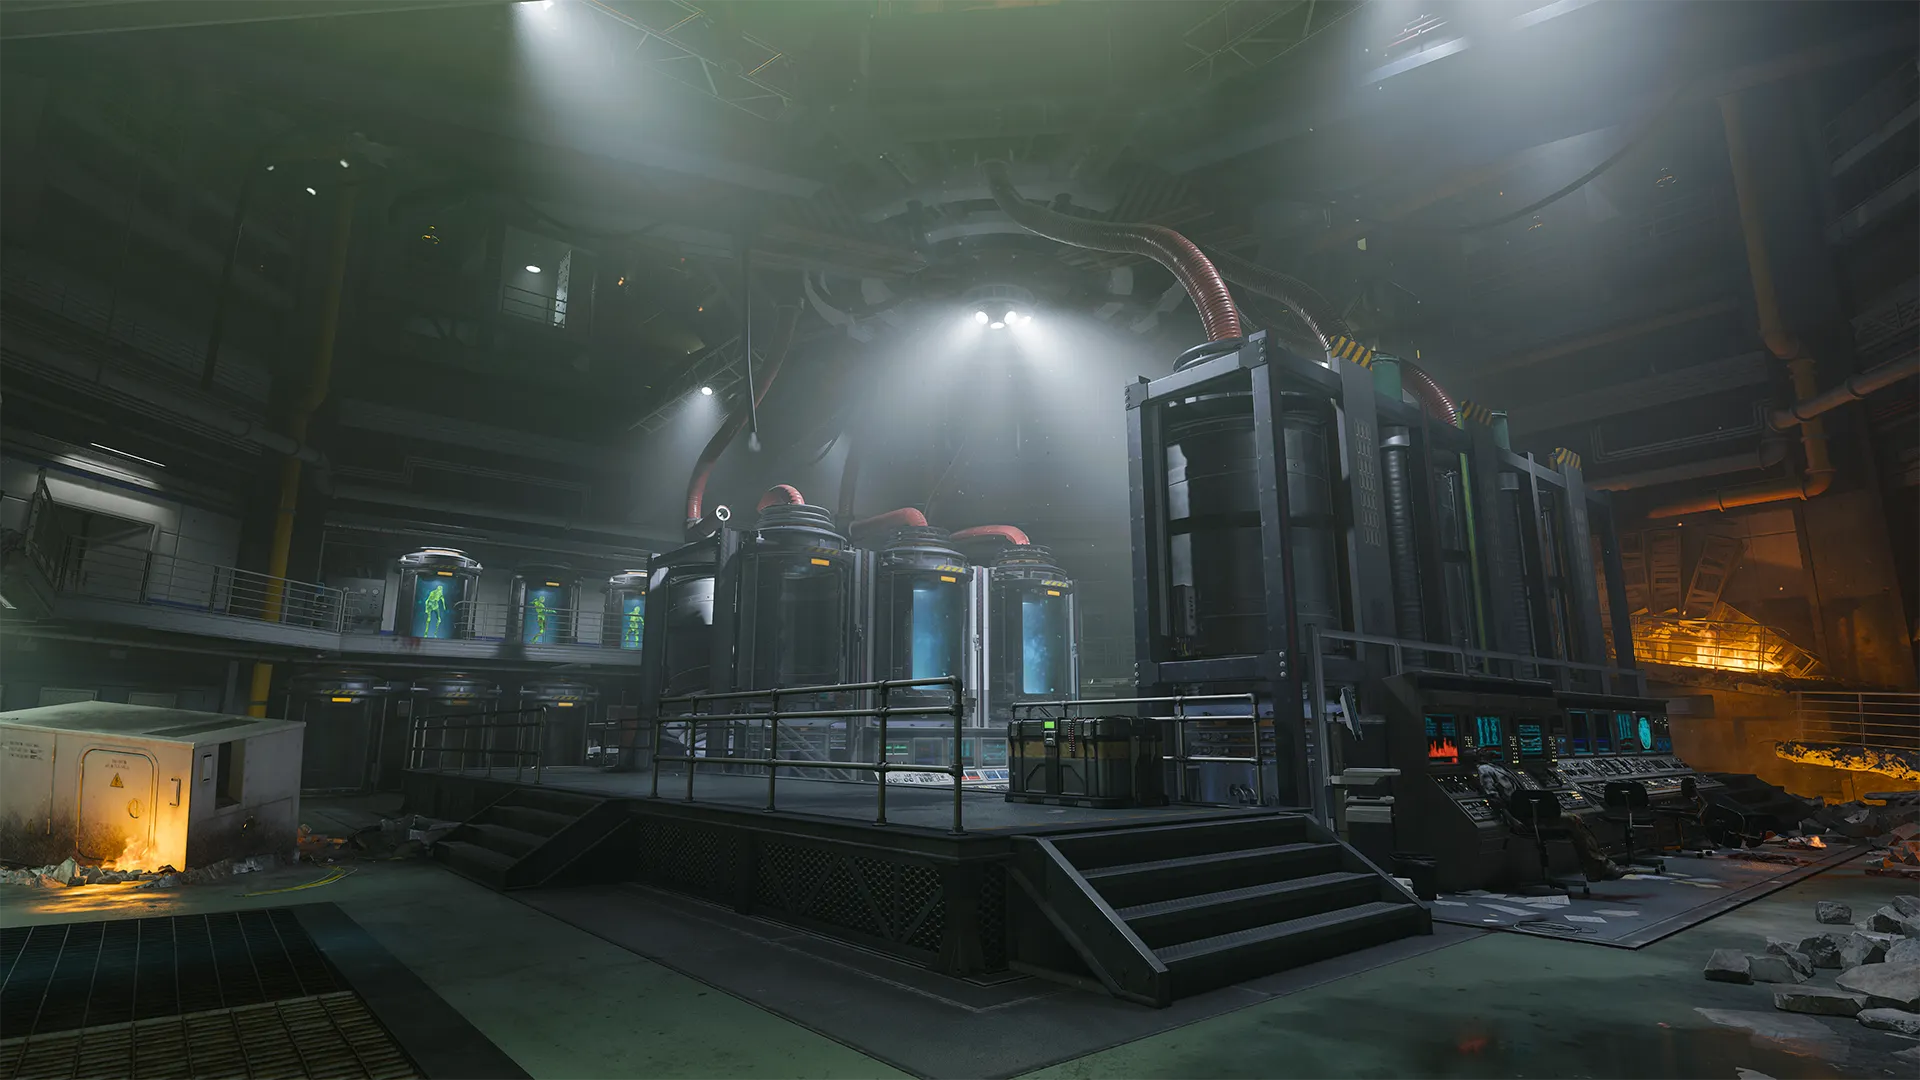
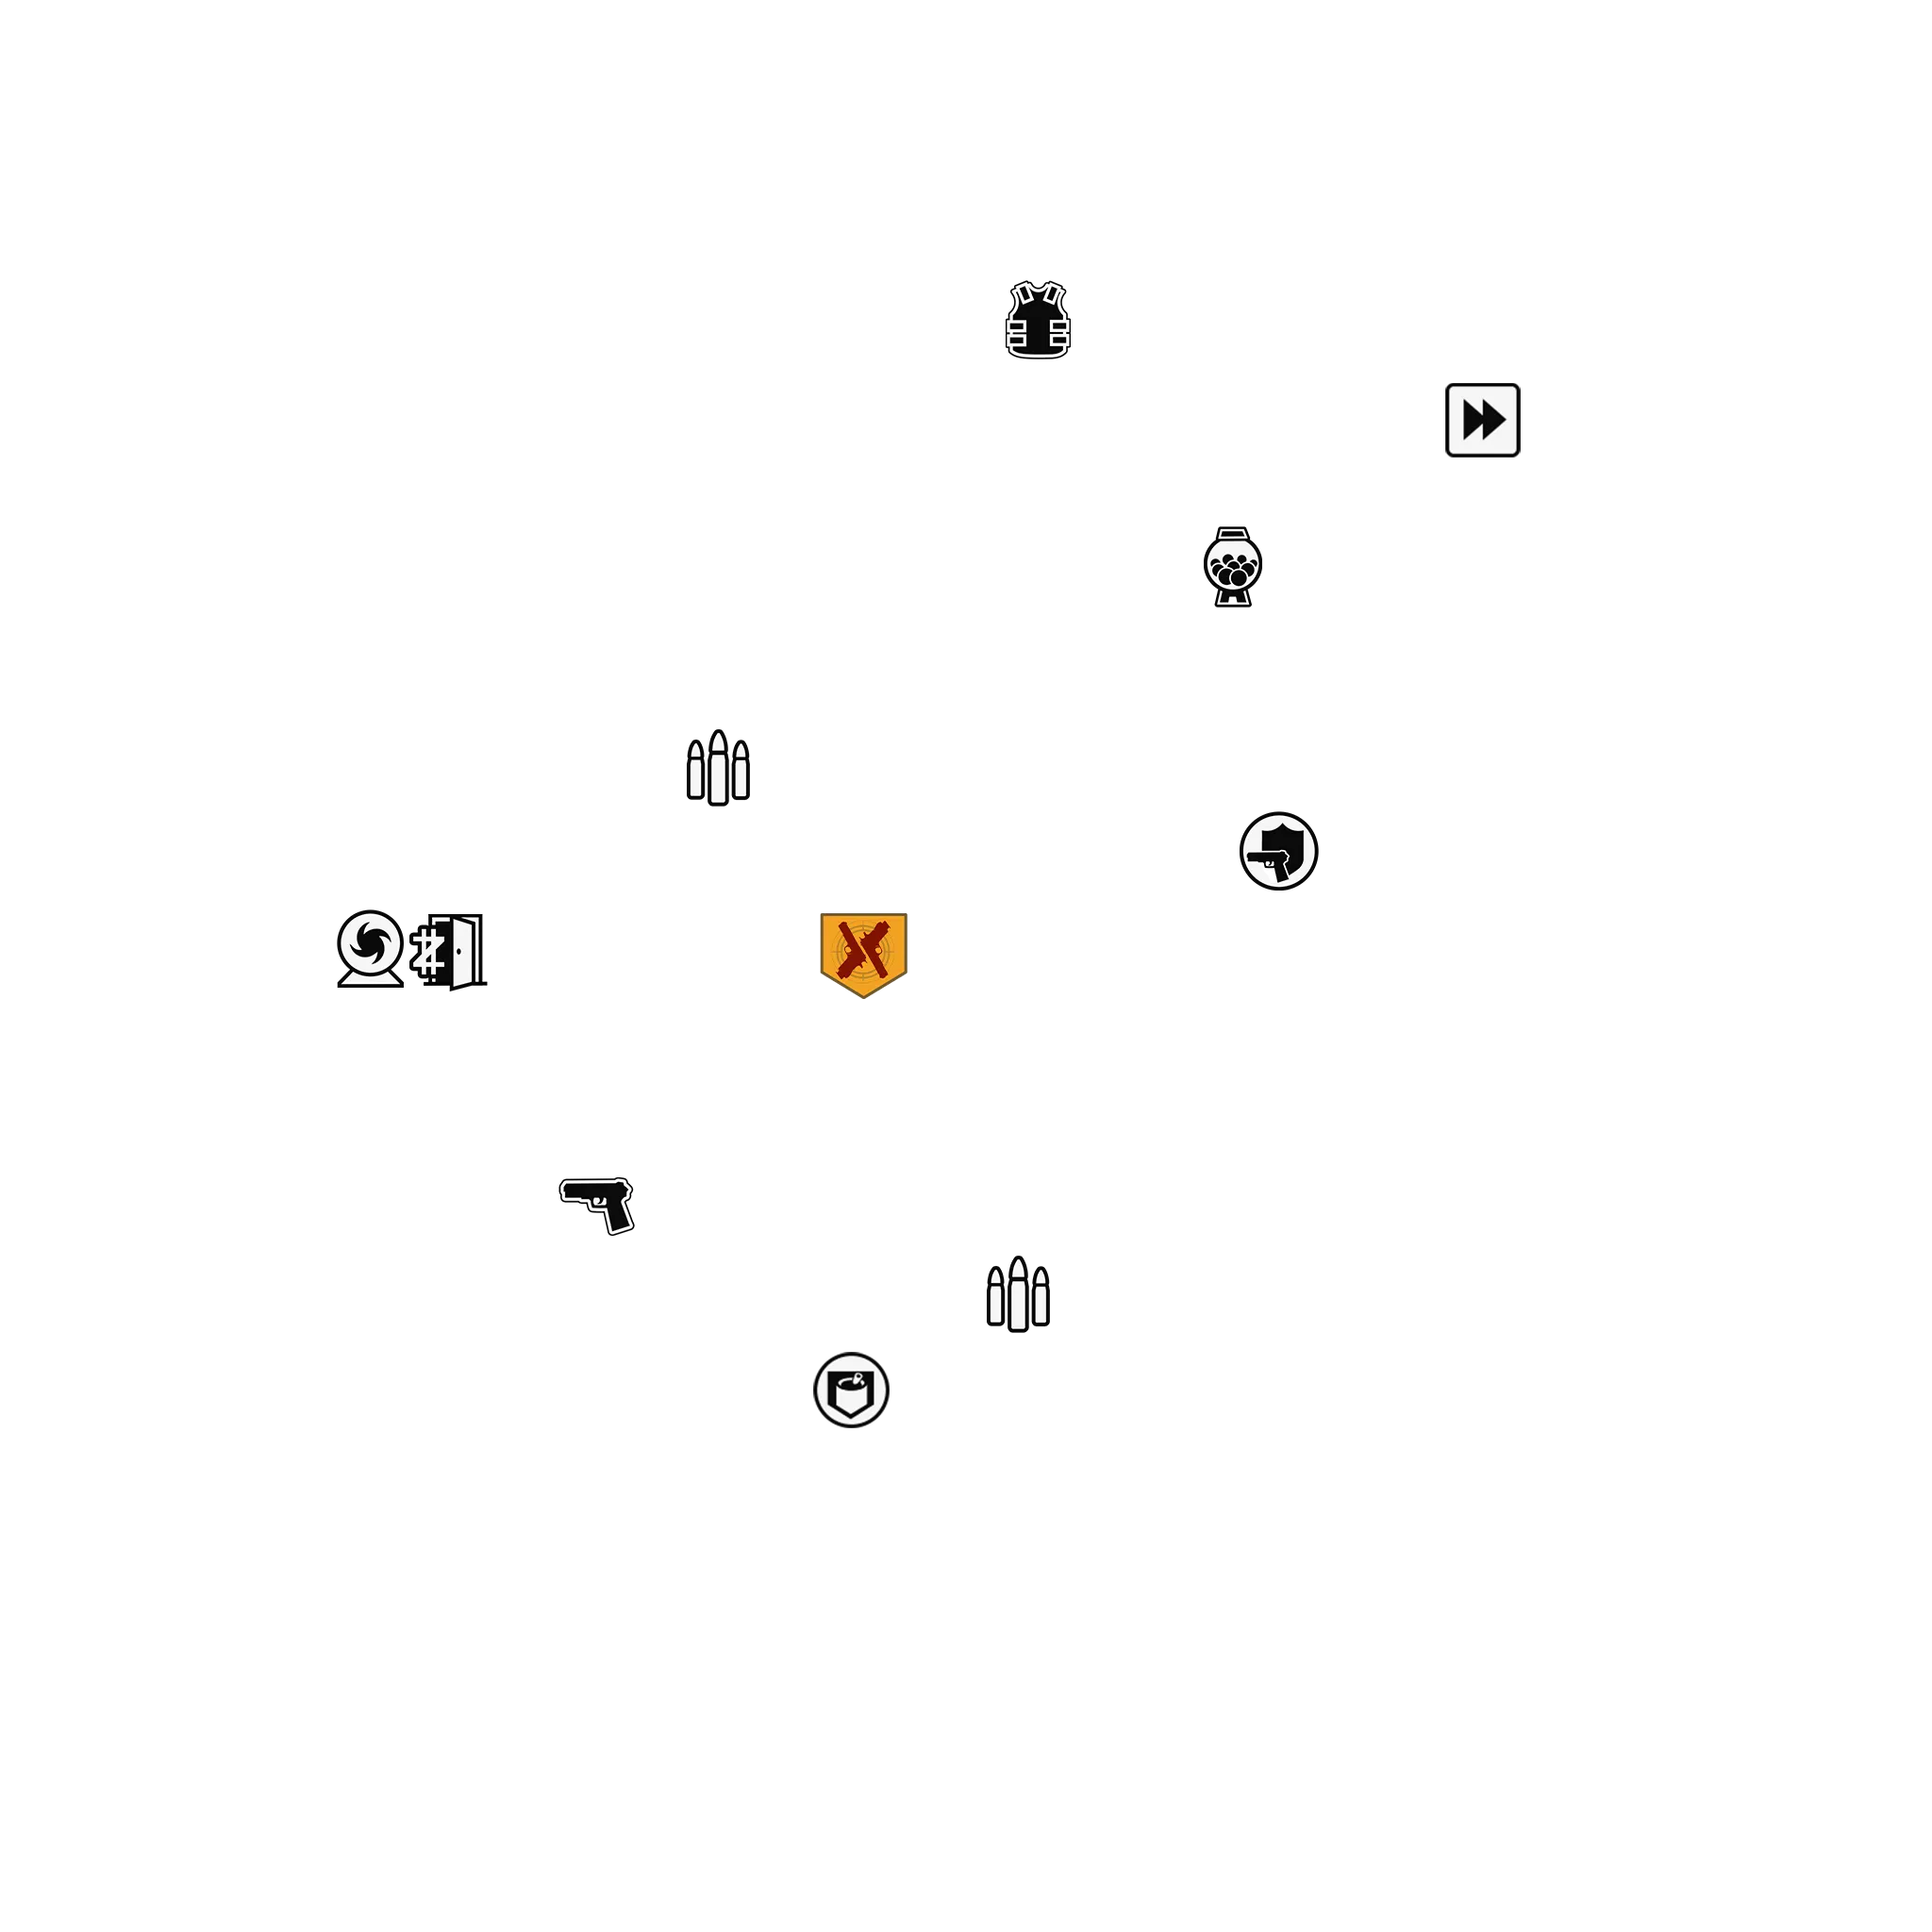
T2 Sublevel 10

-
Show spawn points
-
Reset all overlays
Recommended round pace when exploring: 9-10
Tasks and Available Power Ups
Task
Restart the Particle Accelerator
Task
Turn on the Power
Perk
Vulture Air Perk Machine
Weapon
XMG (LMG) Wall Buy
Armor Vest
Level III Armor Vest
Upgrade
Crafting Table
GobbleGum
GobbleGum Machine
Ammo
Ammo Cache
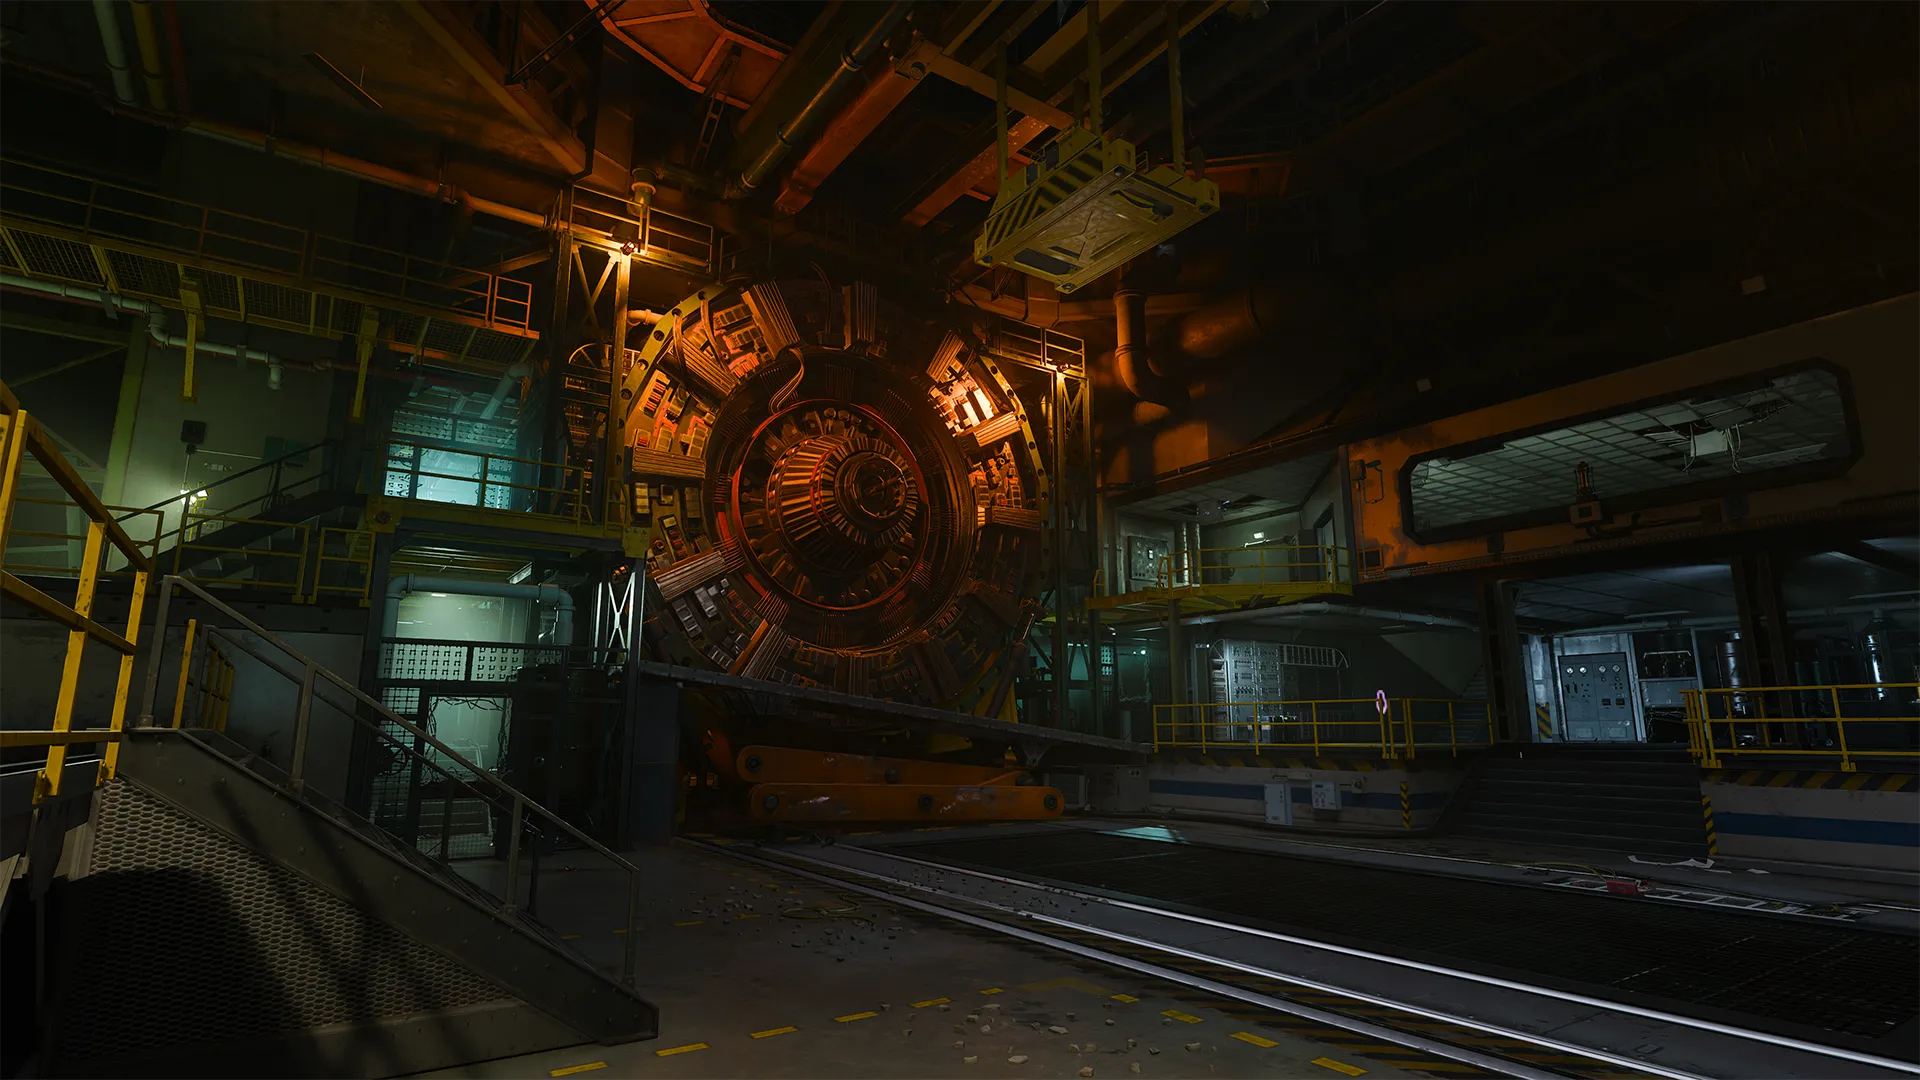
The massive particle accelerator in the center of Sublevel 10 is flanked by stairwells and metal walkways providing access to its primary components. Use these to get above the action and slow down the horde by forcing zombies to climb. Unlike many of the other areas, there are no gaps in the floor to drop through, so explore at will without the fear of overstepping and falling further down.
There’s an upper-level control room opposite the red portal you used to enter the area. Activate the lever at the front of the room to turn on the power and restart the particle accelerator. The Pack-a-Punch Machine will begin to phase in and out of existence along its powerful beam, not able to take hold until the Aetherium deposits are cleared off the coolant pipes. Once cleared, the Pack-a-Punch Machine is ready for use.
Complete the circuit: Turning on the power will activate another red portal in the upper control room, transporting players back to the start of the map in Reception. The portal works both ways, providing the crew with a useful connection allowing you to traverse the map’s disparate parts with ease.
Continuing the Story
Project Janus HQ teeters on the verge of collapse. Stabilize the Aether Reactors. Unleash the Sentinel Artifact. Complete the mission that began on Terminus Island.
With the power back on, the particle accelerator roars back to life and things start to get weird. Keep your head on straight, listen to your comms, and follow the indicated objectives. After all this crew’s been through, you’re finally approaching the end... but not before making an important choice.
It’s time to finish what you started.
©/TM/® 2025 Activision Publishing, Inc.
For more information, please visit www.callofduty.com and www.youtube.com/callofduty, and follow @Activision and @CallofDuty on X, Instagram, and Facebook. For Call of Duty Updates, follow @CODUpdates on X.